


Do you shoot long videos and then need to cut them to fit a specific duration? Speeding videos up can be a way to make your content fit within your time limits, but it can also be a creative tool to add a dramatic effect or create more action-packed videos.
In today's article, you'll learn how to speed up a video in After Effects. I'll show four methods, including built-in tools and external plug-ins.
Let’s get started!
How to Speed Up a Video in After Effects

Here's the fastest way: to enable Time Remapping, right-click on the video, then select Time > Enable Time Remapping. Next, choose Time Remap under Animation and write the expression "time*" followed by the desired speed.

However, After Effects offers a few features to speed up video clips for your video content. Below are three of the easiest and most effective methods to speed up video clips using Adobe After Effect's built-in tools.
Speed Up with the Time Stretch Tool
The first method I will show you is using the Time Stretch tool. This method is the easiest one, allowing you to speed up videos quickly without being an expert video editor.
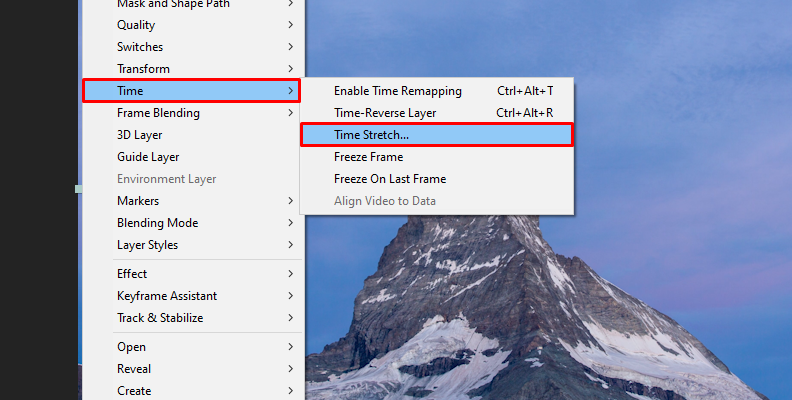
Load your project and arrange the video clip in the layer panel. Right-click the video clip and select Time > Time Stretch.
In the Time Stretch dialog box, adjust the percentage value of the Stretch Factor. 100% represents the original speed. To speed it up, decrease the value; to make it slow, increase the percentage value. Setting it to 0 will create a freeze frame.
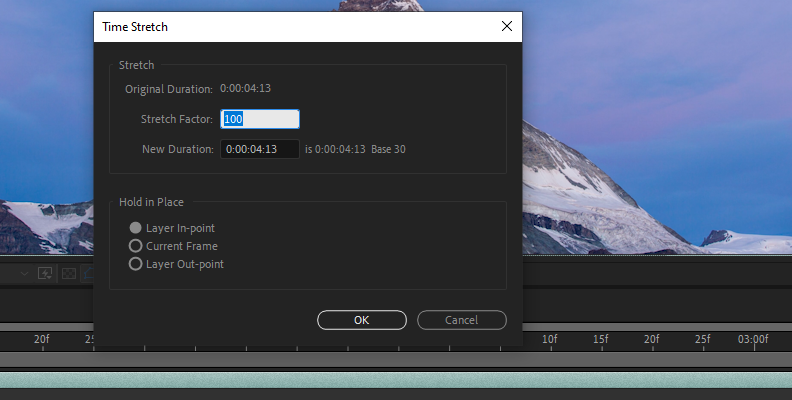
The original and new durations are shown in the dialog box. Keep adjusting the speed until you achieve the desired effect.
Speed Up a Video Clip with Time Remapping
Now, we'll delve deeper into the method we already discussed earlier on.
The Time Remapping tool is a built-in feature that allows you to speed up a clip or portion of a video clip and lower the speed of a video for a slow-motion effect.
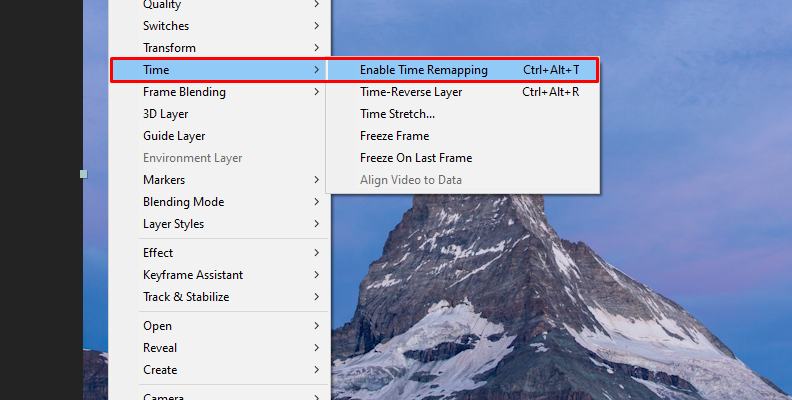
To begin, right-click on the video clip you want to speed up and select Time > Enable Time Remapping from the drop-down menu. Time Remapping will create one keyframe at the beginning of the clip layer and a second one at the end.
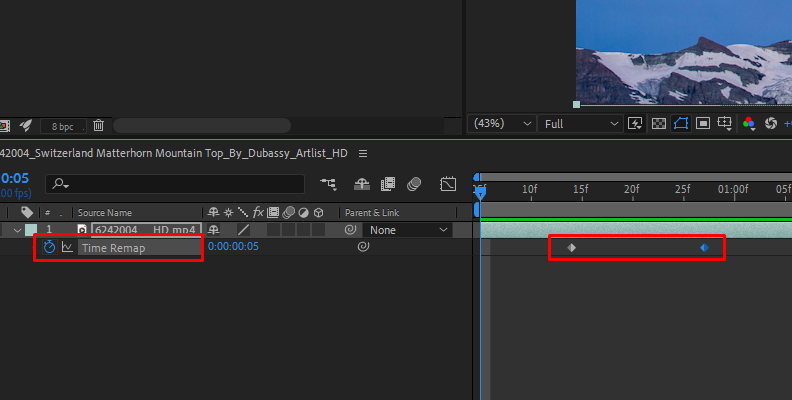
The two keyframes represent the original speed of the video clip. To speed up the video, you need to shorten the distance between them. To do this, click and drag the last keyframe closer to the one at the beginning.
If you click the Graph Editor button, you will see the new speed of the video clip.
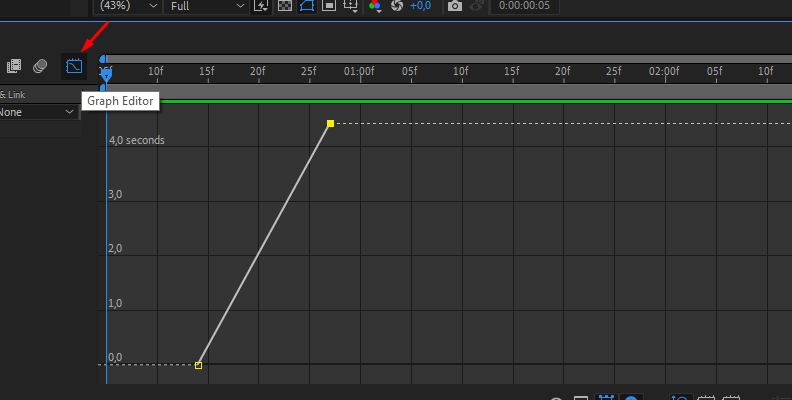
Play the video clip, and it will play faster. Adjust speed by moving the keyframes closer or farther apart until you reach the desired speed.
Speed Up from the Layer Switches Pane
The third method uses the layer switches panes from the timeline panel. Enable the duration and stretch panes to adjust the duration or stretch values to speed up or slow down.
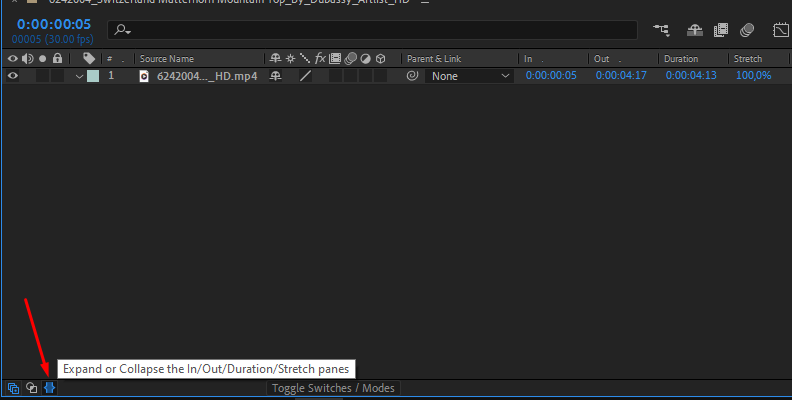
Click the tiny button at the bottom of the layers panel that says "Expand or Collapse the In/Out Duration/Stretch Panes." Hover the mouse over each button, read the description, and find the duration/stretch.
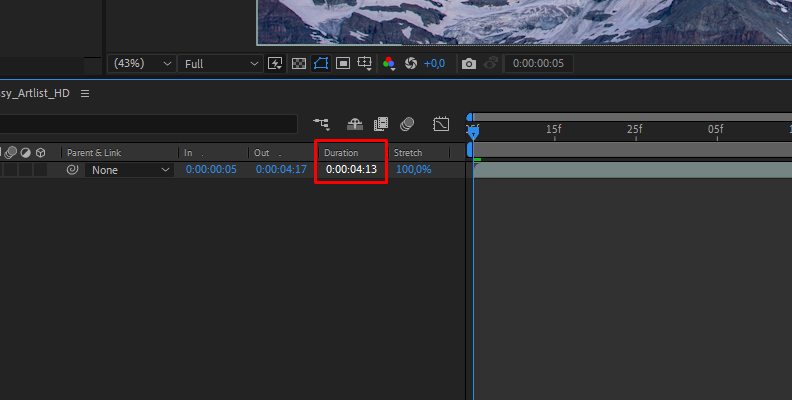
Click the button, and the Duration and Time Stretch controls will be added next to the layers. Select the video layer to speed up and adjust the duration value. You will notice how the stretch percentage value changes as you modify the duration.
Play the video clip and make adjustments until you find the right speed.
How to Speed Up a Video in After Effects with BCC Optical Flow
In this last method, you'll use BCC Optical Flow, an effect part of thecontinuum
BCC Optical Flow analyzes the footage and estimates the motion between frames. Then, it creates new frames in between based on the previous and following frames. This process allows speeding up or slowing down video footage that looks smoother than other methods like Time Remapping or the Time Stretch Tool.
Step 1: Download BCC Optical Flow
First, download the Boris FX Hub app from the Continuum page and install it. Open the Hub app, click Continuum for After Effects to install it. If you don't have a license, it will instantly continue in trial mode, which allows you to try all features with a watermark.
Step 2: Import Video Clip
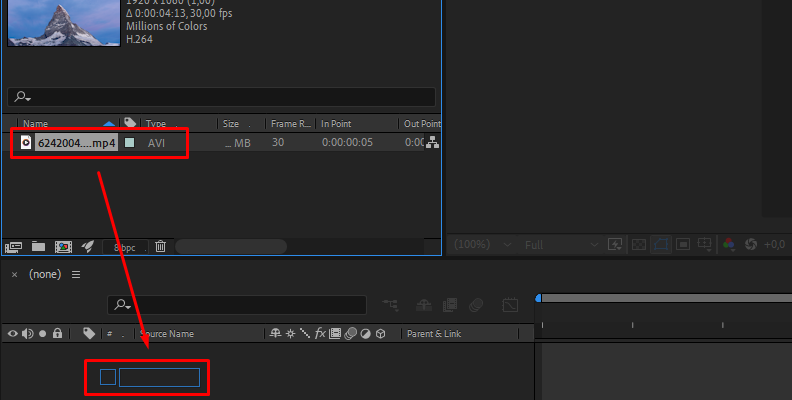
Create a new project in After Effects and import the desired video clip to speed up. Next, drag and drop the video clip to the new composition icon, arrange your layers, and make the edits needed before speeding up.
Step 3: Apply the BCC Optical Flow Effect
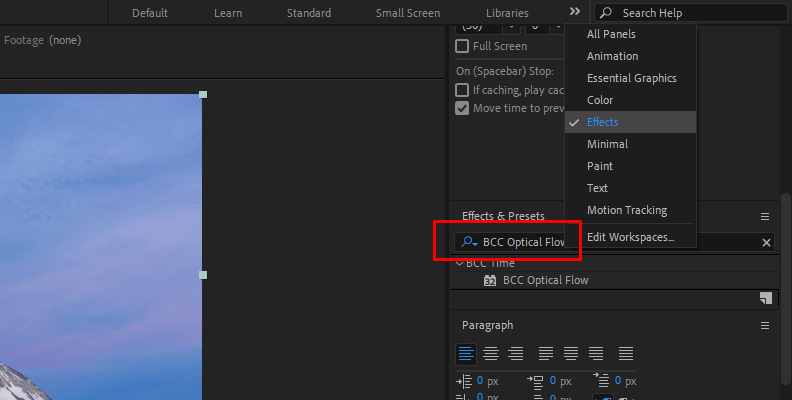
Select the clip layer to speed up and go to the Effects and Presets panel. You can use the search box and type BCC Optical Flow, or display the BCC Time folder, then locate BCC Optical Flow. Drag and drop the effect into the selected clip to apply BCC Optical Flow.
Step 4: BCC Optical Flow Presets
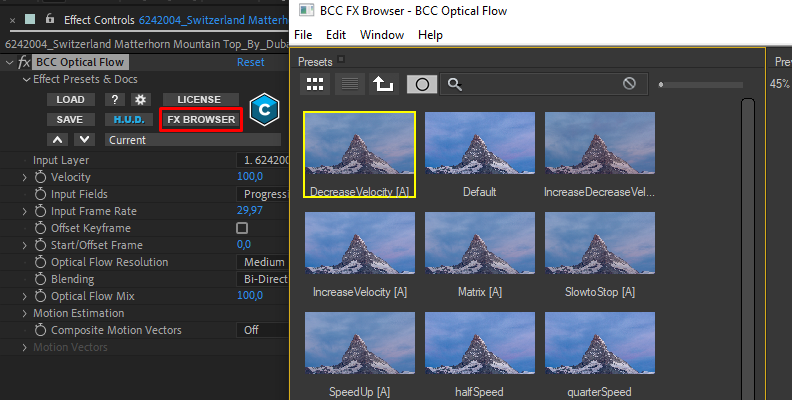
The effect will start with the default settings, but you can find a few useful presets to speed up, slow down, or speed ramp effects. Open the FX Browser to enter the presets library. Select one of the presets and preview it on the viewer window.
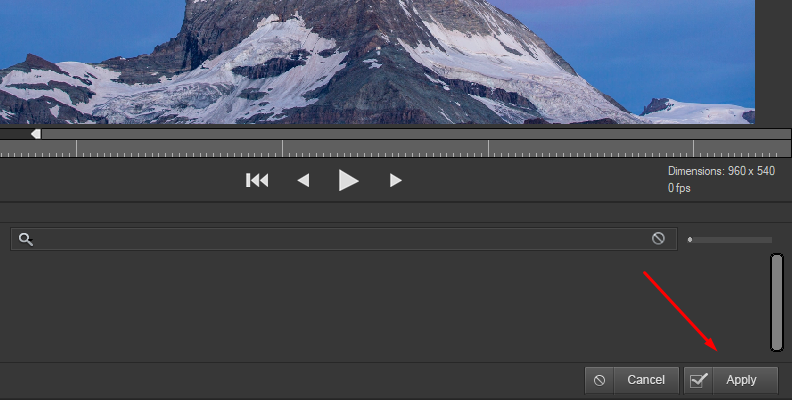
Click apply to use the selected preset and return to After Effect.
Step 5: Adjust the BCC Optical Flow Effect
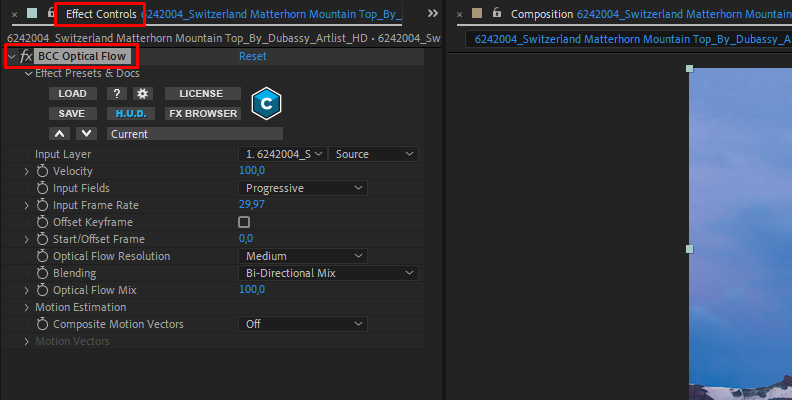
You can edit the selected preset or start from scratch using the parameters from the Effect Controls panel.
The velocity setting controls the speed. Setting it over 100 speeds up the video, and decreasing it slows down the video clip. If you want the video clip to start slow, then increase the speed. You can add keyframes by clicking the stopwatch icon and adjusting the speed at the moments you want with more speed.
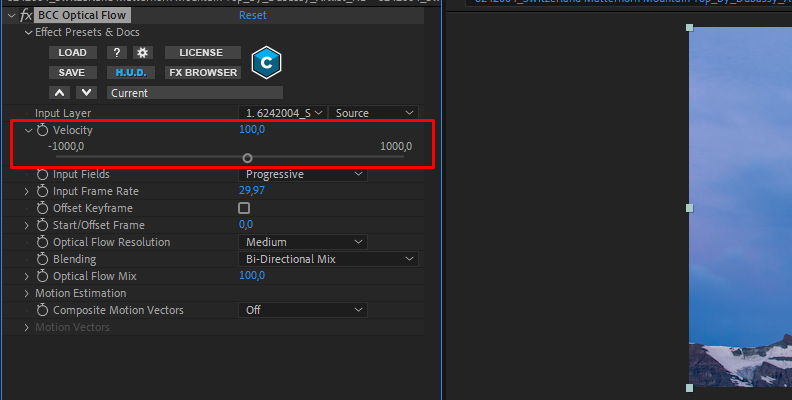
Set the Input Frame Rate the same as the source clip to prevent shaky frames.
Step 6: Correct Sped Up Quality
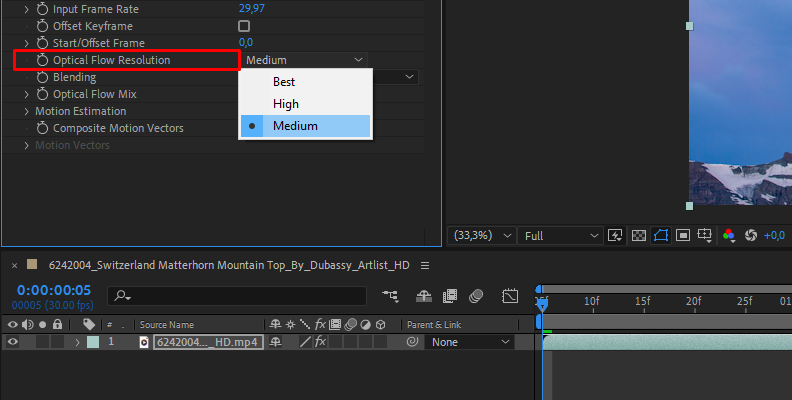
Adjust the quality of the output speed-up video by adjusting the Optical Flow resolution. Choose between Medium, High, and Best and preview the effect to find the resolution that reduces artifacts and jitters.
The Blending options can help you reduce jittering by changing how the effects use a mixture of optical flow synthesis and blending frames, which you can fine-tune using the Optical Flow Mix and Motion Estimation settings.
Experiment with these parameters until you have a smooth and speed-up video.
Final Words
Speeding clips can add a dramatic and powerful effect to a scene. For instance, if you create video tutorials, it can make a long process shorter and easier to understand. Speeding up the video as you explain the process is a good way to show the complete process in less time.
In After Effects, you'll find tools that are good enough if you're starting up. For example, you can create sophisticated dynamics using the exponential scale, position, or scale properties. The exponential scale property offers a more natural acceleration compared to linear scaling, with a smoother velocity increase, whereas the position property allows you to add dynamic motion to your video, creating motion paths that go hand in hand with the increased speed. Finally, you can use the scale property to create dramatic zoom effects, adding to the visual appeal of your sped-up video.
BCC Optical Flow can customize the effect further, making it look even more professional. Plus, with the Continuum plug-ins, you can add more effects to create a visual experience that will leave your audience speechless.
Have fun!


