


Recording a video clip is only a small part of the process of making it look good and sharing it with your audience.
In fact, most would argue that the real work begins once your video clips reach the post-production phase, or to simplify, the moment you import them into an editing software, such as Adobe Premiere Pro.
Whether adding effects and transitions, simply changing the aspect ratio, or reducing video file size, you need a video editing program and the right knowledge to accomplish any of the above-mentioned tasks.
In this guide, we'll help you learn how to resize video clips, change frame size, and improve overall video quality by doing so within Premiere Pro.
So, without further ado, here's what you need to know about resizing a video clip in this well-known editing workspace by Adobe.
Why Would You Need to Resize Video?
Before getting into the details about how resizing videos and changing an aspect ratio is done within Premiere Pro, let's first take a look at why you may need to do so.
Resizing a video within Adobe Premiere Pro can be required for various reasons, depending on the project's goals and creative choices. Here are some common reasons someone might want or need to resize a video in Premiere Pro:
To Do Aspect Correction
Ensure the video has the correct aspect for the intended output. For example, if the original video has a different ratio than the final output (e.g., 16:9 for widescreen), resizing may be necessary to avoid stretching or distortion.
For Project Compatibility
Match the video dimensions to the project settings. If you have footage with a different resolution than your project, resizing helps ensure consistency throughout the entire video.
Zooming and Panning
Create dynamic effects by zooming in or panning across a video. Resizing allows you to focus on specific parts of the frame, emphasizing details or creating visual interest.
Framing and Composition
Adjust the framing to improve the composition. Resizing allows you to crop or reposition the video to achieve a better visual balance.
Multi-Resolution Editing
When working with footage from different sources or cameras with varying resolutions, resizing ensures a uniform look and feel across the entire project that won't cause any viewer disruption.
Output Requirements
Meet specific output size requirements for different platforms. For example, social media platforms may have specific size recommendations, formats, and aspect ratios, so resizing helps ensure your video is suitable for their parameters.
Special Effects and Transitions
You may want to resize for creative purposes, such as creating split-screen effects or transitions that involve scaling the video. We often see this in gaming edits, for example.
Correcting Crooked Footage
Adjust the video orientation if it was shot at an angle or appears crooked. Resizing can help straighten the image. Stabilization, for example, is often done by relying on the crop and zoom features.
Performance Optimization
Reduce the resolution of high-definition videos to improve playback performance during editing, especially if working on a system with limited resources.
How to Resize Video in Premiere Pro
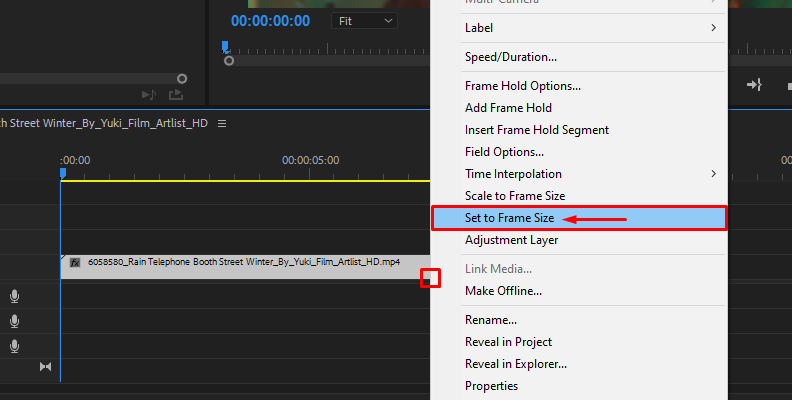
There are a few ways to resize a video in Premiere Pro, but one of the most common is the "Set To Frame Size" option. To use it, simply right-click the video clip that's on your timeline, and from the menu that shows up, click on the "Set To Frame Size" option. That's all.
Premiere Pro allows users to change their video clips' settings through various methods, and we'll show them all to you as well as provide a detailed explanation about how each one affects your clip and what happens "behind the curtains" when you use them.
Let's start with the one we already mentioned.
Resizing a Video in Premiere by Using "Set to Frame Size"
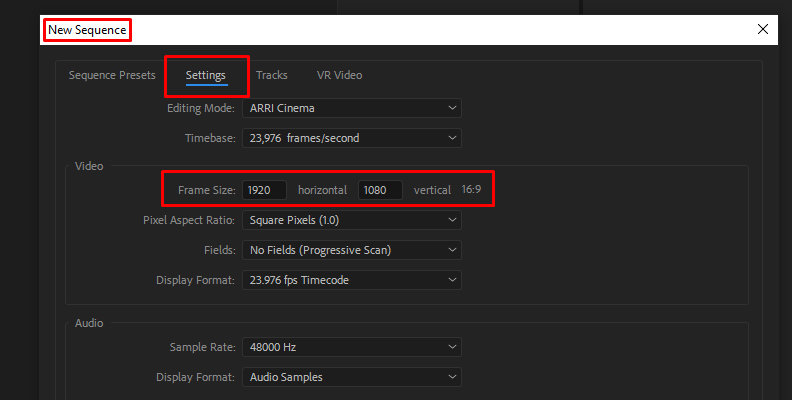
When you create a new sequence in Premiere, you get to choose various settings, such as the frame size, aspect ratio, and more.
Based on this, when you import a 5K video in a 4K sequence, and use the "Set to Frame Size" method, as shown above, Premiere Pro will scale the clip's frame size down while retaining the original resolution, which is often what creators want.
Many experts strongly advise always using this method over the "Scale To Frame Size" one.
The "Set to Frame Size" method is especially useful when you're importing videos from various sources, and they have different sizes but you want to match them all to your original sequence settings while not "forcing" them to change their resolution.
Resizing a Video in Premiere by Using "Scale to Frame Size"
This is the less-preferred and often frowned upon method when resizing videos in Premiere Pro. The reason is that when using "Scale to Frame Size," the software resamples the clip, essentially making that 5K clip from the example above into a 4K clip by changing its resolution, which means you end up with lower video quality.
Now, for something like 5K to 4K, the difference may not be big or even noticeable in the exported video, but for a 1080p clip that you accidentally downscale to 480p, for example, using this feature will heavily downgrade the quality.
Resizing a Video Using "Motion" in Effects Control Panel
Every clip you add to your timeline in Premiere will come with its "fixed" effects. In the effect controls panel, you can modify the parameters for these effects, one of which is called "Motion", as seen in the image below.
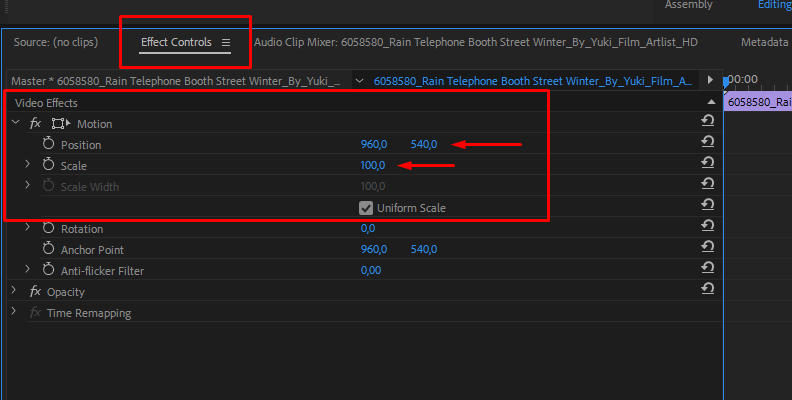
Essentially, the "Scale" parameter will let you "crop" the video, while the "Position" option allows you to re-center it later on, both on the horizontal and vertical axis.
If you uncheck the "Uniform Scale" option, you can scale width and height separately, so you can manually resize the video in a format that suits your needs, essentially making it work like a crop effect and removing unwanted parts.
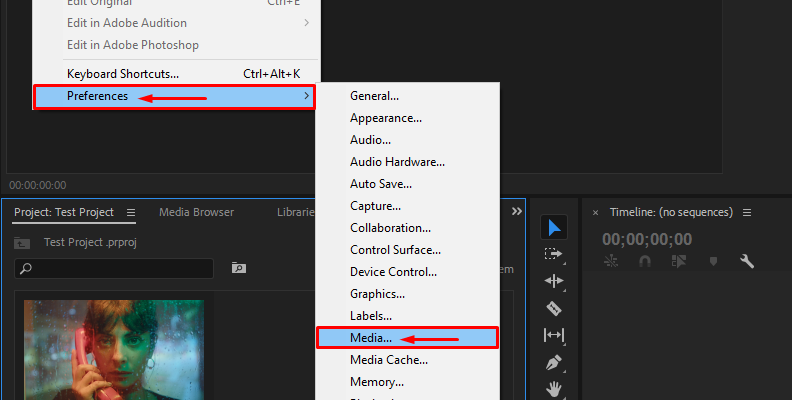
BONUS: Automatic "Set to Frame Size" Scaling (Default Media Scaling)
If you're often working with multiple clips and don't want to spend time manually resizing them, you can open Premiere and go to "Edit" -> "Preferences" -> "Media" and set the "Default Media Scaling" option to "Set to Frame Size" as shown in the images below.
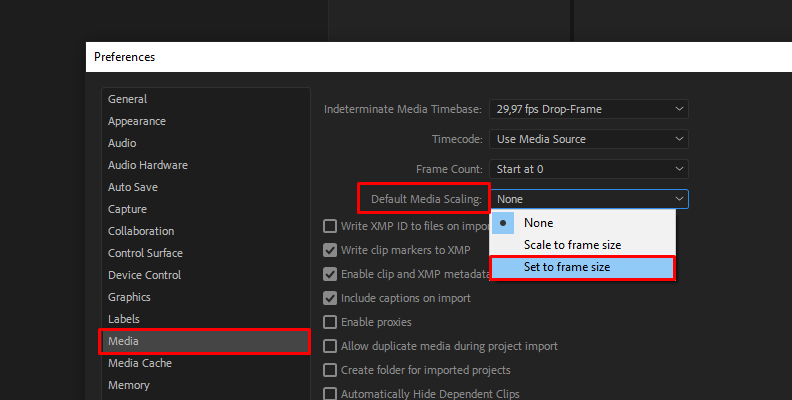
This should save you a lot of time in the future, and you can always disable it if your project has other specific needs that don't benefit from the change.
How to Resize Video in Premiere Pro with Continuum
Resizing a video clip in Premiere is more than possible without having to use any third-party plug-ins or packs. However, tools such as Continuum's UpRez by Boris FX make the job much quicker and flawless.
You can use UpRez to upscale video clips within Premiere Pro as long as you have the Continuum pack installed, for which there's a free version available on Boris FX's website.
Here's how in just a few simple steps:
Step 1:
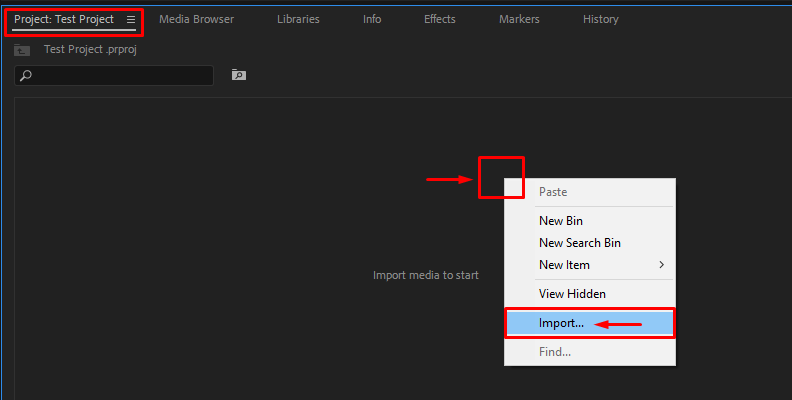
Import a video clip through the project panel, as shown in the image below.
Step 2:
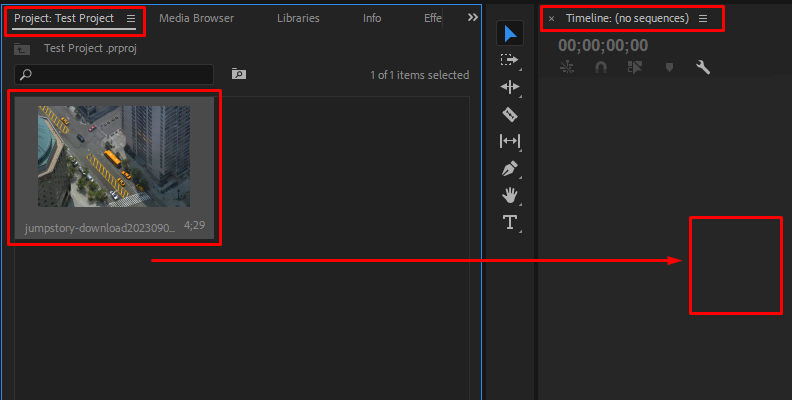
Add the smaller clip to a sequence with the larger clip by dragging it to the timeline.
Step 3:
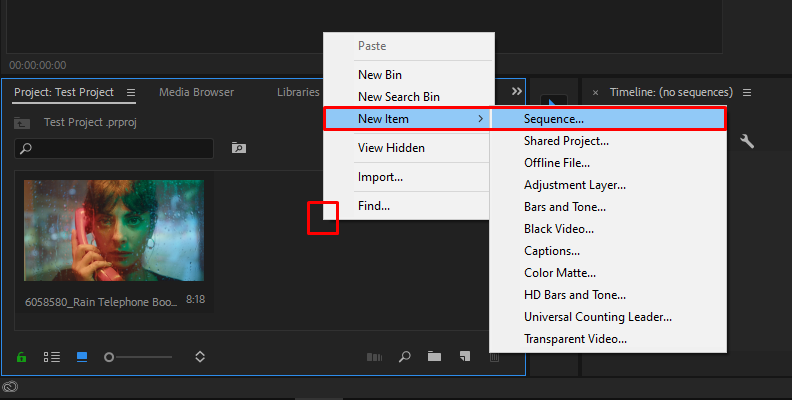
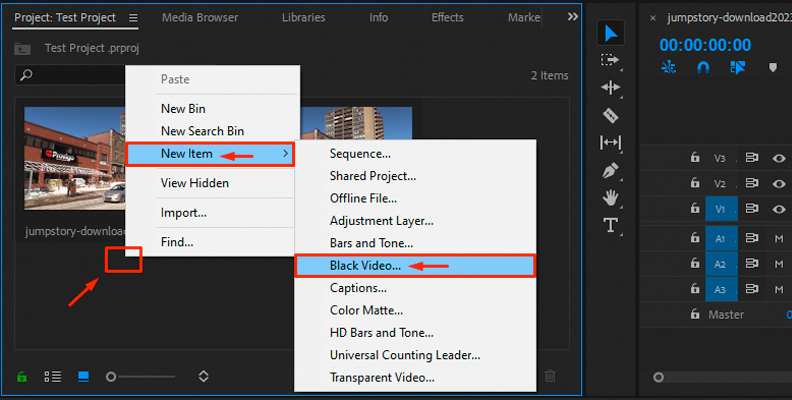
Create a black video slug by Right-clicking within the "Project" panel, choose "New Item" and select "Black Video".
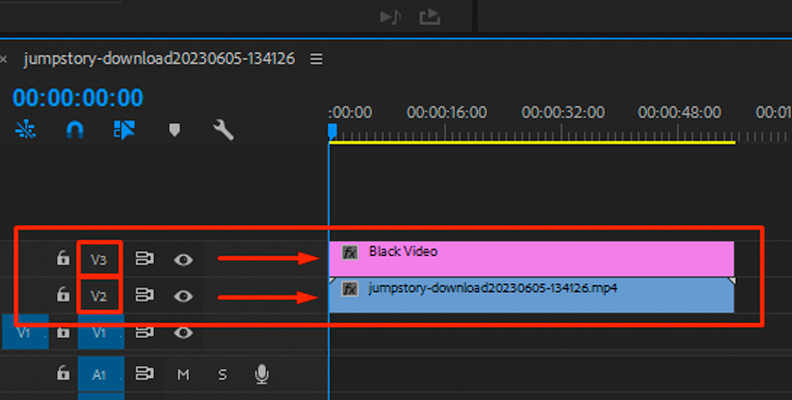
Put the black video slug video track 3, and the original clip on video track 2.
Step 4:
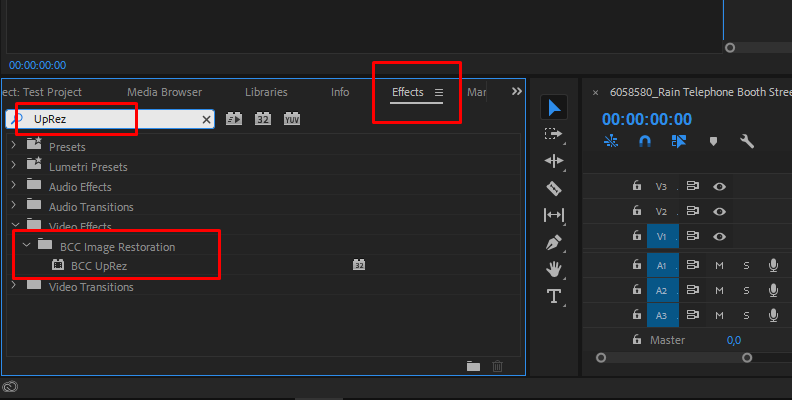
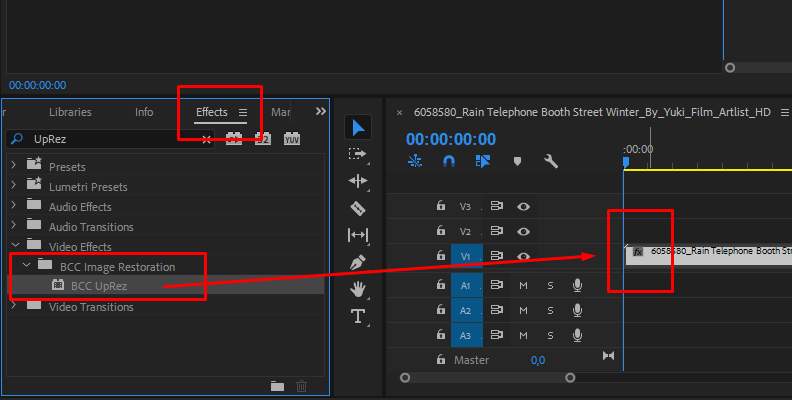
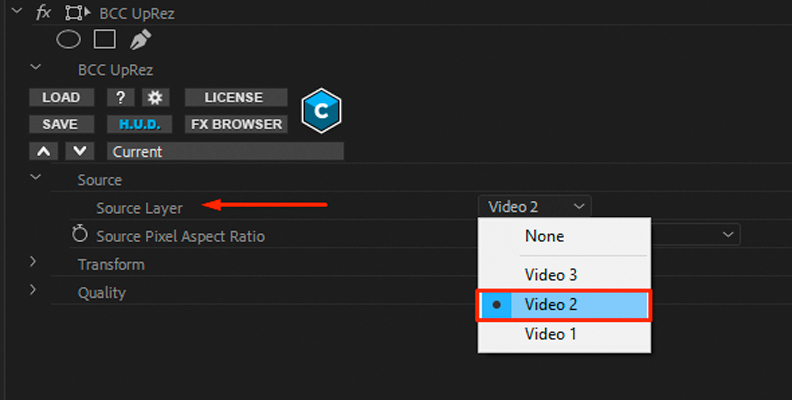
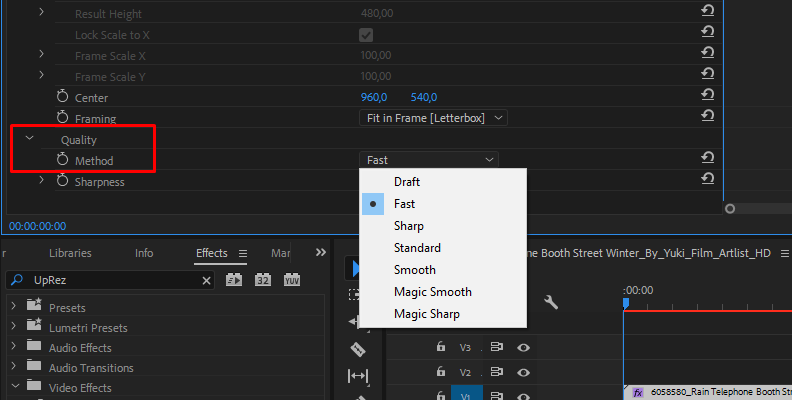
Find the BCC UpRez effect using the search bar, then drag and drop it onto the video clip.
Step 5:
Modify parameters for your video file within the effects control panel.
Step 6:
Export your video when you're satisfied with the resizing/cropping/upscaling results.
Final Words
That's everything you need to know about how to resize a video in Premiere Pro.
Hopefully, this was informative enough to make your video editing work in the future quicker and easier.
Good luck!
FAQ
What file types does Premiere Pro support?
Premiere is known for supporting many different file types, like MOV, QuickTime, AVI, JPEG, TIFF, PNG, MP3, MP4, and more. The full list is long, and you can find it in the official Adobe guide here.


