


Plosives are a common problem in audio recording, but thanks to software like Adobe Audition, removing them requires just a few clicks.
Adobe Audition is audio editing software that's extremely popular among podcasters, vloggers, and content creators for its noise reduction and audio restoration capabilities. Its tools to fix plosives from an audio file can enhance the audio mix for your podcasts and videos.
Today, we’ll look into plosives and six methods to remove them with Adobe Audition.
Let’s dive in!
What is a Plosive?
A plosive occurs anytime we speak, but sometimes, we are unaware of it until we record audio. Plosive sounds come from the sound of the letters P, T, K, and B. As we speak and release the air from our mouths to pronounce these sounds, the air hits the mic’s diaphragm, capturing it as a bump noise or mic rumble.
Plosives can be annoying and distract your listeners. Removing plosives is essential to make your recorded audio sound professional.
How to Remove Plosives in Audition
Adobe Auditions comes with many built-in features for audio restoration. However, it also allows you to use many third-party plug-ins to fix plosives in audio recordings to make your projects sound professional and engaging.

Another good feature is that you can launch Audition from Adobe Premiere Pro if you're editing audio for a video file to take full advantage of all the features in Adobe Audition.
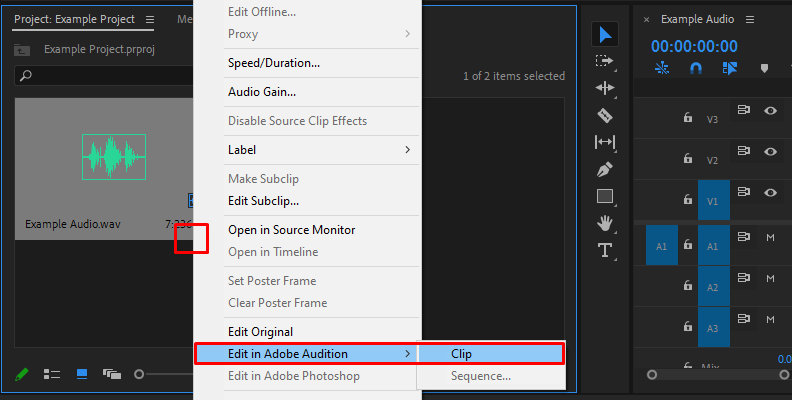
To edit from Premiere Pro, right-click the audio clip and select Edit Clip in Adobe Audition, then continue with one of the following methods.
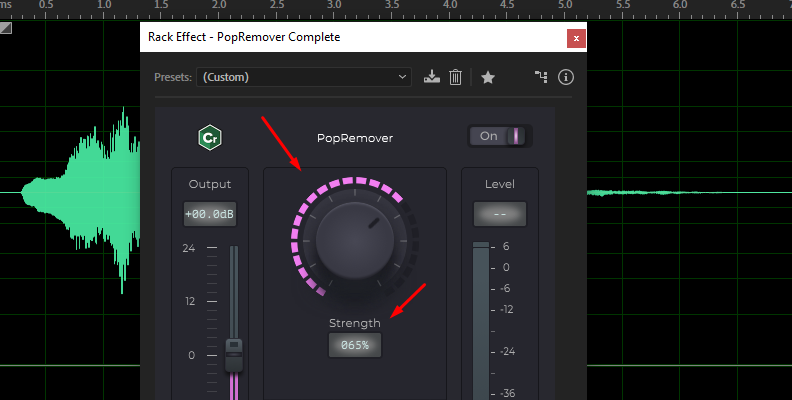
Plug-ins: CrumplePop’s PopRemover
One of the best solutions for removing plosives is external specially designed plug-ins. Tools like CrumplePop’s PopRemover use AI to analyze and identify the parts of your audio with pops and remove only those sounds without affecting the rest of your file. It allows real-time playback so you can check and adjust the plug-in to ensure the best plosive removal.

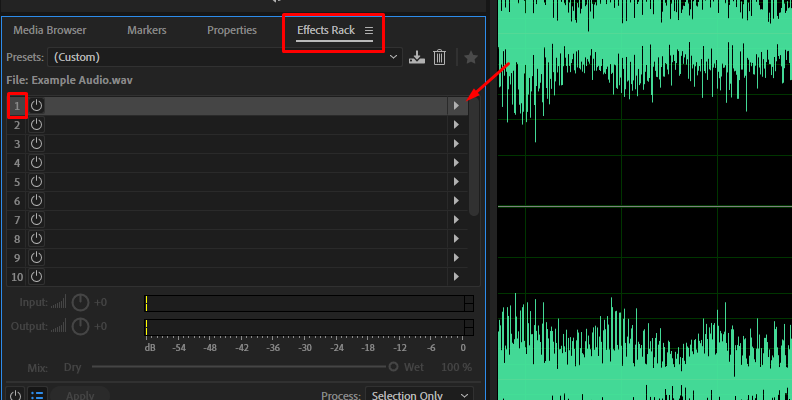
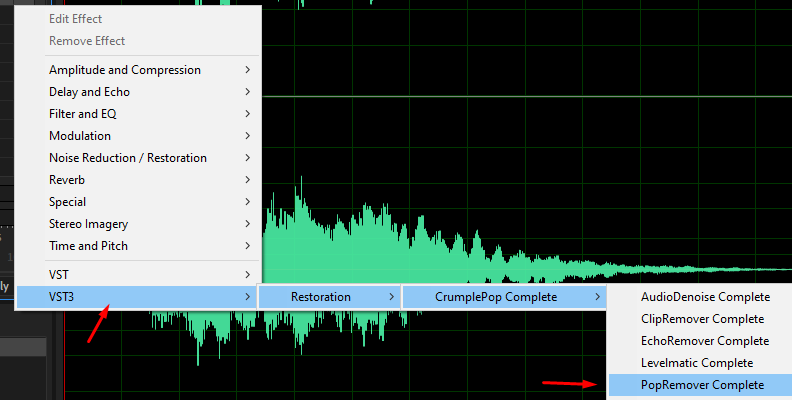
Step 1: To remove plosives with PopRemover, search the Audition effect and select it for the audio clip. PopRemover will automatically analyze and remove plosives. Play the audio to listen to the result.
Step 2: Use the strength knob to apply the PopRemover effect and the lower knobs to adjust the Low, Mid, and High frequencies to target the effect to specific frequencies.
With these simple steps, your audio should sound better and cleaner than the original file.
Hear It For Yourself
Advanced audio AI removes noise and boosts your vocal quality.
Toggle it on/off to hear the difference.
Remove Wind
Remove Noise
Remove Pops & Plosives
Level Audio
Remove Rustle
Remove Echo
Remove Wind
Effect: FFT Filter
Following with one of Audition’s built-in effects is the FFT Filter. The FFT filter, which stands for Fast Fourier Transform, is an algorithm that analyzes the frequency and amplitude of your audio signal and allows you to draw curves to reduce plosives in specific frequencies of your audio clip.
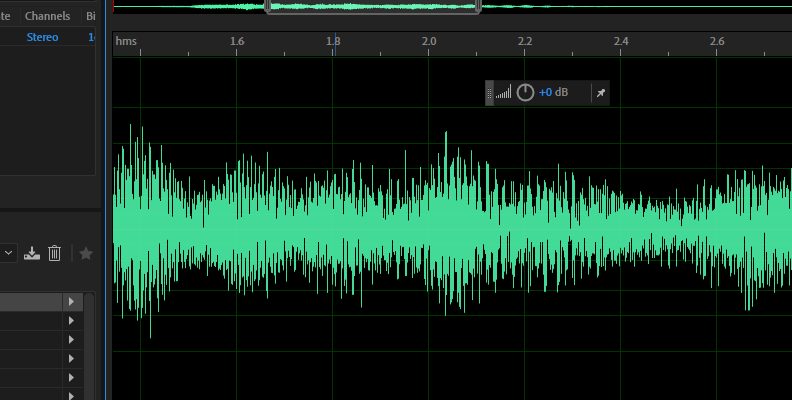
Step 1: Identify the part of the audio where the plosives are present. You will see it more clearly if you zoom in on the audio waveform and notice some peak points. Use the mouse wheel for zooming.
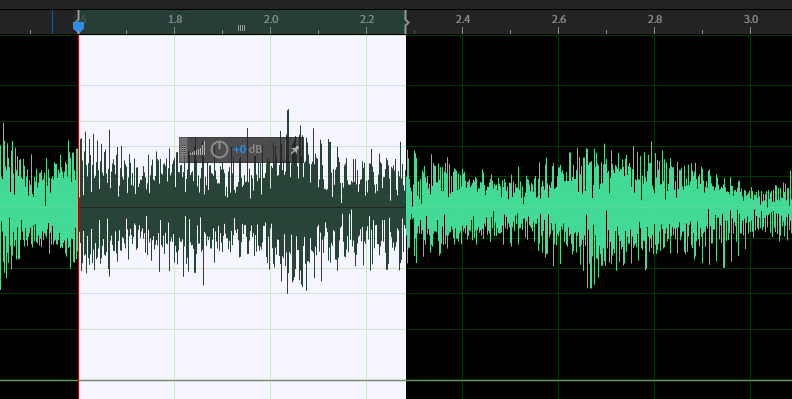
Step 2: Use the Time Selection Tool to select parts of the track with plosives. Enable it with the keyboard shortcut T. Click and drag the plosive area to highlight that audio portion.
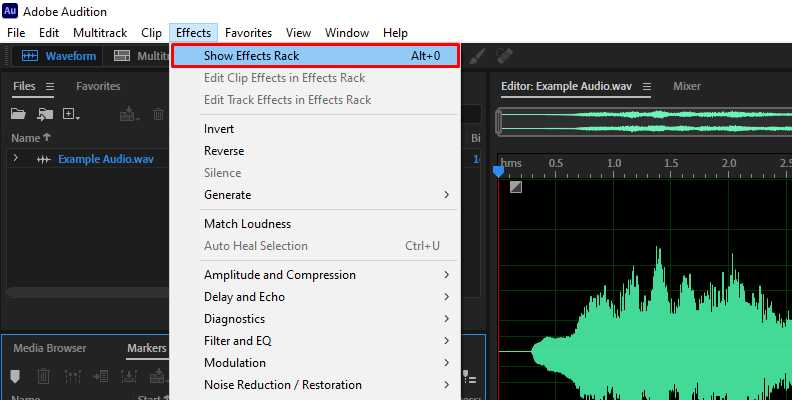
Step 3: Go to the Effects menu, click “Filter and EQ,” then choose the FFT Filter.
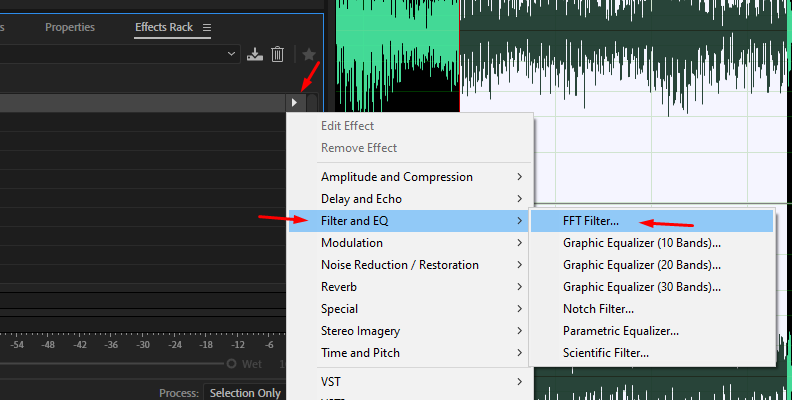
Step 4: To reduce the plosive, you can draw curves in the low frequencies in the effect’s settings. However, the FFT effect has a few presets you can use. One called “Kill the Mic Rumble” works great for removing plosives. Select a preset and click the Apply button to remove the plosives.
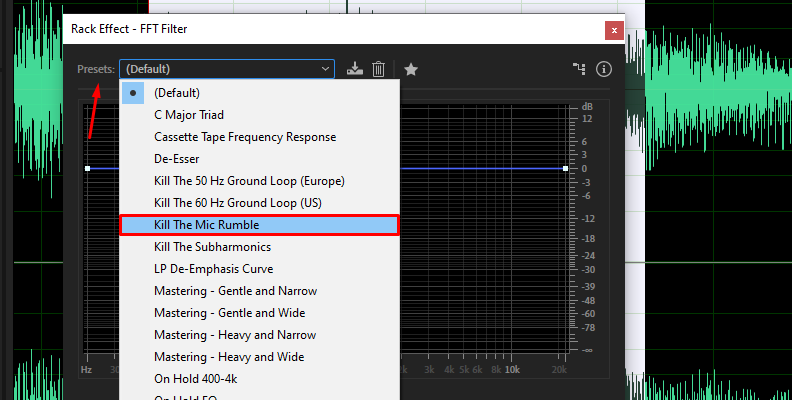
Step 5: Play the audio, and if you still hear plosives, you can adjust the effect by dragging and moving the points in the graph or trying other presets.
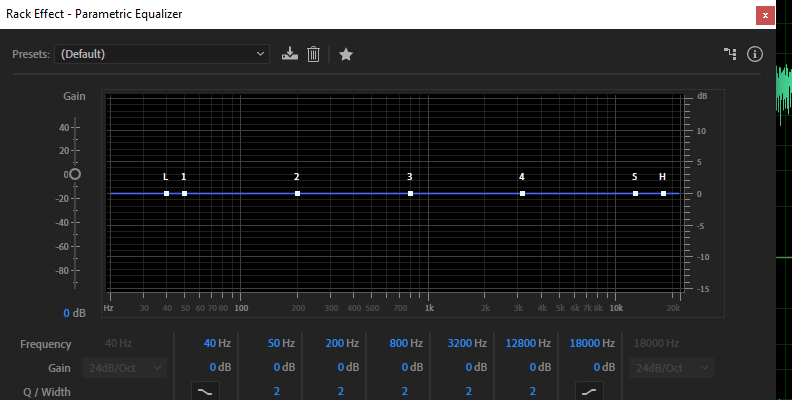
Equalization
EQ is an effect that must be in your audio editing toolbox. Adobe Audition has a few Equalization tools to help you edit and attenuate plosives and other noises like hiss and mic rumbles. Audition offers a graphic equalizer with 10, 20, and 30 bands and a parametric equalizer.
You can quickly and easily equalize your audio with a graphic equalizer because it offers a predetermined number of frequency bands. However, you have complete control over frequency with the parametric EQ, although fine-tuning it can take longer.
Step 1: Press T to select the Time Selection Tool and highlight the part of the audio with the audio peaks caused by the plosive sounds.
Step 2: Go to the Effects menu, click Filter and EQ, and choose the option that best fits your preferences.
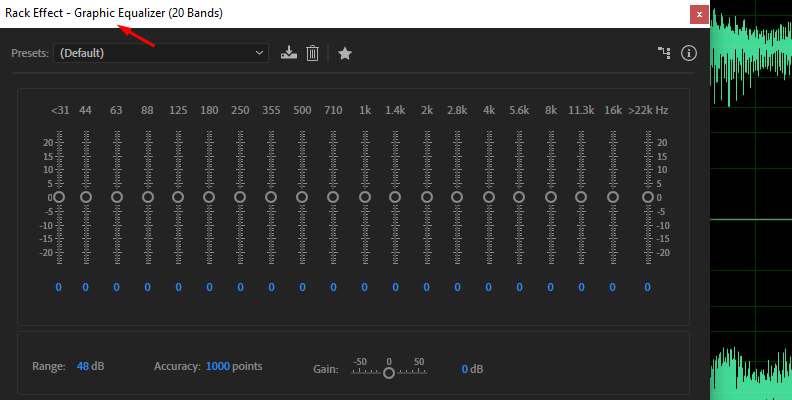
Step 3: Use the gain sliders on the low frequencies on the left side to reduce the bass and mic rumble noises where usually the plosives appear. If you’re using the parametric EQ, you will have more control and can apply a high-pass filter to reduce all noises in these frequencies.
Step 4: Listen to the audio clip and make more adjustments as needed.
Manually Remove Plosives
This is a simple technique to edit noise in quiet sections or where it does not interfere with the rest of the speech.
Step 1: Identify the plosives and use the time selection tool to point out the portion of the track with them.
Step 2: Press delete or right-click in the clip and select a Ripple Delete option to close the gap left by the portion removed.
Volume Reduction
Here’s another quick solution that can hide some pops when you need to make a quick correction on the fly.
Step 1: Highlight the portion of the audio clip with pops. When you highlight a section in the clip, you'll notice that a HUD moves to the selection.
Step 2: In this HUD menu, you will see a dB icon. Click and drag it to the left below 0 to reduce the volume in the selected part.
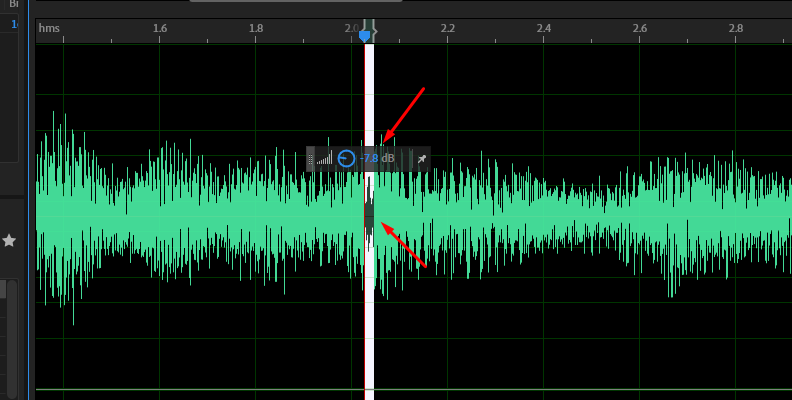
Step 3: Listen to your audio and find a balance in your volume so that the plosives are not as loud but won’t impact the rest of the audio. I recommend reducing the slowing so that the change in the audio levels is not too aggressive throughout the audio file.
Pop Filter
Using a pop filter when recording your voice with a microphone is a simple yet effective way to avoid pops during the recording and save time in audio post-production. These filters are screen mesh placed in front of the microphone to reduce the sound of the plosives coming from the speaker.
Another type of pop filter goes over the microphone like a shield. Many microphones come bundled with one, so it’ll be a good option to look for a microphone that includes it, or you can always create one with a mesh or fabric and a wire.
Final Words
Adobe Audition makes removing plosives easier with built-in tools and support for third-party plug-ins such as PopRemover. Since these noises come from our regular speech, sometimes it’s impossible to avoid them, but with these methods, you can reduce or eliminate them from your audio recordings.
PopRemover is a simple and quick tool that works inside Adobe Audition, Premiere Pro, Final Cut Pro, Garage Band, and more. Wherever you work, PopRemover can be your best tool for removing plosives.
Good luck!


