


When you are recording vocals, there are plenty of things that can get in the way of capturing that perfect performance. Even the best vocalist or podcast recorder can sometimes get things slightly wrong — nobody is perfect, after all.
One of the problems that can afflict anyone is that of plosives. You will know it the moment you hear it because plosives are pretty distinct. And they can ruin even the best take.
Fortunately, even once you have plosives there is plenty you can do to deal with the problem.
What is a Plosive?
Plosives are harsh sounds that come from consonants. The most common one is from the letter P. If you say the word “podcast” out loud, the “p” sound from the word podcast can cause a pop on the recording. This pop is what is known as a plosive.
Essentially, they are like a little explosive sound on the recording, hence plosive. And while P is the most common one to cause plosives, certain consonant sounds are also responsible. B, D, T, and K can all create plosive sounds.
"S" does not cause plosive sounds, but it might cause sibilance, which is the long hissing noise that sounds like air escaping from a tire. A de esser works well to reduce sibilances.
The Nature of Plosives
Plosives are caused by an increased amount of air being pushed out of your mouth as you form certain sounds from syllables. This increased air hits the mic's diaphragm and causes the plosive to be audible on your recording.
You might not get a plosive every single time you speak those syllables, but when you do it will be very clear.
Plosives leave a low-frequency boom on the recording that is pretty unmistakable. These are generally low frequencies, in the 150Hz range and lower.
Remove Plosives From Vocal Track
There are many different ways to fix plosives, and both prevention and cure can make a big difference to your vocal tracks.
Plug-ins
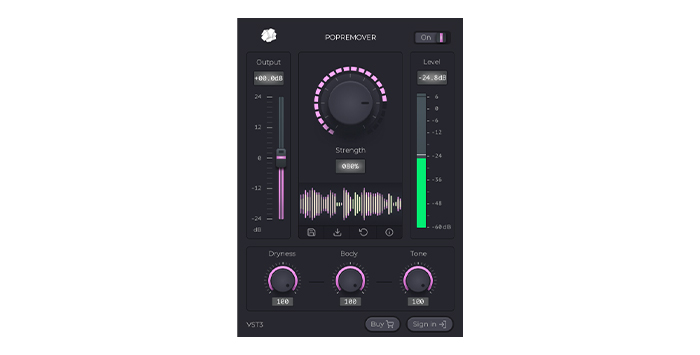
Most DAWs (digital audio workstations) will come with some kind of effects or processing to help deal with any post-production work that needs to be done, such as de essers, dynamic EQ, multiband compressor, gain reduction tools, etc. However, third-party plug-ins, such as CrumplePop’s PopRemover, can make the process of removing plosives easy and the results are much more effective than built-in tools.
All you need to do is identify the part of your vocal with the plosive, highlight it within your DAW, and apply PopRemover. You can adjust the strength of the effect by adjusting the central knob and apply gain reduction until you get a level you are satisfied with.
The low, mid, and high frequencies can also be adjusted so you can tailor the end result to your vocalist, but the default settings are almost always good enough that they don’t need to be adjusted.
As well as commercial effects to deal with plosives there are free options available as well. If you haven’t been able to prevent plosives from occurring during the recording then it’s good to know that there are specific tools available to help after the fact such as CrumplePop PopRemover, iZotope RX or a dynamic EQ plugin.
Hear It For Yourself
Advanced audio AI removes noise and boosts your vocal quality.
Toggle it on/off to hear the difference.
Remove Wind
Remove Noise
Remove Pops & Plosives
Level Audio
Remove Rustle
Remove Echo
Remove Wind
Pop Filter
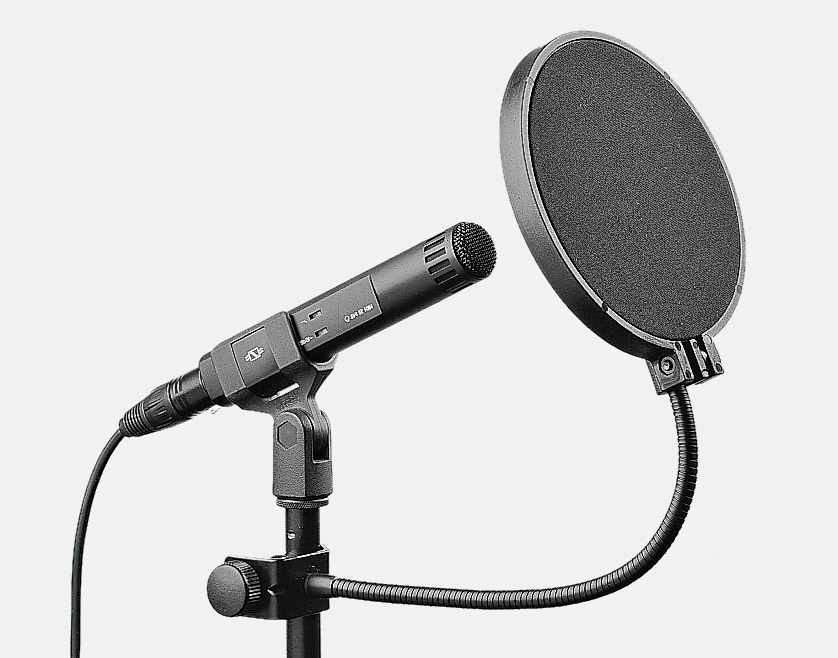
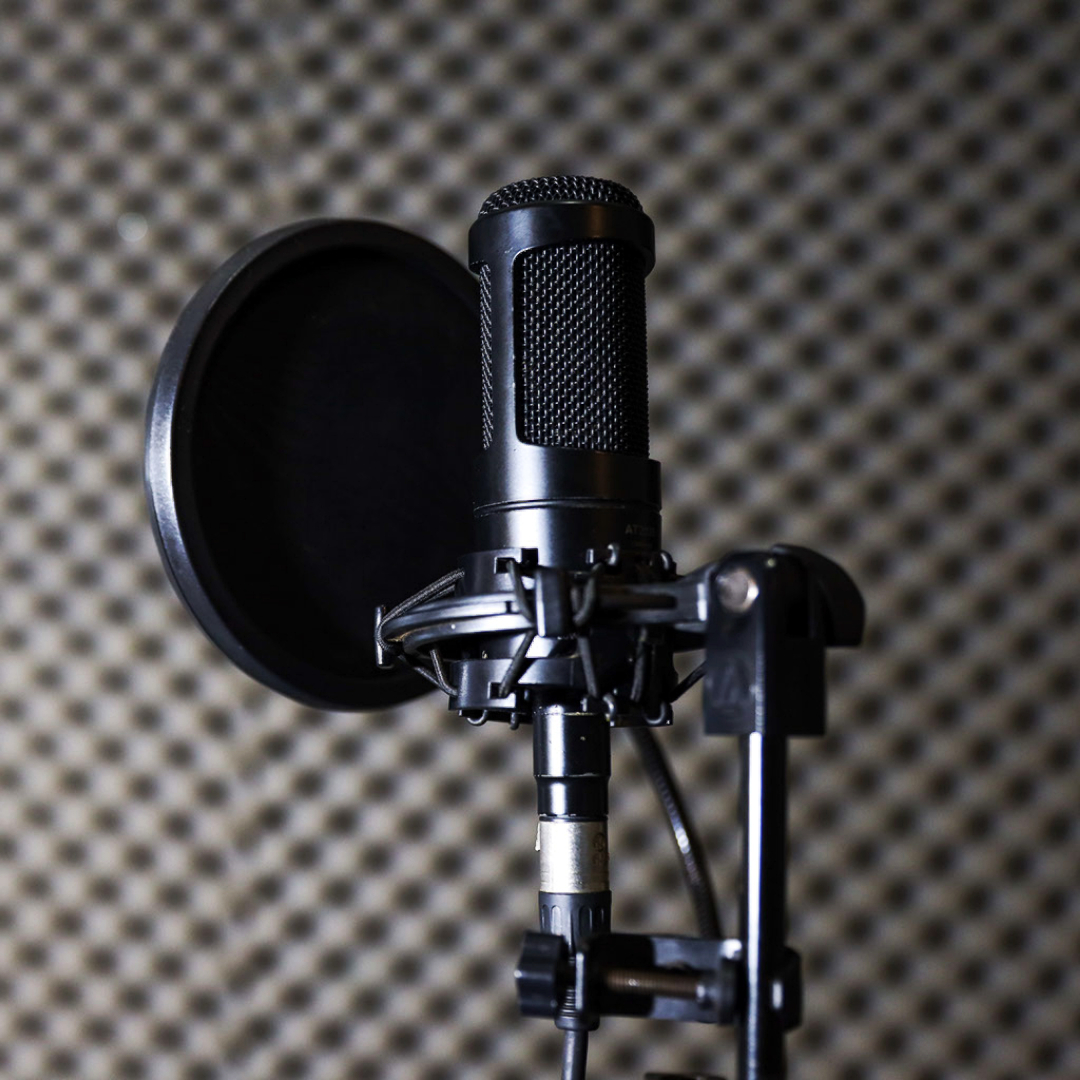
The best way to remove plosives from your vocal recordings is to use a pop filter or pop screen. A pop filter is a fabric mesh screen that sits between the vocalist and the microphone. When the vocalist hits a plosive sound, the pop filter keeps the increased air away from the microphone so the plosive isn’t recorded while the rest of the sound is.
Pop filters are often included when you buy a microphone because they are such a standard piece of kit. But if you don’t have one, then getting a pop screen is an essential investment.
There are different types of pop filters. Some are simple and come as a little circle of material held in place by a gooseneck. These are the most common pop screens. However, there are also wraparound pop filters that will envelop the entire microphone and look more expensive and aesthetically pleasing.
But it doesn’t matter what style of pop filter you use. They will achieve the same thing, which is to reduce plosives. If you don’t have one, get a pop screen!
Microphone Techniques
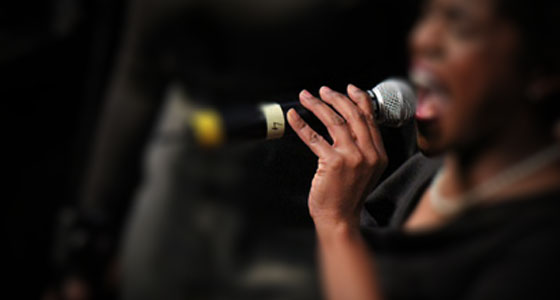
Another simple way to reduce plosives is to tilt the microphone you are recording with so that it is slightly off-axis. This is another way of ensuring that the extra puffs of air that come from plosives don’t hit the microphone diaphragm and cause a popping sound.
By tilting the microphone off-axis the air passes it by and reduces the chance of the microphone’s diaphragm picking up the plosive noises.
You can also ask your vocalist to tilt their head slightly. If their head is tilted slightly away from the microphone it will reduce the amount of air that contacts the diaphragm as well.
It is also worth considering using an omnidirectional microphone. Omnidirectional microphones are much harder to overload when it comes to plosive sounds, so they capture much less of it.
This is because the diaphragm of an omnidirectional mic is only hit from one side, rather than the whole of the diaphragm. That makes it far harder to overload. This is the opposite of a directional microphone, where all the diaphragm is hit and is, therefore, more susceptible to being overloaded.
Some microphones have the option to move between omnidirectional and directional. If you have this option, always choose omnidirectional and your plosives will be a thing of the past.
Placement of Vocalist
Plosives are caused by air hitting the microphone’s diaphragm. Therefore, stands to reason that the further away the vocalist is from the microphone, the less air will hit the diaphragm when there’s a plosive, so the less the plosive will be captured but also less proximity effect.
This is a balancing act. You want to have your vocalist far enough away from the microphone to attenuate plosives, but close enough to ensure that you are getting a good, strong signal when they are performing.
It’s a good idea to do some test vocal recordings to establish the appropriate distance for your vocalist, as sometimes even just a few inches can make all the difference between a plosive ruining a take and a plosive barely even being heard. A little practice means you can work out the best place and keep it consistent for any future recordings.
High-Pass Filter
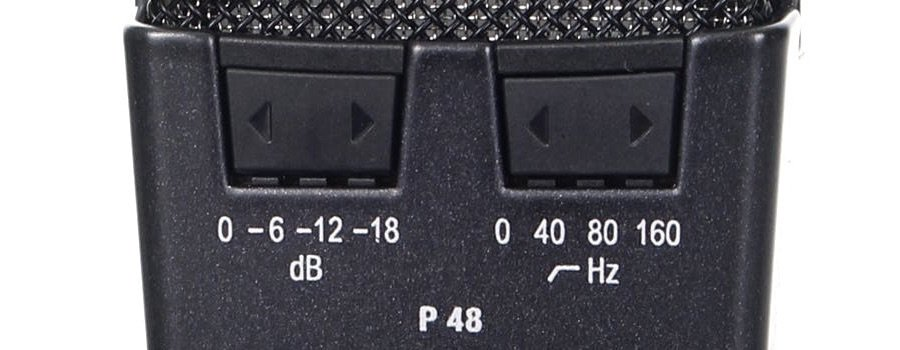
Some microphones will come equipped with a high-pass filter. This is also a feature of some audio interfaces and microphone preamps. This can make a real difference when it comes to cutting down on capturing the plosives in the first place.
A highpass filter is also called a low cut filter because they cut the low end of the frequency spectrum.
Some microphones, audio interfaces, and preamp high-pass filters will be simple on/off affairs.
Others may give you a frequency range you can choose or adjust. Select a frequency, then do some test recordings to figure out which one is most effective at removing plosives.
Normally, plosives are in the low frequency range. Setting the highpass filter on the low end around 100Hz should be good, but this can vary depending on the vocalist or the equipment being used. A little experimentation with the highpass filter will allow you to make an informed choice and select the low cut that will be most effective for your setup.
Equalization Low Roll-off
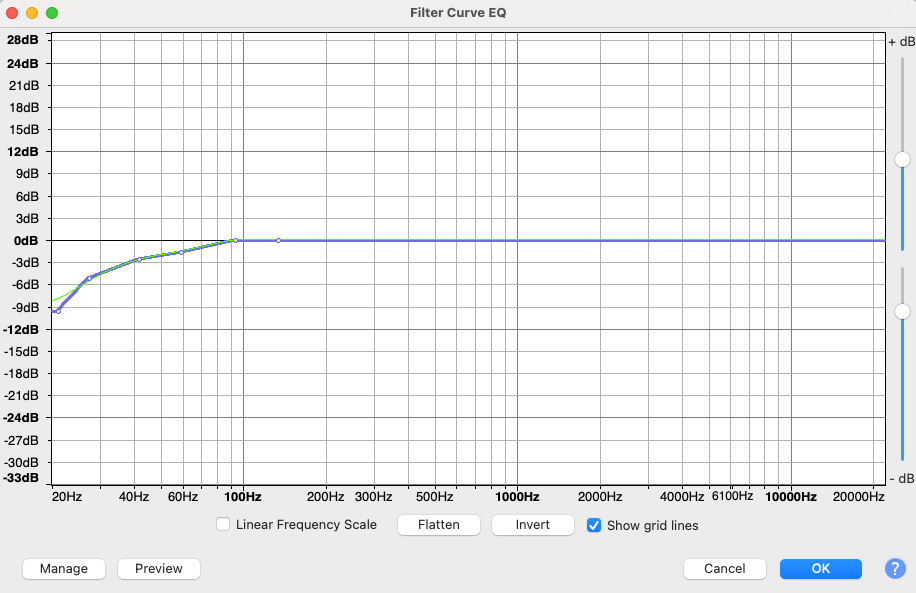
This is a software solution to help with plosives, but using your DAW’s built-in EQ-ing.
Because plosives occur at the low frequency range with certain consonants, you can use equalization to manually reduce those frequencies and EQ the plosive out of the recording.
This means you can set the levels to reduce across the low end of the frequency spectrum only. Depending on how loud the plosive you are trying to deal with is, you can apply equalization to specific frequencies. Once you have done this you can either apply the result to one particular plosive, or the whole track if it is a problem that keeps coming back.
As with plug-ins specifically designed to deal with plosives, there are loads of EQs available on the market, such as parametric EQ and dynamic EQ, both free and paid for, so you don’t need to stick with the default one that comes with your DAW.
However, for dealing with plosives, most EQs that come with DAWs will be sufficient for your needs.
Reduce the Volume of Plosive
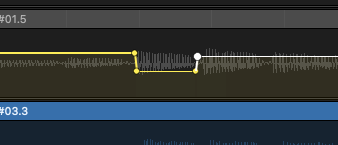
Another technique to deal with plosives is to reduce the volume of the plosive on the vocal track. This won’t entirely remove the plosive, but it will make it stand out less on the recorded audio so that it feels more “natural” and integrated into the final track.
There are two ways this can be done. You can do it via fader automation, or you can do it manually.
Automation allows the reduction to be applied automatically, and “on the fly” (that is, as your track is playing back). Choose the volume control on your DAW’s automation tool, then set the volume to reduce over the plosive part of the sound wave only.
With this technique, you can be extremely precise and only adjust the volume of the plosive. Because automation is a non-destructive form of editing you can always go back and change the levels later if you decide you aren’t happy with them.
Manually adjusting the volume is the same principle but more time consuming. Find the part of your audio wave form that has the plosive, then highlight it and use your DAW’s gain or volume tool to reduce the volume of the plosive until you are happy with it.
This can also be done very precisely, but whether the edit is non-destructive or destructive will depend on the DAW that you are using.
For example, Adobe Audition supports non-destructive editing for this, but Audacity does not. In Audacity, you can undo the change until you are happy with it, but when you move on to edit other parts of your track, that’s it — you are stuck with the change.
Before deciding the most viable option, check what kind of editing your DAW supports.
Conclusion
Plosives are a problem that can afflict any talent, from a vocalist to a podcaster. They degrade the quality of what is being listened to and can cause a real headache for any producer trying to deal with them.
There are plenty of techniques to address plosives, from pop screens to dynamic EQ and room acoustics. And, with a little patience and practice, you can consign plosive problems to being something that only other people need to worry about!


