


In this tutorial, I’ll guide you step-by-step on how to record audio in FL Studio, from the first moment you open FL Studio until you hit the record button and save your audio file. I’ll also provide you with some tips for recording audio of the highest quality.
Let’s dive in!
How to Record Audio in FL Studio Step-by-Step Tutorial
Before recording audio, you must have your audio equipment and drivers installed on your computer. For vocal recordings, at the very least, you’ll need a microphone, audio interface, and XLR cables. Which audio interface and microphone will depend on your needs and budget. I discussed these topics in the past, so if you have any doubts, check out my recent articles on audio interfaces and microphones for audio recording.
First, connect your audio interface and download and install its drivers. Download them on the manufacturer's website. Once installed, you can download FL Studio and install it on your computer. As a reminder, you must have FL Studio Producer Edition or higher to have the audio recording feature.
Step 1: Set Up FL Studio Audio Settings
The first time you open FL Studio, you should configure your audio settings so that the next time you open your session or start a new project, it detects your audio device and drivers. Otherwise, you won’t be able to record.
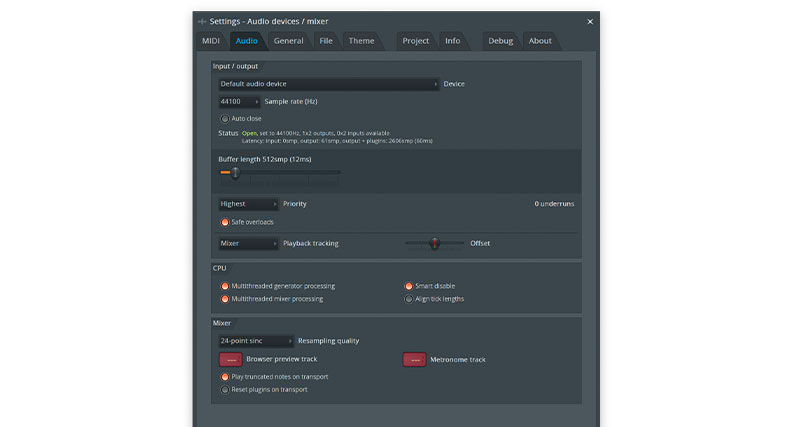
To bring up the System Settings, press F10 on your keyboard and click on the Audio tab. In this tab, you have three sections. In the Input/Output, select the audio drivers of your audio device. For Windows, ensure that the ASIO driver is installed. If you work with multiple audio devices, check these settings each time you record to ensure you are using the correct drivers for your session.
Set your sample rate and buffer size. You will usually work with a sample rate of 44100 Hz or 48000 Hz. In terms of buffer size, there is no one-size-fits-all solution: set a small buffer size if you want to record with less latency, or opt for a larger buffer size to help you process more plug-ins and post effects during mixing and mastering.
So, set it according to what you’ll be doing. You can change the buffer size to decide whether to reduce latency or have a better CPU performance.
Step 2: Configure Your Inputs on the Mixer Track
In FL Studio, the mixer tracks are called insert tracks. You need to set the mixer tracks to allow recording on it. Select an insert that’s empty (except the Master track), and on the right side of your screen, you will see a panel where you need to select the input device. Click the dropdown menu to display your audio input options. Here, you can define the input channel for your audio device. They will be displayed in two sections: the first for stereo inputs and the second one for mono inputs. This is important to remember because if you’re recording your microphone and selecting the input from the stereo channel, you will only listen to the audio from one side. Choosing from the mono section, FL Studio will make the audio play from both sides.
Step 3: Check Your Levels Meters
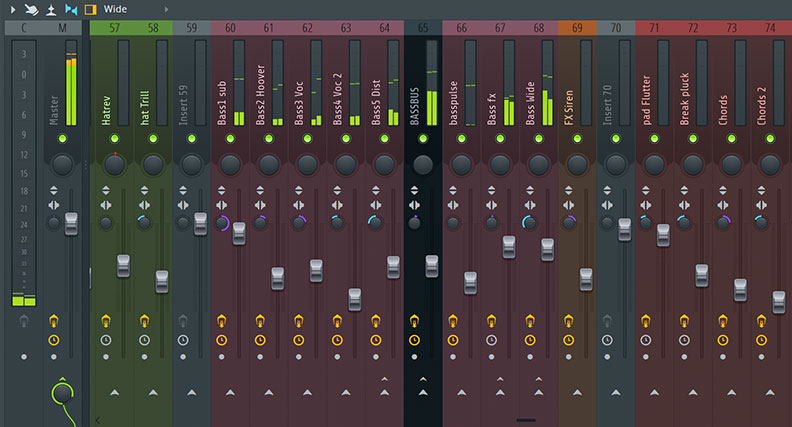
Once your inputs are correct, you should receive the signal from your audio device. It's essential to check your levels to ensure your audio recording does not clip or is too low. First, ensure your microphones or instruments are connected to your audio device and test your microphone by singing or speaking into it and your instruments by playing a few notes.
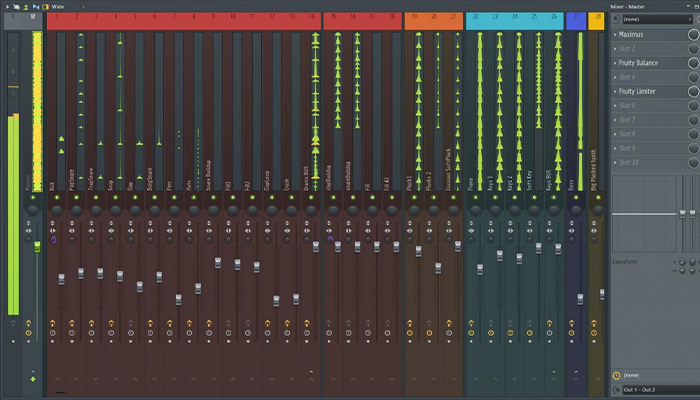
Some audio interfaces will have built-in level meters where you can see the signal and volume, but if yours doesn’t, use FL Studio level meters in the insert track. Adjust the Gain volume on your audio interface and keep an eye on the levels to keep them below 0dB and the bar color green. To stay on the safe side and have room to add plug-ins and other processing that may affect the volume, something between -10 and -12 should be fine.
Step 4: Track Label and Save Destination
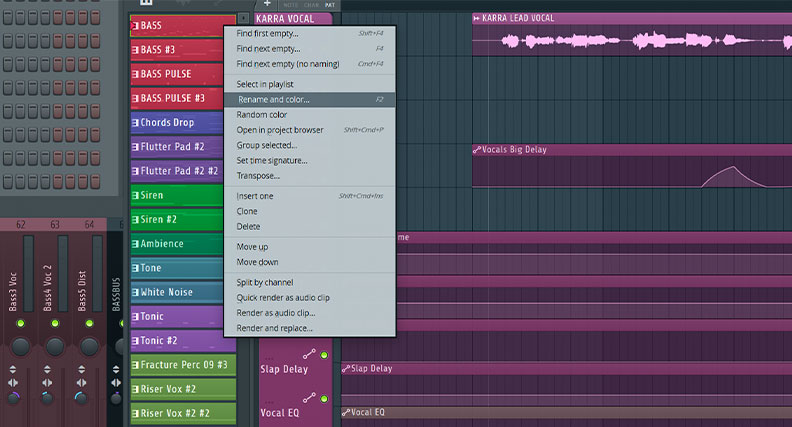
You can change the name of your audio tracks by right-clicking it and selecting rename, color, and icon to identify which mixer track is a voice track or other instrument.
To change the save location and file name, right-click the arm button. That’s the little circle button at the very top of the mixer track. If it’s on (red), right-click it twice to open the browser window and choose the folder and name for your .wav file.
You can also set a default record location for your project from F10 > Project > Data Folder. In this way, all your recorded audio will be saved into the default folder you set.
Step 5: Start Recording
Now, let's focus on the transport panel. Here, you have your essential record, stop and play button, and other options for the metronome, count-in, overdub, loop recording, etc. If the light is on, it means the option is enabled. I like to use a count-in to give you a few seconds to prepare myself. You can also turn on the metronome to help you stay in time after pressing the record button.
Once your recording options are set, click the arm button in the mixer track if you haven’t already. It must be red to be able to record. Press record to show the dialogue box asking if you want to record with the Edison audio editor or into a playlist as an audio clip. For now, select to record directly into the playlist as an audio clip, and the count-in will begin. When it finishes, all the armed tracks will start recording.
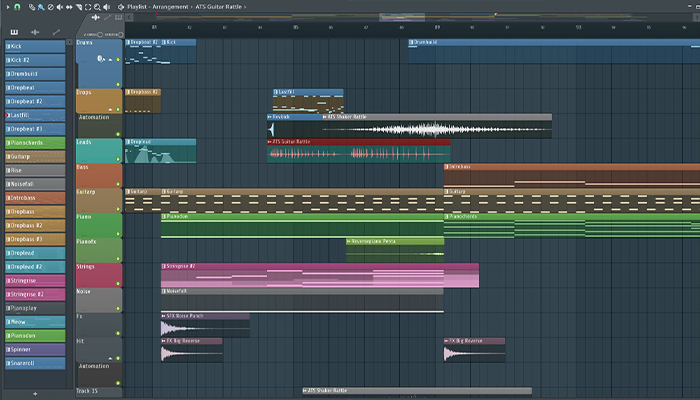
Press the space bar or stop button to stop the audio recording. You will see the recording in the playlists. Press play to listen to your audio recording to see if it was captured correctly. Now, you can proceed to edit and export your audio file.
Tips and Tricks
Here are some tips to improve the quality of your audio recordings and streamline your workflow while editing with third-party plug-ins.
Clean Up Your Recordings
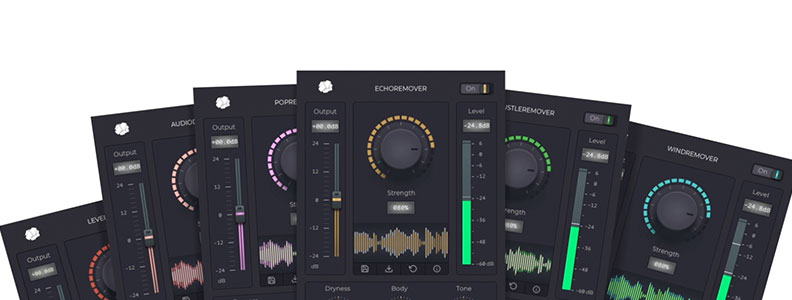
Sometimes, it doesn’t matter how much you do to avoid unwanted noises in your recordings. You’ll still find them in your audio files. Using third-party plug-ins like CrumplePop will help you fix the noise and deliver a clean audio recording to your clients.
CrumplePop effects include tools to denoise audio and others to target specific unwanted noises. AI technology automatically identifies and eliminates them, allowing you to hear the clean audio clips in real time.
AudioDenoise removes background noises, hisses, and hums.
WindRemover helps you get rid of heavy wind sounds when you record outdoors.
If you don’t have a pop filter, PopRemover can help you minimize the plosives on your audio track.
Lapel mics are very handy to use. However, they can pick up rustle sounds caused by movement. RustleRemover will efficiently detect and eliminate these noises without affecting the rest of the recording.
Are you recording with heavy traffic? No worries, TrafficRemover automatically targets these noises and reduces them.
When your audio distorts due to clipping, ClipRemover can help you fix it.
EchoRemover can fix bad audio recordings with echo.
The Levelmatic tool can automatically adjust the levels of loud or quiet audio.
You can add any CrumplePop tool from the mixer track in FL Studio. Select an effect slot > Select > More Plug-ins and scroll until you find the CrumplePop Complete plug-ins. Double-click the plug-in you want to add to the mixer track.
Hear It For Yourself
Advanced audio AI removes noise and boosts your vocal quality.
Toggle it on/off to hear the difference.
Remove Wind
Remove Noise
Remove Pops & Plosives
Level Audio
Remove Rustle
Remove Echo
Remove Wind
Wear Headphones

Use headphones during your recording to listen to the other audio tracks and monitor your voice in real time instead of listening through your speakers after you press stop. It will avoid recording unwanted audio and make your recording more precise. It can also help you listen to what FL Studio will record and find the perfect distance for your microphones. If there are background noises, sometimes you can identify them better with your headphones.
Pop Filter for Vocal Recordings
Using a pop filter when recording vocals in FL Studio is recommended. We generate plosive sounds naturally, which can hit the microphone and create noises in the recording. These filters are affordable, and there are some DIY solutions online. However, if you don’t have one, you can use third-party plug-ins like PopRemover to eliminate them in post-production.
Recording with Edison
Edison is a built-in recording and audio editing tool in FL Studio. You can load it as an effect in the mixer track or select it from the recording dialogue when you hit the record button. It’s an advanced feature that allows sound designers and producers to record into Edison, take multiple takes, and then export the best audio clips to the playlist.
Final Words
Using new audio software for the first time is always complicated, but once you try FL Studio a few times, I’m sure you’ll notice how intuitive and fun it actually is. Remember that it’s essential to configure your audio device settings at the beginning if you want to record without issues later in the process.
Experiment between recording into the playlists and using Edison to find what suits you better, and remember to use plug-ins to clean and repair your audio track.
Have fun!
FAQ
How to Connect Mic to FL Studio?
First, check what type of mic you have. If it’s a USB microphone, you need to plug it into your computer and select its drivers in the audio settings in FL Studio. On Mac, you might need to give your microphone access to FL Studio.
You will need an XLR cable and an audio interface if you have a dynamic or condenser microphone. Connect the microphone to your audio interface with the cable and the audio interface to your computer. Then, select it on the audio settings in FL Studio.
Condenser microphones require phantom power to work. Check if your audio interface can provide the 48V needed; you can find it in the manual, or it will have a button or switch that reads 48V that you can enable. If your audio interface does not provide the 48V, you must buy a phantom power separately and connect it between your mic and the audio interface.


