


Creating the retro looks of printed posters for your favorite photos and videos has never been this easy. Today, software such as Photoshop, GIMP, and After Effects feature high-quality, built-in posterization filters to achieve an authentic posterized image effect.
In this tutorial, I’ll show you how to posterize a photo using a Continuum effect called BCC Posterize. This posterize photo effect will give you more control over the style, tones, and which part of the image you want to posterize.
Let's dive in!
What is Posterization in Photography?
Posterization was a printing method used years ago to reduce the colors in an image so that posters could be printed with low ink. Today, posterization is used in photography as an artistic technique with effects and filters that reduce the color of an image to simulate the poster effect.
The posterize effect produces images with a scan low-resolution, retro style, and less detail. Many photographers and photo editing enthusiasts love to play with this effect for artistic purposes.
How to Posterize a Photo with BCC Posterize
The BCC Posterize effect is a filter that limits colors to create posterization looks and styles for photos and videos. It offers simple-to-use controls and a lot of freedom to get creative with the filter.
Follow this tutorial to posterize your photos with the free trial of Continuum. It's compatible with Adobe After Effects, Premiere Pro, VEGAS Pro, DaVinci Resolve, Final Cut Pro, and more.
I’ll use After Effects for this tutorial, but the same workflow applies to any host.
Step 1: Import Photo
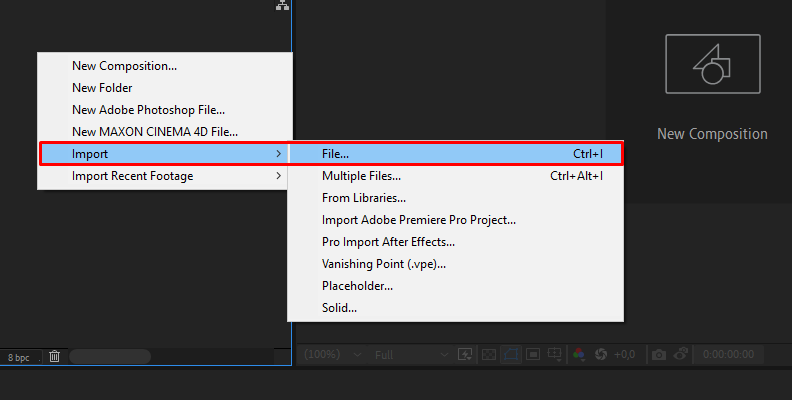
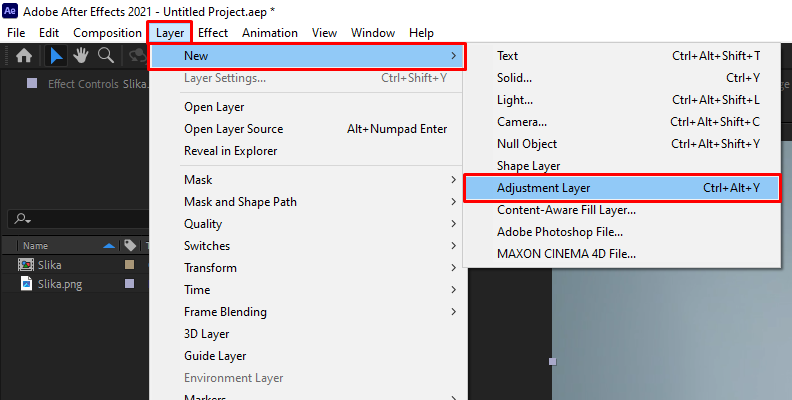
Launch After Effects and import a photo to posterize. Drag the image to the timeline to create a new composition and add a posterize adjustment layer where you’ll apply the effect. In this way, you can adjust and change settings in BCC Posterize without affecting your original image. In After Effects, Go to Layer > New > Adjustment Layer.
Step 2: Apply the BCC Posterize to Effect
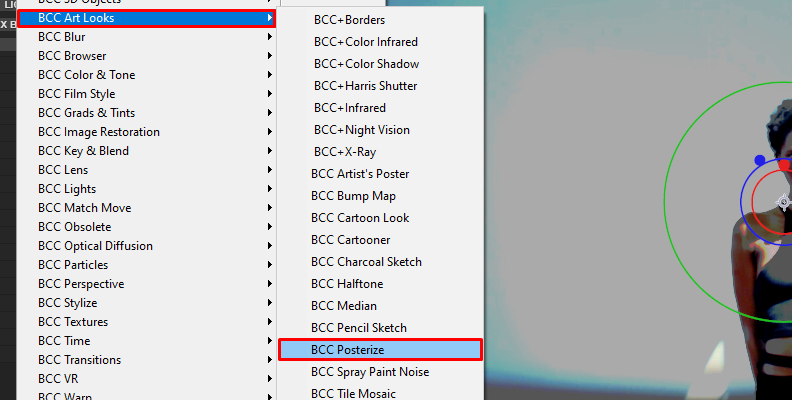
Go to the Effects & Presets panel and find the BCC Posterize effect under BCC Arts Looks > BCC Posterize. Double-click the effect to apply it, ensuring the posterize adjustment layer is selected in the layers panel. You can click and drag it directly to the adjustment layer.
Step 3: Exploring BCC Posterize Presets
The default settings can work for some images. However, let’s go through the settings to find out what you can do with the BCC Posterize effect.
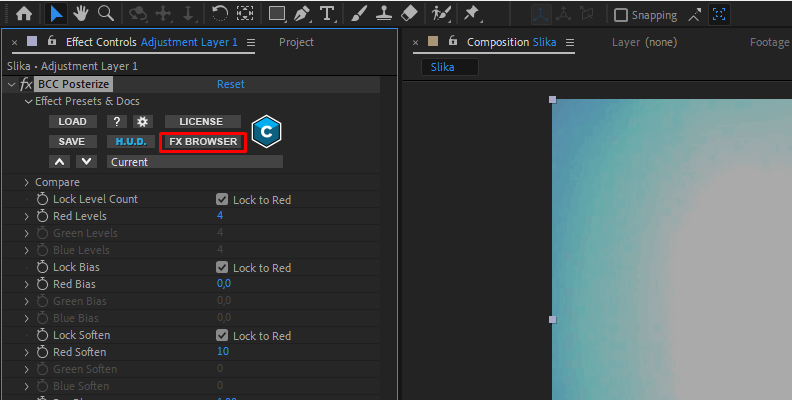
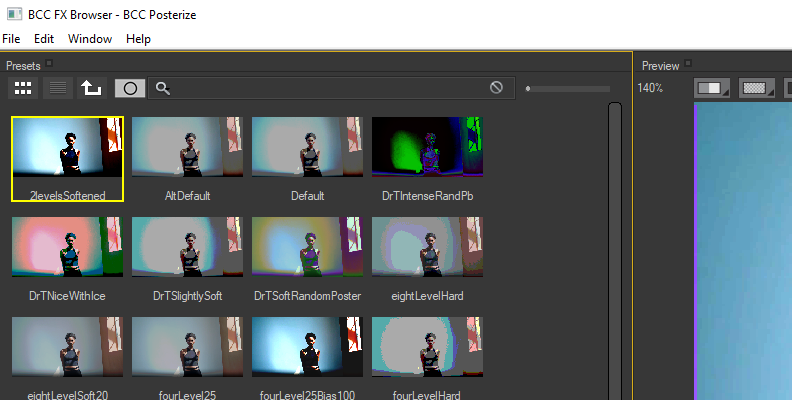
If you have a look that you wish to achieve, look at the presets to see if there’s something similar to what you have in mind. On the Effects panel, select FX Browser to launch the preset library.
Select and preview the preset, then click Apply to accept the selection and return to your host. If you want to customize the posterize effect, the following steps will clarify the process.
Step 4: Color Levels and Bias
The first thing to adjust is how many tones you want in your posterized image. By default, the number of levels is locked to the red channel, establishing the number of colors on the red, green, and blue channels. If you want to adjust each color level individually, uncheck the Lock Level Count and adjust each channel.
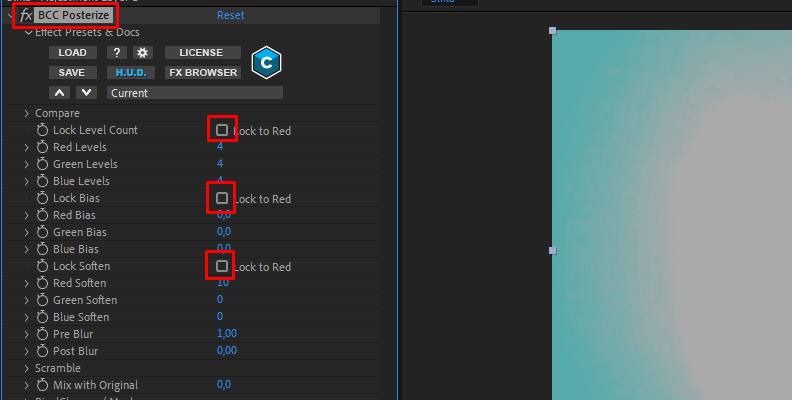
You can increase or decrease the values to limit the number of colors each channel has in the picture among the 256 levels.
You can add a color bias to change the look of your final posterized image. Adjusting the value slider in positive numbers will produce whiter tones, and negative numbers will produce darker ones.
Step 5: Use Soften to Smooth the Image
The posterize effect creates a harsh-looking image, but sometimes you want a more natural photo while keeping the posterization style. In the BCC Posterize settings, you have a Soften parameter that allows you to smooth the tone transitions in the output.
Step 6: Adjust Blur
BCC Posterize includes two types of built-in Blur for your posterized image: the Pre Blur applied to the original photo and the Post Blur applied after BCC Posterize. Blur can help soften the edges.
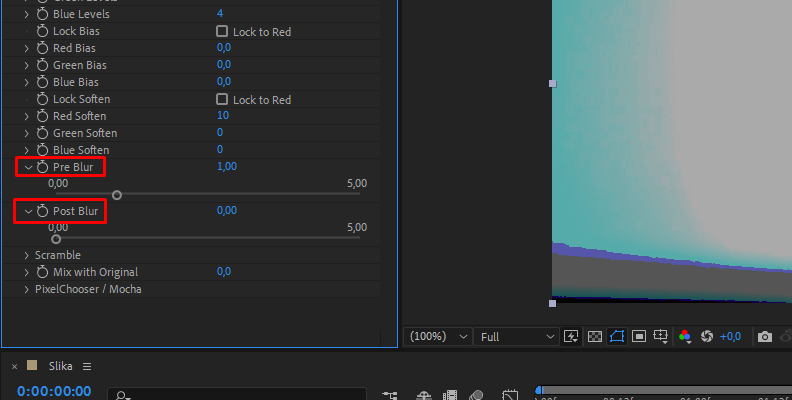
Remember that Pre Blur does not increase the number of output colors, but Post Blur does.
Step 7: Scramble Colors
If you want to be more creative, you can change the order in which the colors appear in the image. The Scramble parameter allows you to mix the red, green, and blue channels to add variation. If you set the color levels to 3, the three levels will interchange the order of appearance, creating different looks.
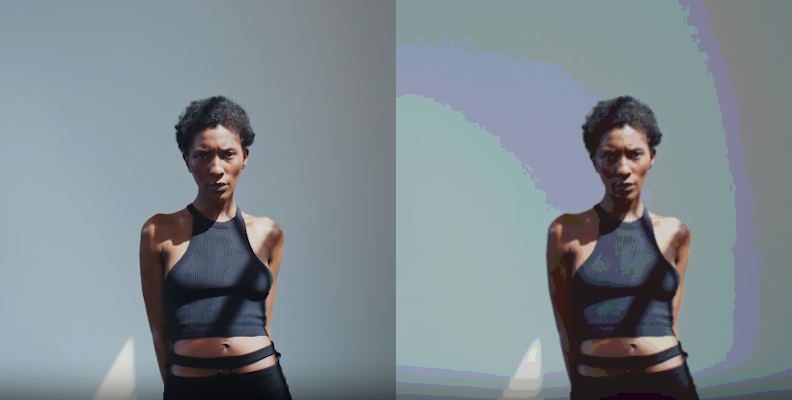
Step 8: Compare Mode
Compare Mode lets you choose how to display the source and output pictures. Compare the posterized picture with the original to make the last adjustments with the BCC Posterize effect.
Selected Posterization with BCC PixelChooser
Sometimes, you create a posterization effect you like but want it in sections of the image while leaving the background intact. BCC PixelChooser is a built-in masking tool in Continuum filters that lets you apply BCC Posterization to only a portion of the image.
BCC PixelChooser comes with Mocha Planar Tracking integrated to help you create mattes to apply the filter on selected areas of the image and tracking to lock the mask to a moving object in the footage or to camera movement.
Follow the next steps to add selected posterization with BCC PixelChooser.
Step 1: Enable PixelChooser
Almost to the bottom of the BCC Posterization settings is PixelChooser. Click on it to display its parameters and select PixelChooser On to enable the rest of its settings.

Step 2: Launch Mocha
Click on the Mocha button to launch the Mocha interface. Don't worry if you don't have the Pro version; this Mocha feature comes with the effect. Mocha is the easiest way to create single or multiple masks where you want to apply the posterization effect.
Step 3: Creating a Mask with Mocha
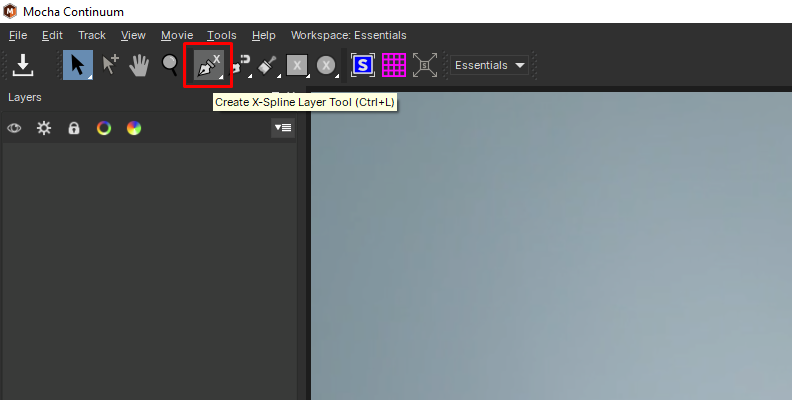
In Mocha, go to the toolbar and select the icon with a pen and an X to draw the shape in the image where you want the BCC Posterize effect.
Save the project by selecting File > Save Project, and exit the Mocha interface. Back in your host, you will have BCC Posterized applied only to the mask created in Mocha.
Final Words
With BCC Posterize and BCC PixelChooser, you can create stunning photos that combine classic and carefully crafted posterization effects. You can also use Mocha to track BCC Posterize to the camera movement in a video clip or to a static object.
After BCC Posterize, you can explore the rest of the Continuum filters to enhance your photos and art.
Have fun!
FAQ
How do I posterize an image in Word?
In a new document, go to the Insert tab. Select "Picture” and browse the image you want to posterize.
Go to the Format tab, select "Artistic Effects" from the toolbar, and click on Artistic Effects Options.
One of the last rows of effects is called "Cutout." Click on it to apply it.
Select Color and adjust Color Saturation and Tone in the Format tab to create different styles.
Word is not the best way to create a posterize photo look and will not produce a similar result as BCC Posterize, but the good thing is that everyone can use it, even without editing skills.


