


Merging video clips is a technique that every video editor must use at some point in their career. It allows you to edit faster, combine video clips that were shot separately, merge audio clips into one single track, and create split-screen scenes in your films and vlogs.
In this article, I'll show you how to merge clips in Premiere Pro. You'll learn to merge video clips, audio clips, video and audio clips, multiple clips, and combine video clips into one frame.
Let’s dive in!
How to Merge Clips in Adobe Premiere Pro
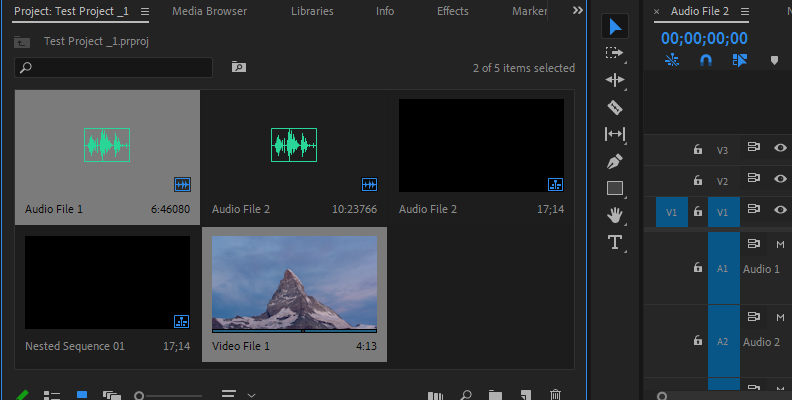
Import your files into the Project folder. After that, select the specific clips you wish to combine. Then, right-click on the chosen files and select "Merge Clips..." from the drop-down menu.
However, there are different ways to merge clips in Adobe Premiere Pro, and if you want more options, keep reading to find out more ways to merge clips professionally.
The first method I’ll show you is merging clips into the same sequence for easy editing.
Merge Audio Clips
Follow this method when you want to merge multiple audio clips into a single audio track.
Step 1: Import media files into a new project in Adobe Premiere Pro.
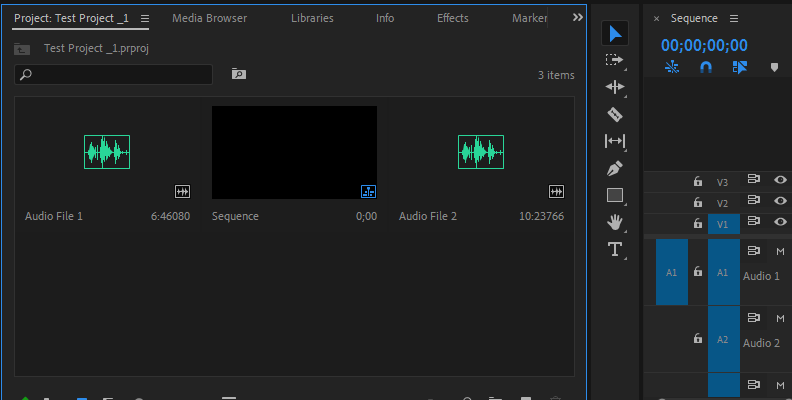
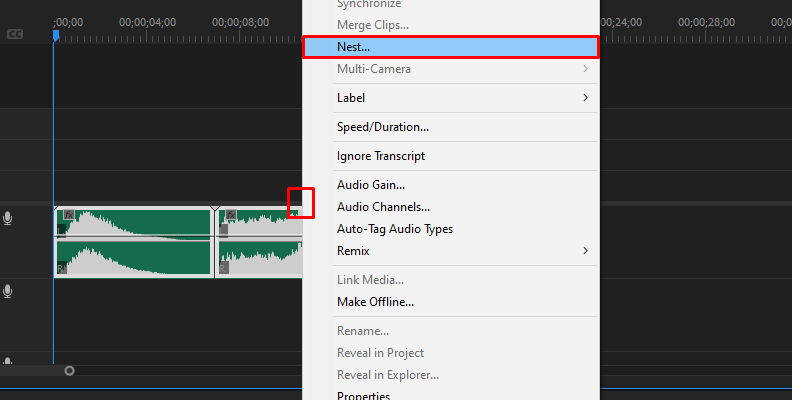
Step 2: Select all the audio clips you want to merge in the timeline panel by pressing shift-click.
Step 3: Right-click the selected clips and click “Nest” on the drop-down menu to create a nested sequence. Name the nested sequence and click OK.
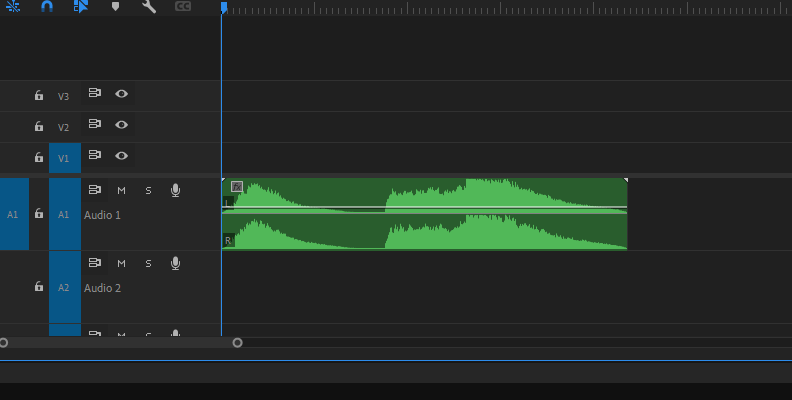
Step 4: The new nested sequence will appear in a different color as the main sequence. Now, you have all the audio clips merged into the nested sequence.
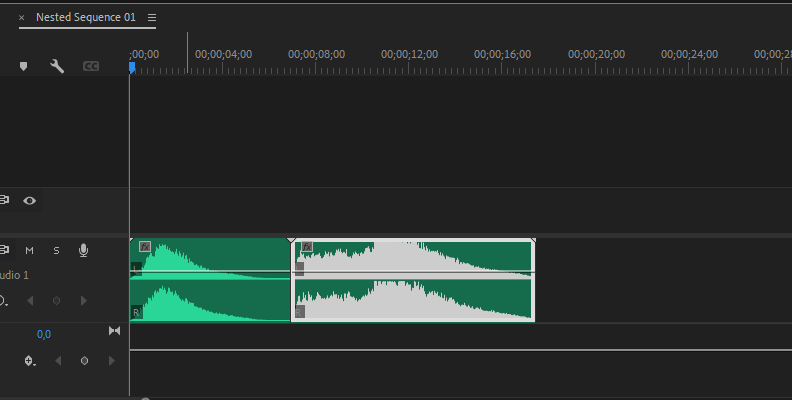
Step 5: You can edit the nested sequence by double-clicking it and editing the merged clips individually inside the nested sequence.
Merge Video and Audio Clips
This method allows you to combine a video clip with an audio clip recorded separately from the camera audio. Examples include interviews with more than one person, video podcasts, or films where the actors are far away from the camera.
Step 1: Before merging, it is important to synchronize the audio and video clips to avoid sync issues.
Step 2: Select the video clip and audio clip. Right-click on them and select "Synchronize" from the drop-down menu. Choose a Synchronize Point method to sync audio and press OK. Replay the clips to ensure the audio is in sync.
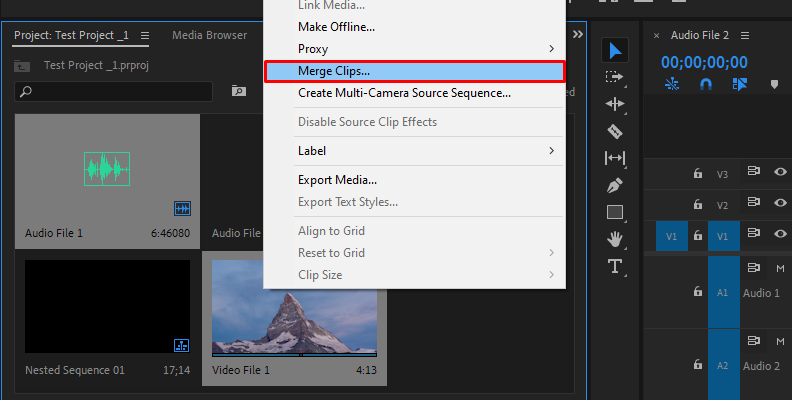
Step 3: To merge, select both clips, right-click on them, and select "Merge Clips" from the drop-down menu.
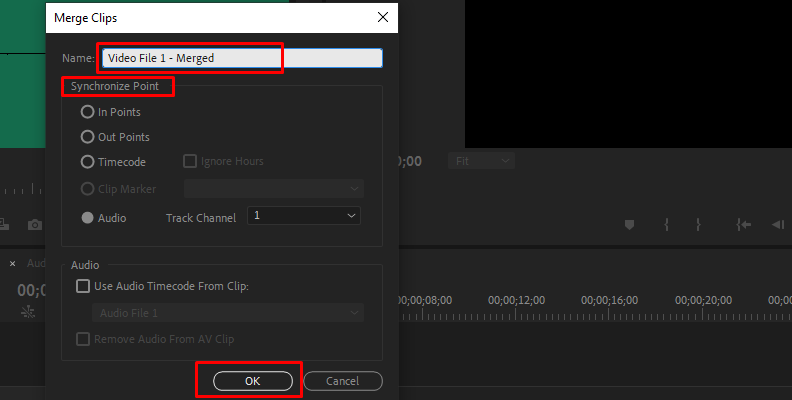
Step 4: Type a name for the merged clip in the Merge Clips dialog box and click OK.
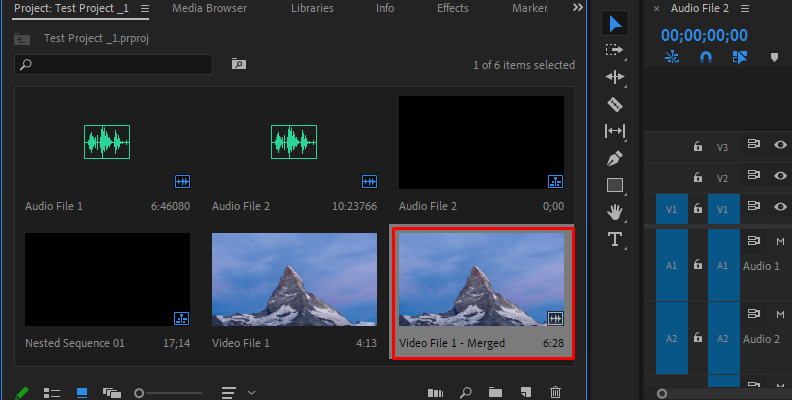
Step 6: The merged clip should be in the project panel and ready to be added to your timeline.
Finally, if you need to erase the source camera audio, click on “Remove Audio from AV Clip”.
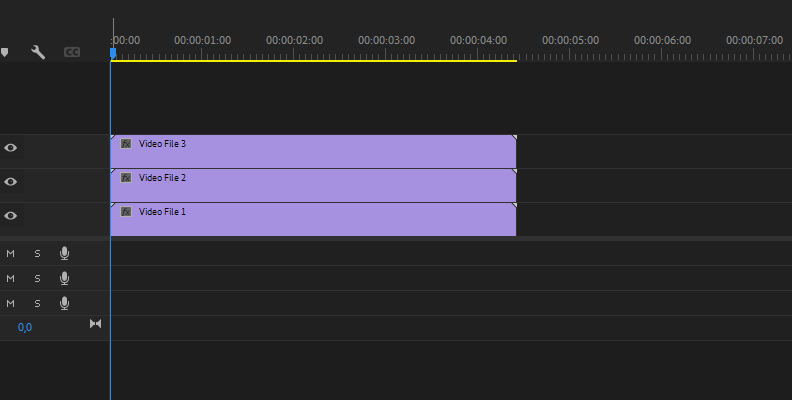
Merge Multiple Video Clips
Follow these steps when you have multiple videos and want to merge them into a single video clip in one frame, like a multi or split screen. The process can be tedious, but it's worth it.
Step 1: Import all the clips you want to merge into a new project.
Step 2: Select the video clips to merge and drag them to the timeline. Ensure you stack them one on top of the other on separate video tracks.
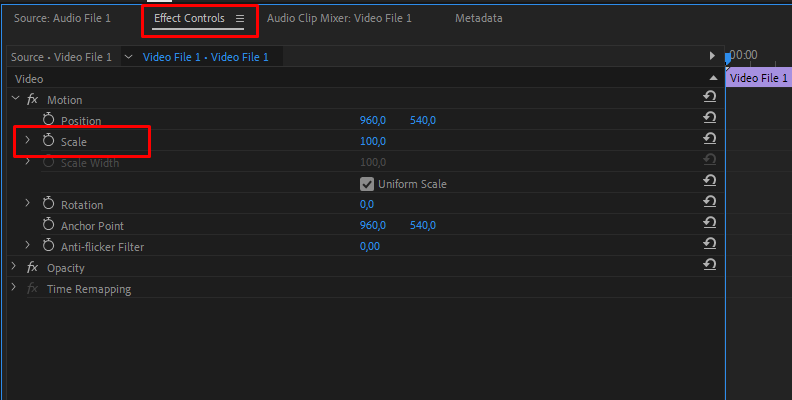
Step 3: Select one of the video clips and open the Effect controls for that video clip.
Step 4: Adjust the “Scale” setting to resize the video clip and “Position” to move the video to the spot you want on the frame.
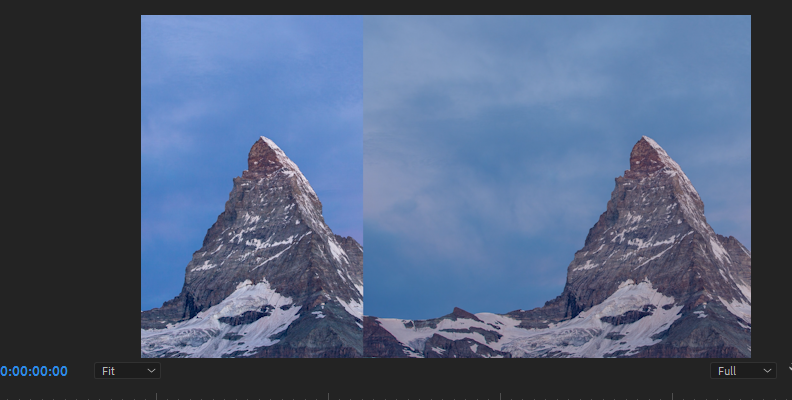
Step 5: Repeat the last step with the other clips to create the split-screen look. Arrange them as you want them to be displayed.
Step 6 Play the video to ensure everything is in the right order and that it plays well simultaneously. You can get creative and make some video clips bigger than others to highlight a specific scene.
Merge Clips in Premiere Pro Using the Blending Modes
This method merges clips on different tracks to superimpose them and create a new frame that blends the two tracks into a new composition. Unlike merging multiple video clips into one frame in a split screen format, this method combines the two video clips to create a new one, allowing you to make creative compositions.
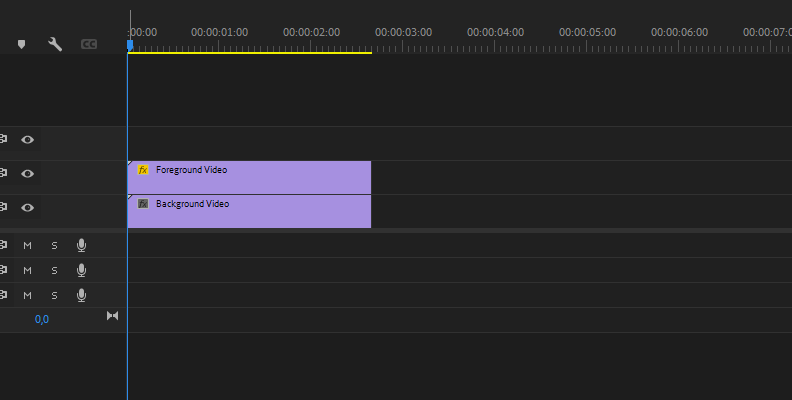
Step 1: Add the two video clips you want to merge, ensuring they are in separate video tracks, one above the other. The video in the background must be on the bottom track, and the foreground video clip must be on the top track.

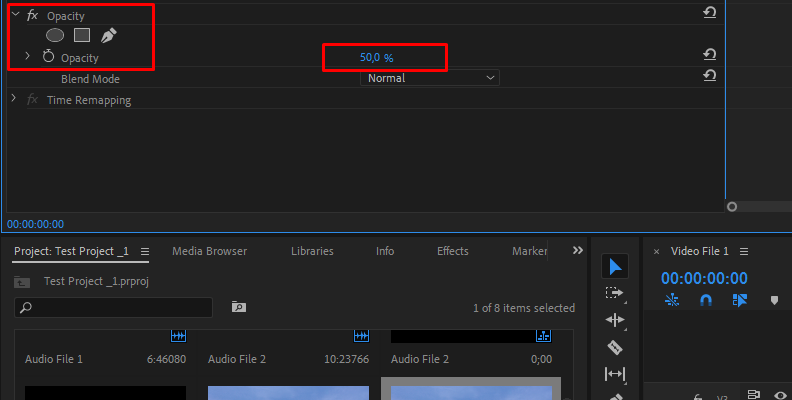
Step 2: Select the video clip in the higher track (the foreground video clip) and display the Effect Controls panel.
Step 3: Display the Opacity slider and drag it under 100% to blend the foreground and background video clip perfectly.
Step 4: Go to Blend Mode and display the drop-down menu to select among a wide variety of Adobe Premiere Pro blending modes. Experiment with the blending modes to find one that merges the video clips seamlessly.
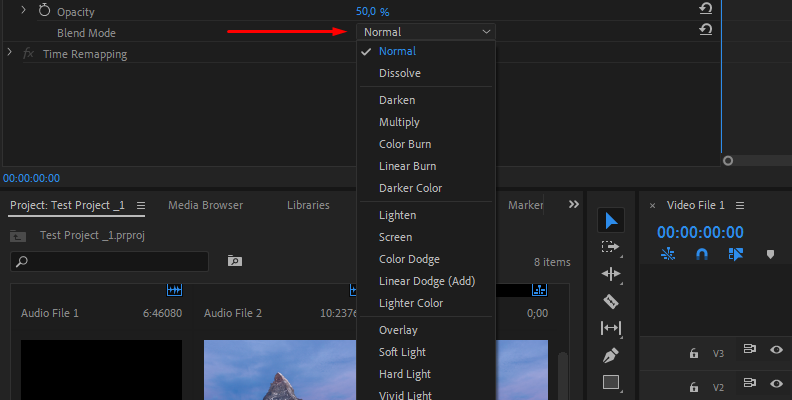
Step 5:. You can return and adjust the Opacity slider to find the right blending between the two video clips.
How to Merge Clips in Premiere With BCC+ Math Composite
For the last method, you will require the Continuum plug-ins from Boris FX. If you’re new to Continuum, you can download the free trial to follow this tutorial before purchasing a license.
The BCC+ Math Composite filter in Continuum allows you to combine video clips using blending modes. It composites a new video clip for your sequences by blending the background and foreground video clips.
Step 1: Create a New Sequence
Launch Adobe Premiere Pro and import the video clips you want to merge. Place the first clip in one track in the timeline panel to be the background and add the other clip to a different video track above the background video.
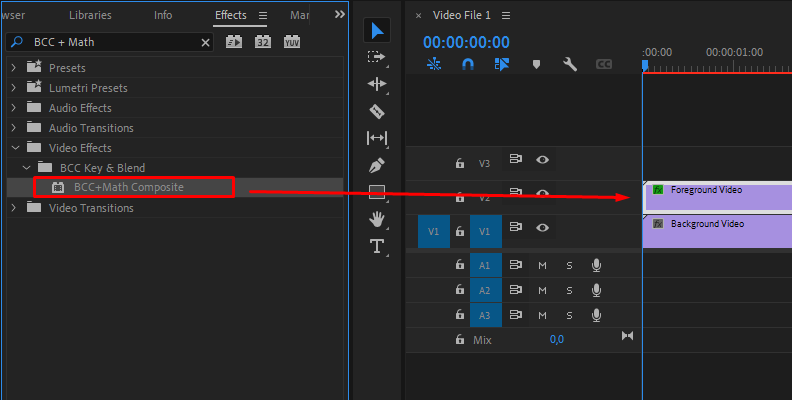
Step 2: Apply BCC+ Math Composite
Go to your effects browser and locate Video Effects > BCC Key and Blend > BCC+ Math Composite. Click and drag the filter and drop it in the foreground video clip, which should be on the top track.
You won't see anything happening because you must configure the filter first. It is very straightforward, so let's get into it.
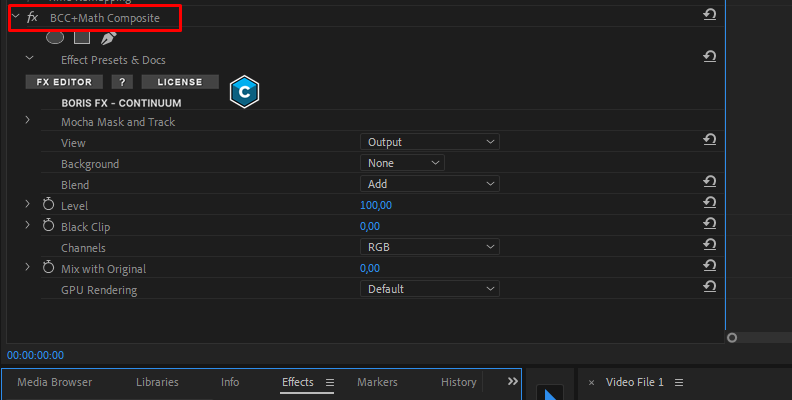
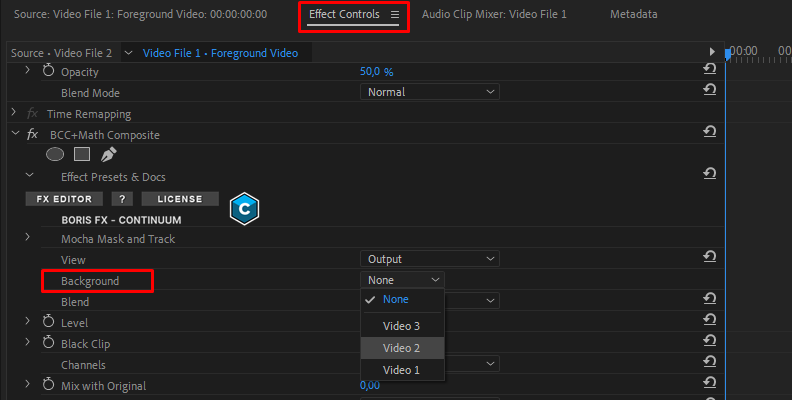
Step 3: Select the Background Video Clip
Because you apply the effect to the foreground video clip, you need to define which is the background video clip. Click the pop-up menu in the background and choose the video clip at the bottom.
You can choose a source mask and draw a mask on the portion of the foreground video that you want to merge with the background video clip. There’s a better way to achieve this with Mocha, but we’ll get there in a moment.
Step 4: Select the Blend Mode
Display the Blend pop-up menu and choose a blend mode to combine video clips. Adjust the Level slider to adjust how much of the foreground video clip is visible over the background.
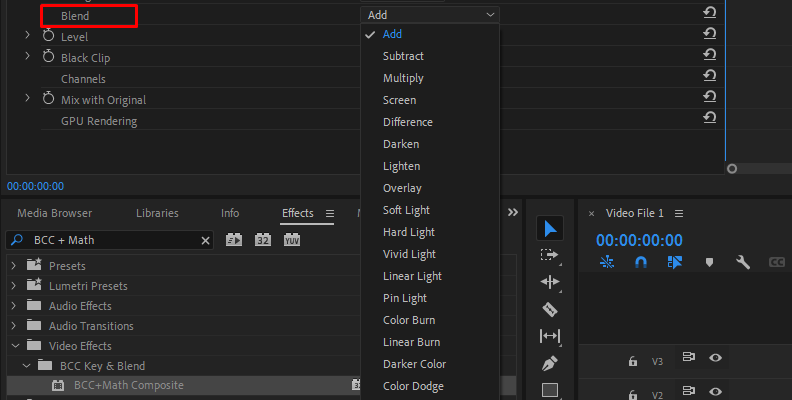
Try different blend modes, such as subtract, multiply, lighten, screen, etc., and experiment with the level settings to achieve a creative scene.
Step 5: Adjust Black Clip
If you notice unwanted black areas in the new composition, you can adjust the black levels of the foreground video clip using the Black Clip slider to avoid the “Milky Black” look. Adjusting Black Clip will depend on the foreground video and the chosen Blend mode. In some cases, you might not need to adjust it.
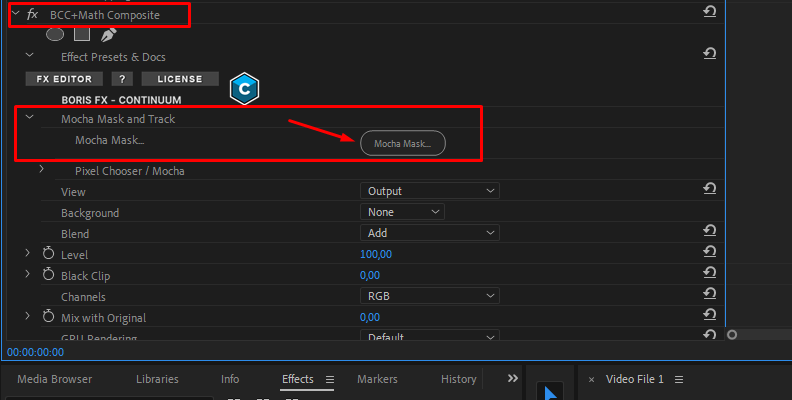
Step 6: Mocha Mask and Track
The BCC+ Math Composite filter features Mocha to create a mask and track the effect. It allows you to restrict the filter to a specific part of the frame, which is useful when you want to blend only part of the foreground video clip with the background.
Display the Mocha Mask and Track settings, and click the Mocha Mask button to go to the Mocha UI.
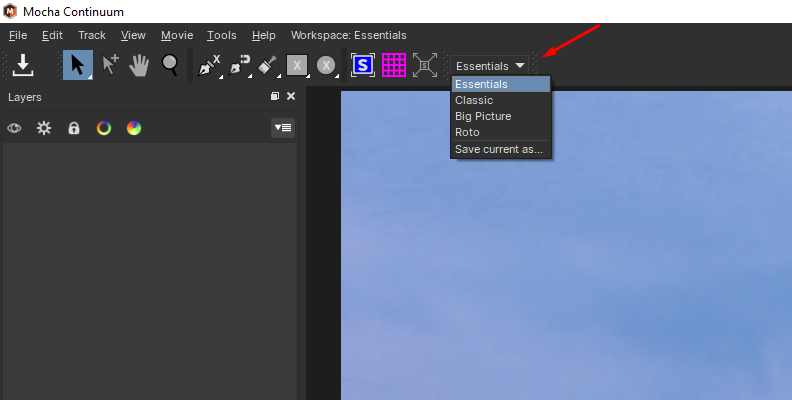
If you're unfamiliar with Mocha, it is a planar tracker for masking and tracking. It has many advanced features, but we'll work with the essential tools for this tutorial. First, ensure you're in the Essentials workspace to make the interface cleaner with the necessary basic tools.
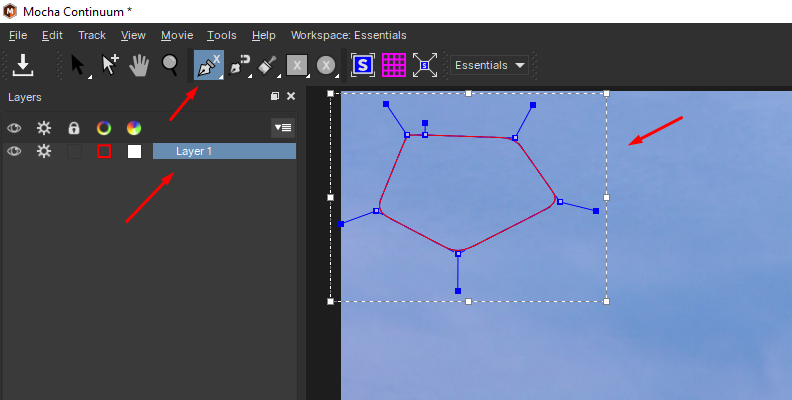
Step 7: Drawing Masks in Mocha
Select one of the pens, shape, or brush tools to draw a mask on the part of the image you want the filter to affect. If your shape is complex, the spline tools give you more control over drawing the masks.
Click to add points and right-click to close the shape. Once you finish, the layer will be added to the layer panel. You can rename the layers to identify them back in Premiere Pro.
Create another mask if you have multiple elements you want to affect with the BCC+ Math Composite filter.
Step 8: Tracking with Mocha
Under the layer panel, you have the tracking options. Select the layer mask you want to track, then choose the track motion depending on your video clip. Click the track forward and backward buttons to begin the tracking process.
The process can take longer, depending on the length of the video clip. Once finished, go to File > Save and close the Mocha UI to return to Premiere Pro. There, you can adjust the mask intensity and opacity, invert the mask, and adjust other settings under the Pixel Choose / Mocha parameter to create a thrilling look.
Final Words
Combining video clips can be easily achieved in software like Adobe Premiere Pro and Continuum. In today's article, you've learned how to merge clips in Premiere Pro using different methods for five scenarios:
Merge audio clips using nested sequences.
Merge video and audio clips.
Merge multiple video clips
Merge clips with Adobe Premiere Pro's blending modes.
Merge clips with Continuum's BCC+ Math Composite and track with Mocha.
Continuum plug-ins can add another layer of inspiration to your video clips, delivering exceptional looks and visual effects for your vlogs, films, and other video content.
You can subscribe tocontinuum
Good luck!


