


In video editing, effects are often used for various purposes, like creating thematic transitions, bringing up graphic elements creatively, starting or ending sequences, and much more.
The glitch effect can be seen in many different content types, like music videos and films, as it's a creative way of adding production value and is relatively easy to create in any modern video editing software, including Adobe Premiere Pro.
When it comes to transitions and video effects, the video glitch effect has to be one of the most widely-used ones, and if you haven't mastered it yet, this tutorial has everything you need to learn how to add it to your future projects comfortably.
Without further ado, let's get straight into it.
What are Glitch Effects?
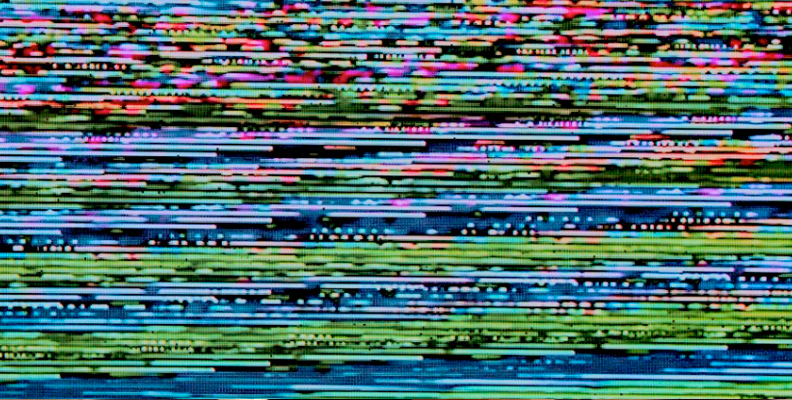
The term "glitch effects" or a "video glitch effect" refer to a specific on-screen effect that simulates a visual bug resulting in distortion of the elements you see, something you would experience when a graphics card starts failing.
The effect could be animated or consist of still images, but this mostly depends on the context and the reason it is implemented in the video.
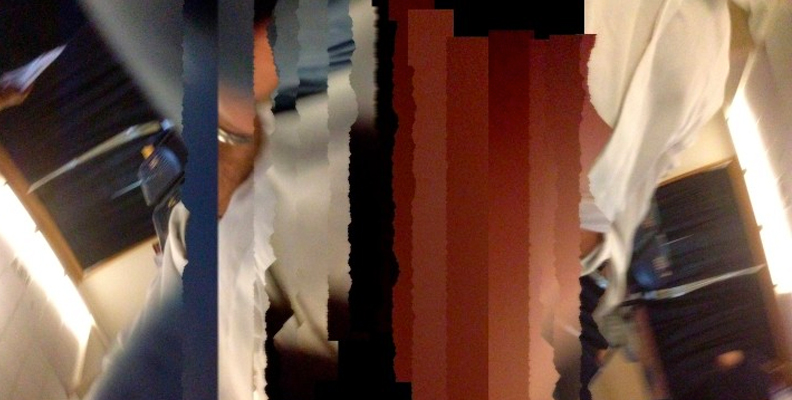
Depending on the context, the glitch effect could be made to look more "computery", like the system was "hacked" or there's a virus affecting it, or more "natural", like if the camera was damaged or the colors mixed in an unusual way.
When it comes to video effects, glitch effects are endorsed by video editors due to the many creative ways they can be presented, as there are no "rules" as to how a glitch looks or how it should "behave" when shown on screen.
Simply said, you can think of your own glitch effect and it will still look great without anyone pointing out that you're "bending the rules" for it.
How is a Glitch Effect Used in Videos and Why?
The glitch effect has many uses in videography, both in casual and more serious projects.
As a video editor, you can use the glitch effect to:
- Create a scary suspense moment
- Simulate camera or old TV screen failure
- Combine it with a jumpscare effect
- Create a cool transition
- Use it as an indicator that you're replaying a scene
- Add a specific aesthetic and artistic touch
- Induce a nostalgic feeling
Whether you're working on a film or a music video, if you have creative freedom, you can find ways to benefit from the glitch effect.
Now that you know more about it, it's time to learn how to create a glitch effect in Premiere Pro. The following section covers that in detail.
How to Make a Glitch Effect in Premiere Pro
As mentioned above, creating a glitch effect has no rules. There are many ways to do it, and the one you prefer is usually the best.
The steps below cover only one of the many available approaches to create glitch effect for your video project, but if you follow them closely you'll get this task done in no time.
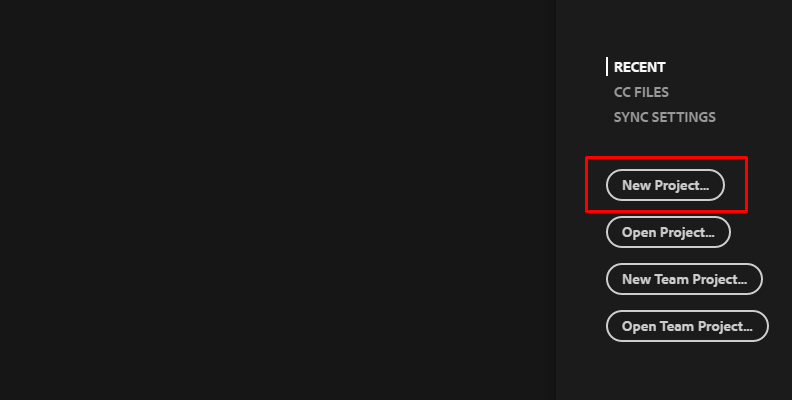
Step 1: Create a Premiere Pro Project and Import Your Video Clips
The first step to creating a glitch is to set up a project within your video editing software, which in this case is Premiere Pro.
To do so, open Adobe Premiere Pro, click "Create A New Project" and wait for it to load. Then, import the video clips that you wish to add a glitch effect to. You can do this by double-clicking an empty area in the "Project" view then choosing the videos from your computer's storage and clicking "Import" to finish the process.
Now, all that's left for this setup phase is to create a sequence. You can do this by dragging and dropping one or multiple video clips (the ones you just imported) onto your timeline.
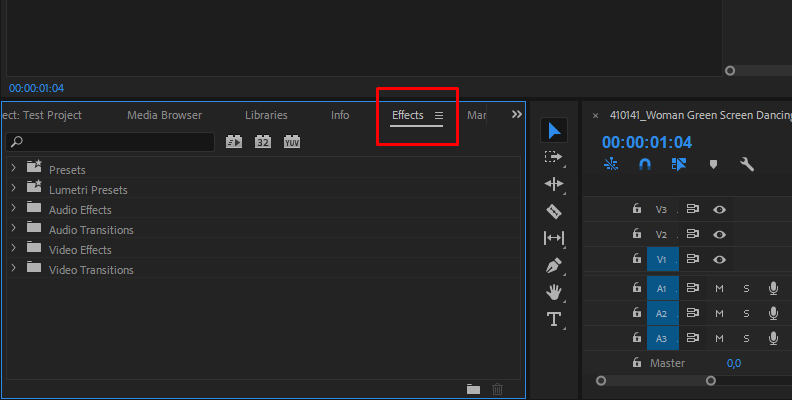
Step 2: Add a Glitch Effect (Premiere Pro Built-In) From The Effects Panel
Click on the "Effects" tab to open the panel where you can search for various video and audio Premiere Pro effects.
In the search bar, type in "Glitch" and select the "VR Digital Glitch" effect located within the "Immersive Video" folder, then drag and drop it over the video on your timeline.
Step 3: Modify the Effect Parameters
Next, click on the video on your timeline and then open the Effect Controls Panel.
Under the "VR Digital Glitch" effect parameters, expand the "Distortion" section and change the "Color Distortion" value to 100. Lower the value of the "Distortion Rate" parameter to 0.
Expand the "Noise" category and increase the "Noise Strength" parameter to 60.
Step 4: Animate the Glitch Effect's Master Amplitude
In the effect controls panel that's currently open on your screen, move the blue playhead to where you want the glitch effect to start. Then, click on the stopwatch icon next to the "Master Amplitude" parameter which will add a keyframe. Change the value of the Master Amplitude parameter to zero.
Move the playhead three frames forward by using the right arrow key on your keyboard and set the Master Amplitude parameter to 100. This will automatically create another keyframe. Move the playhead three frames forward again and set the Master Amplitude parameter to 0 again. This will create a third keyframe.
Step 5: Animate the Glitch Effect's Scale and Position
Move the playhead back over the first of the three keyframes you created in the previous section. Set the video's scale to 115 to slightly zoom it in. This will help so that when we're adjusting its position later on it doesn't go out of its borders.
Now click on the stopwatch icon next to the "Position" parameter which will in turn create a starting keyframe. Use the right arrow key on your keyboard to move the playhead one frame forward, and then adjust both the horizontal and vertical positions of your video by changing both values in any way you want. This will create a second keyframe.
Now, move the playhead one frame forward using your right arrow key again, and click on the "Reset Position" button (the counter-clockwise arrow icon) which will create a third keyframe with the original positions of your video.
Move the playhead one frame forward again and reposition the video randomly again. Then move it one frame forward and reset it again. You can keep repeating this for as many remaining frames if you want the glitch effect to last longer, or you can go with our original concept which is only five keyframes.
Make sure to set different position values to prevent double images, as you don't want the video moving the same way each time. Different values will make the effect look more randomized and unique.
When done, play all this back and you'll notice the video's color changing due to the Master Amplitude values we animated earlier, and its position also changing due to the five new (or more) position keyframes we created just now.
All mixed together, it looks like a glitch effect.
This process is very similar to other popular methods for creating a glitch effect, such as using the wave warp effect to create a glitch transition with. You simply add the effect to your video and animate various parameters in the effect controls panel until you get the desired look.
How to Create a Glitch Effect in Premiere Pro with Boris FX
Making glitch effects in Premiere Pro can be much easier when using a renowned plug-in or a pack with top-grade filters like Continuum by Boris FX.
If you are not a fan of tinkering and manually creating effects, a simple pack with fully-customizable, drop-and-play options is a better choice for you.
Available for all modern and popular video editing programs, you can find Continuum on Boris FX's website with a free trial version accessible.
Once you download and install it for Premiere Pro, you can follow these steps to create top Glitch Effects without any effort.
Here's how to do it:
Step 1: Drag and Drop the Desired Glitch Effect on Your Video Clip
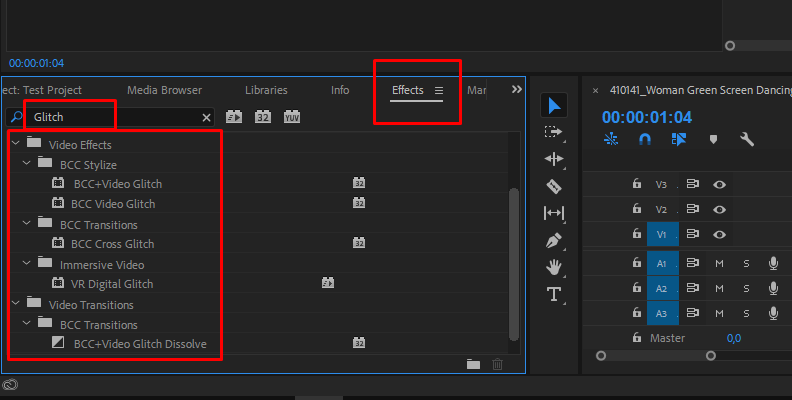
Once you install the Continuum pack by Boris FX, open Adobe Premiere Pro and type in "Glitch" within the search bar in the "Effects" panel.
![]()
![]()
You'll immediately notice more results coming up than before, including "Video Glitch", "Cross Glitch", "Video Glitch Dissolve" (used for transitions), and more.
![]()
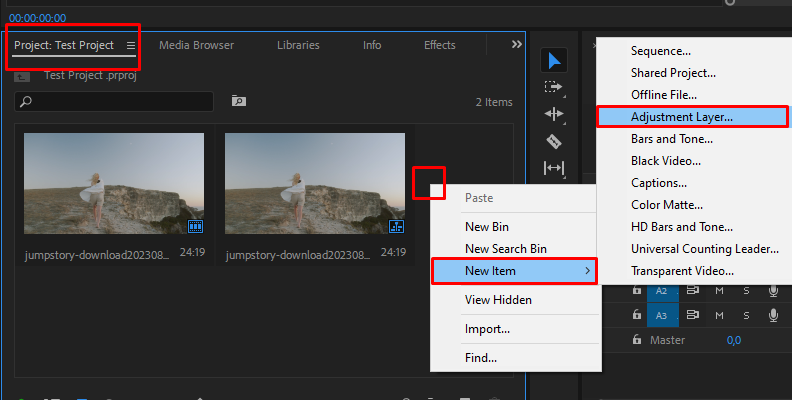
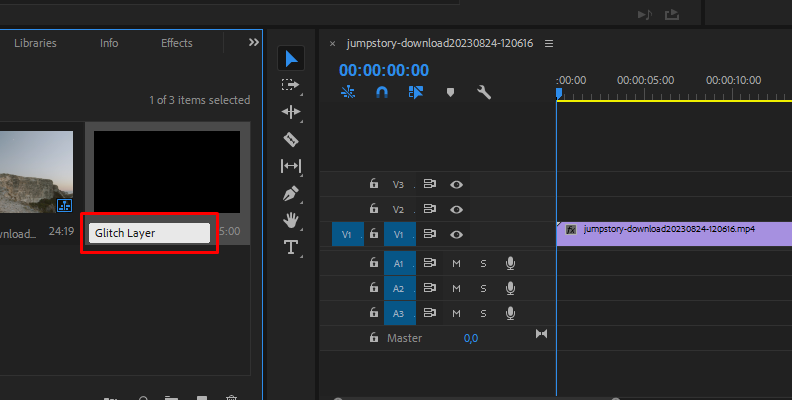
Create an adjustment layer and name it "glitch layer" so you can recognize it more easily. Then, drag and drop it on a video track above the section where you wish the video glitch to happen on your original video.
![]()
![]()
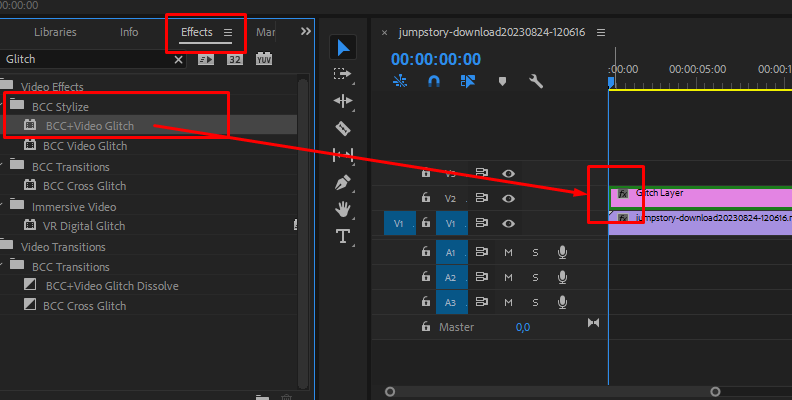
Select the "BCC+ Video Glitch" effect from the "Effects" panel and drag and drop it over the glitch layer you just created.
![]()
Now when you play the video back, you'll notice the glitch effect showing when the playhead moves over the glitch layer.
Trim the adjustment layer to last exactly as long as you wish the glitch effect to last.
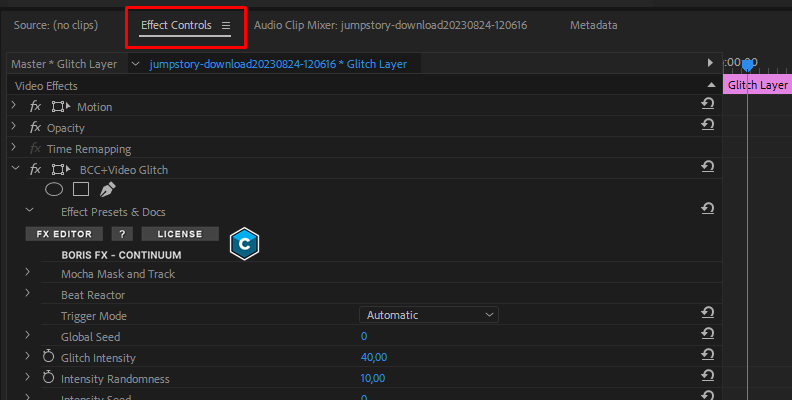
Step 2: Adjust the Effect's Settings to Your Needs
The final step is to open the effects control panel and adjust the many parameters available for the BCC+ Glitch effect.
![]()
There are many settings available that you can change to make this match your content.
You can combine this effect with the text tool when you edit videos to give more life to the graphics and texts you show or use it in any other way you want.
Final Words
Now you know how to create a glitch effect Premiere Pro style and enhance both the look and feel of your next video.
Hopefully, this will help you increase the overall quality for any other Adobe Premiere Pro projects you may work on in the near future, as being able to use effects comfortably is a great advantage any video editor should have.


