


Are you struggling with a way to add more creative titles and text to your videos, logos, and photos? 3D text can catch your audience's attention, increase engagement, and create a unique style for your brand.
Today, I'll show how to create 3D text in Adobe After Effects. First, I'll use the After Effects built-in tools so anyone can follow this tutorial, and then the Continuum effect BCC Extruded Text.
Let’s dive in!
How to Make 3D Text in After Effects
Adobe After Effects features many tools for crafting anything we can think of, but some tools are difficult to understand and master.

In the next section, I'll show you a few ways to create 3D text using only After Effects, from simple 3D text to more complex and unique 3D text with animation and effects.
Method 1: 3D Layers
With this first method, you stack 3D layers to simulate a 3D effect on your text. It's a quick and simple way to make 3D text, but the downside is that you can see the separation between the 3D text layers when it rotates.
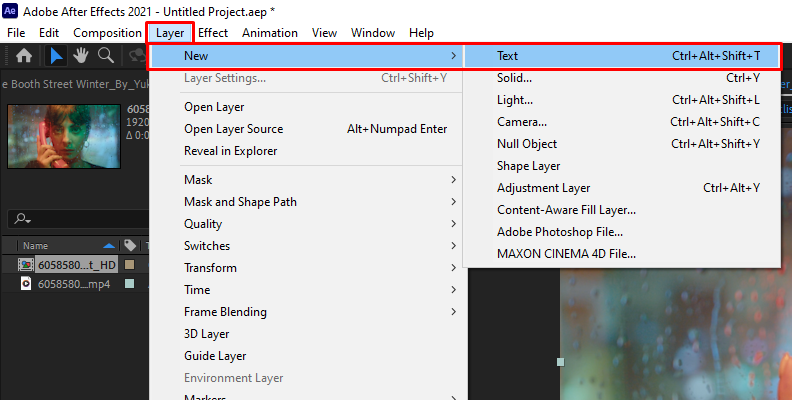
Step 1: Create a Text Layer
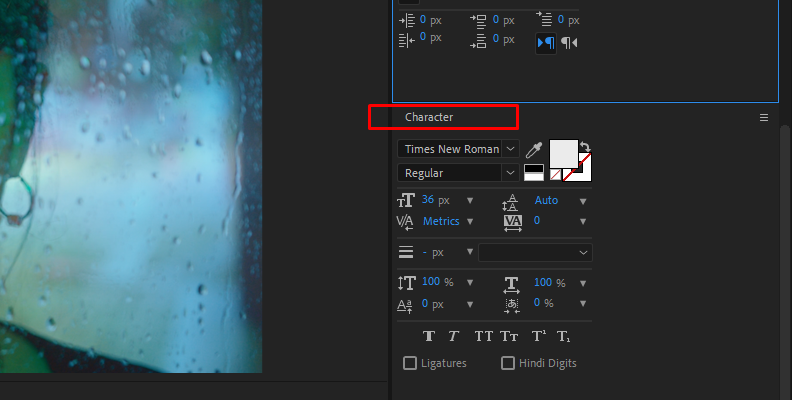
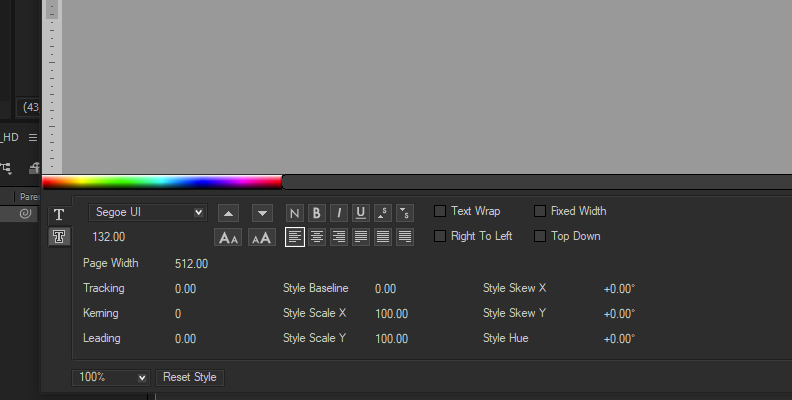
The first step is to create a simple text layer. Go to the menu Layer > New > Text. Now type what you want your text to read, choosing font type, size, style, and color from the Character panel.

Step 2: Make the Text Layer a 3D Text Layer
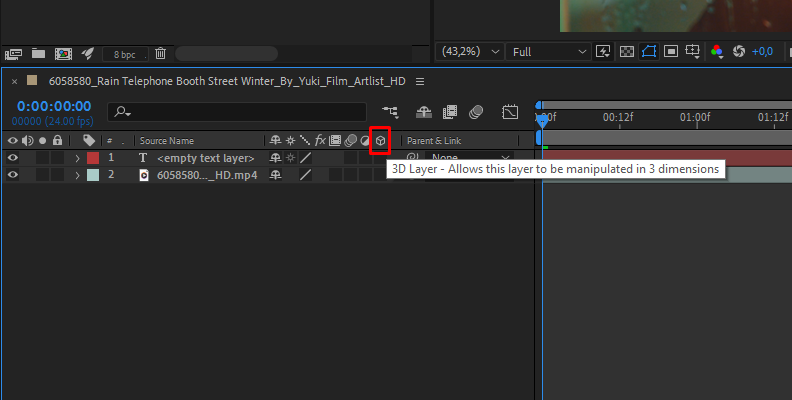
Check the 3D box on the layer panel. A little 3D cube will appear when 3D is enabled on that layer. If you can’t see these options, try clicking the Toggle Switches/Modes to alternate views.
Now, if you display the layer settings, you'll have more X, Y, and Z rotation properties. This allows you to move the text's Y, Z, and X axes.
Step 3: Stack 3D Text Layers
Even if the text is already in a 3D environment, it doesn't have volume or look 3D. To achieve this, you can try two things: duplicating each layer and manually changing the Z-axis in the Position properties or using expressions to automatically add variation to the Z-space when you duplicate layers.
If you've never used expressions before, alt-click in the position's stopwatch and type the following line in the expressions menu:
[value[0],value[1],index*10];
Change the index value for another number to add that variation between each layer and then duplicate layers to stack them and give volume to the text.
Step 4: Create a Parent Null Layer
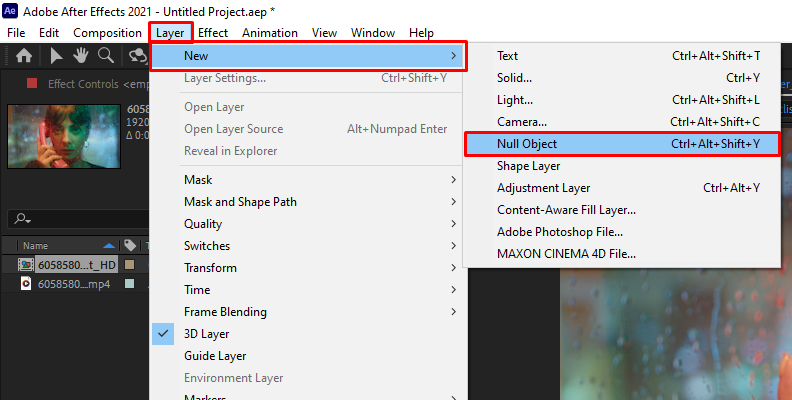
Create a new Null Layer from Layer > New > Null Object and make it a 3D Null layer. Select all the text layers except the Null layer you just created, click on the whip, and drag it to the Null layer.
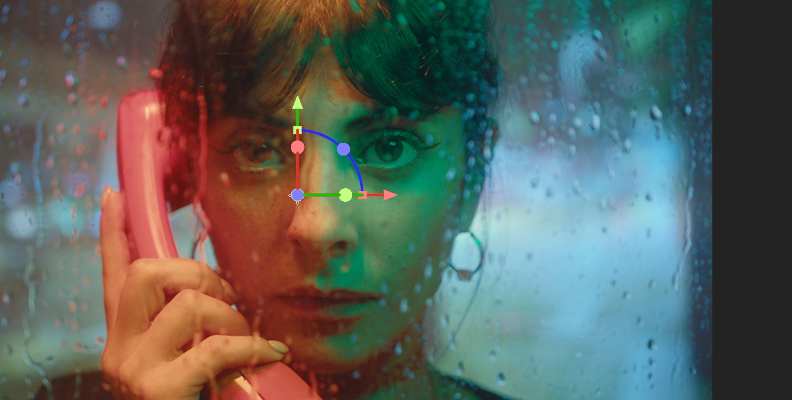
Now that all the 3D text layers are parented to the Null layer, display the rotation properties (you can press the R key) to adjust the X and Y-axis.
Step 5: Add Shadow
The last step is changing the layer's color to give the 3D text more depth. Select all 3D text layers except the front (upper) layer. Change the color from the Character panel to darken the sides and insides.
You can also add a Camera and Light layer to cast shadows, add a light effect, and manipulate the position. Stack other effects, such as glow, blur, etc. Get creative!
Method 2: 3D Text Using the Extrude Function
After Effects features a built-in Extrude function that allows you to create a more realistic 3D shape for your 3D text. Follow the next method to create 3D text with the Extrude function.
Step 1: Create a 3D Text Layer
Start by creating a 3D text layer like in the previous method. Go to Layer > New > Text. Type your text and select the font and size. Convert it to a 3D text layer by checking the 3D cube box.
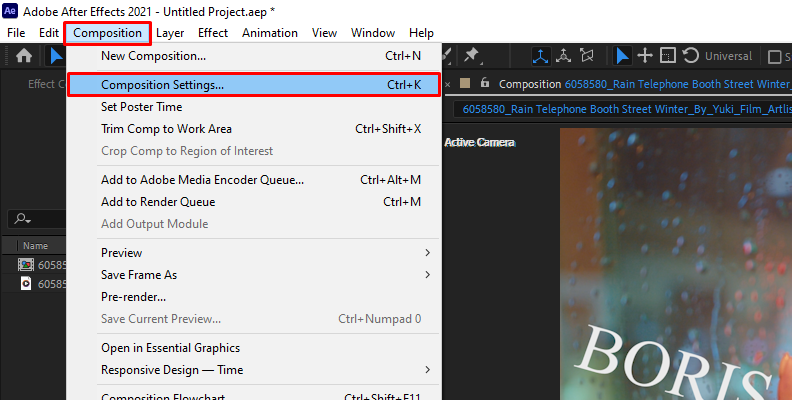
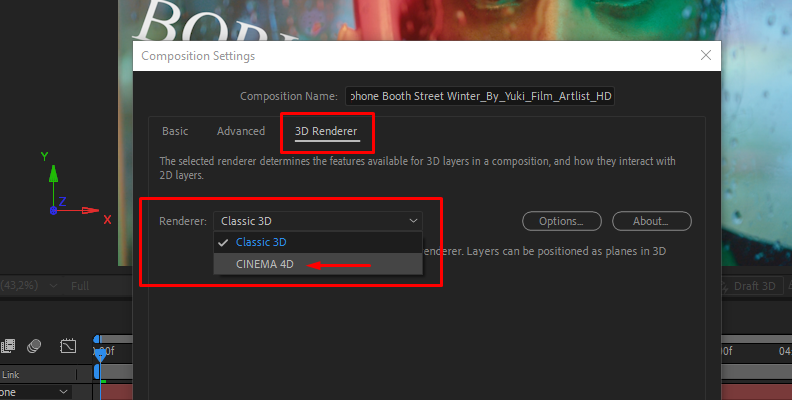
Step 2: Set the Renderer to Cinema 4D
The Classic 3D Renderer is selected by default, but you'll have to change it to Cinema 4D Renderer to use the Extrude function. Go to Composition > Composition Settings, then under the 3D Renderer tab, change the Renderer to Cinema 4D. It will display a few options turned off with Cinema 4D render. Press OK to continue.
Step 3: Adjust the Extrude Depth
The Cinema 4D renderer enables the Geometry options for the 3D text layer. To give your text a 3D look, display the 3D text settings and adjust the Extrusion Depth under Geometry Settings.
You can select a Bevel Style, such as angular, concave, or convex. Adjust the Bevel Depth and Hole Bevel Depth too.
Step 4: Change Color and Shadows
In the layer settings, next to Text, you'll see Animate. Click the play icon and choose an option between the front, bevel, side, and back, and add a Color, RGB, Hue, Saturation, Brightness, and Opacity.
The new property will be placed under Text > Animator 1. There, you can adjust its settings to create color and shadow effects. You can also select front, sides, and other combinations to create different effects.
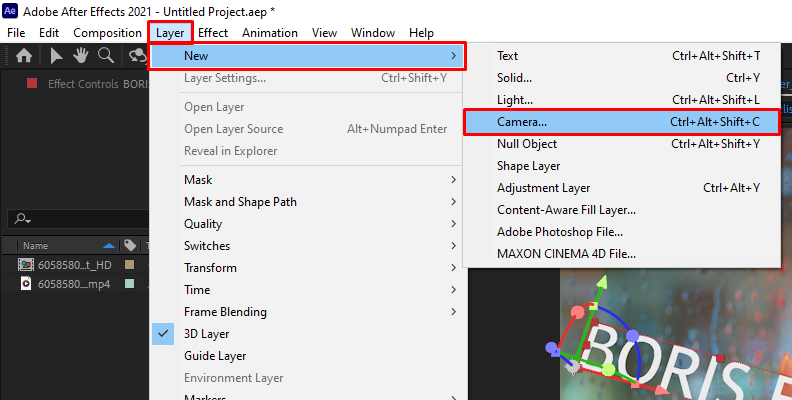
Step 5: Add a Camera Layer
You can create a camera layer from Layer > New > Camera. Adjust or leave the default settings and press OK. Then, you can adjust the camera from the new layer to focus your 3D text.
You can animate the position with keyframes. Click the Position stopwatch and move the playhead as you change the values.
If needed, you can add more effects, such as Light and Shadow layers, but you should have the basic extrude object ready by now. Drag the background image to the bottom layer and edit the rest of the composition.
Method 3: Building in Cinema 4D Lite from After Effects
For this third method, you'll use Cinema 4D Lite, which is built into Adobe After Effects. This method allows you to create a 3D object in Cinema 4D Lite and bring it to After Effects.
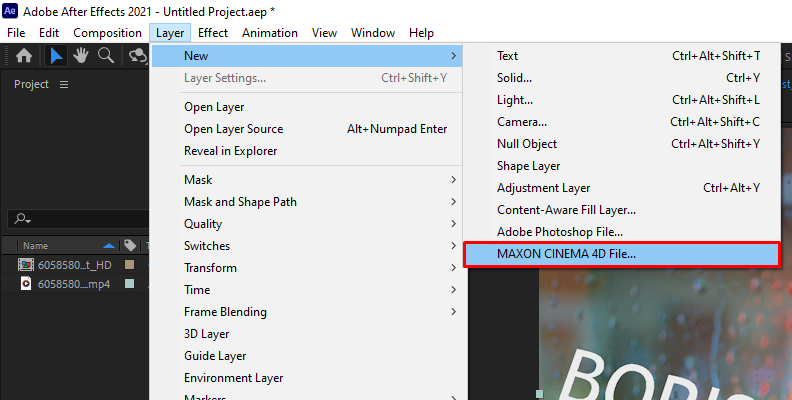
Step 1: Create a New Maxon Cinema 4D File
Go to the Layer menu and select New > Maxon Cinema 4D File. Save your new file in your projects folder and click Save. When the pop-up window appears, just click OK to continue.
Wait for Cinema 4D Lite to launch.
Step 2: Create Text in Cinema 4D Lite
If you're a beginner in Cinema 4D, it might seem overwhelming at first. But don't worry, you don't need to know everything for this tutorial. Simply follow along, and you'll be able to create your very own 3D text.
Go to Create > Spline > Text Spline. You can type the text in the object's properties and select other format options.
Step 3: Extrude the 3D Text
To add volume to the text, you need to extrude it. Go to Create > Generator > Extrude. On the object panel to your left, drag the Text object to the Extrude object. You now should have the 3D text looking more 3D.
Adjust the extrude offset values using the slider or typing. The direction is on Auto by default, but you can customize it and change the direction manually.
Step 4: Add Color
The 3D text does not currently have a color. You can add one by creating a material. Go to the Create menu and click Material > New Default Material. On the Object panel, select the desired color and then drag the material to the Extruded object.
Step 5: Save and Return to After Effects
Once you finished adjusting your extrude depth and color, go to File > Save to save the After Effects Project file. Simply close the window to return to After Effects, where the 3D text layer created in Cinema 4D Lite will be.
If you don’t see the 3D text in After Effects, ensure the Renderer is set to “Current” in the Effect Controls panel.
Now, you can place your background, other motion graphics that complement your 3D text, and your favorite effects.
How to Make 3D Text with BCC Extruded Text
The final method I'll show you to create 3D text is with the BCC Extrude from the Continuum plug-ins suite. BCC Extrude allows you to create 3D text objects and control each setting for the four sides of the object.

BCC Extruded Text is compatible with Adobe After Effects native 3D camera, lighting, and mask tools and features built-in lighting and 3D camera options.
BCC Extruded Text is available in the Continuum plugins suite and the Continuum 3D Objects Unit. Download a free trial of Continuum to practice with this guide.
Now, let's discover how BCC Extruded Text can deliver enhanced 3D texts and extra customization.
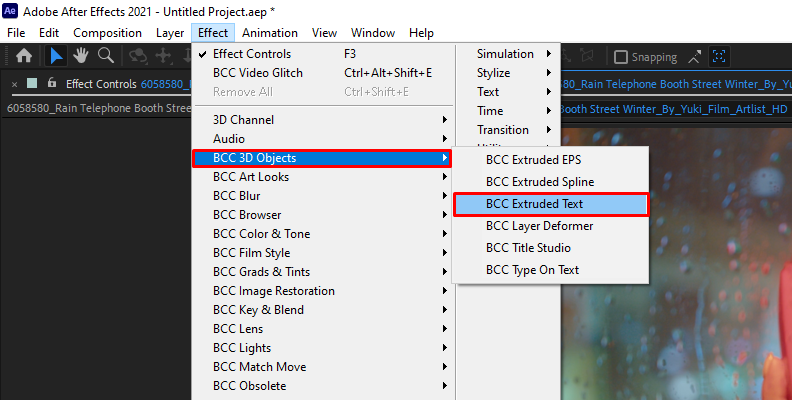
Step 1: Apply BCC Extrude Text
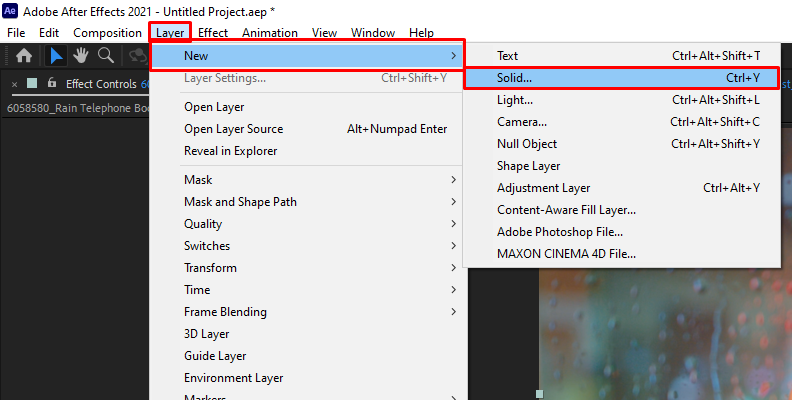
Start by creating a Solid layer in your new composition. Go to the panel Effects & Presets and search for BCC Extruded Text. Drag it to the layer to apply it, and the default text will immediately appear.
Step 2: Creating a 3D Text
On the Effects Controls panel, you'll find a few options. Click on "Edit Text" at the very top. You can change the text, select font, style, and scale here. Click Apply when you're done to return to After Effects.
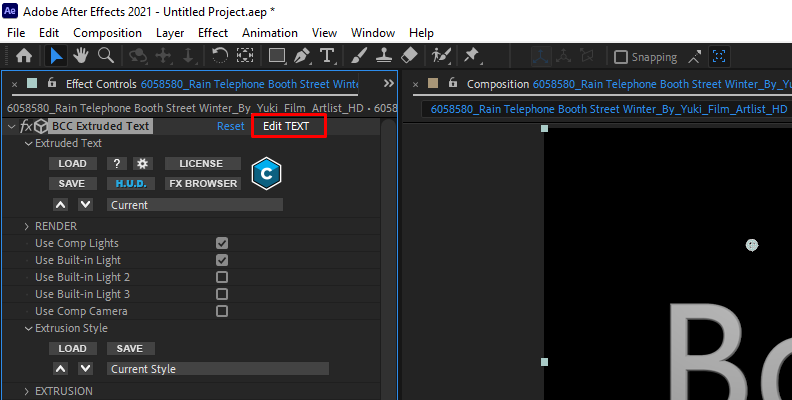
In the Render parameter, you can use the native lights and camera from the composition or the built-in lights from BCC Extruded Text.
Under Extrusion Style you can save and load presets and choose one of the pre-installed presets.
Step 3: Extrusion Parameters
Click on Extrusion to display its parameters. The first option is the Extrusion Depth, which defines how much the 3D text extends from the back to the front. You can also select the bevel style and amount and enable bevels on the side and back.
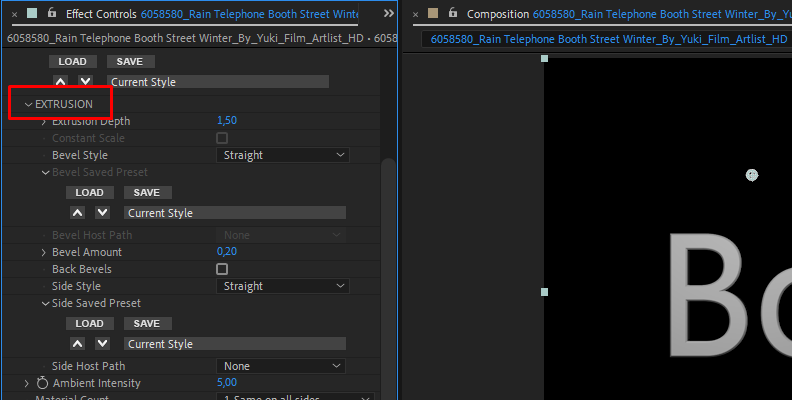
Step 4: Choosing Material
Choose the material distribution for the extruded text. You can apply the same material to all sides or combine the sides, bevel, and back.
Display the Material settings and make adjustments, such as:
Select a material preset.
Use a texture from a file or a layer.
Set the color with Ambient, Diffuse, and Highlight.
Adjust the material’s opacity.
Set the amount and intensity of the highlights.
Adjust the Reflection.
Step 5: Transformation Settings
Under this parameter, you can adjust the rotation, position, scaling, and opacity of the 3D text. You can keyframe these settings if you want to animate the 3D text.
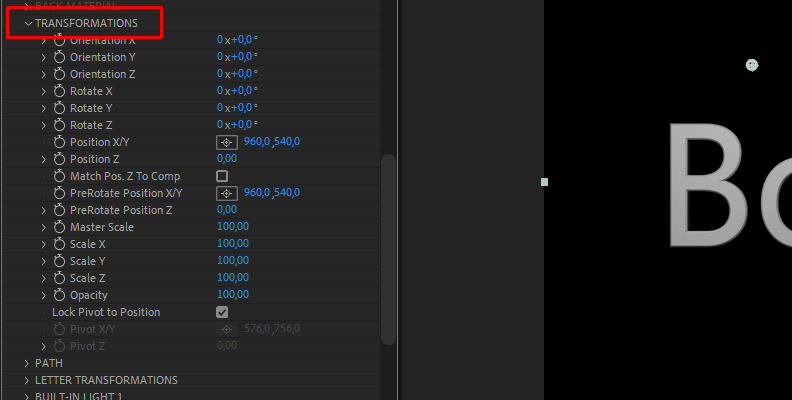
Under Letter Transformation, you can control and animate the characters in your 3D text.
Step 6: Built-in Lighting
When you're not using After Effects lighting, you can set the Ambient Intensity to adjust the ambient lighting on the material. Below, you'll also find the built-in light settings. You can set the light type X, Y, and Z source for each and the light color, intensity, and attenuation.
Step 7: Built-in Camera
When not using the native After Effects 3D camera, you can select the model type, X, Y, and Z position, orientation, and adjust spin or rotation.
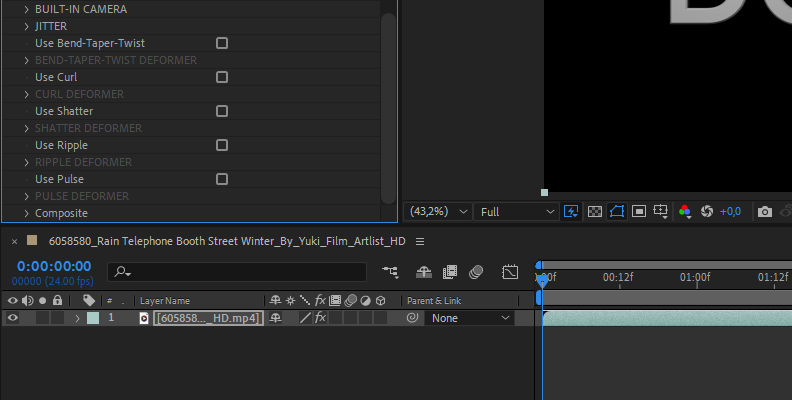
Step 8: Extrusion Effects
Finally, you have the Extrusion effects of Jitter, Curl, Shatter, Ripple, and Pulse. Enable the desired effect and display its settings to control the effect behavior. You can combine them to create interesting animations.
Play the composition to see the 3D text.
Final Words
That's how you create a 3D text from scratch and make it the way you want! Try adding more After Effects or Continuum effects. Color corrections, curves, and glows are some options you can start experimenting with.
Good luck!


