


Making the final cut on a complex video editing project is one of the most satisfying feelings you can experience as an editor. However, the task doesn't end there.
From the moment you create a project, it isn't finalized until you click the "export" button, and there are quite a few things you need to know before you do so.
In this guide, we'll talk about exporting a video, mainly in Premiere Pro, but most of the tips and advice will also apply to any other exports you make in different software.
If you want to learn more about properly exporting videos from Premiere Pro using the right settings, keep on reading. Let's get into it.
Exporting in Premiere Pro
To answer the question of someone who just wants to export a video in Adobe Premiere Pro as quickly as possible, here's how to do it.
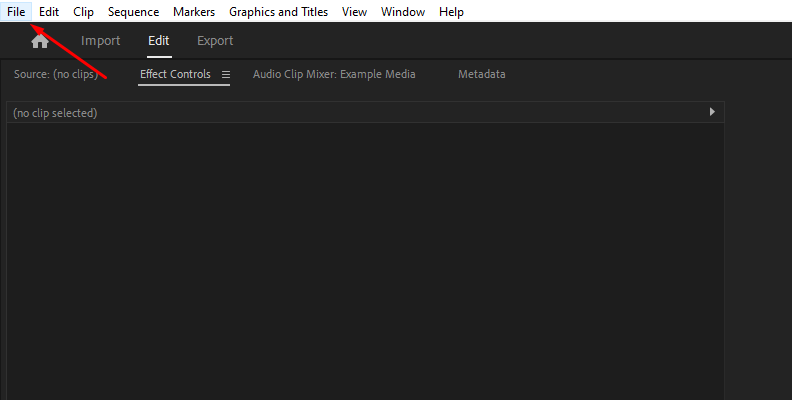
Once you have all your final edits made, navigate to the top left corner of Premiere Pro and click the "File" button as shown in the image below. Keep in mind that you must first select your sequence. You can do so by clicking on it from the timeline area, for example.
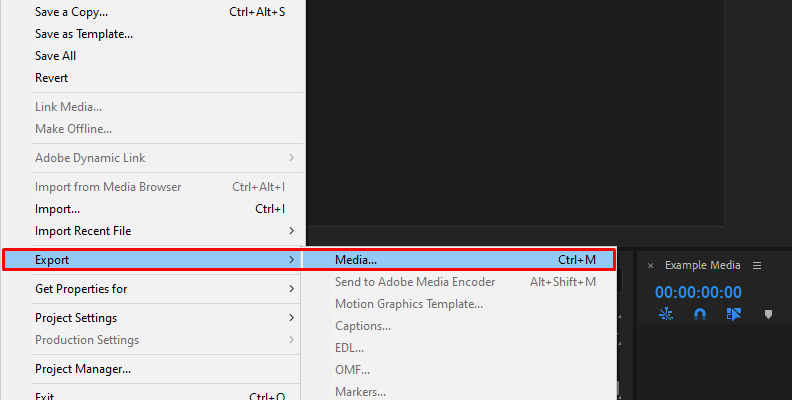
Then, from the list of options, use your cursor to hover over "Export" and select "Media" when the menu expands. You can also use the CTRL key on your keyboard combined with M, so CTRL + M, as a shortcut to open the Export menu.
This will open the export window where you can see all export settings available for you to modify based on your project's needs.

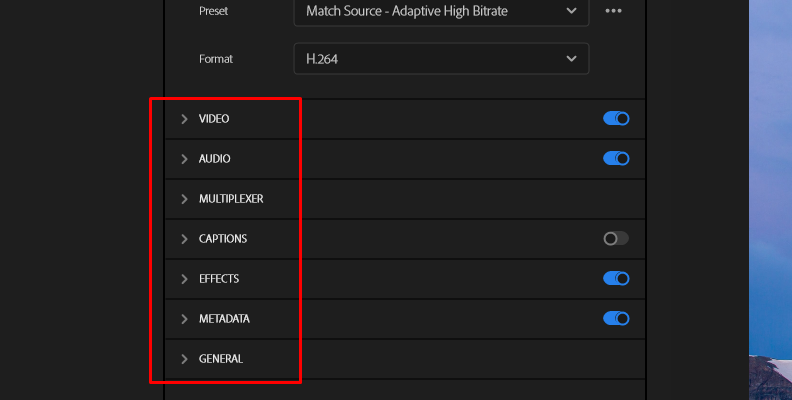
Expand the "Video" category to see the export settings window containing video-specific options.
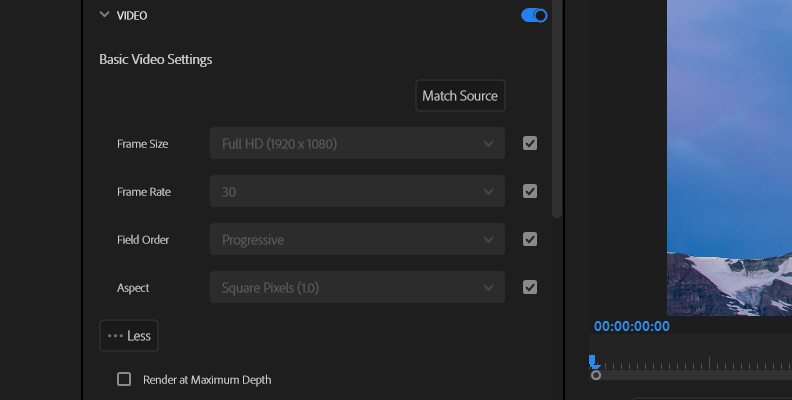
You can also click on "More" to expand the window even further and choose from even more advanced settings and options.
You can also specify which part of your timeline/sequence you want to export by expanding the "Range" option.
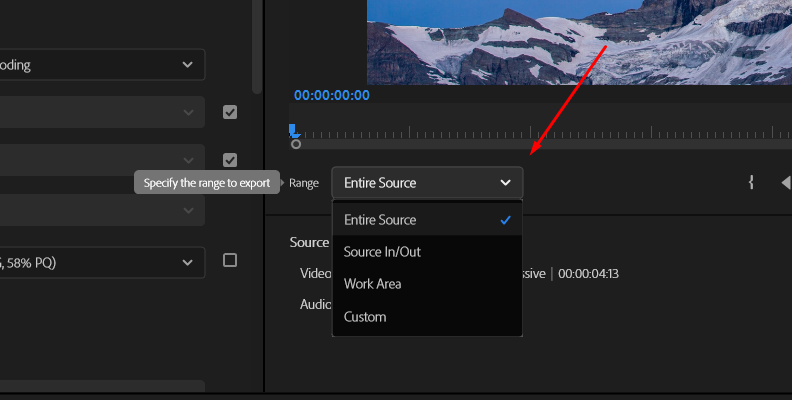
The "Entire Source" option will export the whole sequence that you've selected.
The "Source In/Out" option will only export the parts that you've marked with input and output markers, which you can do by heading over to the timeline area, moving the playhead where you want, and pressing "I" for an "Input" and "O" for an "Output" marker.
You can also choose "Work Area" and "Custom" depending on your needs.
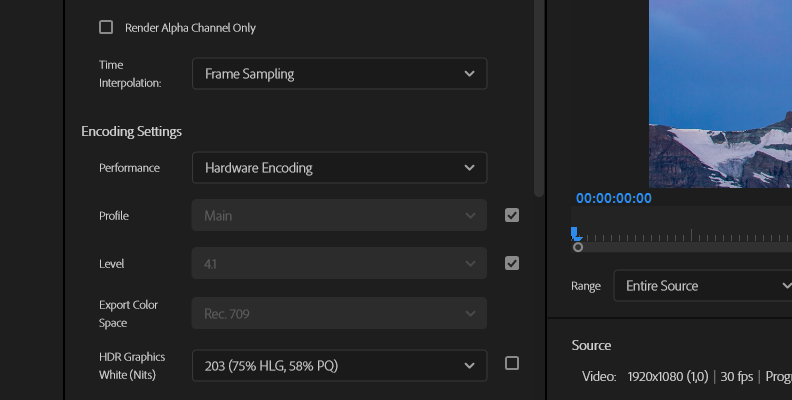
If you scroll down the panel on the left side, you can see there are many other menus to expand, including the one for audio settings, effects, and more.
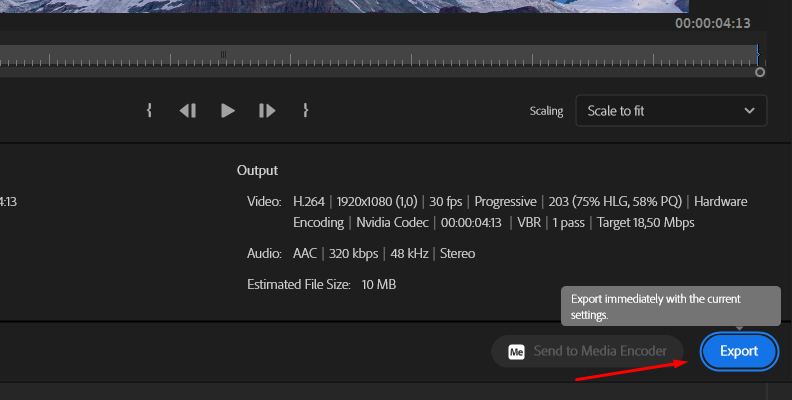
When you're done selecting the parts you wish to export, double-check all the settings you want your exported video to have, and change the output name of your file, click the blue "Export" button at the bottom-right corner of the export window.
That's all there's to it!
Things to Consider When Exporting a Video in Premiere Pro
When exporting a video in any software, there are a few significant things you must consider before hitting the "export" button.
These include the format, the target frame rate, the required file size, the target bitrate, and a few others.
Here's what you need to consider:
The Video Format
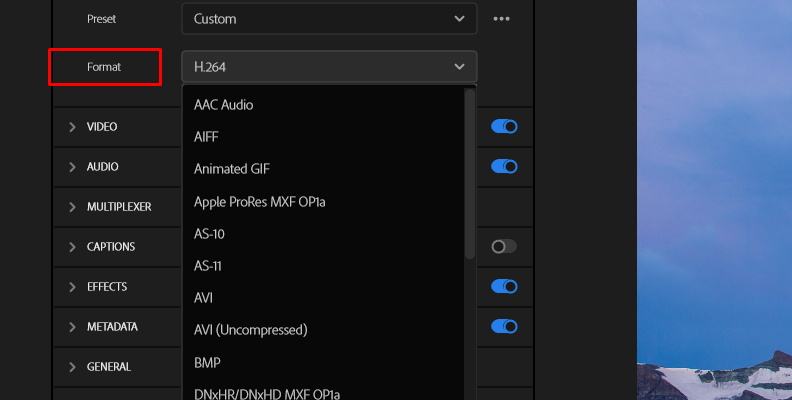
The first thing would be the video format in which you want to export your source sequence. There are popular video formats that you should consider, such as:
- H.264: This is the most widely used format and is ideal for online content, including YouTube and Vimeo. It produces a good balance between file size and quality.
- QuickTime: Often used for professional workflows, especially in post-production houses. It allows for high-quality outputs with a variety of codecs.
- AVI: This is an older format that can be useful for specific applications or archival purposes.
Each one of these has its perks and cons. What you should mostly base this decision on is the platform for which you're exporting. We'll cover this in a bit.
The format in which you're exporting your video will determine whether specific platforms and devices can play it, so keep this in mind.
The Frame Rate
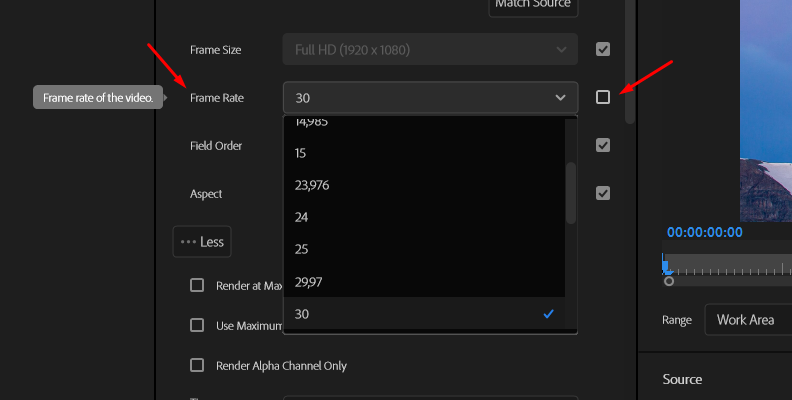
If your source video was recorded using 120FPS, for example, and you're preparing it for a platform that supports only 30 or 60FPS, there is no reason to export in 120. One of the main reasons for this is that the file will be unnecessarily large, making it more problematic to store and upload, while the viewer will get no benefits at all.
In fact, some platforms may not even allow you to upload a video in such a high framerate or they will just convert it to an acceptable frame rate once the video uploads.
But, what about the other way around? Can I export my 30FPS video to 60FPS?
You can, but you need to use the Adobe Media Encoder and the Optical Flow feature within Adobe Premiere Pro to generate the extra missing frames using the software's help. Only then you can export in 60 fps and get a result that's somewhat close to what would be a real recording taken in 60 fps.
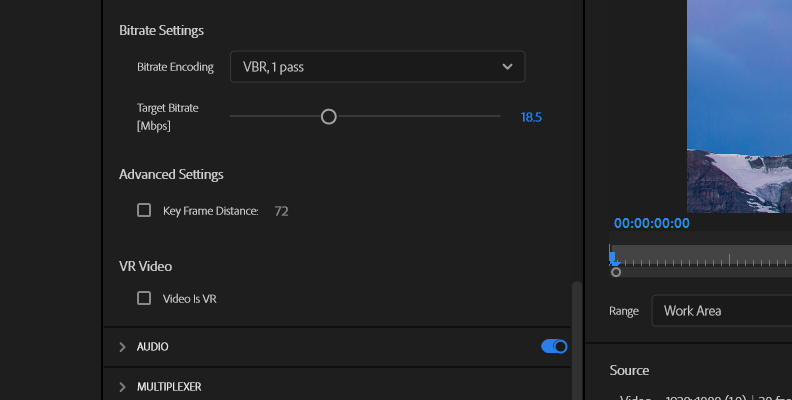
The Target Bitrate
If you want to delve deeper into tweaking and optimizing your export file, you can adjust the bitrate. High bitrate means better quality but also a larger file size.
Other things to consider regarding bitrate are the following:
- Encoding Settings: You can choose between VBR (Variable Bitrate) and CBR (Constant Bitrate). VBR is typically preferred as it adjusts the bitrate according to the complexity of the video, which helps maintain quality while keeping file sizes reasonable.
- Target Bitrate: A good starting point for HD video is 10-20 Mbps. For a 4K video, you might want to start at 40 Mbps. Adjust this based on your needs and the platform's requirements.
The File Size
The file size will mostly depend on how high bitrate you've chosen, as well as the format and frame rate of the video. All of these will have a significant impact on the final size of your export, but you should not choose settings that will worsen the quality of your video just for the sake of storing space.
You should find the perfect balance between quality and what the platform you want to share your video to accepts in terms of size and other settings, such as the ones we just mentioned.
Once again, if you don't want to do all this manually and prefer not to worry about optimizing your content for different platforms, you can rely on the Adobe media encoder to take care of all that by simply selecting a preset or multiple presets for more videos, and then initiating a render with already-optimized settings.
This will ensure you have the best export setting for each platform separately, including YouTube, Instagram, TikTok, and other popular platforms.
Audio Settings
Last but not least, you need to take a look at your audio settings.
Here's what you might want to consider regarding audio:
- Sample Rate: Typically set to 48 kHz, which is standard for most video projects. 44.1 kHz is also popular and commonly used for music production.
- Bitrate:: 192 kbps is standard for high-quality audio. You can increase this if your project involves high-fidelity audio tracks. 320 kbps is an even higher quality and will sound better at louder volumes.
- Audio Codec: AAC is commonly used for online video, offering a good balance between quality and file size. WAV is also common, as it's uncompressed it will have a larger file size but a better dynamic range than AAC.
Final Words
That's about it regarding exporting video content using Adobe Premiere Pro. You can create successful exports by taking into consideration the things we listed above and never have to worry about incompatibility or other similar issues.
Hopefully, this will help you improve all your future work.
We thank you for reading and wish you the best of luck!


