


Adobe Photoshop is the world's most popular photo editing software, offering a myriad of tools and effects that when combined with the required skill set and imagination, can result in mind-blowing digital art, retouches, photo manipulations, matte paintings, and more.
But, each tool in Photoshop is equally important and needs to be mastered separately, as it can bring so much value to a photo on its own when used correctly.
In this guide, we'll specifically focus on the Radial Blur Effect, a visual effect often used in graphic design and video editing, one that you're likely already familiar with, even though you may not know it yet.
We have a lot to cover, so without further ado, let's get straight into what you need to know about creating the radial blur effect in Adobe Photoshop.
What is Radial Blur?
The radial blur effect (or radial blur filter) is a visual effect used in photography, graphic design, and video editing to create a sense of motion or to draw attention to a specific area of an image or frame.
It involves applying a blur filter that radiates outward from a central point, creating a circular or radial blur pattern.
The radial blur effect can serve multiple purposes and can be used in the following scenarios:
Motion and Speed
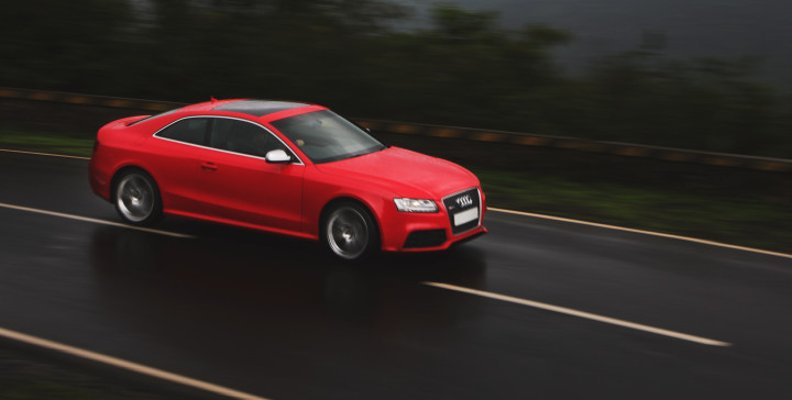
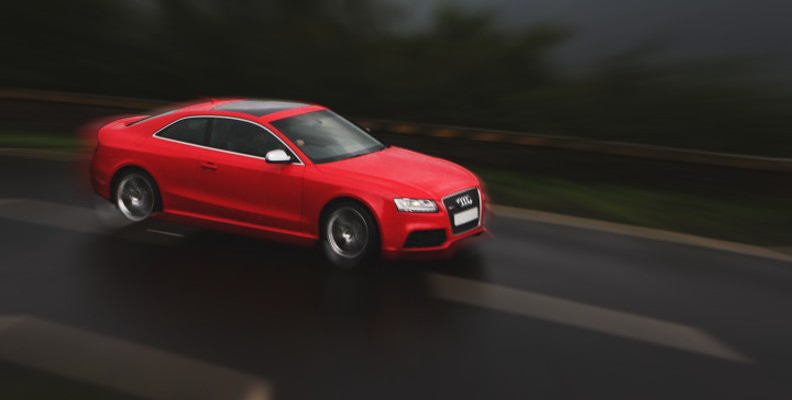
Radial blur is often used to convey a sense of speed or motion in an image.
For example, when photographing a moving object (such as a car or a runner), applying radial blur to the background can make the subject appear like they're moving with greater or even supernatural speed through time and space, giving them a more dynamic look and feel.
In a way, the moving object or person would be "focused" within the shot, as the rest of the elements shown will be blurred. You can often see this type of radial blur filter added in photos of cars taken during high-speed driving or a race.
![radial blur effect]()
![]()
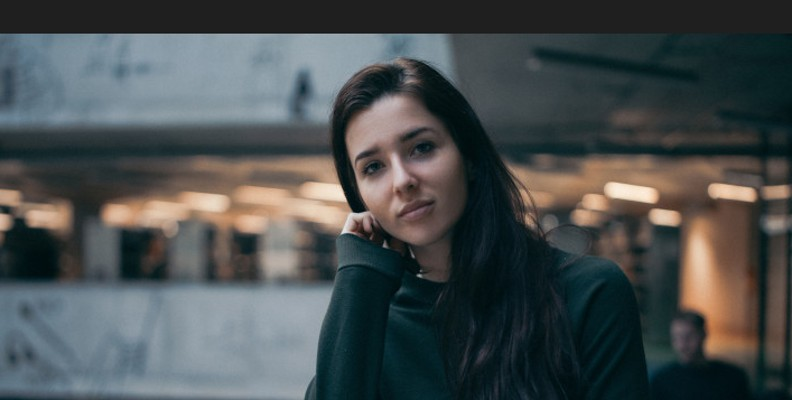
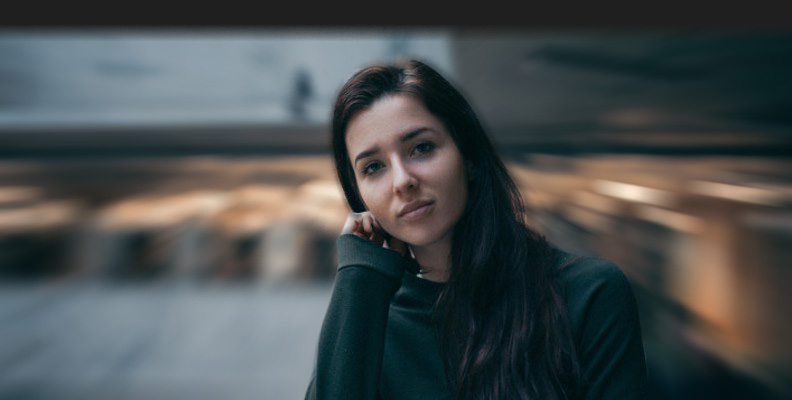
Focus and Emphasis
By blurring the background or peripheral elements in an image while keeping the central subject sharp, radial blur can draw attention to the subject. This can be particularly useful in portrait photography.
![]()
![]()
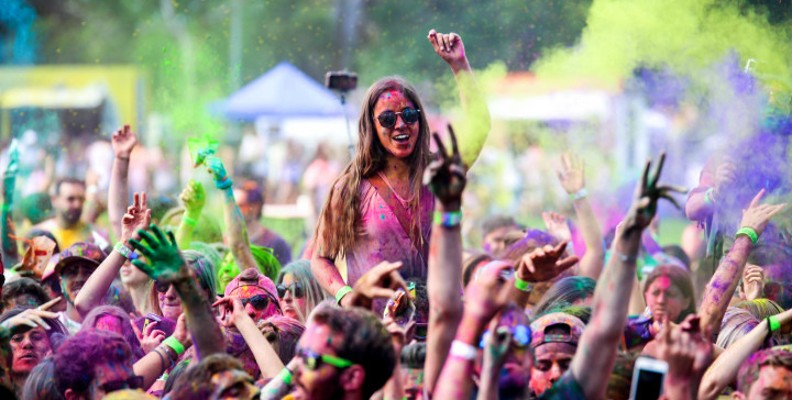
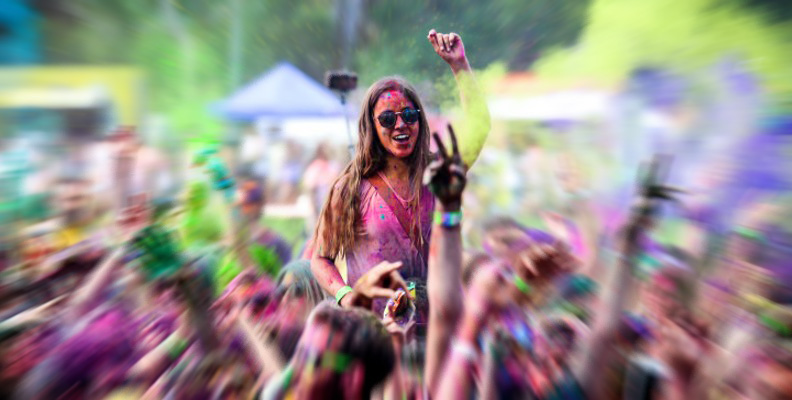
It's also useful for "isolating" one person in a large crowd and drawing all attention to them.
![]()
![]()
The radial blur effect is also often used as a technical tool. For example, when the viewer needs to focus on one word that's displayed on a long list of text. The radial blur filter in this case can make everything else seem unimportant by blurring all words but the one the viewer needs to focus on.
Artistic Expression
Radial blur can be used creatively to add a sense of drama, energy, or surrealism to an image. It can help create visually striking compositions and evoke specific emotions in the viewer.
Artists find various ways to incorporate the radial blur filter into their work.
![]()
![]()
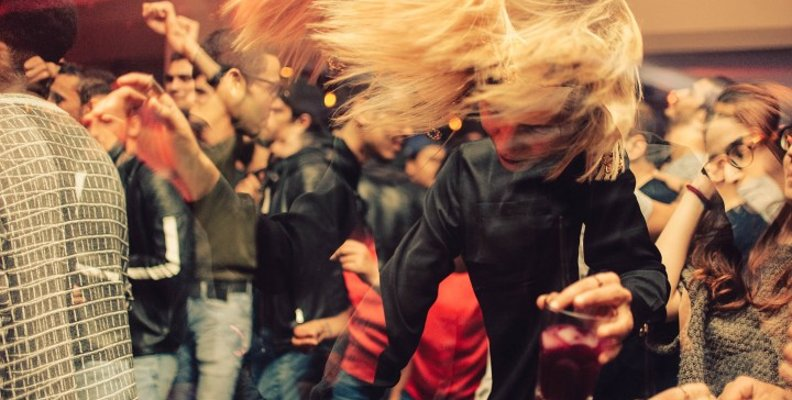
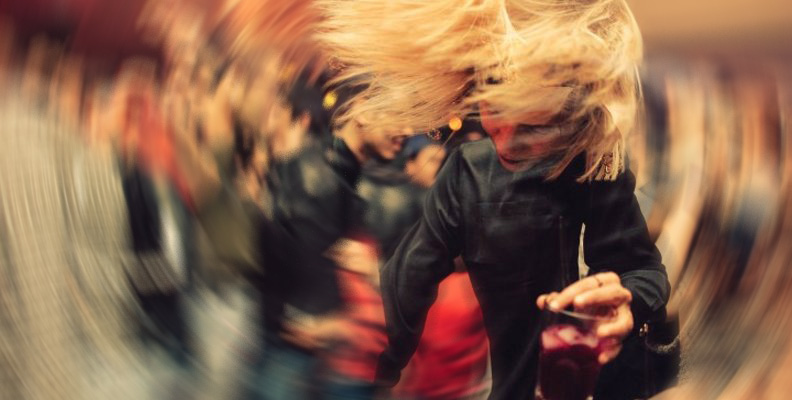
Adding radial blur to an image of a person immediately makes it more exciting and adds a sense of surprise, motion, and alertness. It can make a person look like they're in a hurry, panicking, or like something important around them is about to happen.
A simple radial blur effect can change the whole meaning and feeling of an image.
Transition Effects
In video editing and motion graphics, radial blur is often used as a transition effect between scenes or shots. It can create smooth and visually appealing transitions, especially in fast-paced or action-packed sequences.
Since almost any widely used effect can be used as a transition, the radial blur filter is often the top choice for many video editors. The radial blur effect is also often used as a transition for professional image-based presentations.
Correction and Distortion
Radial blur can also be used to correct certain distortions in images, such as fisheye distortion in wide-angle photos. By applying radial blur selectively, you can help correct the curvature and improve the overall look of the image.
This requires a bit of technical knowledge but when applied correctly it can do wonders.
Simulating Depth of Field
In some cases, radial blur can simulate the effect of shallow depth of field, where the foreground and background are intentionally blurred to isolate the subject and create a sense of depth.
If you want to make something appear closer or further in your image, you can use the radial blur filter to manipulate the distance by creating an illusion.
How to Create Radial Blur Effect in Photoshop
To create radial blur images for free, all you need to do is load up Photoshop and get familiar with some of its basic features, like creating a smart object and a layer mask, knowing how to duplicate background layer(s), and a few other details that we'll go into in just a second.
Plug-ins and third-party software do help a lot when it comes to adding effects like Gaussian blur, zoom blur, and radial blur to your image, but they are not always necessary.
With that said, here's how to add a radial blur to your image for free using Adobe Photoshop.
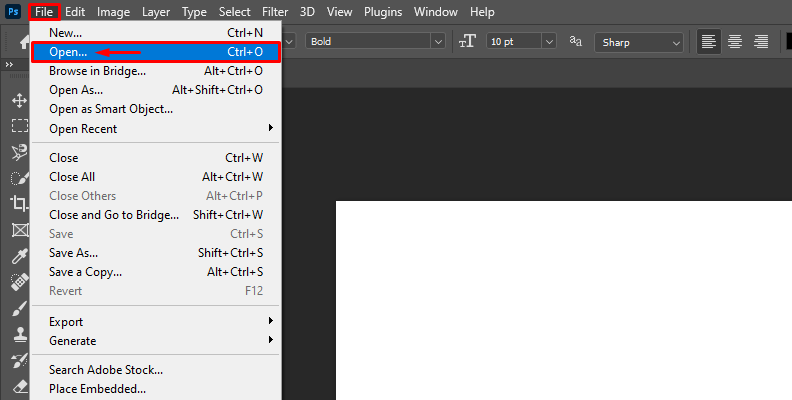
Open Your Image
Start by opening the image you want to apply the radial blur effect to in Photoshop. To do this, go to File > Open and select your image.
![]()
You can also load Photoshop and drag an image over it, which will automatically open it in the working area.
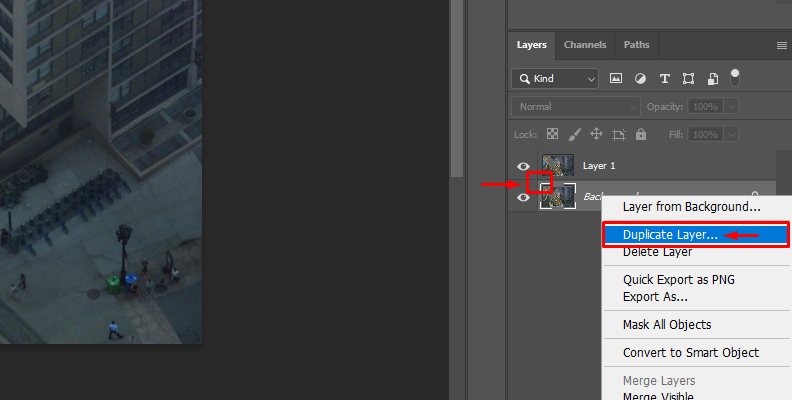
Duplicate the Layer (Optional)
It's a good practice to work on a duplicate layer to preserve the original image. Right-click on the background layer in the Layers panel and choose "Duplicate Layer." You can name the duplicate layer if you like to find it more easily later on, which is very helpful in more complex projects.
![]()
If you just need to apply a radial blur to your image, you can work on the original layer, but we still recommend duplicating to form a good habit for future work.
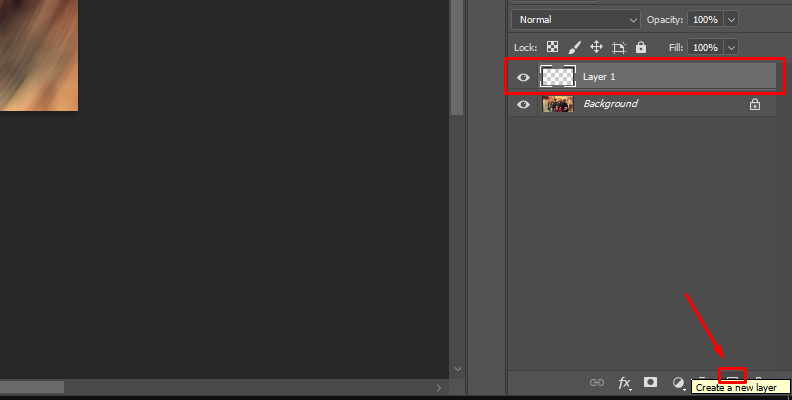
Create a New Layer (Optional) And Select The Area Of Focus
If you want to apply the radial blur effect on a separate layer, you can create a new blank layer by clicking the "New Layer" icon at the bottom of the Layers panel.
![]()
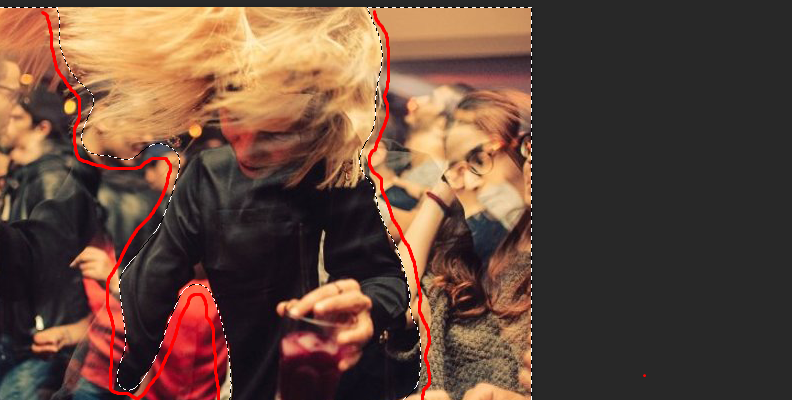
Determine the center point for your radial blur effect. You can use any selection tool you prefer, such as the Elliptical Marquee Tool or the Lasso Tool, to make a selection around the area you want to remain sharp and unblurred.
![]()
If you want the entire image to be blurred uniformly, skip this step.
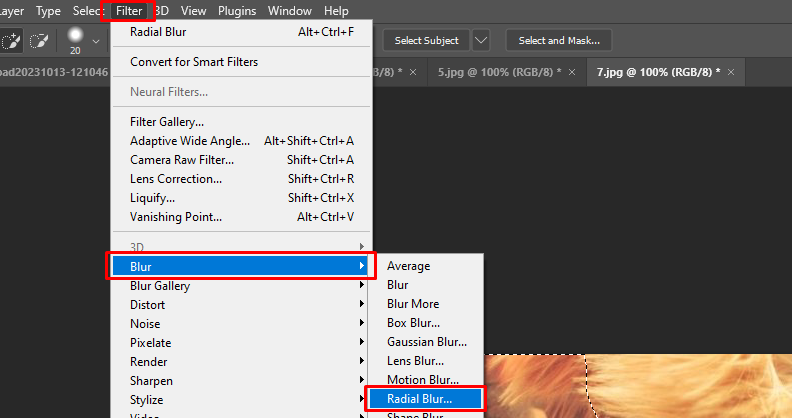
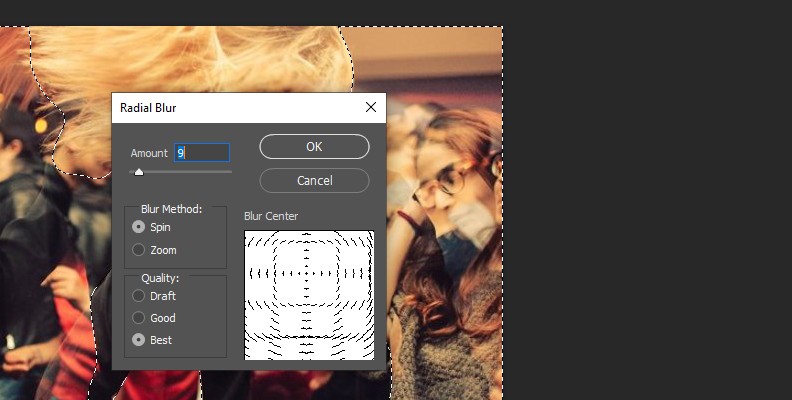
Apply the Radial Blur Filter
With your selection (or without one if you're applying the blur uniformly, meaning to the whole image), go to Filter > Blur > Radial Blur to open the Radial Blur dialogue box.
![]()
In the Radial Blur dialog box, you'll find two blur methods: "Spin" and "Zoom." Choose the method that suits your image the most.
![]()
Spin: This blur method simulates a circular motion blur, making it appear as if the image is spinning around the central point.
Zoom: This blur method creates a zooming effect, making it look like the image is either zooming in or out from the central point.
Use the "Amount" slider to control the intensity of the blur effect. You can preview the effect in the dialog box as you adjust the slider.
Ensure that the "Center" option is selected in the dialog box. You can also manually drag the center point to the desired location within your image. Click on the image to set the center point at the spot you want.
Once you are satisfied with the settings and preview, click the "OK" button in the Radial Blur dialog box to apply the effect.
Refine The Filter (Final Touches)
Now that the effect is applied, you can add some finishing touches. To do this, make sure that the subject you wish to be unblurred is on a separate layer, then create a layer mask by selecting that layer and clicking on the "add layer mask" button at the bottom of the layers panel.
Next, select the brush tool and set its opacity and flow to a hundred percent. Paint around parts of your main subject that you don't want to be in focus. For example, if you have a person in your shot walking from left to right, and you want to make it look like they're entering into focus, you can paint their left side to blur it.
You can preview your changes in the layer mask thumbnail, which will also let you know that you're working on the mask, and not the layer itself.
When done, simply save and export the final image. That's all there's to it!
How To Create Radial Blur Effect With Boris FX
You can use third-party plug-ins to create a radial blur effect (or any other) within Photoshop much more easily than if you were to do everything manually. In this specific case, we recommend Optics by Boris FX.
Optics is a renowned plug-in that's available both as a standalone software or as an extension for your favorite photo-editing software. There's also a free, trial version available that you can download.
Once you download and install Optics, countless effects are available for you to add to your images with a single click. Here's how to use Optics by Boris FX to apply Radial Blur to your images.
Load Up Photoshop and Open a New Project
Launch Photoshop on your PC and create a new project. We recommend not working on a project that you've already started so that you don't accidentally make any unwanted changes.
![]()
Insert The Image You Wish To Add Radial Blur To
Your next step is to insert the image you wish to add the radial blur effect to within Photoshop. You can do this by clicking File -> Open, or simply dragging and dropping an image on the blank canvas in Photoshop.
![]()
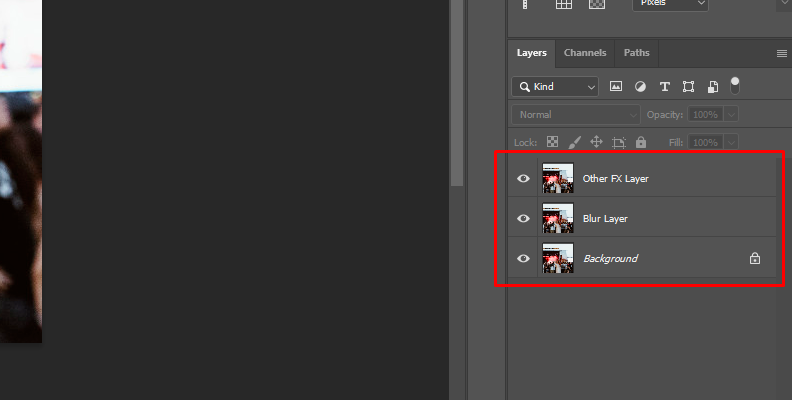
Create One or Multiple Layers for Your Image
You've likely already heard that working with smart objects in Photoshop is a great habit when using multiple layers. If you plan to do that, convert your image to a smart object, create the necessary layers, and name everything properly so that it's easy to find later on.
![]()
- Load Up Optics and Add The Radial Blur
![]()
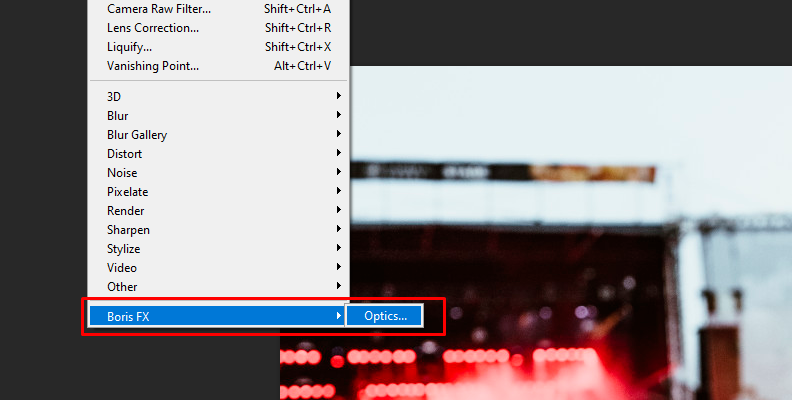
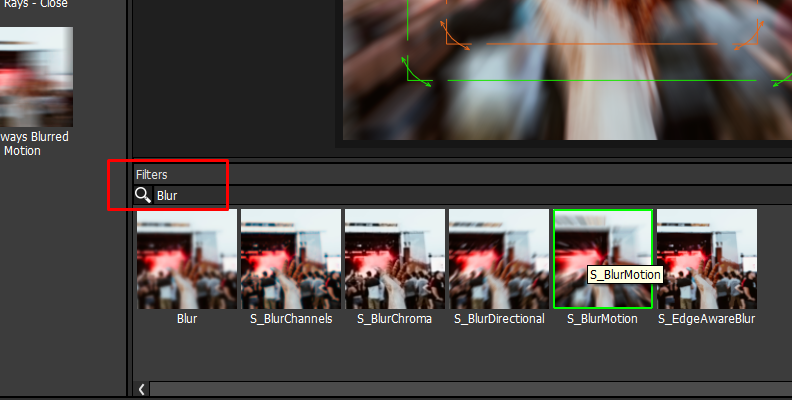
In Photoshop's top bar menu, click Filter -> Boris FX -> Optics. This will open Optics and all effects available in it will be ready to use immediately. Use the search bar to type in "Blur" and you'll see a dozen effects show up on the results page.
![]()
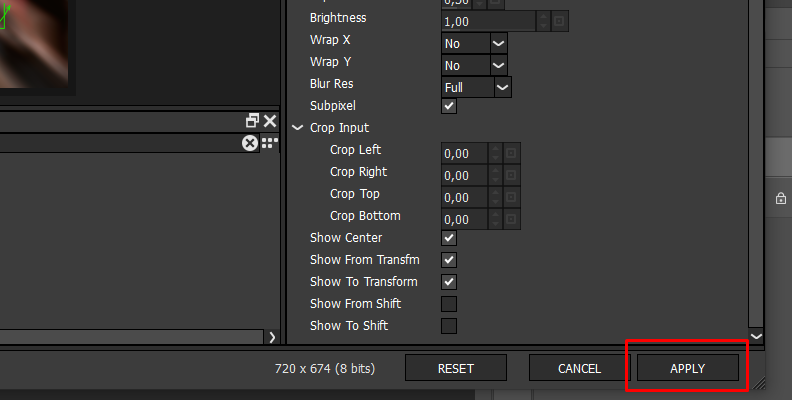
Click on any of the presets to preview it. Modify any of the parameters until it fits the theme of your image. When done, simply click the "Apply" button and save the changes. That's all there's to it!
![]()

Final Words
The radial blur filter is used regularly, both in photography and videography. It's a powerful effect that's easy to add and can change the whole feel of the image.
Luckily, you now know how to add it to your images, so hopefully, this will be yet another useful tool in your creativity box to enhance whatever it is you'll work on in the future.
FAQ
What is The Blur Effect Radius?
The blur effect radius is a parameter that determines how far from the center of the effect other objects will be affected. In other cases, it could determine how "dense" the blurring will be. It all depends on the effect type.
What is Radial Blur in Games?
Video games use various blur techniques to enhance immersion and visuals. It's rare to see radial blur as an option, as mostly it's directional blur and camera movement motion blur, but there are some exceptions. Radial blur in games can be used to mimic a shockwave from an explosion or the speeding of a car, like when using nitrous, for example.


