


Modern photo and video editing programs allow us to accomplish tasks that were once deemed impossible or only within the range of professionals with expensive equipment.
Combining two photos or videos into one, in the sense of blending elements together to form one image that looks real, was one of those seemingly difficult tasks, but not anymore.
In this guide, we'll talk about how you can combine images and videos into one, so if you're willing to learn more, here's what you need to know.
What Does it Mean to "Combine" Multiple Photos or Videos?
The term combining photos can have multiple meanings, such as reducing their size and fitting them into one canvas that would otherwise only contain one photo. This is a helpful method for when you want to show more content with fewer posts or if you simply enjoy creating photo collages.
You can merge as many images as you want this way using different layouts, and most of them are available in free apps such as Instagram, for example.
However, to combine photos can also refer to a method in which you merge images, usually two but sometimes more, to form one image that contains all the important elements of both photos.
This method is often used for digital art, as you can create unrealistic scenarios that look good and are interesting to the viewer's eye, such as placing a modern city building in a desert, for example.
Reasons to Combine Two Pictures or Videos Together
There are multiple reasons to combine pictures together.
When you merge pictures, you can create abstract art, but that's not the only use case. There are functional use cases, too.
For example, although it takes more work and quite a bit of skill, you can merge multiple group photos into one so that everyone gets the version where they look best, yet it's still one group photo with everyone included.
Next, you can "fix" elements that you believe are reducing your photo's quality or aesthetics, for example, removing unwanted people or objects. If you took a photo where you really like how you look, but the background is crowded or simply doesn't look good, you can wait a bit for the area to clear then take a photo of only the background and merge them together, or add a completely different background.
The possibilities are endless, and when you learn how to do this, you'll see how exciting photo merging and combining images can be.
With that said, let's get to learning.
How to Combine Two Pictures or Videos With BCC+ Math Composite
In this section, we'll be using Adobe Premiere Pro in combination with BCC+ Math Composite to combine two photos.

Although Premiere Pro is not popular in the category of photo editing tools like Adobe Photoshop is, it can still be used to work on images other than videos, especially with tools such as those featured in Continuum.
Before we get into it, a quick introduction to Continuum.

Continuum is a creator's pack by Boris FX containing hundreds of tools, transitions, filters, effects, and everything else that you need to get your video and photo editing to a whole different level. There's a free version available that you can download and use until you decide whether this is the right choice for you. Keep in mind that content will be watermarked when using the free version.
With that said, here's how to use BCC+ Math Composite in Premiere Pro to combine images.
Step 1: Launch Adobe Premiere Pro and Import Media
Assuming you downloaded and installed Continuum for Premiere Pro, your first step would be to launch Adobe Premiere and import media.
Let's start by combining two photos.
Create a new project by using the "New Project" button on the Adobe Premiere Pro home screen.

Set your preferred settings and let the software load into the new, empty project.
Then, it's time to import media.
You can do this by heading over to the "Project" tab and right-clicking anywhere on an empty area where it says "Import media to start" as shown in the image below.

Doing this will take you to your computer's file explorer, where you need to locate the two photos you wish to merge and import them.
Step 2: Create a Sequence (Timeline)
Now that you have your images imported, you need to move them to the timeline area to create a sequence to work on.
To do this, simply select, then drag and drop the two images onto the timeline area.
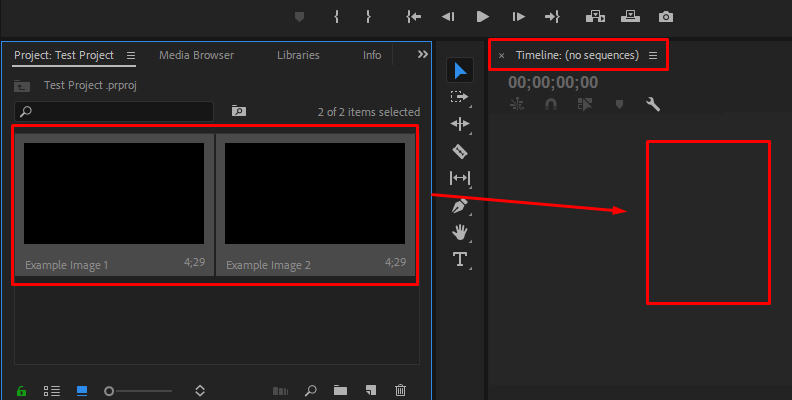
Now, before we add the effect, it's important to make sure that both images are on a separate video track. This is because, during the next step, our BCC+ Math Composite effect will ask us to choose the background image based on the video track number.
This is simple to solve, as you just need to place the videos one above the other.
Important Note: In Premiere Pro, when using the BCC+ Math Composite filter, you need to set the background image on the bottom and the foreground image on the top layer.
Step 3: Apply the BCC+ Math Composite Effect
Now, it's time to apply the effect.
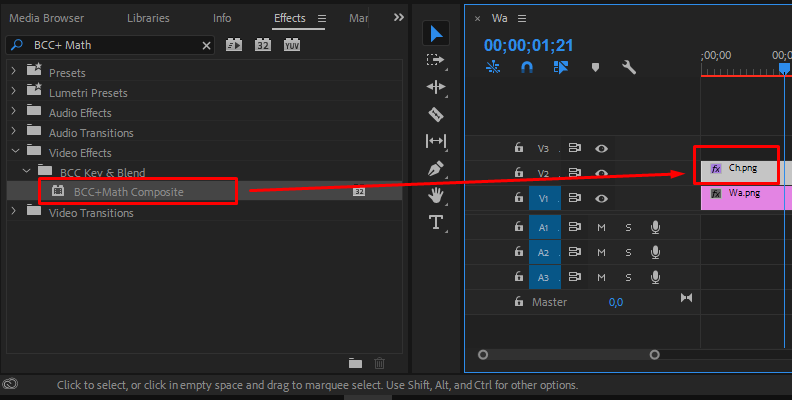
Navigate to the "Effects" tab by clicking on it. Then, use the search bar to type in "BCC+ Math Composite" as shown in the image below.

Upon locating the effect, drag and drop it over the foreground photo, which, in this case, is the top one.
When done, move on to the next step.
Step 4: Adjust Settings and Parameters
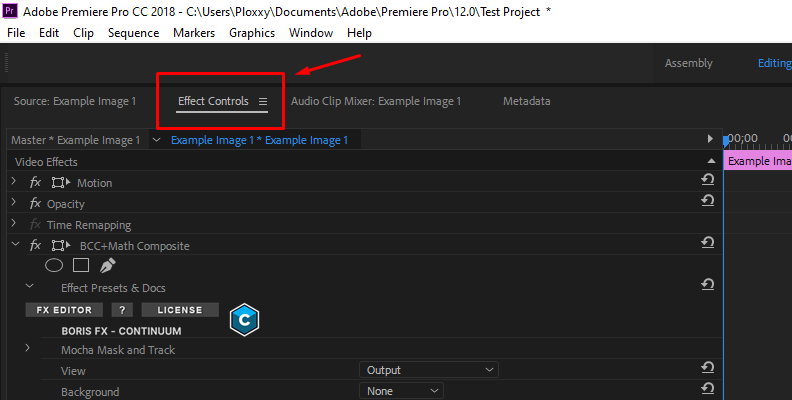
Now, the final step is to open the "Effect Controls" panel and modify a few settings so that the BCC+ Math Composite effect can do its magic.
Since the bottom picture is our background, we'll set this parameter to Video Track 1.
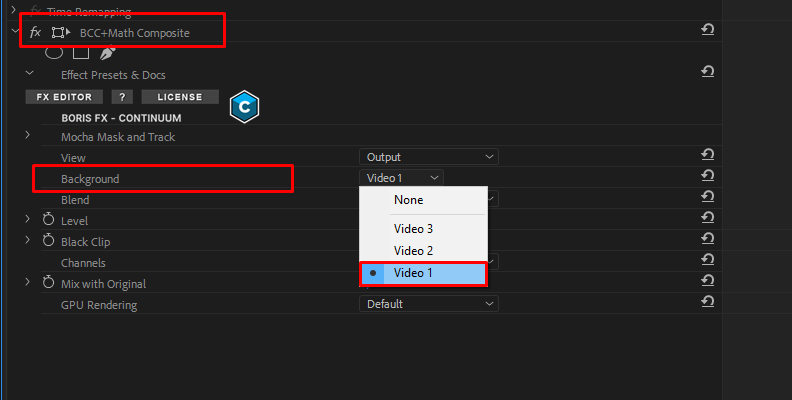
That's all you need to do.
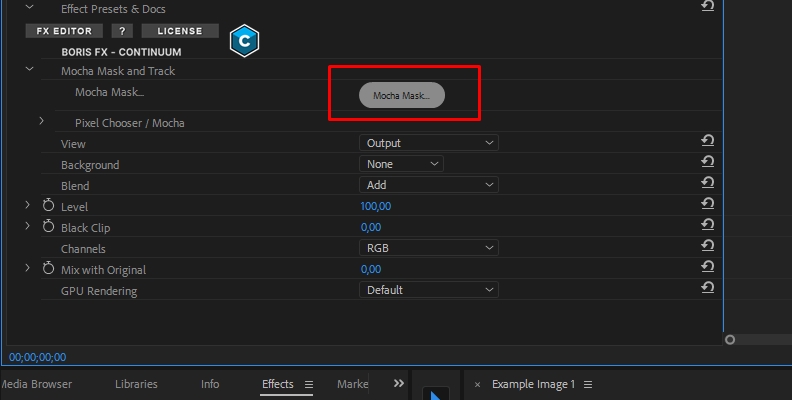
Now, if you want to isolate parts of the image and mask, you can use Mocha, one of the world's best masking and tracking software.
You've now successfully merged two photos into one.
Adjust the settings until you get what's perfect for your specific project.
How to Combine Two Pictures Together on iPhone Without an App
One of the best things about iPhones is that you can do most tasks, such as using a collage template to combine several photos together or use any type of grid layout for that matter, without the need to search for third-party apps and install them on your phone, which takes even more storage space.
Needless to say, combining photos like this allows you to save storage space and also post the same amount of content with fewer posts, which is sometimes a lot better for your engagement on social media.
So, here's how to do it on an iPhone:
Step 1: Download and Setup the Shortcuts App
This step is required, and although it looks like you're doing something unnecessary at first, it'll make things much easier for you in the long run, as after you properly set up the shortcut, merging photos into one single image will take only a few taps on your screen.
So, if you don't already have the app installed (as it's been included in OS updates in the past) download and install the Shortcuts App from the App Store. Once that's done, open it, and on the shortcuts tab, click on the "+" sign. Select the title area by tapping it and name your shortcut based on what its function will be, like "merge photos horizontally" or something along those lines. Tap the "add action" button to finish.
Now, use the search bar to type in "Select Photos" and select it from the list. Now, tap the downwards pointing arrow next to the name "Select Photos" to expand the dropdown menu, and enable the "Select Multiple" function by toggling the button on.
Next, use the search bar again to type in "Combine Images". Select it from the list, and choose your preferred method of combining, such as vertically or grid, as the default is set to horizontally.
Use the search bar again to look up "Save Photo To Album", select it from the list, and then finally tap the "Done" button in the Shortcuts App.
Step 2: Ensure the Shortcut is Easily Accessible
After creating the shortcut, make sure it's easily accessible by navigating to the "All Shortcuts" tab within the Shortcuts App and then tapping and holding the icon of the shortcut you just created until the settings menu for it opens. Select "Details" and then toggle the button "show to share sheet" and even use the "add to home screen" button.
Step 3: Start Merging
Now, everything is set up, and it's time to start merging your photos.
Open the photos app and create a merged photo. Tap the share button located in the bottom-left corner of the screen and click on your newly created shortcut that should be on the list now. Select the photos you wish to merge together, and when done, click "Add" in the upper right corner of your screen to finish up the process.
Now your photos are saved to your camera roll, merged in the order you selected them.
That's all there's to it!
Final Words
Now you know more about merging photos, creating layouts, why you should consider doing this, and most importantly, how to do it.
Hopefully, this will help you share more content with fewer posts, get better engagement on social media, save storage space, and create some interesting visual art using the methods listed above.
Thank you for reading, and best of luck!


