


With the rise of social media and different ways of viewing different content, the number of different sizes and aspect ratios has exploded.
Videos have always had varying dimensions as time has passed and technology has developed, such as the move from "square" to widescreen TV. As these dimensions change, it is important for creators to know how to work their way around them.
For filmmakers and editors, especially those new to the software, learning how to change a video’s aspect ratio using Final Cut Pro may be a bit of a challenge.
What is Aspect Ratio?
What is aspect ratio? The aspect ratio of an image or video is the proportional relationship between the width and height of that image or video. To put it simply, it is the parts of a screen occupied by the video you see. For example, an old TV program displayed on a widescreen TV might have black lines at the sides to keep the program appearing square in the original video format. The aspect ratio is the width and height of the image displayed, not the width and height of the entire screen.
It is usually depicted by two numbers separated by a colon, with the first number representing the width and the last number representing the length.
Common Types of Aspect Ratios Used Today Include:
- 4:3: Academy video aspect ratio (this is the "square" aspect ratio of old TV shows).
- 16:9: Video on widescreen.
- 21:9: Anamorphic aspect ratio.
- 9:16: Vertical video or landscape video.
- 1:1: Square type video size.
- 4:5: Portrait video or horizontal video.
Note that this is not at all an exhaustive list of different aspect ratios present today. However, these are the options you’re most likely to encounter in your work.
Aspect Ratio Available in Final Cut Pro
Final Cut Pro is Apple’s professional video editing software. If you work with a Mac and want to change the aspect ratio of a video, Final Cut Pro is the perfect tool to achieve this. It allows you to repurpose projects that have standard horizontal aspect ratios.
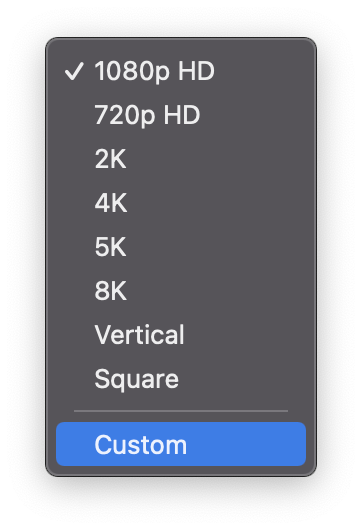
Before we get into the “how?”, it is important to have a full grasp of the resolution and aspect ratio options present in the Final Cut Pro. Aspect ratio options available in Final Cut Pro include:
1080p HD
- 1920 × 1080
- 1440 × 1080
- 1280 × 1080
1080i HD
- 1920 × 1080
- 1440 × 1080
- 1280 × 1080
- 720p HD
PAL SD
- 720 × 576 DV
- 720 × 576 DV Anamorphic
- 720 × 576
- 720 × 576 Anamorphic
2K
- 2048 × 1024
- 2048 × 1080
- 2048 × 1152
- 2048 × 1536
- 2048 × 1556
4K
- 3840 × 2160
- 4096 × 2048
- 4096 × 2160
- 4096 × 2304
- 4096 × 3112
5K
- 5120 × 2160
- 5120 × 2560
- 5120 × 2700
- 5760 × 2880
8K
- 7680 × 3840
- 7680 × 4320
- 8192 × 4320
- Vertical
- 720 × 1280
- 1080 × 1920
- 2160 × 3840
1: 1
These options are usually displayed according to their resolution values.
How to Change the Aspect Ratio Inside Final Cut Pro
This is how to change the aspect ratio using Final Cut Pro:
- Download and install the Final Cut Pro app from the App Store. After the application download and installation, open the software.
- Create a new project and import the desired video files from the source location to your Final Cut Pro timeline.
- In the Libraries sidebar, choose the event that contains the project whose aspect ratio you intend to adjust. You can also create a new project here, apply the desired aspect ratio, then add your video to it.
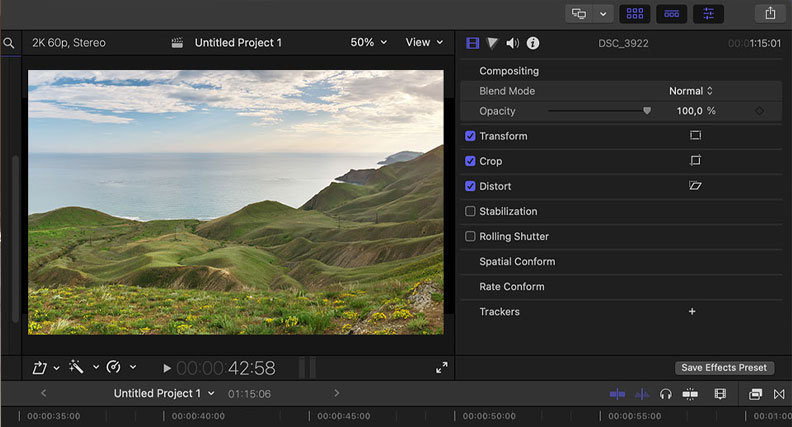
- Place the video on the Final Cut timeline and go to the video inspector window, which you can open by clicking the top right side of the toolbar or pressing Command-4. If the inspector option is not visible, you can open it by clicking Choose Window > Show in Workspace > Inspector.
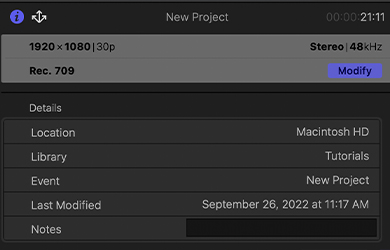
- Select the project. At the top right corner of the property window, click the Modify tab.
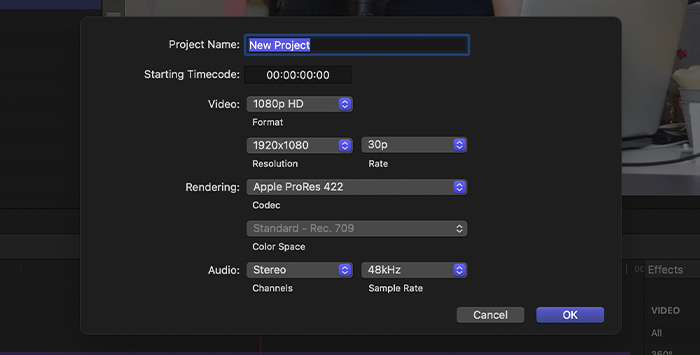
- You will then see a pop-up window where you have options for the resize operation. In the pop-up window, change the video format and new aspect ratio values as your work demands.
- Also in this pop-up menu is a ‘Custom’ option where you have more freedom to adjust the resolution values based on your preferences. However, be aware that if you start using non-standard aspect ratios values on your media files, other viewers may find the content difficult or awkward to watch, so unless you know exactly what you need and why you need it, it's better to stick to predefined ratios.
- Save your respective changes if you’re satisfied with the new aspect ratio image size, or modify the values as much as you like if you’re not.
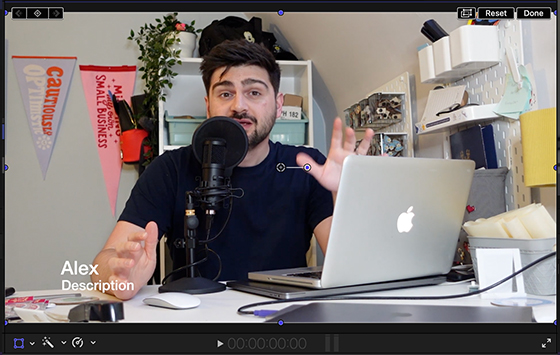
Final Cut Pro also has a Crop tool if that's what you prefer. You can easily find it by clicking the pop-up menu in the lower-left corner of the viewer.
Smart Conform Feature
Final Cut Pro has another feature to help you with aspect ratios. This is known as the Smart Conform feature.
It lets Final Cut scan each of your video files for details and preemptively reframe clips that differ from the project's required video size.
This feature also lets you quickly create an orientation (vertical, horizontal, widescreen, or square-type frame) for your project and make manual framing choices later.
- Open Final Cut Pro and open a previously created horizontal project.
- Click on the project and duplicate it. This can be done by:
- Click Edit > Duplicate Project As.
- Control-click the project and choose Duplicate Project As.
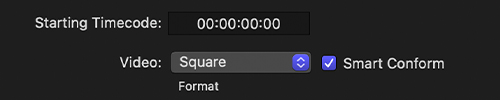
- A window should pop up. Select a name to save it as and decide your project settings for that duplicate project (Already horizontal, so select Vertical or Square video format.)
- Change the aspect ratio. A Smart Conform checkbox appears, which you should select.
- Click OK.
Once selected, the Smart Conform checkbox analyzes the clips in your project and “corrects” them. You can do an overscan of your corrected media files and manual reframing if needed using the Transform effect.
Why Should We Change the Aspect Ratio for A Video?
Why is it important to know how to change the aspect ratio inside Final Cut Pro? Well, aspect ratio is important in all creations with a visual component. For the same content to travel from a Mac to television and all social media platforms, adjustments need to be made to preserve features and details.
TV sets, mobile phones, computers, and social media platforms have varying aspect ratios for various reasons. As a Final Cut Pro user, being able to change your aspect ratio on a whim is a skill you want to have.
Letterboxing
If the aspect ratio of a video is not well adjusted to a television screen, it will be compensated for by letterboxing or pillar boxing. “Letterboxing” refers to the horizontal black bars at the top and bottom of the screen. They appear when the content has a wider aspect ratio than the screen.
“Pillarboxing” refers to black bars on the sides of the screen. This occurs when the filmed content has a taller aspect ratio than the screen.
For the longest time, the majority of videos have had horizontal dimensions with some minimal variation. However, the ascent of mobile devices and social media networks has led to media files being consumed in other ways. Simply working on a TV screen or cinema screen just isn't enough anymore.
Portrait
We are embracing the portrait format - what you see when you hold your cellphone in front of you vertically rather than horizontally - more and more every day. This means content has to be adapted to every valid platform to boost visibility and get views.
This has become an important part of post-production – creating many versions of video content, with each one having a different aspect ratio.
Even within a platform, there may be the need for different aspect ratios. A good example of this is seen in two of the more popular social media houses in the world: YouTube and Instagram.
On YouTube, videos are uploaded and consumed mainly in a horizontal format, and viewers access them through smartphones, tablets, laptops, and nowadays, directly via television. However, there are also YouTube Shorts, which are usually vertical in a 9:16 ratio.
On Instagram, most content is consumed vertically and in a square format. However, there is the Reels feature where videos are portrayed vertically but on fullscreen.
Therefore, if you want your work to appeal to multiple crowds even within the same social network, being able to change the aspect ratio of your videos is a must.
Final Thoughts
As a beginner video editor, you may find Final Cut Pro a bit difficult to work around. If, like many, you’re wondering how to change a video’s aspect ratio with Final Cut Pro, this guide should help you.
If you don’t use a Mac for your video editing, then Final Cut Pro will not be accessible to you as it is a Mac-only product.


