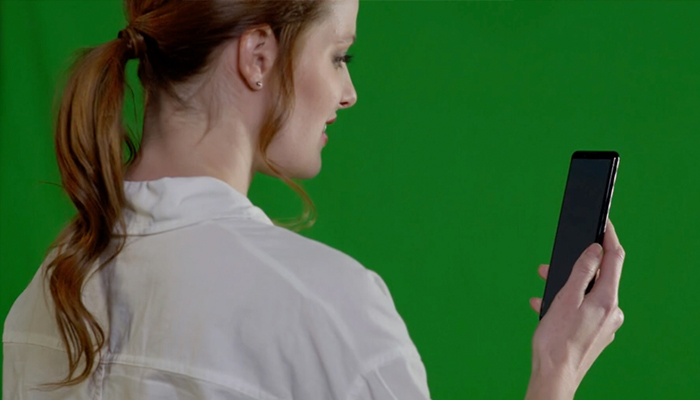
Sometimes, unwanted shadows appear in pictures that you only realize once you’ve edited them in your favorite image editor. You probably know that fixing this issue can be challenging, even with tools like Photoshop.
Any popular image editor will have a luminance, curves, or lightning tool to adjust the overall image. Still, it's harder to achieve when you want to edit only part of the image, like the bottom or center.
You can get away with using a layer mask in Photoshop or another image editor, but the process can also be complex if you’re not used to working with multiple layers and masking.
If you’ve ever wondered how to brighten one part of a photo, this tutorial is for you. In today’s article, I'll show you a very simple trick to increase brightness and make other lighting adjustments to a specific part of the image in just a few seconds.
For this tutorial, I'll use our BCC Reverse Spotlight filter from Continuum to fix dark areas in only part of the image. This effect will allow you to achieve the perfect light for your images.
Here are a few tips and recommendations before starting:
-
Shoot with your camera on RAW, especially when you plan to do some heavy photo editing afterward. The RAW file is best because it will retain more quality after processing and compression.
-
The effect is non-destructive, but you can make a duplicate layer or a copy of the original image to have a safe file in case something goes wrong.
-
You can use BCC Reverse Spotlight on virtually any image editor, such as After Effects, Premiere Pro, DaVinci Resolve, and Final Cut Pro.
Let's dive in!
Lighten a Specific Area of an Image with BCC Reverse Spotlight
BCC Reverse Spotlight is more than a lighting effect. With Reverse Spotlight, you can target only part of the image that needs to be brightened. Unlike using a layer mask in Photoshop, Reverse Spotlight allows you to set the light source on the area, set the width, direction, intensity, and color of the light, and so much more.
BCC Reverse Spotlight also features tools to blend the effect with the original image, Mocha Tracking for masking, motion tracking, and Beat Reactor.
Follow the next basic steps to fix your images in no time with BCC Reverse Spotlight.
-
Step 1: Download and Install Boris FX Hub
The first thing to do is visit the Boris FX webpage and download the Boris FX Hub. You can download the free trial to get an idea of what the tool offers. Once you download and install it, choose to install Continuum for your compatible host and wait to complete the download and installation.
-
Step 2: Create a New Project
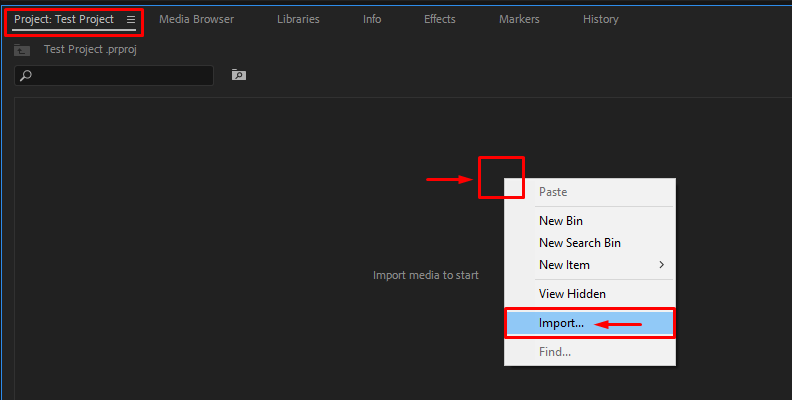
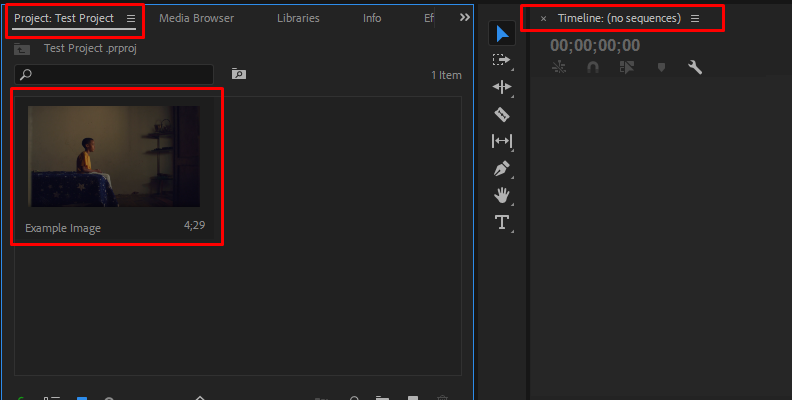
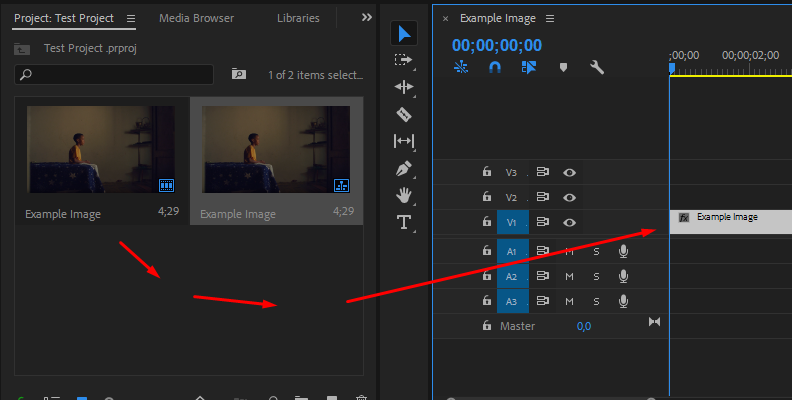
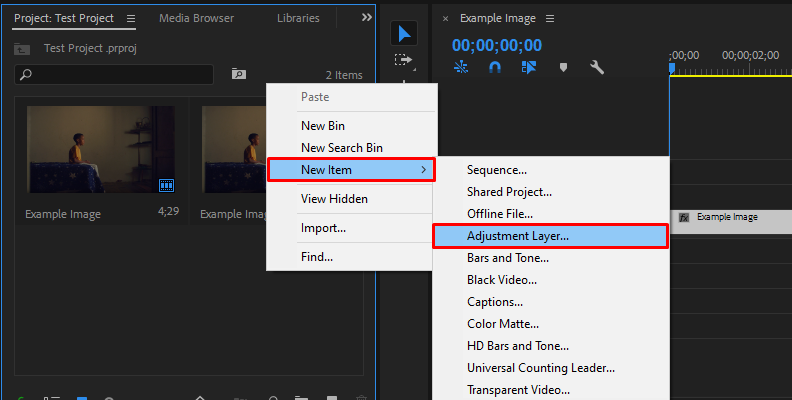
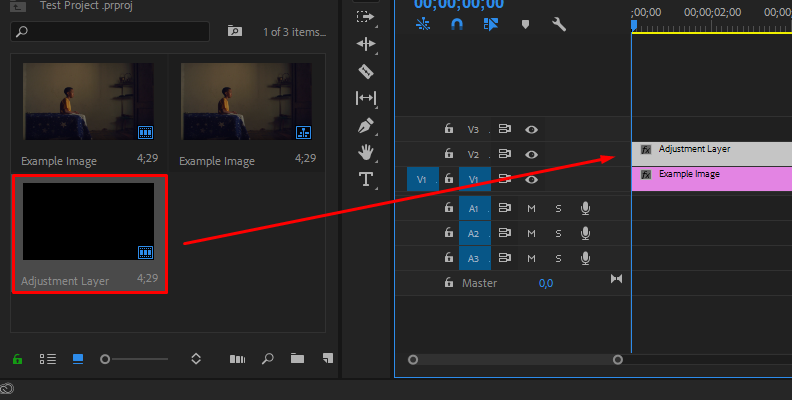
Create a new project using your preferred image editor and import the photo you want to brighten. You can duplicate the layer, add a new layer, or place an adjustment layer to apply the effect to it rather than the original image.
-
Step 3: Apply BCC Reverse Spotlight
Go to your effects library and search for the BCC Reverse Spotlight to apply it to the adjustment layer or image. You will find it in your effects library under BCC Lights > BCC Reverse Spotlight. Add it to the layer, and you will immediately see the default settings affecting part of the image.
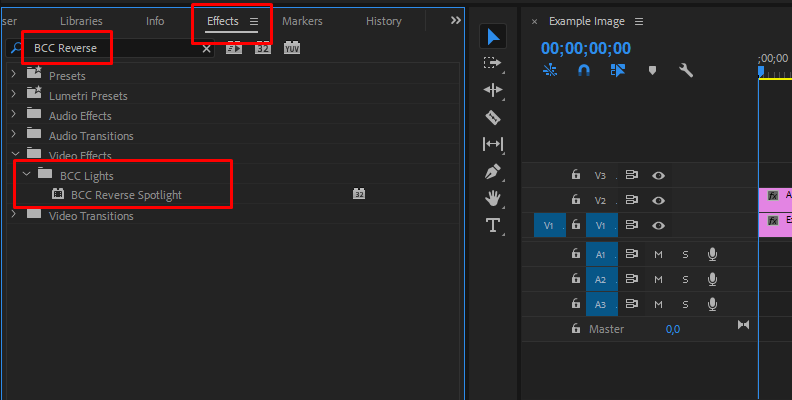
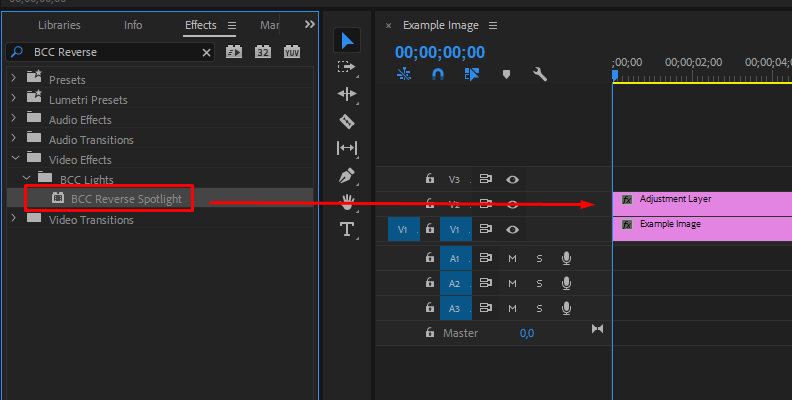
Now, let's adjust Reverse Spotlight to brighten those dark areas in your photo. You'll see a few parameters you can tweak in the effects panel. I'll go individually, explaining what each does and how you can use it in certain scenarios.
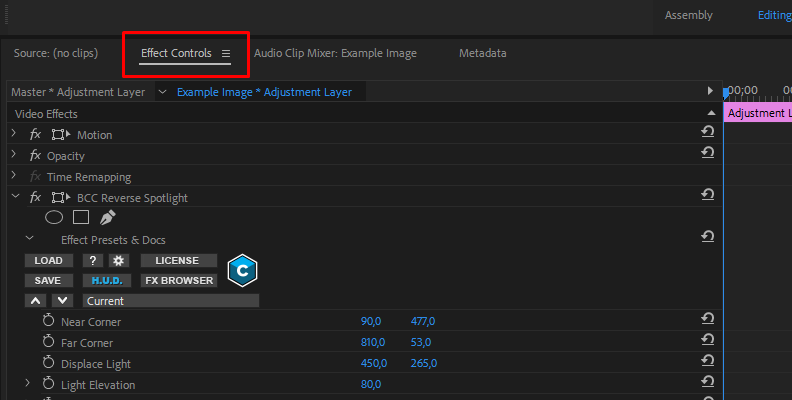
There are two paths you can take:
Choose a preset and call it a day.
Start from scratch or edit the preset
Let's analyze both options.
-
Step 4: Try the Presets
Every Continuum effect comes with pre-installed presets you can access through the FX Browser. Click the FX Browser button at the top of the effects settings to launch the presets library. Here, you can find several options to choose from.
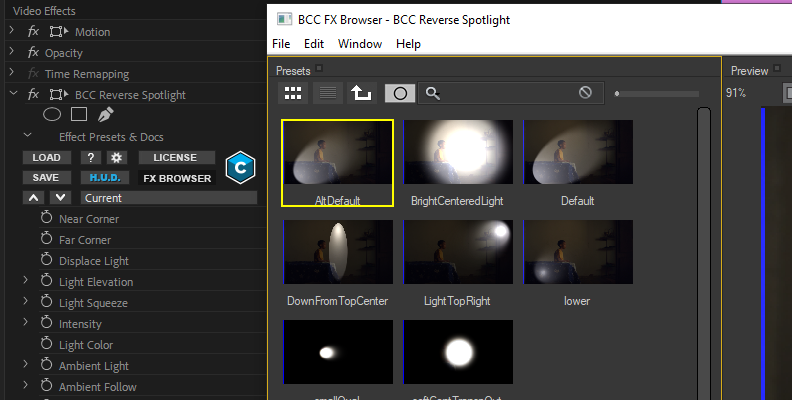
I suggest exploring the presets library. You might find something ready to use that will speed up your editing process.
Should you decide to use a preset, select it and click Apply in the bottom right corner to return to your host application. You can edit the preset or leave it as it is and continue editing the image, applying other layers to edit contrast, highlights, saturation, etc.
-
Step 5: Setting up the Light Source
You will work with the same effect controls whether you start from scratch or edit a preset. The first set of parameters are the Near Corner and Far Corner. With these, you can define the area to brighten. The Near Corner sets the beginning of the light source, and the Far Corner sets the farthest point from the light source.
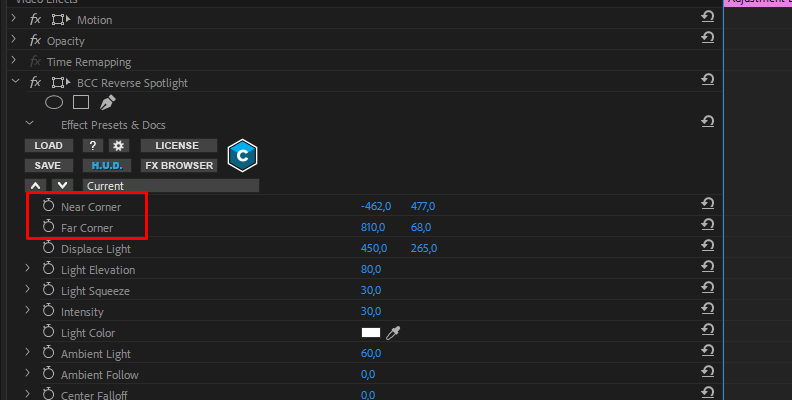
You can move the light source and target area using Displace Light. It moves the selected area without altering the shape and intensity of the light, which is helpful when you want to animate the effect and keep a uniform shape.
-
Step 6: Adjust the Height, Shape, and Intensity of the Light
You can further control the shape of the light using Light Elevation and Light Squeeze. Tweaking these settings with the Near and Far Corner allows you to change the shape of the light to make it narrower or wider and create your lightening effect.
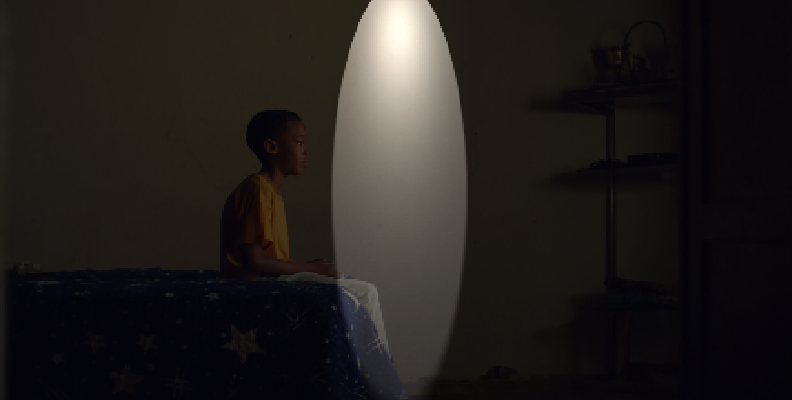
You may notice that making these lighting adjustments can dim the light. Compensate it with the Intensity control to increase the brightness levels of the brightened selection. You can also change the light's color to fit the image's atmosphere and mood.
-
Step 7: Ambient Light Adjustments
With BCC Reverse Spotlight, you can also set the behavior of the ambient light on the overall image.
Adjust the Ambient Light parameter to add or reduce the ambient light from the source image, Ambient Follow to make the ambient light fall off of the portions of the lit area, and Center Falloff to set the falloff of the light in the lit portion of the image. The Center Falloff can be set to negative values to create a spotlight ring on the image.
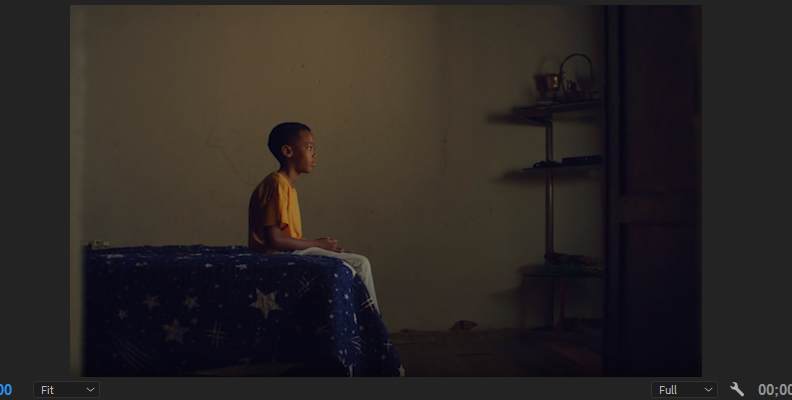
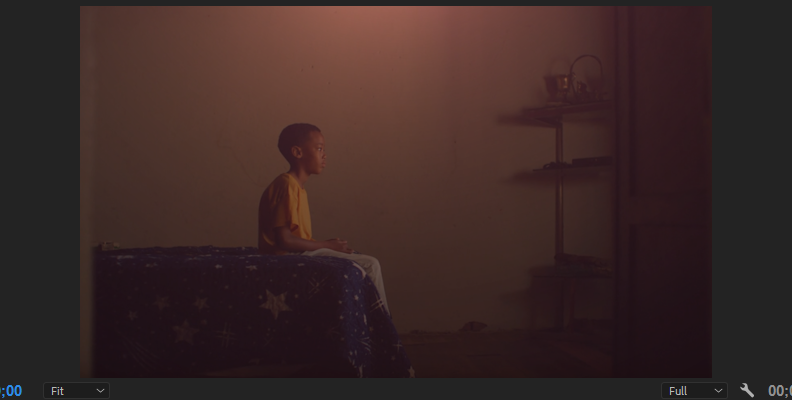
Finally, with Edge Falloff, you can adjust the edges of the lit area to soften them and blend them better with the rest of the image.
These parameters don’t affect the other applied light of Reverse Spotlight.
-
Step 8: Advanced Adjustments
The rest of the parameters can give you more control over the image but are generally used by more advanced users.
-
The Edge group controls lighting in the edges of the source image, not the lit area. You can modify the intensity and threshold and apply pre- and post-blur.
-
The Common parameter group offers mixing options to blend the image's ambient light with the spotlight.
-
Motion Tracker/Mocha launches Mocha to use the tracking and masking tools. You can set up tracking quicker than using keyframes.
-
Beat Reactor allows you to animate the effect based on an audio track. An example of using Beat Reactor is creating audio visualizers.
-
Final Words
BCC Reverse Spotlight is a filter that can be used in virtually any image editor to reduce shadows and improve lighting by adding a brightened selection. Adjusting the light's shape, edges, and intensity can turn a good picture into an unforgettable one.
Download Continuum to try BCC Reverse Spotlight features and other Light effects.
Good luck!


