If you work in documentaries, shoot a lot outside, or make vlogs while visiting public spaces, you may often need to blur faces, brand logos, plate numbers, sensitive information, and other background elements. Blur can also achieve stylish looks, speed effects, and dreamy sequences, and it can be applied to the entire video background to focus attention on the subject.
DaVinci Resolve is a video editing powerhouse that provides many tools for professional, intermediate, and beginner video editors. The blur effects included in the free version are enough for most beginners, and DaVinci Resolve Studio expands its arsenal of tools.
In this tutorial, you’ll learn how to blur part of a video in DaVinci Resolve. You'll work with DaVinci Resolve's built-in tools, and I'll provide an external filter to make the process quicker when you need to track and blur multiple faces.
Let’s dive in!
How to Blur Part of a Video in DaVinci Resolve
DaVinci Resolve comes with tools to create professional blur video corrections, compositions, and video editing. Video editors use blur effects for multiple reasons, and DaVinci Resolve offers blurring options that are easy to work with and add to your workflow.

Follow the step-by-step guide, which is intuitive even for those without video editing skills, to add blur to part of a video in DaVinci Resolve.
Step 1: Import Video Clip
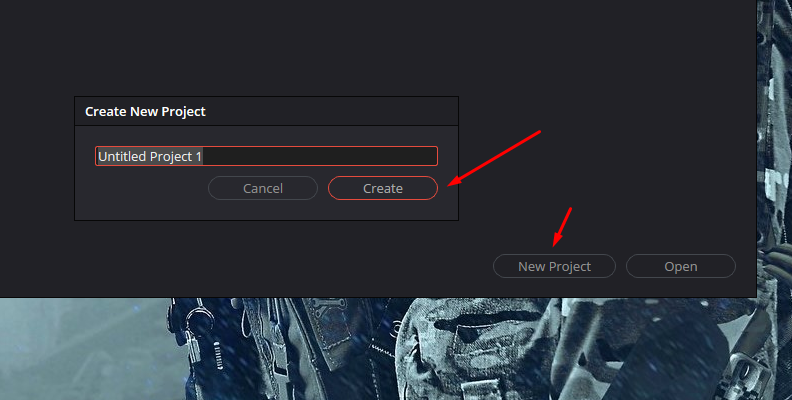
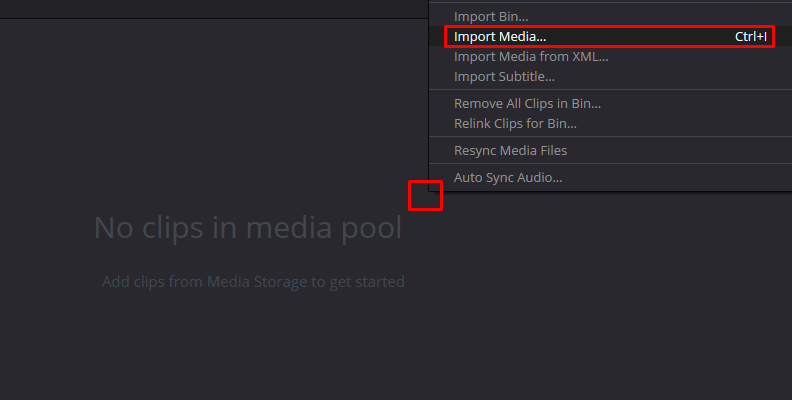
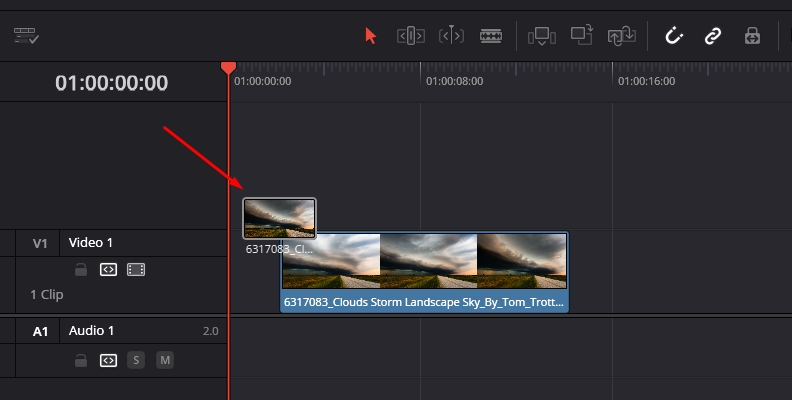
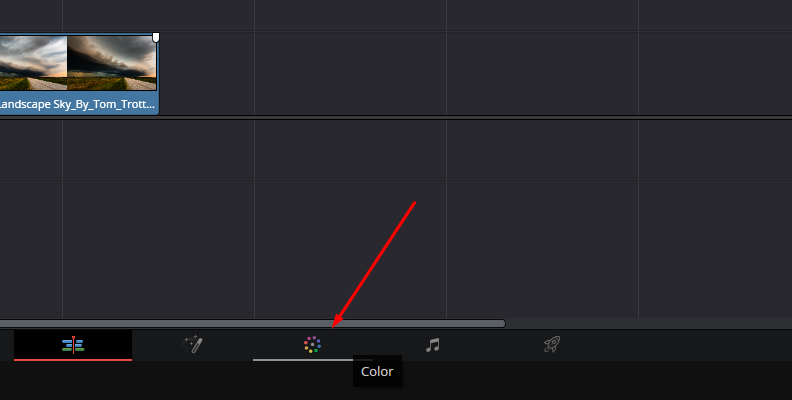
Start a new project and import the videos for your sequence. Drag the videos to the timeline to build your sequence. Edit your footage until you have the sequence arranged. Then, switch to the Color tab when you’re ready to start the blurring process.
Step 2: Prepare Your Videos for Blur
If a scene has multiple short videos, you might want to create a compound clip to work with that scene in one clip on the color page. If, on the contrary, your clip is too long and you only need to blur a few seconds of it, you can divide the clip to make it shorter and work with that one more easily on the Color page.
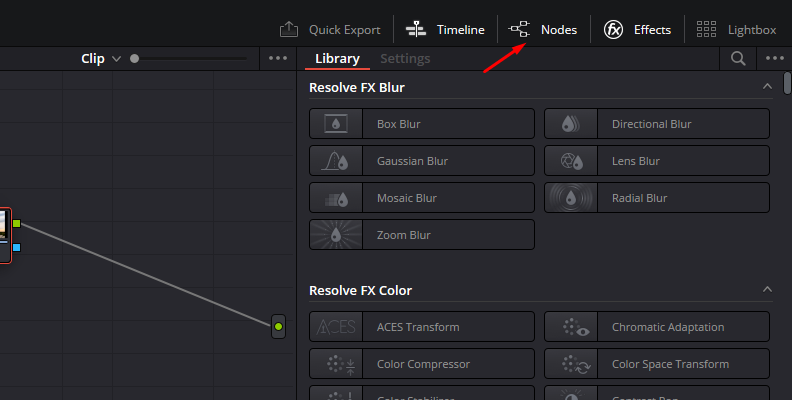
Next, go to the Color page and select the clip where you want to blur part of the image. If you have more than one clip in the timeline, click the Clips button at the top of the screen to see all clips available. Select the one you want to add blur. Make sure you also have the Node grid visible. If you can't see the Node grid, click the Nodes button at the top right corner.
Step 3: Power Window
Search for the Power Window tool in the middle toolbar. The Window icon looks like a circle with four points in the circumference. The Power Window is a versatile and effective tool for selecting parts of the image with masks for color grading and visual effects.
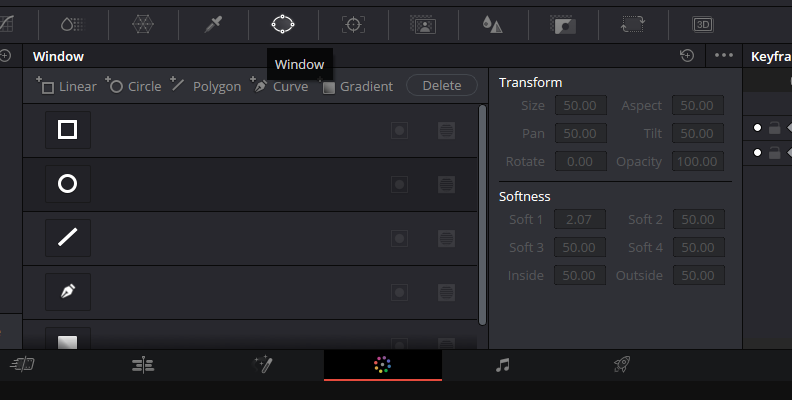
Once in the Power Window tab, select a shape for the mask. You can create a rectangle mask, for example, plates or a circle for faces, or choose the pen tool to create custom shapes around the object, subject, or desired area to blur.
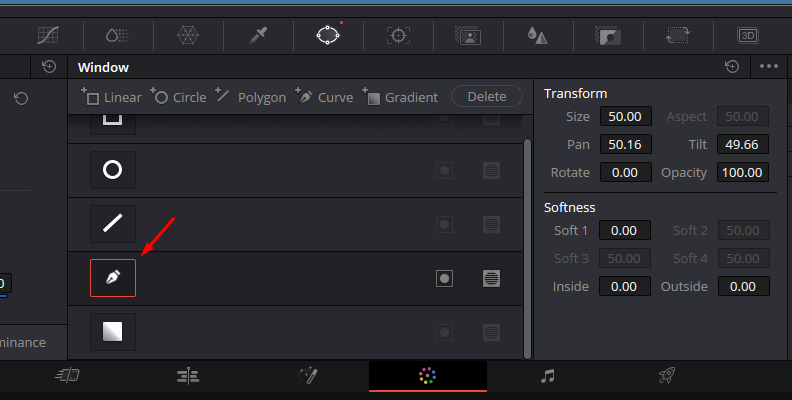
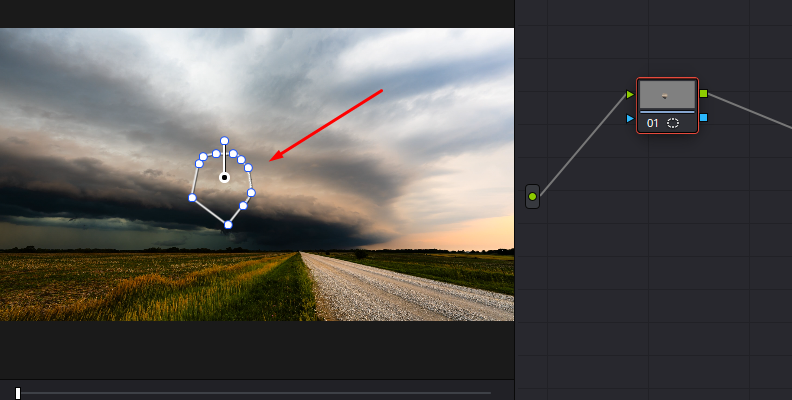
When you click on a shape, it will appear in the preview window. Place the shape over the part you want to blur and adjust the size using the edges of the mask’s shape. Zoom in and out of the video clip to better adapt the mask to the object you want to add blur.
Step 4: Tracking Moving Objects
You can skip this step if your objects are not moving. But if you want to blur moving objects, you must track them first.
Ensure the Power Window is selected, and click the Tracker tool to open the tracker window.
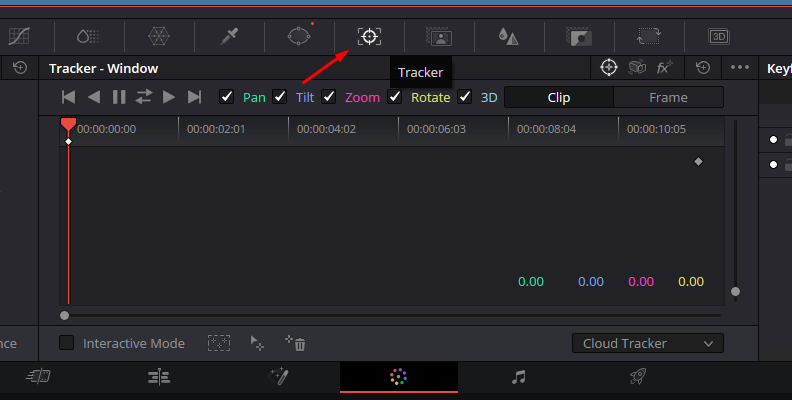
Place the playhead at the beginning of the clip and press the track forward button. Or, if you are starting on a frame where the moving object is visible, use the track forward and reverse buttons to track the object over the length of the clip. You could also track frame by frame if you need to adjust the tracking.
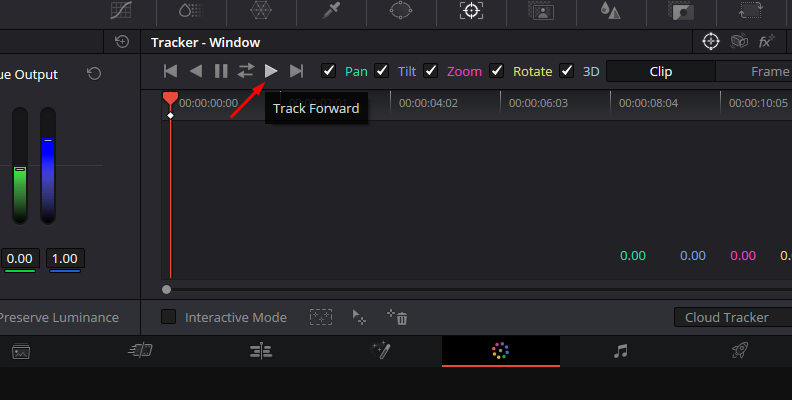
DaVinci Resolve will begin tracking the object throughout your video clip. When it's done, you can preview to ensure the tracking is correct or make adjustments.
Step 5: Apply a Blur Effect
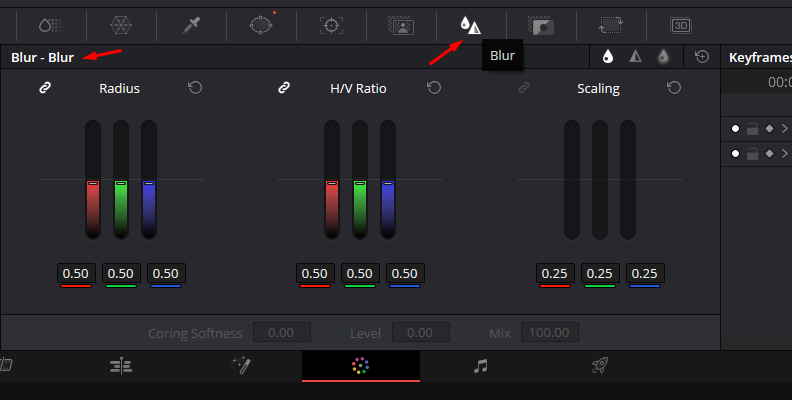
Select the blur tool from the toolbar panel and ensure you are in the Blur-Blur panel. In this blur panel, use the Radius sliders to adjust the amount of blur to apply to the object. Experiment with the H/V Ratio sliders to alter the blur effect.
If you prefer to add other types of blurring effects like Gaussian blur, mosaic blur to add the pixelate effect to a face, or another blur effect you have installed on your computer, click the Effects button next to Nodes on the top menu to open the DaVinci Resolve Effects library.
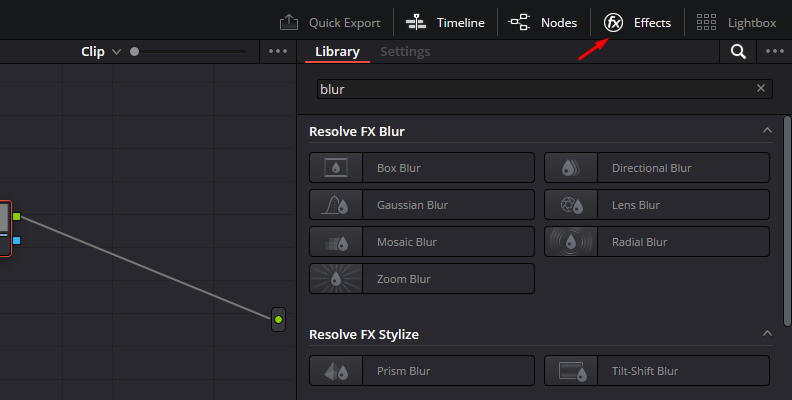
Click on the magnifying glass to enable the search bar and type blur. Select the Blur effect that you want and drag it to the node.
You can adjust the blur effect on the Settings tab to get the desired look. For example, if you add the Mosaic Blur effect, you can adjust the pixel frequency, shape, and other parameters, or if you add the Gaussian blur, you can adjust the strength and border type.
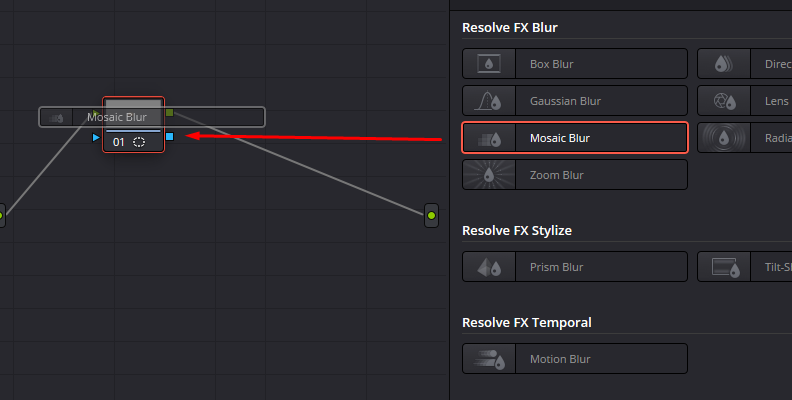
Other cool blur effects that can add an extra look to your videos and not just hide sensitive information are Gaussian blur for the bokeh effect (it's very common to blur the entire background) and Motion blur to add the effect that a subject is moving faster.
Play the video to check how the blur effect looks, then make the adjustments needed to make it look good and stay in place.
Step 6: Blurring with Multiple Objects
If you have multiple objects on the screen and can create various shapes in the same node, DaVinci Resolve will apply the same blur effect and settings to all masks equally. If you want to use a different type of blur for other parts of the image, you’ll need to create a separate node for each mask.
Right-click the node and select Add Node > Add Serial.
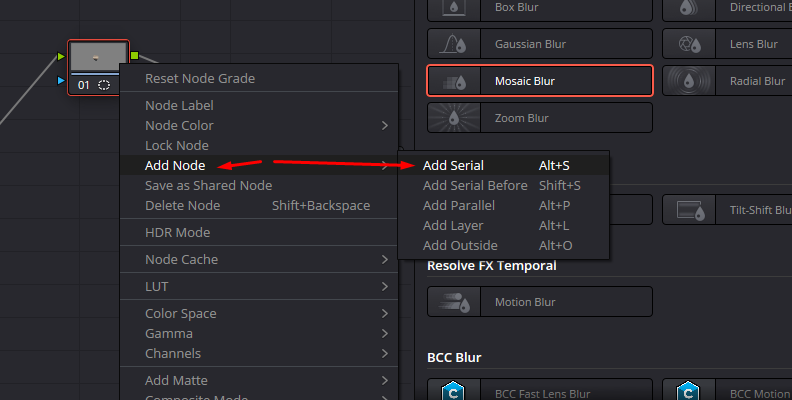
Select the new node and draw a mask using a power window. Repeat the steps for masking, tracking, and blurring. If you need to add blur to a third or more objects, add a new serial node and repeat the process.
Blur Part of a Video in DaVinci Resolve with Witness Protection ML
When you film documentaries or need to blur multiple faces in a frame, BCC+ Witness Protection ML can streamline the process.
BCC+ Witness Protection ML is a 32-bit hardware-accelerated filter featuring machine learning that automatically scans the footage and finds human faces on every video frame. Then, it generates an oval mask for every face and tracks its movement, applying a blurring effect. It makes the masking, tracking, and blurring process less time-consuming and easier to do.
To get BCC+ Witness Protection, you need the most recent version ofcontinuum
Step 1: Install Continuum
Download and Install the Boris FX Hub. Run the hub and find Continuum from the available products. Select the DaVinci Resolve OFX version and install it. Now, open DaVinci Resolve, and Continuum should be installed in your Effects library.
Import your videos to DaVinci Resolve and organize your timeline, arranging the sequence for your video project.
Step 2: Apply BCC+ Witness Protection ML
BCC+ Witness Protection ML can be applied from the Edit or Color page. Click the Effects button to open the Effects library and search for BCC+ Witness Protection ML under Open FX > BCC Match Move. Click and drag it to the clip or node if you are on the Color page to apply it.
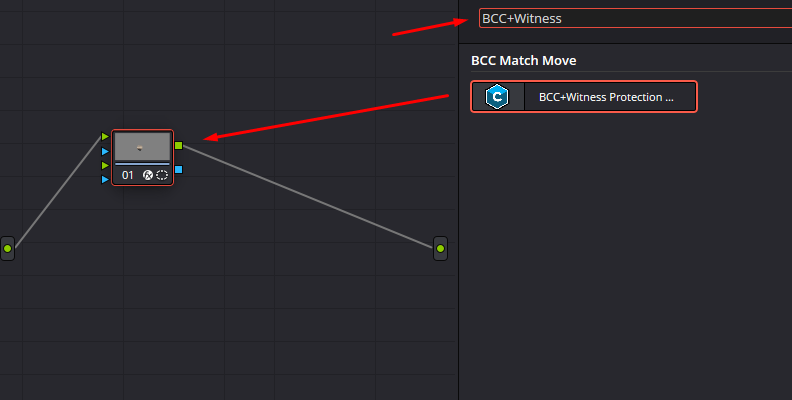
When you first apply the effect, it will take some time to analyze your footage, detect faces, and use the default settings.
Step 3: Witness Protection ML Presets
The filter comes with presets you can explore and use for your videos. Click FX Editor in the filter’s settings to launch the presets window. You have some blur, blackouts, mosaic, and tinted presets. Select one from the left panel and preview it in the preview window. To use one of the blur presets, click Apply.
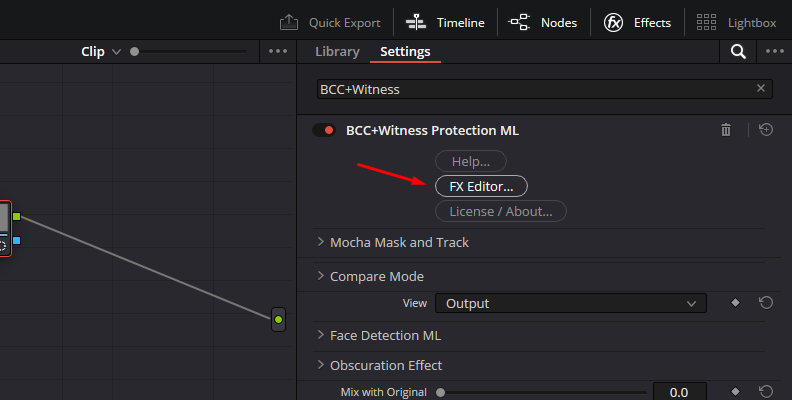
Step 4: Customizing the Witness Protection ML Filter
You may not want to use a preset or modify an existing one. To see the filter's parameters, open the Inspector panel if you’re on the Edit page or the Settings tab on the Effects panel if you’re on the Color page.
The filter is divided into group parameters for masking and tracking with Mocha Planar Tracker, a Compare Mode to preview the changes, the Face Detection ML settings, and parameters to adjust the Obscuration Effect.
Step 5: Mocha Mask and Track

The Mocha Mask and Track allows you to manually draw masks to select which part of the image will be affected by the filter. With Mocha, you can generate mattes and track objects. Then, under the Pixel Chooser / Mocha parameter, you can adjust the mask settings, such as feather, intensity, opacity, mask feather, and more.
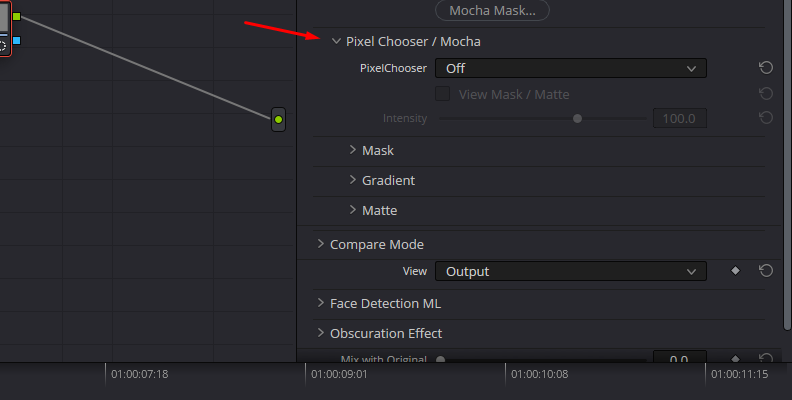
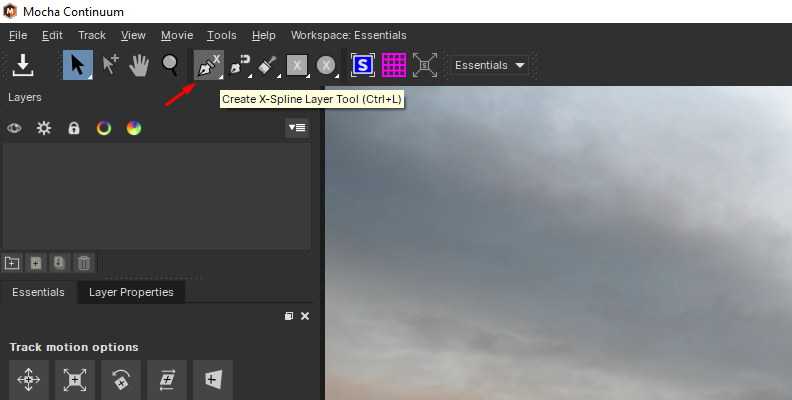
The Witness Protection ML face tracker can be disabled, and you can use the Mocha planar tracker to make and track objects manually.
Step 6: Compare Mode and View
The featured compare mode lets you compare the result with the original video. You can compare in different view modes, including side-by-side and split-screen mode. The view modes switch between render views.
There are three different render views: Output for the final output render, Matte to display the matte used by the ML face tracking, and Overlay to display the color overlay for the masks.
Step 7: Face Detection ML
In these settings, you can adjust the Face Detection ML model or turn it ON/OFF and the mask shapes generated by the machine learn model. When using the Mocha planar tracker instead of the ML model, uncheck the Enable box. Then, choose the model for Face Detection from the dropdown menu.
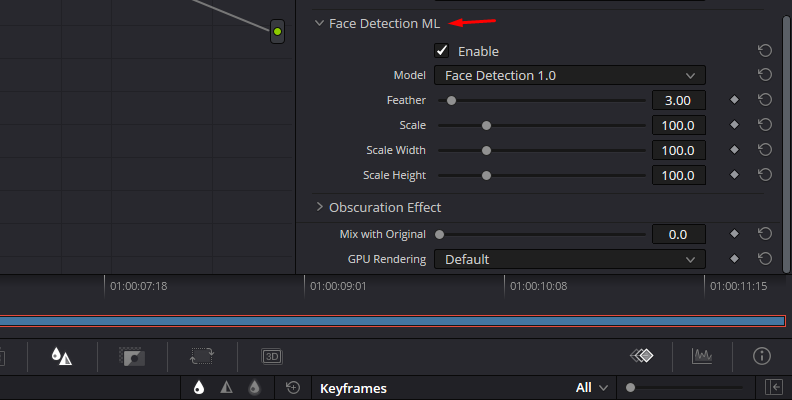
The corresponding sliders allow you to feather and adjust the mask shapes' size, width, and height.
Step 8: Obscuration Effect
The Obscuration Effect adjusts the blurring effects applied to the masks. Adjust the Blur Amount to set the level of blur for the faces. You can add a mosaic effect by increasing the Mosaic Size slider and changing the Size X and Y sliders, which will change the width and height of the mosaics.
Adjust the Mosaic Scramble to randomize the mosaics in the effect. This option shuffles the pixels, making the arrangement more random as you increase the slider. Use the Mosaic Scramble Seed to alter the value used by the Scramble tool to randomize the effect.
Use the Brightness and Contrast sliders to increase or decrease the brightness and contrast of the mask. Play with these settings to create a lightning effect that covers faces better.
You can additionally use a color over the faces. Tint Color opens the Select Color window to pick the color you want. Use the Tint Amount to set the strength of the color. You can check the Solid Tint checkbox to use the color as a solid mask.
Finally, you can use the Blend Mode dropdown menu to choose a blending mode for the obscuration effect and the source image. This gives you tools to get creative with the filter and create unique blur effects.
All that remains now is to go to the Deliver tab to render and export your final video with your desired resolution.
Final Words
DaVinci Resolve is a video editing software featuring virtually everything you need for video content, short films, movies, and many other video projects. Once you get familiar with the tools and workspace in DaVinci Resolve, you will improve your workflow and blur parts of the image quickly.
If you want to improve your workflow even more when you need to blur faces, the BCC+ Witness Protection ML filter makes things easier by just applying the effect and letting it work in the background. You'll never struggle to blur faces or the fear of uploading an unblurred face online.
Good luck!
FAQ
How to blur an object in the video for a specific time length?
If you want to blur part of the image but for a specific time length, you must add keyframes to the blur effect.
After tracking the object and applying the blur effect, go to the Keyframes panel on the bottom right side of the screen. Display the Corrector 1 option to see all the options for that node. If you have more serial nodes, they will appear listed here, so select the one you want to change.
If you added Blur from the blur tab on the color section, search for the Color Correction option in the list. If you apply an effect, it will appear on the list with its name, for example, “Gaussian Blur.”
Place the playhead where you want the blur effect to stop, click the diamond symbol next to the blur effect's name, and adjust the blur intensity or Radius to zero. This will gradually reduce the blur until it reaches the keyframe's position.
If you need the animation to be different or keep the intensity until the last moment before removing it, add extra keyframes to maintain or slow the blur reduction.


