


Experienced video editors can transform long shots into dynamic videos filled with emotions. Most of the time, transitions can help enhance the quality of your footage, allowing you to switch between two clips seamlessly and create engaging visual content.
Every video editing software has basic and more advanced transition functionalities that you can master as you work on more videos, and DaVinci Resolve has become a favorite among video editors thanks to its versatility and powerful tools. The software comes in two versions: DaVinci Resolve and DaVinci Resolve Studio, the latter version coming with more features for advanced users.
In this step-by-step guide, you'll learn how to add video transitions in DaVinci Resolve and apply them to multiple videos, as well as use external plug-ins to make your content look even more professional.
Let’s dive in!
How to Add Transitions in DaVinci Resolve
Every video editing software allows you to add transitions, but DaVinci Resolve transitions make the process exceptionally easy to follow. You'll need at least two adjacent clips or one long video to cut into different clips and a set of transition effects. DaVinci Resolve has plenty of transition effects, more than enough for most video projects.
Step 1: Set Up Your Project
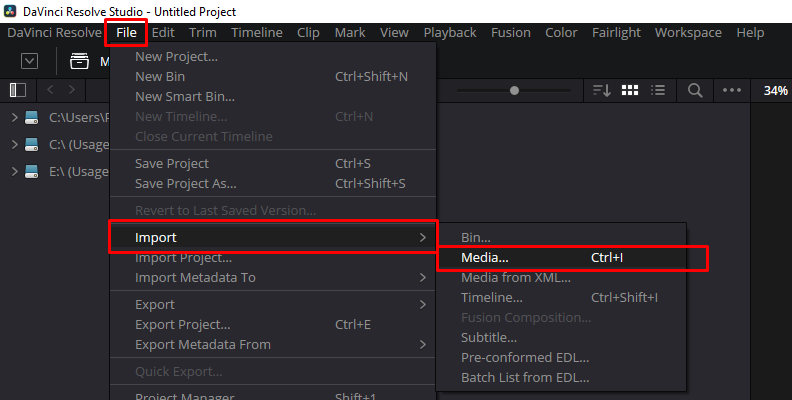
Open the project you're working on that needs transitions, or create a new project if you’re starting fresh, and import the media files. Go to the main menu File > Import and locate the media files on your computer. Click Open to bring all files into DaVinci Resolve.
![]()
Step 2: Create a Timeline
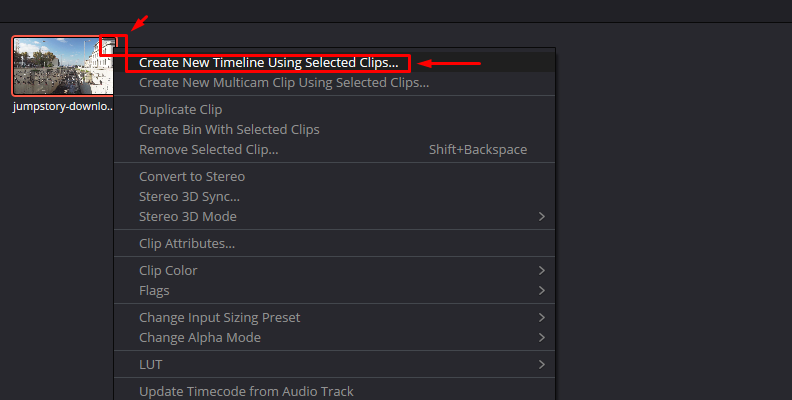
Select the video clips you want to add to the Media Pool. Right-click on any clip from your selection and choose "Create New Timeline Using Selected Clips" from the drop-down menu. Name the timeline in the pop-up window and edit the number or tracks as needed. Click Create to set your new timeline.
![]()
Step 3: Edit the Video and Arrange the Clips
Organize your video clips the way you want your story to progress. Take the time to organize and edit your footage, bearing in mind that parts of the video will disappear as you apply the transition effect.
Step 4: Apply DaVinci Resolve Transition Effects
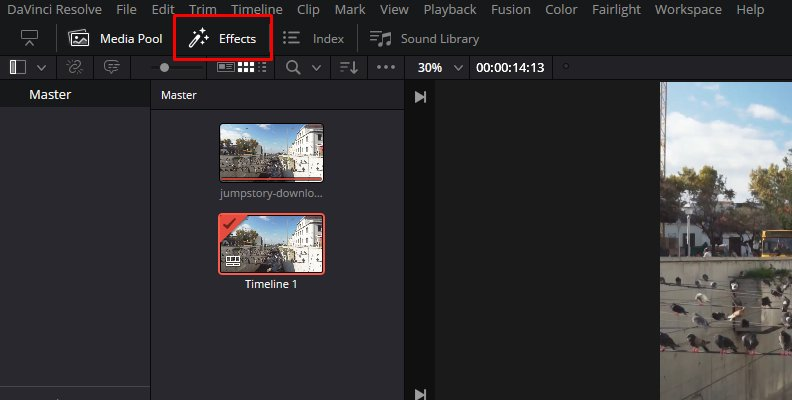
Switch to the Edit page and then click on Effects in the upper left corner of the screen (the magic wand icon.)
![]()
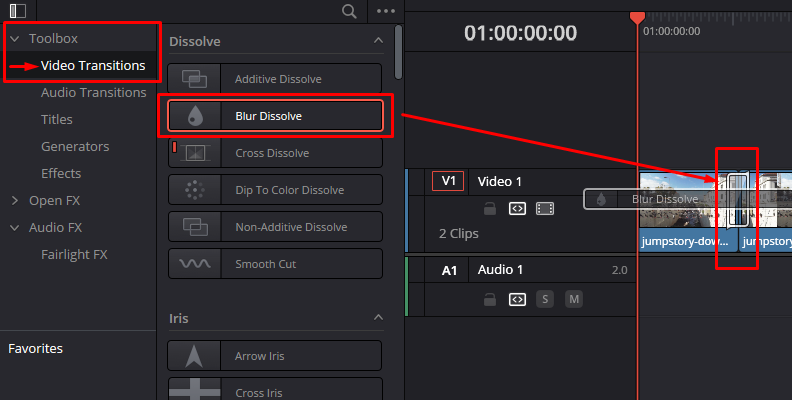
Video transitions are under the ToolBox > Video Transitions panel. DaVinci Resolve transitions will appear in the library, where you can choose among different types of effects.
![]()
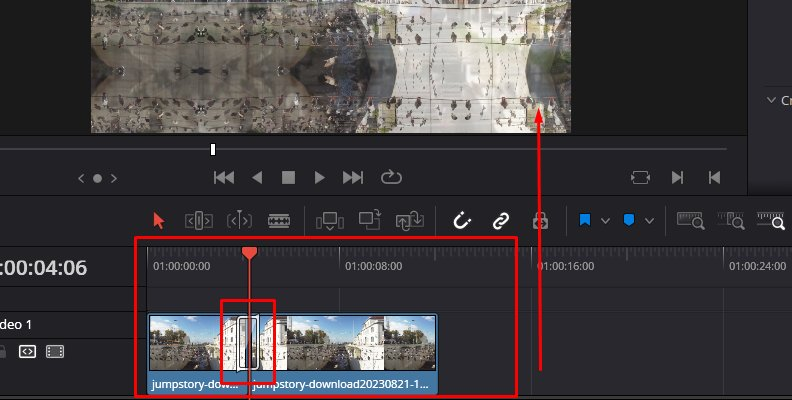
You can preview transitions if you hover your mouse over one and move the cursor left and right. Drag your desired transition between two clips, and a small transparent box will appear over the clips. If you can't see it, zoom in on your timeline.
![]()
Step 5: Edit Transitions
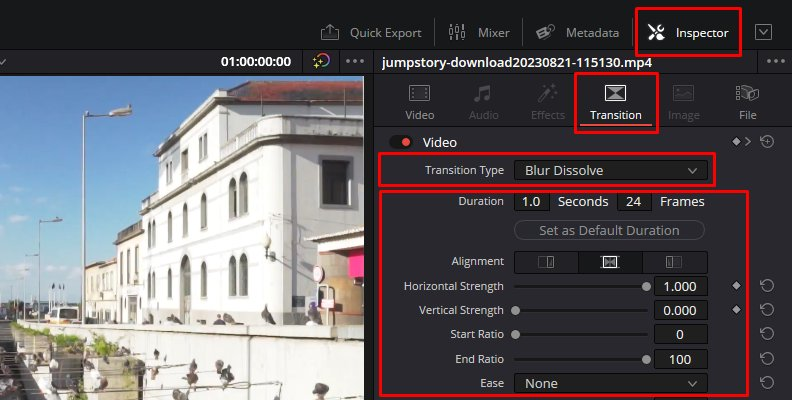
You can easily customize your transitions in DaVinci Resolve. Select the transition box and drag the edges to change the duration of the effect. You can also open the Inspector panel on the top right corner and click on the Transition tab to find more settings to adjust. Adjust these settings to craft unique effects.
![]()
You can save the transition changes you made and create a new preset for the future. Right-click the transition and select Create Transition Preset in the pop-up menu. Name the new preset, and click OK. You will find your transition presets under the User category in the transitions library.
Step 6: Remove or Replace a Transition
Remove a transition by selecting it on the timeline and pressing Delete. If you prefer to replace it, drag the chosen transition over the previous one, which will erase the previous one, and apply the new transition to the timeline.
Finally, preview your video to see the final result. DaVinci Resolve allows you to save your favorite transitions by right-clicking it and selecting Add to Favorites. Or set a new standard video transition that DaVinci Resolve will use when applying default transitions.

Add Transitions in DaVinci Resolve with Boris FX Plug-ins
DaVinci Resolve has many transition effects, but you can also further expand your palette with external plugins. Boris FX plug-ins offer professional suites that include stylish transitions that’ll turn your footage into a striking motion picture.
Step 1: Get Boris FX Continuum or Sapphire
Download Boris FX plug-ins from the Continuum and Sapphire download page. Select your host or standalone version and operative system. You'll have to either register for a new account or sign in with an existing one.
Step 2: Create a Project in DaVinci Resolve
Create a new project and import video files into DaVinci Resolve from File > Import > Media. Then select all the clips you will use for your video project, right-click on them and select Create New Timeline Using Selected Clips, type a name, set the number of audio and video tracks, and click Create.
Step 3: Edit Timeline
Edit your clips and organize them across the timeline to create the desired sequence. As you arrange your timeline, you should be able to identify the type of transition you envision.
Step 4: Add Boris FX Transitions in DaVinci Resolve
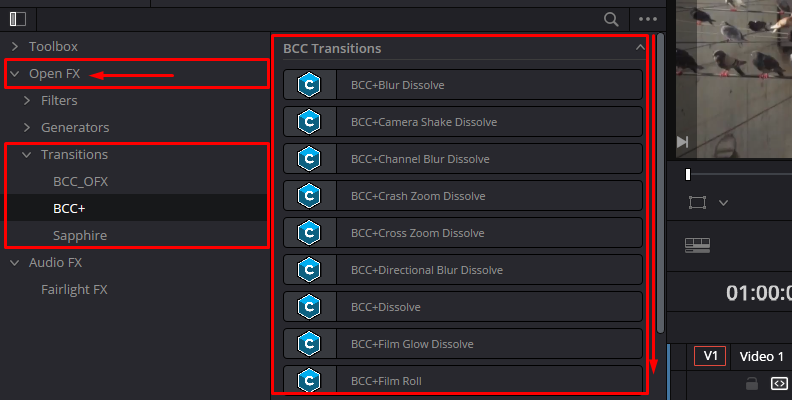
In the Edit page, select Effects to open the effects library. All Boris FX transitions are under Open FX > Transitions.
![]()
Preview transitions by hovering the cursor over it. When you find one that you want to add, drag it to the clips. It will appear as a transparent box over your clips like a DaVinci Resolve transition.
Step 5: Edit Boris FX Transitions
Select the transition you want to edit and drag the edges to change the duration. Edit more settings by opening the Inspector panel, then click the transition tab.
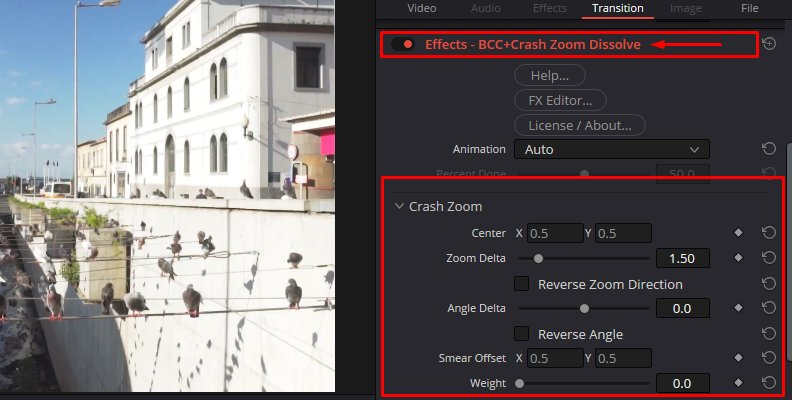
Scroll down in the transitions menu to see the Boris FX transitions settings. Each transition has parameters you can personalize to your needs, and you can modify duration, color, form, animation, and more.
![]()
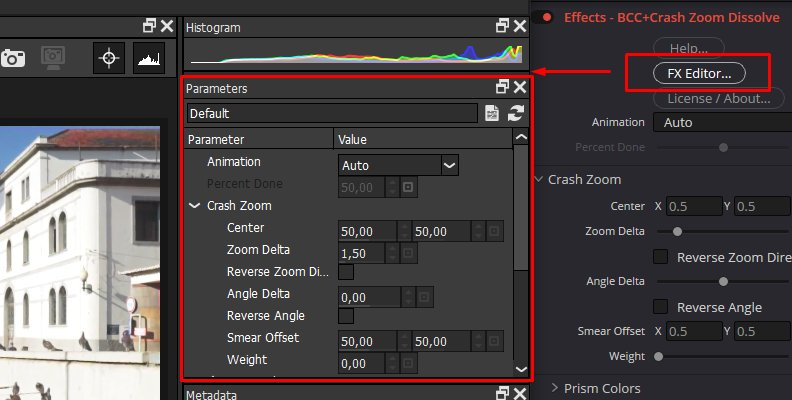
Additionally, Continuum has multiple presets for transitions: click the FX Browser or FX Editor, and select from the presets you find there. You can then make further adjustments in the Inspector panel of the preset you applied.
![]()
Playback the video to see how transitions look and make more adjustments if needed, or replace them with a new transition effect.
![]()
Step 6: Remove and Replace Boris FX Transitions
Remove Boris FX transitions in DaVinci Resolve by selecting the transitions and pressing Delete. To replace a Boris FX transition, drag a new one on the existing transition.
Adding Multiple Transitions
It’s not uncommon to receive multiple clips from a client, and adding transitions one by one when you have dozens of video clips in the timeline can be chaotic and time consuming. Streamline your process in DaVinci Resolve by adding transitions to multiple clips simultaneously.
Step 1: Set a New Standard Transition
DaVinci Resolve will pick the standard transition and apply it to all clips, but you can also change the default transition if you want. To do it, go to Effects > Toolbox > Video Transitions. Find the transition you want to apply to multiple videos, right-click it and select Set As Standard Transition. A red line will appear on the new default transition.
Step 2: Add Transitions
Select all the clips in the timeline where you want to add transitions. An easy way to select all clips is with CTRL + A in PC or CMD + A in Mac. Then go to the main menu Timeline and choose to add a transition or use the keyboard shortcut CTRL + T or CMD + T. Be careful when adding transitions this way because it will add both audio and video default transitions. To avoid audio and video misalignment, choose to add Video Only Transition (ALT + T or Option + T) or Audio Only Transition (Shift + T).
Final Words
DaVinci Resolve is a great video editing software that can help both beginners and advanced users with basic and simple transitions for quick edits, the option to add the same transition to multiple clips for a quick process, and advanced tools to create unique transitions for professional work.
DaVinci Resolve features enough transition effects to meet all client or personal video project requirements, but if you’re looking for cutting-edge tools that can upgrade your content, look no further than Boris FX Continuum or Sapphire, which can take your videos to the next level with seamless transitions.
FAQ
How Do I Add Custom Transitions in DaVinci?
You can create custom transitions in DaVinci Resolve with Fusion.
- Add cross-dissolve or any transition to your clip.
- Right-click the transition and select Convert to Fusion. It will allow you to open the transitions on the Fusion page to edit it. Right-click it again, and click Open in Fusion Page.
- Activate the node view in Fusion by clicking on Nodes at the top of the screen. If your transitions are grouped together, right-click it and select Ungroup.
- You can add more nodes like Transform and Blur to customize your transitions. To access all your tools, press Shift + Space.
- Select each node and open the Inspector panel. You can fine-tune the effect from there to make unique customs transitions.
- Arrange the nodes and select them all. Right-click them and click Macro > Create Macro. Name your macro and verify all the settings are correct. In the Macro window, go to File and select Save As.
- To import the custom transition to your transition library in DaVinci Resolve, open the effects library Templates > Edit > Transitions. Locate the folder where you save the Macro and drag it from your Explorer or Finder into the transition library in DaVinci Resolve.
- Switch to the Edit page, and open the Effects library. Your custom transition should be under Toolbox > Video Transitions > Fusion Transition. Just scroll down until you find it and apply it to your clips.
Can I Apply Multiple Transitions to a Single Clip in DaVinci Resolve?
You can apply multiple transitions from the Fusion page. Create a custom transition where you combine several transition effects. Then create a Macro and import it back to the Effects library to add it to the Edit page to a single clip.


