


Dealing with imperfect conditions on set has been a longstanding challenge in cinematography and photography. Often, you may wish for a calmer day and brighter sunlight on set, only to be met with cloudy weather or wind that's beyond your control. Waiting for perfect conditions can cost significant time and money, especially when large production crews are involved.
Fortunately, modern video editing software and expertly developed plug-ins now make it possible to add and combine various elements to achieve the desired look and feel in the final product, a feat once considered impossible.
In this guide, we'll walk you through the process of adding a rain effect to your video or photo. We'll also explore the key benefits of doing so, along with some professional tips to enhance the realism and immersion of your results.
Without further ado, here's what you need to know.
How to Add Rain to a Video With BCC Rain
The BCC Rain Effect is part of thecontinuum
There's also a free version of Continuum available for download, which is a great way to try out all the filters, presets, transitions, effects, and everything that the pack has to offer, for free. Keep in mind though that your content will be watermarked when using the free version of Continuum.
With that said, let's take a look at how you can add light rain, falling rain, a rain overlay, or anything else you may need to enhance your content as a video editor using the BCC Rain effect in Premiere Pro in this detailed step-by-step guide.
Step 1: Launch Premiere Pro and Create a New Project
The first step is to launch the software you'll be working with, in our case, Premiere Pro. Although Premiere is mostly used as a video editor, you can use it to apply various effects and filters to photos too.
Given you've successfully installed Continuum for Premiere Pro, you should be able to find all filters, tools, transitions, and everything else offered by the pack within Premiere's "Effects" tab/panel.
Once you launch Premiere, create a new project using the button on the home screen. We recommend a new project over working on an already-existing one.

Step 2: Import the Video/Photo You Want to Add Rain to
Once you create a new project, it's time to import media. To have any material to work on/with, navigate to the "Project" tab within Premiere and right-click anywhere on the empty area, then choose "Import" from the list of options.
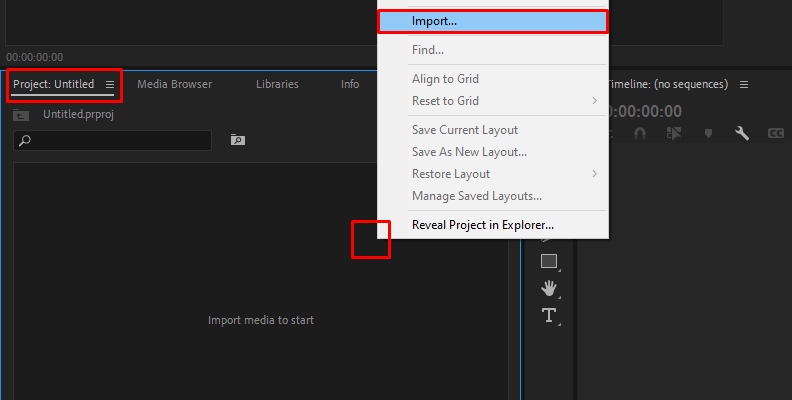
Find the files on your PC using your operating system's explorer and import them within Premiere Pro.
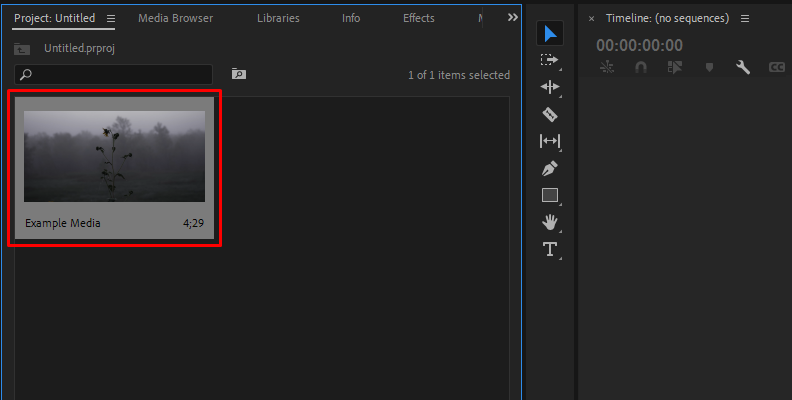
You will see all files that you've chosen to import within the same "Project" tab.
Step 3: Create a Sequence of the Media You Want to Add Rain to
Before you can start working on any files, you first need to have a sequence. You can make a sequence of the video or photo you wish to add a rain effect to by clicking on it and dragging it to the timeline area.
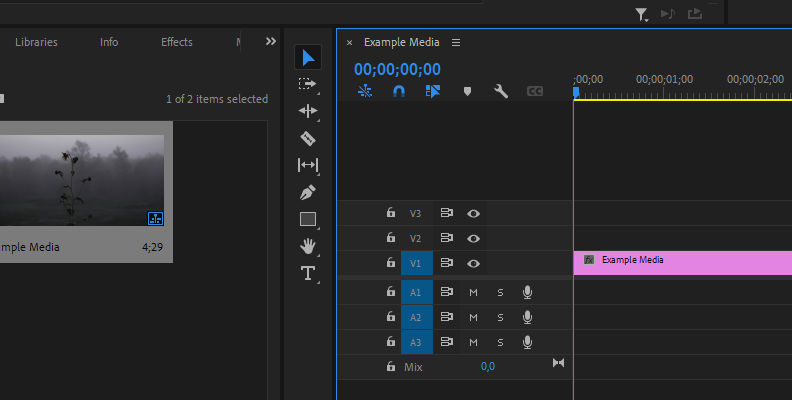
Once you have the sequence, you can trim it, make cuts, apply effects, or do any other edits you need. You can also rename the sequence, which is good practice when working on more complex projects.
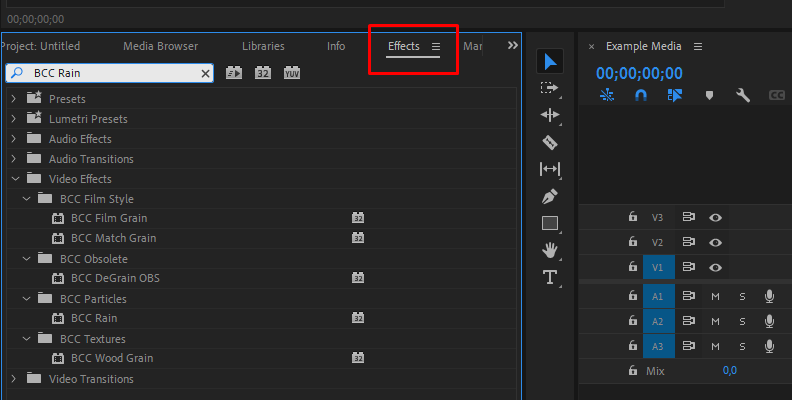
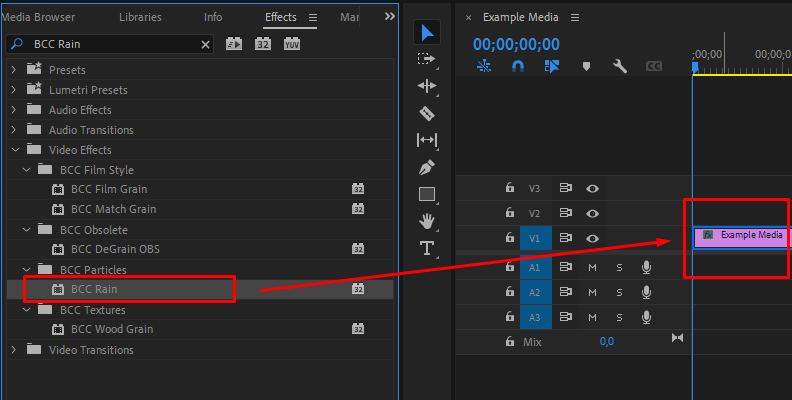
Step 4: Find the BCC Rain Effect and Apply It
To add any effect to a video or image in Premiere Pro, click on the "Effects" tab to open it, then use the search bar to quickly find what you need instead of opening all folders separately.
In our case, you need to type in BCC Rain and find the effect on the list.
Then, simply drag and drop the effect over the video/image on your timeline.
The filter will be automatically applied. However, you may not instantly get the results you want or need for your specific case.
Step 5: Modify Settings and Parameters
All the magic happens once you select the video/image on your timeline by clicking it and then accessing the Effect Controls panel located in the top-left corner of your screen in Premiere Pro.
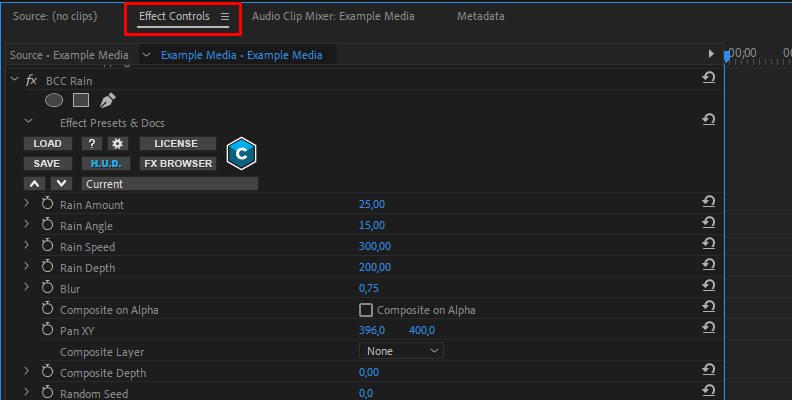
Here, you can use the various offered parameters and settings to adjust how much rain you want to have, what the rain effects should look like, and more.
Rain amount, rain angle, rain speed, and rain depth are just some of the parameters that will make a large impact on your overall effect. Once again, you can find a separate explanation for each setting on the BCC Rain Effect webpage.
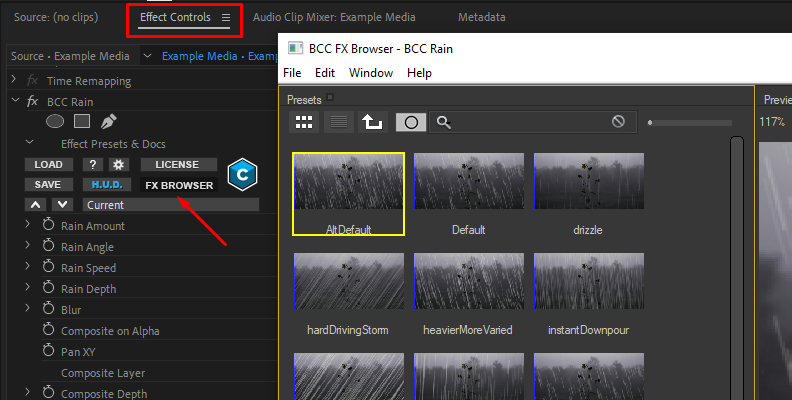
You can also access the "FX Browser" by clicking the button as shown in the image below, which will open a list of presets that you can use.
When you're done and like the way your video looks, save the changes and export. You can always return to your project to make changes later.
Pro Tips When Adding Rain to a Video
If you want to add rain effect filters to your video, there are some things you can do to make the whole look a bit more immersive and realistic. For example, sound effects will have the most significant impact.
Whether you're just practicing or working on a film project where you didn't manage to get rain during the recording set, finding an adequate sound effect that matches the rain speed and distance and applying it will have the most impact on realism.
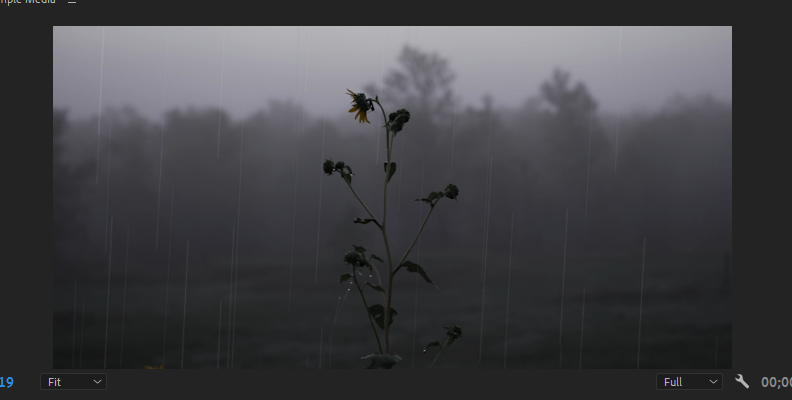
Next, you can ensure the footage you're using can realistically have rain in it. For example, try to avoid footage where the sky is fully clear and it's sunny, as that can ruin the immersion. That said, you can also adjust the lighting in your footage to better match that overcast sky look. Usually manipulating the brightness parameter and reducing saturation will help with this.
Then, you can add multiple layers of rain. Some closer and some further away from the camera. This will enhance realism. While at it, adding motion blur will also help a lot, as raindrops fall quickly and we cannot see them clearly because of it.
Adjusting the angle and speed should also be done according to the environment presented to the viewer. If it looks windy, the rain angle and speed should correspond with that. You can fully reduce the rain speed if you are going for the slow-motion look often seen in atmospheric YouTube videos.
Finally, if you can simulate wet surfaces, that will add to the immersion even further. Streets cannot look fully dry if it's pouring rain on the video. This is usually a task for more advanced video editors, but still very achievable using modern tools.
Final Words
That covers everything you need to know about adding rain to a video and making it as immersive and realistic as possible.
Hopefully, this will help you take your editing work to a whole new level whenever you're challenged with such a task in the near future.
Thank you for reading, and best of luck!


