


Improving the viewer's experience, making your content more immersive, and showcasing your editing skills can all be achieved by incorporating visual effects into your videos.
There are numerous ways to enhance your videos with classic visual effects worth mastering, and motion blur is one of the prime examples.
Motion blur is one of the most widely-used visual effects in modern editing and an essential tool in every editor's toolkit. It has infinite use cases and should not be overlooked by anyone wanting to take their editing game to the next level.
In this tutorial, we will demonstrate how to properly use motion blur in DaVinci Resolve, so without further delay, let's dive straight into it.
What is DaVinci Resolve Motion Blur Effect?
As explained in one of our other Motion Blur Guides, what's important to understand is the most popular use case of this effect, which is making movement seem more natural.
Whether applying it to an object moving quickly through time and space or using it to create more realistic camera movement, knowing how to use this effect correctly will take your video editing to a whole new level.
It's also important not to confuse the motion blur effect with the other blur effects available in DaVinci Resolve, like the gaussian blur, radial blur, zoom blur, and others.
Motion blur is a special effect that can add an artistic touch to your videos by blurring particular objects in the scene. Alternatively, it can enhance realism by creating a natural blur during camera movement. It has some functional uses too, like blurring faces and license plates for when you want to protect someone's privacy in one of your videos.
There are also some unconventional methods of using motion blur, for example, a "streaking" effect, a blurry timelapse of cars going down a highway, or stars moving in the sky.
Whether your aim is to enhance the visual appeal of your footage or achieve a specific effect, mastering the application and manipulation of motion blur is an essential skill for video editors. In the following section, we will guide you on accomplishing this in DaVinci Resolve.
How to Add Motion Blur in DaVinci Resolve
Adding a motion blur effect in DaVinci Resolve is simple, but one thing to note is that the process is different based on the software version you have. If you have the free version of DaVinci Resolve, this section covers the steps you need to follow to apply motion blur to your videos. For the studio version of DaVinci Resolve, skip to the next section below this one.
So, once you open DaVinci Resolve on your PC, click on the Media tab to open the section where you can import the clips you want to add motion blur to.

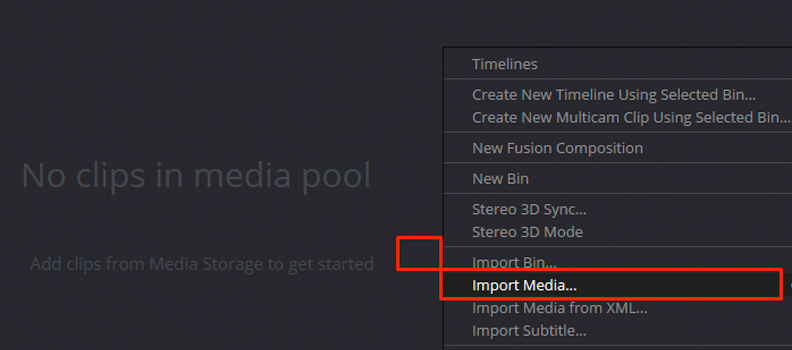
Right-click an empty area within the Media tab and choose the "Import Media" option from the menu. Choose your clips and wait for the import process to end.

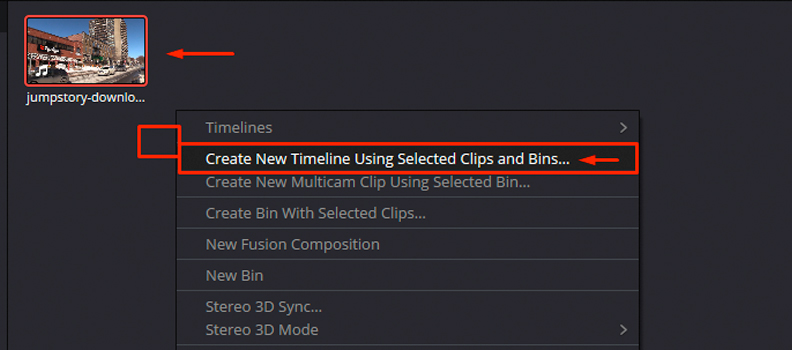
Now you should see your video clips in the media panel. Choose one or multiple, then right-click them and select the "Create New Timeline Using Selected Clips and Bins" option from the menu.
Next, double-click the timeline you just created to open it, then click on the Fusion tab.
Once in the fusion tab, use the "Shift" + "Spacebar" key combination on your keyboard to bring up the menu. In it, type in "Optical Flow" and add it. You may also skip adding Optical Flow, but it makes the overall result better.
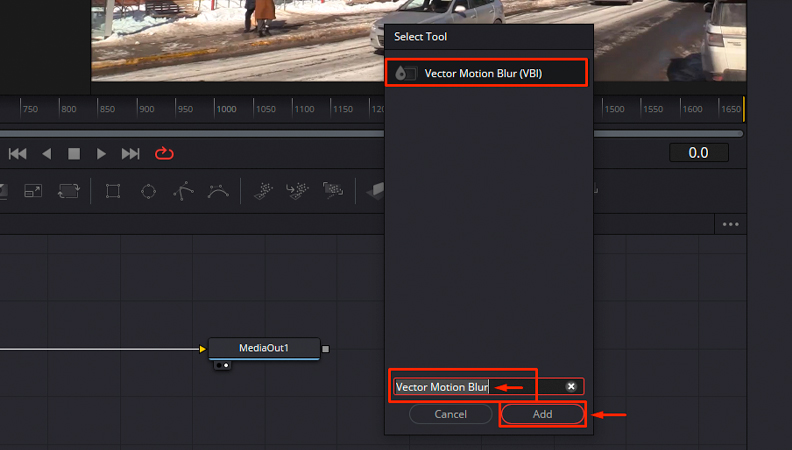
Bring up the menu again and type in "Vector Motion Blur" then add it. You can use the regular Motion Blur effect, but we recommend Vector Motion Blur as it's overall better than the other motion blur effects and is our go-to DaVinci Resolve blur option of choice when taking this approach.
When finished, your nodes should look like this.

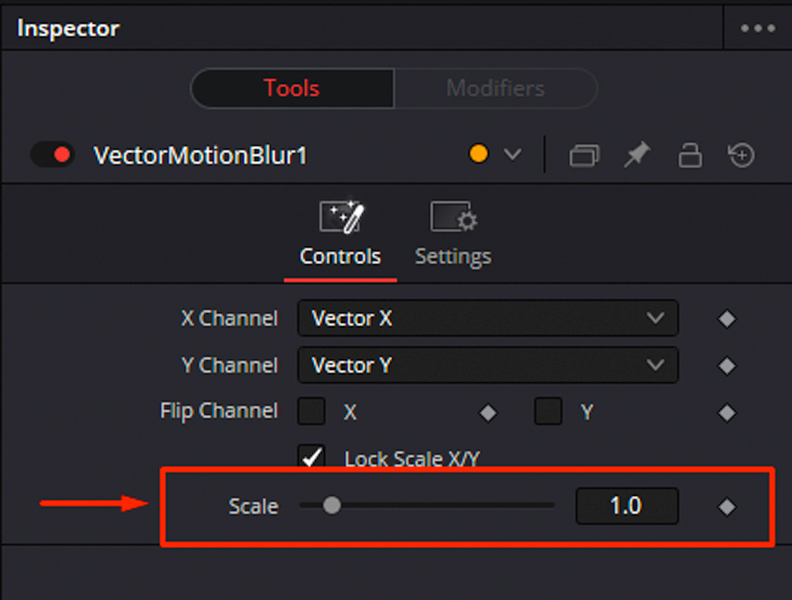
The last step is to click on the Vector Motion Blur node to open the Inspector panel for that specific effect, then adjust the settings based on your preference and content type.
A good starting point would be to adjust the scale setting which is basically the overall motion blur value and preview the changes, then move to the other motion blur settings if you need more personalization.
That's all there's to it when it comes to adding the motion blur effect within the free version of DaVinci Resolve.
How to Add Motion Blur in DaVinci Resolve (Studio)
This section covers the required steps to add motion blur in the paid, studio version of DaVinci Resolve. If you have the software purchased and licensed, follow the steps below to add motion blur effects to your video clips.
Create the Project, Import Media, and Create a Timeline
Open DaVinci Resolve, load up a project, and import video material into your timeline. Then, create a timeline using one or multiple clips that you imported.
![]()
To do this, click on the Media section, then right-click an empty area with it and select which clips to import.
![]()
Finally, create a timeline using one or multiple clips you imported by selecting a clip (or multiple) using the left mouse button, then right-clicking an empty area and choosing the "Create New Timeline Using Selected Clips and Bins" option.
![]()
Find the Effect and Apply it to Your Video(s)
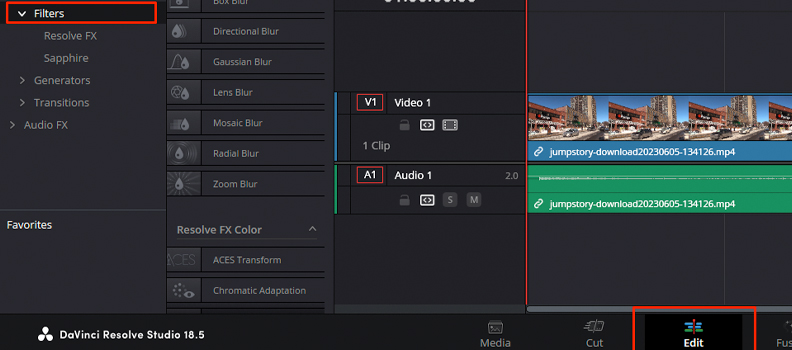
Click on the Edit button in the bottom menu to open the Edit view, as we were previously in the Media view. Then, expand the Filters section on the left, as shown in the image below.
![]()
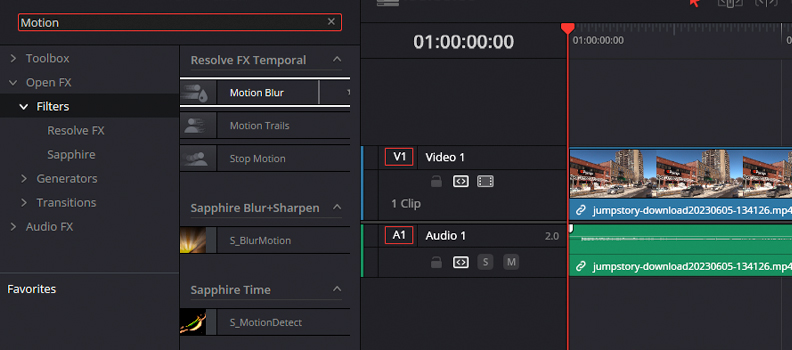
We'll now use the search bar function to find our motion blur effect quicker through our effects library.
So, click on the search bar, then type in "Motion" and select Motion Blur which should be shown as a result under the "Resolve FX Temporal" section along with other motion effects. Drag and drop it over the video on your timeline.
![]()
Customize and Adjust the Effect Parameters For Your Needs
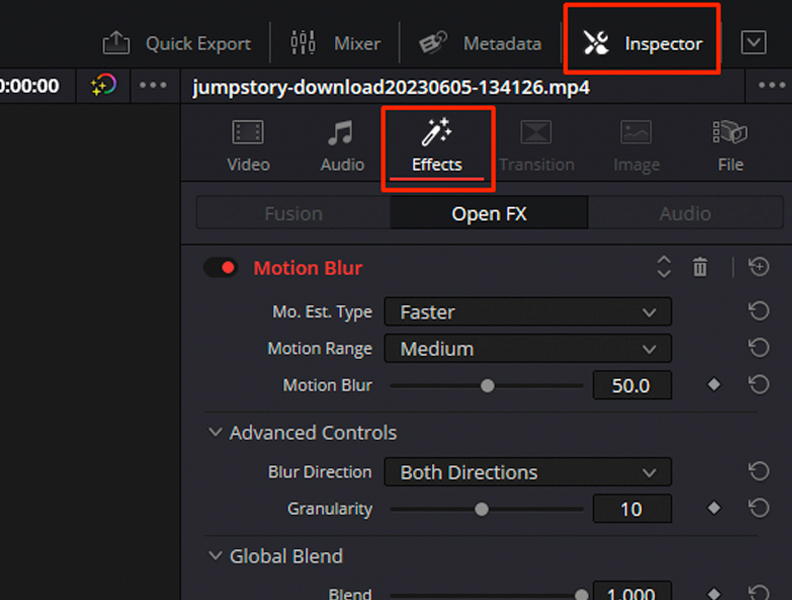
The last step is to customize how this motion blur looks on your video, and for that, we'll open the Inspector tab in the upper-right corner, then click on the Effects section where we can find various parameters for the effect we just applied.
![]()
Once again, during this step, you can change the motion blur value, direction, type, and more, all depending on your content type and needs.
Combine this effect with other ones from the effects library if you want more creativity within your videos, or just leave the final result as it is with a quality motion blur that's more than enough in many cases.


How to Add Motion Blur in DaVinci Resolve with Boris FX Sapphire
Adding motion blur effects and other visual improvements to your videos is always easier when using a renowned plug-in known for its quality and simplicity.
For this specific task, we'll be using the industry-leading Sapphire pack by Boris FX. You can find a free version of Sapphire as a trial on the official website.
How to Add Motion Blur in DaVinci ResolveOnce you download and install the pack, all filters will be available to use, including motion blur, which is the primary focus of this tutorial.
Applying the Effect to Your Video(s)
So, to add motion blur to your video clips within DaVinci Resolve, load up the software, create a project, import a few video clips, and create a timeline using them.
Then, use the search bar to find the effect within the effects library. Type in "Motion" or "S_BlurMotion", find the motion blur by Sapphire on the list of other effects, and drag and drop it over your video.
It will be immediately applied and you will be able to tell the difference right away.
![]()
Modifying the Values & Parameters
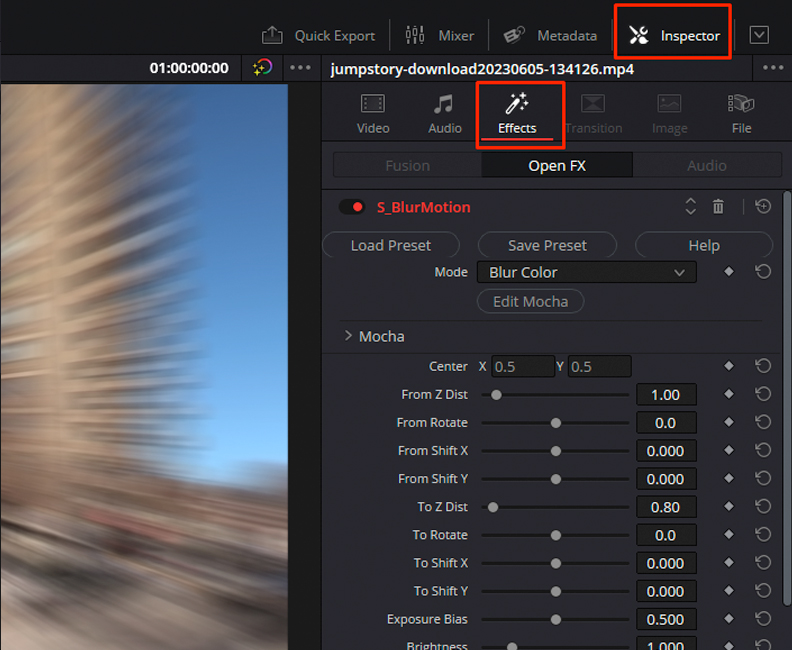
The last thing to do is to use the Inspector panel to customize the many available parameters according to your needs.
So, click on the clip on your timeline that you just applied the Sapphire blur to, then in the upper-right corner, select Inspector, and click on the "Effects" tab if it's not automatically selected.
![]()
Finalize your changes by modifying a broad list of settings, including presets.
When done, preview the changes and export your video. That's all there is to it when it comes to adding motion blur using Sapphire by Boris FX.
This approach offers a lot more customization options, crucial for editors working on more complex and serious projects, professional films, and high-production-value content.

Final Words
You now have all the necessary information on the multiple available approaches to adding motion blur in Davinci Resolve. This tutorial should enhance your video editing skills significantly since mastering this commonly used effect is crucial, and you can now use it with confidence.
It's worth noting that another viable option would be to use different software you are more familiar with. For example, add motion blur to your footage within Premiere Pro before importing the video into DaVinci for further editing. This is particularly useful if you have paid plug-ins installed in another workspace.
Regardless of your approach, this tutorial guides you through the steps of adding motion blur in DaVinci Resolve seamlessly, and you should also keep in mind that if you have Boris FX plug-ins purchased, you can use them with various hosts, as they're compatible with all modern, popular video editing software.


