If you want to make your videos look like timeless films, with that dusty retro look typical of classic cameras and film stock, you need to add film grain.
Today, you’ll learn how to add film grain in Premiere Pro to make your video footage look more cinematic and artistic.
Let’s dive in!
What is Film Grain?
Film grain is the small, gritty particles you see in films, old movies, and old photographs. It gives video footage a cinematic touch and can give the analog vibe of a 20th-century movie.

The origins of film grain are tied to the birth of photography and film. The grain was caused by the material and chemicals used in the film development and appeared in the picture as specks in black and white.
To add grain to digital photography, you can set your digital camera's ISO higher or use video editors like Adobe Premiere Pro. Using video effects and filters, you can achieve a film grain effect for your videos and photos.
Let’s look at the following guide to add film grain in Adobe Premiere Pro.
How to Add Film Grain in Premiere Pro
There are two methods to add grain to your video footage in Premiere Pro. I’ll show you the steps to add film grain with the Noise Effects and add them using grain overlays that you can download or purchase from other sources.

Adding Film Grain with the Noise Effect
The Noise filter is a built-in effect included in Premiere Pro that adds a layer of noise to your video footage.
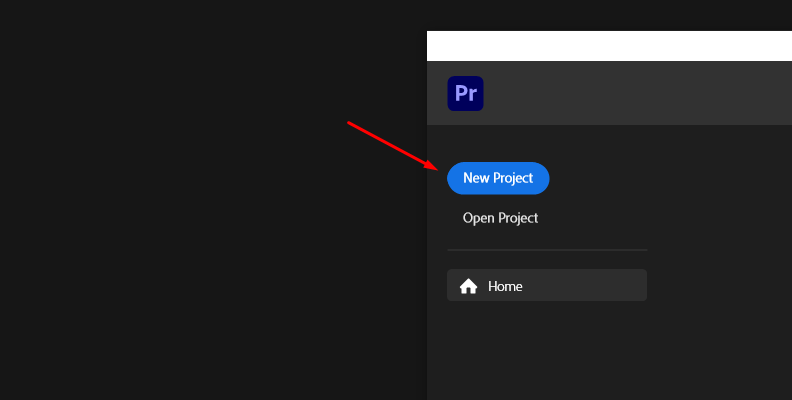
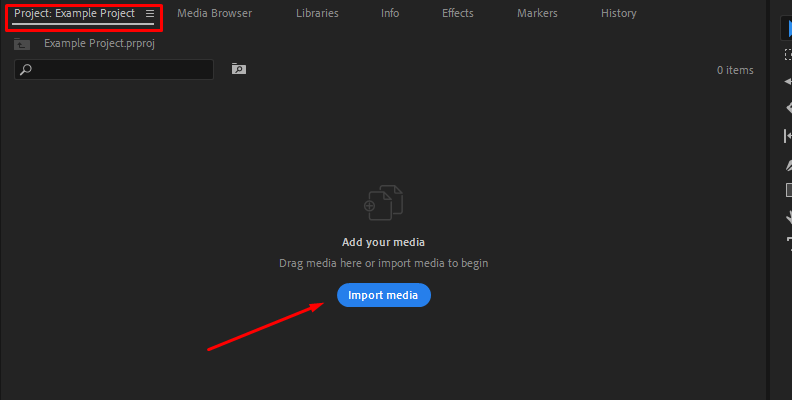
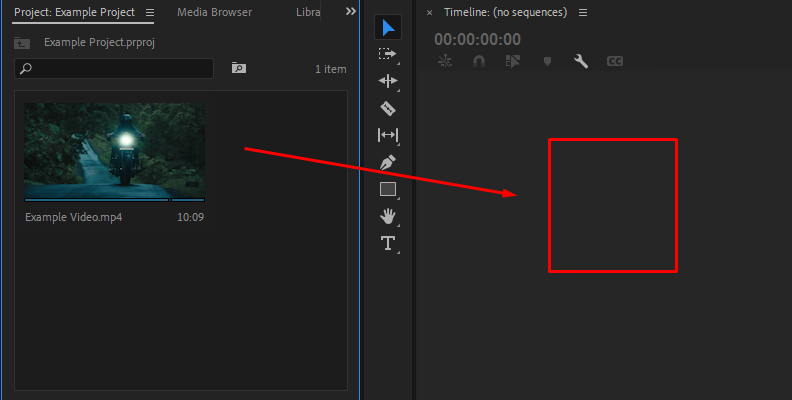
Step 1: Import the video into your project and create a new sequence in the timeline. It’s best to make all the edits before applying the Noise effect, especially when working with color and other image restoration tools.
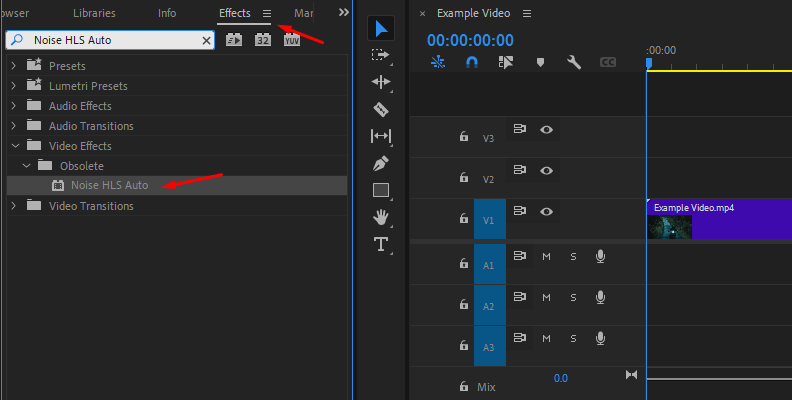
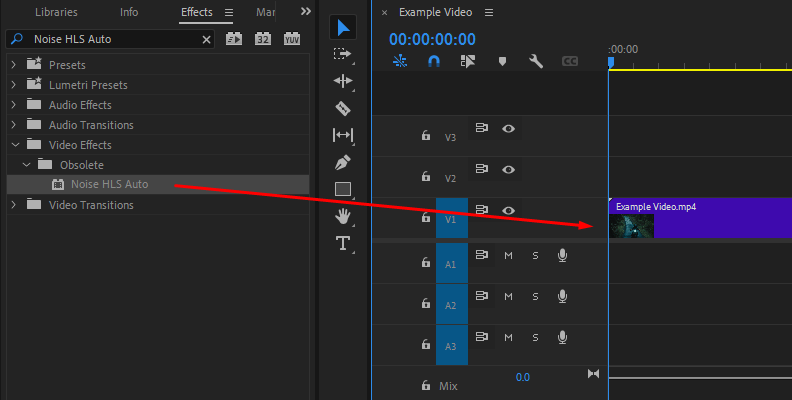
Step 2: Navigate to the Effects panel in Adobe Premiere Pro and use the search box to type “Noise HSL Auto.” Click and drag the effect to the clip in the timeline. Then, open the effect controls panel and scroll down to the Noise HSL controls. There, change the Noise parameter from Uniform to Grain.
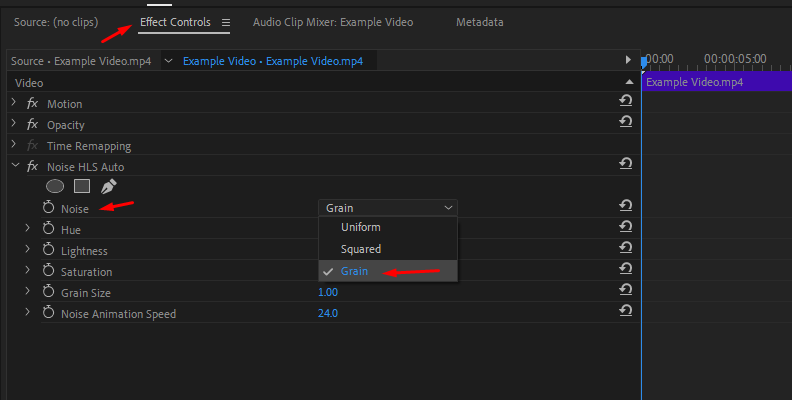
Below are some parameters you can adjust, such as Hue, Lightness, Saturation, Grain Size, and Noise animation. Start by increasing the lightness to make most of the grain visible over the image. Start at 20% and try increasing or decreasing until you find a value you like. Play with the other settings to find creative looks for each of your videos.
Add Film Grain Using a Film Grain Clip Overlay
You can download free film grain overlays to use in your video projects. You'll find free film clips on the Internet, even those resembling real film stock. The following steps will show you how to add a film grain clip to add grain to your videos.
Step 1: Import the video and the film grain clip into the sequence. Place the film grain clip above your clip.
Step 2: Open the Effect Controls panel, scroll to the Blend Mode parameter, and change it to Overlay. This will make the top clip transparent and appear over your original clip. Select Opacity and adjust the percentage to set how much grain you want in your clip.
If you need to extend the length of the film grain overlay clip, you can copy and paste it into the same track as the original clip’s length.
Add Film Grain in Premiere Pro with BCC Film Grain
BCC Film Grain is an auto-animated noise effect that adds grain to your videos and photos. It's included in the Continuum plugin, it's simple to use, and you'll learn how to use it by following the next steps.

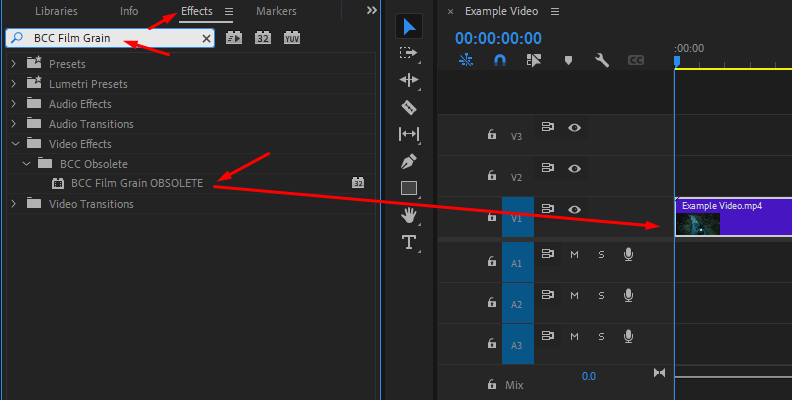
Step 1: Apply BCC Film Grain
Search for BCC Film Grain in the Effects panel and drag the filter to a clip in the sequence. You can also apply it to an adjustment layer in case you want to add it to multiple clips with.
Step 2: Explore the FX Browser
All Continuum filters come with presets you can apply by launching the FX Browser at the top of the settings in the Effect Controls panel. You can click on each preset, preview it, and use it for your clip.
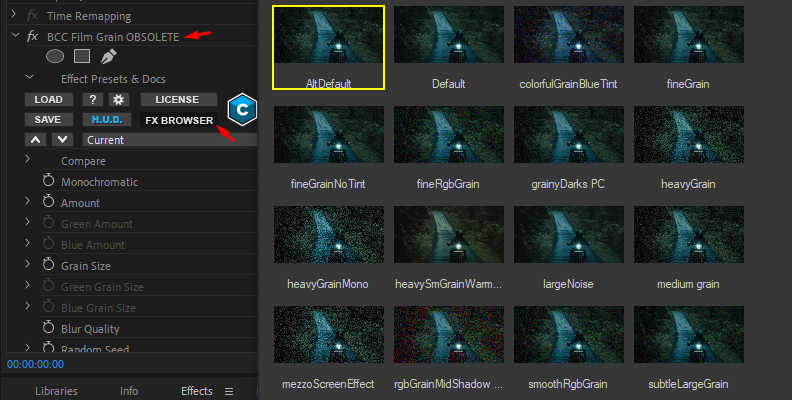
Step 3: BCC Film Grain Settings
BCC Film Grain gives you a lot of settings to customize the grain the way you want.
Use monochromatic when working with grayscale images, and uncheck it when using color footage.
The Red Amount and Red Grain size parameters control the luma noise and grain size when monochromatic is On. When Monochromatic is Off, you’ll have a slider for each color channel.
Film Grain will add a Blur effect, but you can change the Blur Quality from the dropdown menu, where you’ll find different Gaussian Blur and Pyramid levels. By default, you have Pyramid, which is faster and often offers good quality. You can try Pyramid Smoother or the higher levels of Gaussian for better quality, but they will also take more time to render.
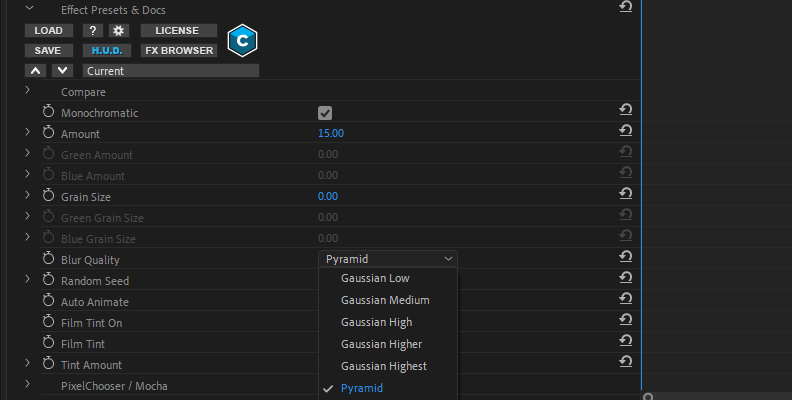
The Random Seed settings adjust the value for the randomness of the grain filter.
Here you'll find two checkboxes. One will auto-animate the grain that changes throughout the clip, and you can uncheck this option to create a static grain. The other will enable the use of Film Tint in the image.
When Film Tint is On, you can change the Film Tint color and adjust the amount of tint applied to the image.
Final Words
Adobe Premiere Pro’s Noise effect works great, but you must stick with its settings or look for a different free pack with film grains. If you want more customization, BCC Film Grain offers an advanced tool in a simple and easy-to-use plugin. It’s suitable for everyone looking for a quick way to add grain and professionals who need more customization to create unique film grains for videos.
Here's a bonus tip: download your Continuum free trial featuring BCC Film Grain and hundreds of other filters and presets to make your videos look like never before!


