


In video editing, one of the most important skills to learn is how to transition from one shot to another smoothly. It's generally believed that the more "invisible" and unnoticeable the transition, the better job you've done at redirecting the viewer's attention to the next important thing shown on the screen without interrupting their focus.
When it comes to digital video editing and modern software, like Premiere Pro, After Effects, Avid, Davinci Resolve and many others, one of the things we all must agree with is that there are countless options available regarding transitions. Amazingly, most can be applied with just the click of a button.
In this guide, we'll focus specifically on dissolve transitions, as this it's one of the oldest and most widely-used methods to connect two shots, even from the old times when editors had to use film tape.
What is The Film Dissolve Effect/Transition?
The film dissolve effect transition is a simple and regularly used method in video editing, consisting of two clips changing their transparency value, essentially "dissolving" into each other.
The film dissolve transition is actually done using two very common film editing effects called fade in and fade out.
The transition happens as one of the clips (the first one in order) on the timeline begins to fade out, meaning its transparency is slowly animated to increase, eventually reaching maximum and the clip turning invisible, while the second (following) clip becomes more opaque, meaning its transparency decreases and it becomes more visible.
This creates a seamless flow and a gradual transition which is complete when the first clip "dissolves" into the second clip.
The transition can be created and added in Adobe Premiere Pro by anyone, even without previous knowledge regarding video transitions, as it's set as one of the default transition effects that you learn first when starting to use this software.
In both videography and filmmaking the dissolve transition is often used to indicate the passage of time.
A common example is when films show a person waiting. Instead of wasting the viewers' time showing the entire sequence in real-time, editors rely on the dissolve effect to show multiple shots of the person sitting in the same room (often in a different position, once on a chair, once on the ground, etc..), creating the effect that the person was in there for a longer period.
Another example would be connecting multiple shots of how nature changes during the seasons, or snow slowly piling up on a street in the neighborhood.
Sometimes, the cross dissolve is used solely for aesthetic purposes, just so that the shots are not connected by abrupt cuts.
You can see this in ads, for example, where various products are being marketed, and they are simply shown in slides like a PowerPoint presentation, but with cross-dissolve video transitions in between.
What is a Cross Dissolve?
Some refer to the dissolve transition as "cross dissolve" but they are essentially the same thing. Both "dissolve transition" and "cross dissolve" are acceptable terms in videography, and they refer to the same, popular transition effect.
Depending on the software you're using, you may have to use a different name when searching to find the transition effects in the effects panel.
How to Apply Dissolve Transition Premiere Pro for Free
Adobe Premiere Pro is one of the most widely-used editing programs, and applying the cross-dissolve transition with it is straightforward.
Here's how to do it:
Step 1: Import Media Within Premiere Pro And Create A Sequence
The first step to adding cross-dissolve to two video clips in Premiere Pro is importing media within the software and creating a timeline.
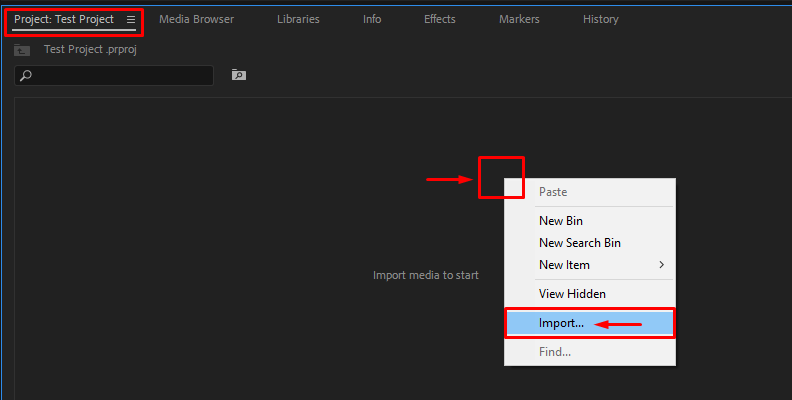
You can do this by navigating to the "Project" section and dragging one or multiple videos anywhere on the empty area where it says "Import media to start" as shown in the image below.
You can also right-click the empty area and choose "Import" to browse your computer for files.
![]()
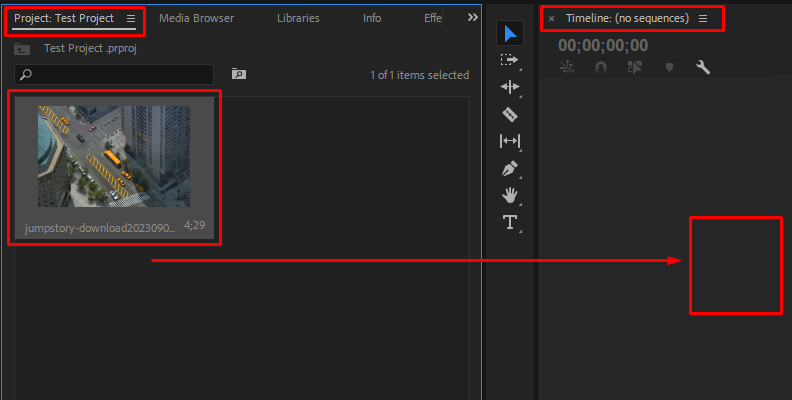
Once you import the media within Premiere Pro, it's time to create a sequence. You can do this by dragging the imported videos to the timeline area, as shown in the image below.
![]()
Now that you have a sequence ready, you can search for the effect to apply it.
Step 2: Find And Apply The Effect
Make sure that both videos are set on your timeline in the right order.
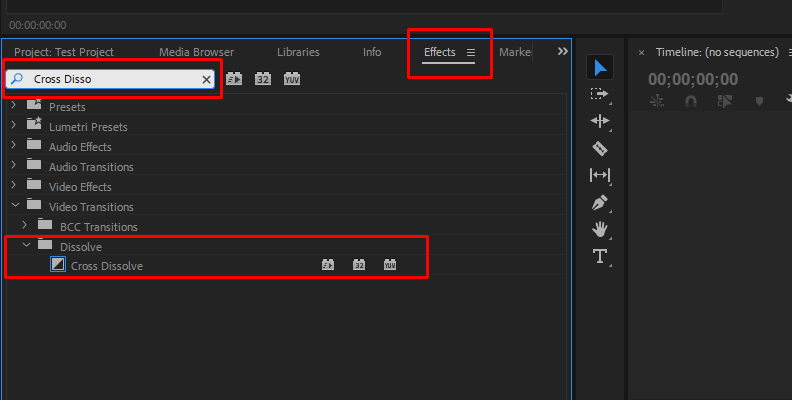
You can find the effect within the Adobe Premiere Pro "Effects" tab under the "Video Transitions" folder, as shown in the image below.
![]()
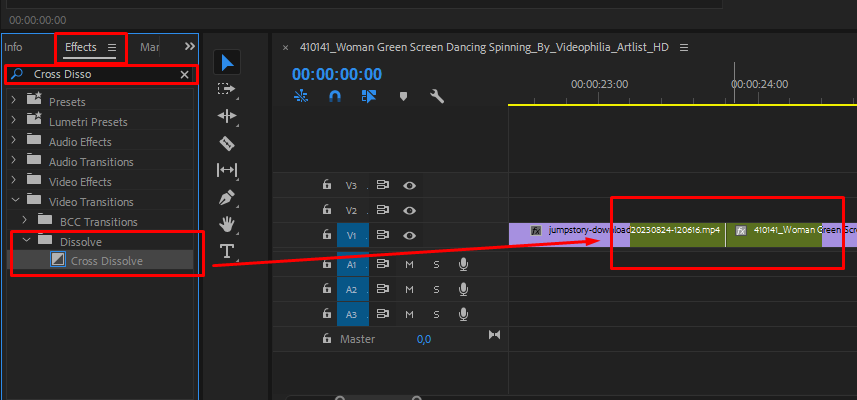
From there, all you need to do is drag and drop the effect over the two videos set in the right order on your timeline.
![]()
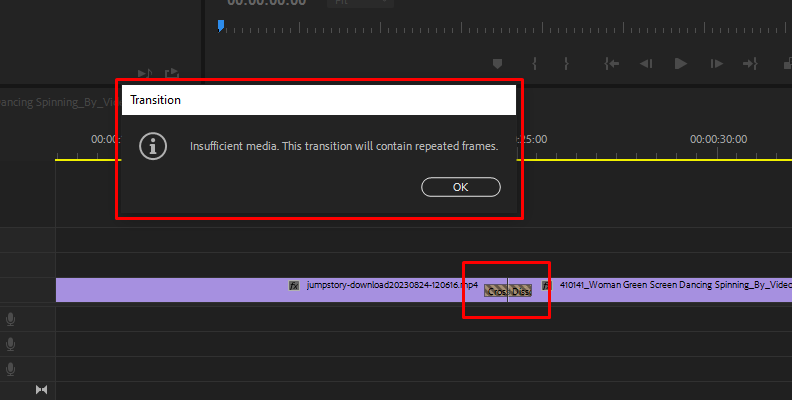
However, an important thing to note is that there must be extra frames of footage at the end of the first clip and the beginning of the second one, otherwise, you'll get the "Insufficient media. This transition will contain repeated frames" error, as shown in the image below.
![]()
The effect will still work despite this error, but the seamless flow of this gradual transition effect won't look as good due to the repeating frames (still image).
Quick-Adding Cross Dissolve to Videos
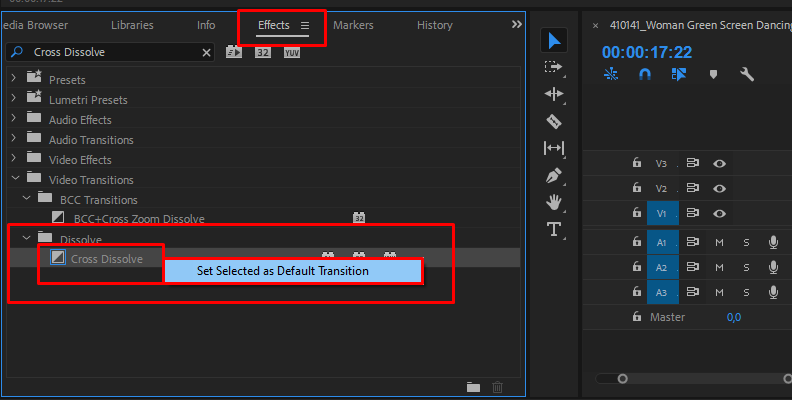
Another important thing to note is that you can apply this effect to your videos using only a keyboard shortcut, which in Adobe Premiere Pro is CTRL+D for Windows users.
This shortcut adds your default transition of choice to your videos.
To add cross-dissolve as a default transition, simply right-click it from the list in the "Effects" tab where you found it, then choose "Set Selected as Default Transition" as shown in the image below.
![]()
How to Apply Dissolve Transition in Adobe Premiere Pro With Boris FX Continuum
Third-party, renowned plug-ins, like the ones from Boris FX, can be used to make any editing work much easier.
For this specific task, we'll use Continuum, a tool known to every editor for its simplicity and customizability.
Continuum is available on the official Boris FX website, along with a free trial that you can download without having to pay anything. It's available for all modern and popular video editing programs, like Avid, and Adobe Creative Cloud Suite.
Once you download and install the Continuum pack, all effects and transitions will become available to use within Adobe Premiere Pro.
The rest is simple and straightforward.
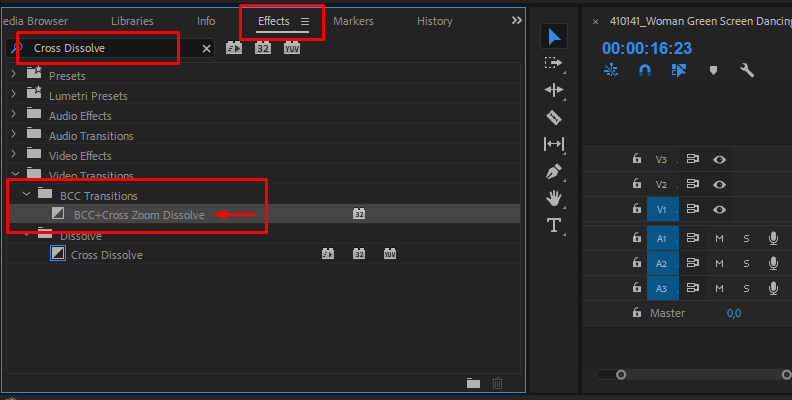
Once you have your videos laid out on the timeline, all you have to do is find the "BCC+ Cross Zoom Dissolve" effect from the "Effects" tab shown in the previous steps above, then add it to your videos by dragging and dropping it.
From here, you can take advantage of Boris FX's incomparable customizability panel within the Effect Controls section of Premiere Pro and modify your effect to suit your needs.
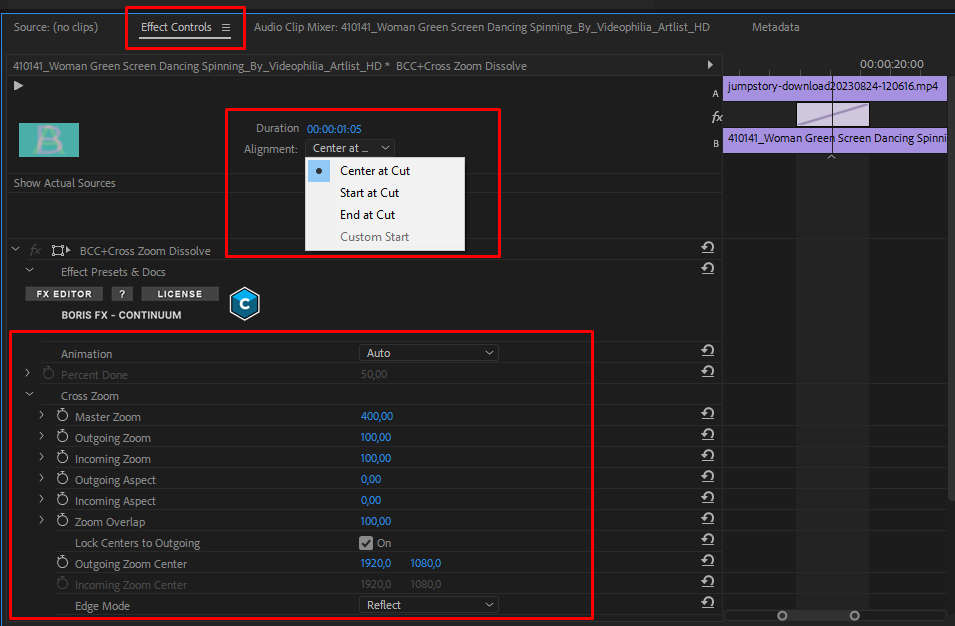
Changing any settings is easy, and all it takes is adjusting parameters to change the duration of the zoom, fading, and more. You can really enhance your videos by having complete control over how the scene transition is done using the Cross Dissolve effect from the Continuum pack.
Final Words
Now you know lots more about the dissolve transition effect in Premiere Pro, as well as how to create it yourself or take advantage of a popular, renowned plug-in to take your videos to the next level.
Hopefully, this will serve you well for all your future editing work.
Good luck!


