


Aspiring video creators and hobbyists can now access the same video editing techniques that were previously reserved for professional editors. Most video editing software available today, including Final Cut Pro, Premiere Pro, and After Effects, comes equipped with extremely valuable tracking features.
In this article, I’ll provide you with a detailed guide on how to use motion tracking in Final Cut Pro. We’ll explore two methods: Final Cut Pro's native object-tracking feature and the cutting-edge tracking tool crafted by Boris FX.
So, let's get started! Get your clips ready, and let's dive into the world of motion tracking.
Overview of Motion Tracking in Final Cut Pro
Final Cut Pro is a video editing software exclusive to MacOS that offers all the editing tools you need to create professional videos, including a motion-tracking feature that will help you create videos with more stunning visuals.
Motion tracking is a technique that involves analyzing and recording the movement of an object in a video clip and using the recorded data on another object to add motion. Final Cut Pro allows you to easily track data from an object and apply it to a video effect, title, logo, and still images to animate it by making it follow the tracked object.
There are several uses for motion tracking. The most popular ones are to add special effects, remove or blur objects, faces, and brands, add logos and callouts for price tags, labels, or subject names, color grading, isolate objects, and remove green screens.
In Final Cut Pro, object tracking can be achieved with a few clicks thanks to its analysis methods that speed up the tracking process. Final Cut Pro uses the point cloud analysis method to target specific pixels in the frame, machine learning to track everyday objects such as cars, people, and animals, or a combination of both methods for object tracking.
Object tracking is only available on Final Cut Pro 10.6 or above on MacOS Big Sur. To verify your Final Cut Pro version, go to Final Cut Pro > About Final Cut Pro. The following window will display the version you have installed.
How to Do Motion Tracking in Final Cut Pro
Before starting to track your video, there are some things to consider for successful motion tracking:
Prepare your footage for future tracking. For example, let’s say you're shooting a bicycle commercial, and you know you will be adding titles to objects to label each part and isolate them. Make the shot as clean as possible so that Final Cut Pro tracks fast without needing you to fine-tune the tracking areas.
Consider your subject and camera position. The ideal shot will have your subject in the frame the entire time. Sometimes, you have to manually adjust the tracking grid outside the viewer. Luckily, Final Cut Pro machine learning analysis can detect the subject when it overlaps with other objects in the video clip.
Adjust contrast and lightning. A video clip with good lighting and contrast will provide more precise points for tracking. A solution for low-contrast footage is applying a color effect to your clip to boost the contrast before tracking.
In short, the best footage for tracking is one with good contrast, where the subject stays in the frame with clear tracking points and little movement. Prepare everything before shooting to obtain this type of footage and a quick and easy motion-tracking process.
Now that you know how to prepare your footage, let’s get into the step-by-step Final Cut Pro motion tracking tutorial.
Step 1: Set Up Your Final Cut Pro Project
Import your video clips from your Mac or a storage device connected to your Mac and drag the files from the finder into Final Cut Pro, or use the import window and search for the folder with your video clips.
Create a new project with Command + N, name the project, and drag your video clips to the timeline. Organize your video clips and edit them until you have a sequence you want to keep.
Step 2: Object Tracking
![]()
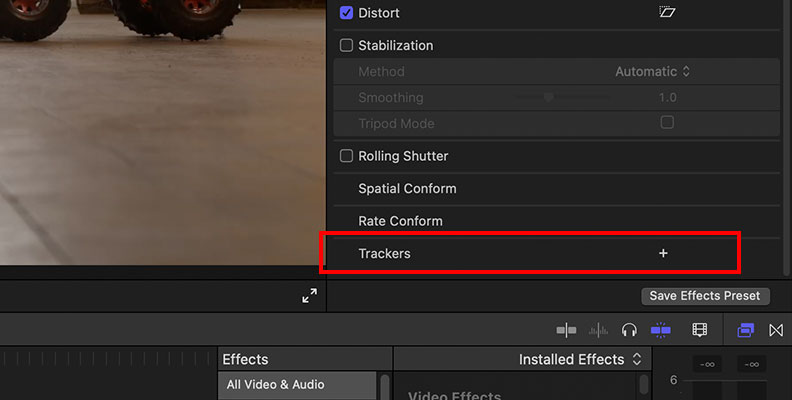
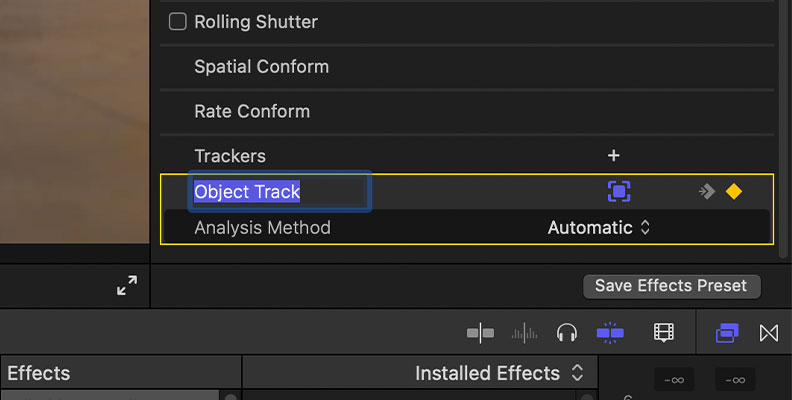
Select the video clip in the timeline with the object you want to track. Go to the video inspector and scroll down until you see a Tracker option at the bottom. Click on the + icon to display the tracking grid. Adjust the grid to the shape of your object.
![]()
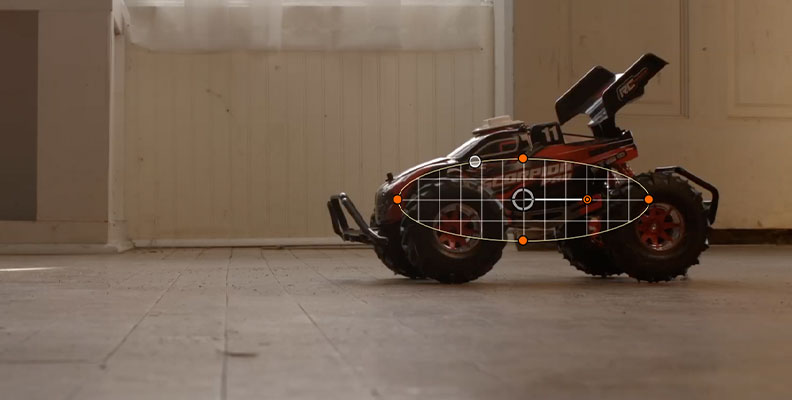
You can resize, shrink, rotate, and round the edges. Once you have the object tracker in the size and shape and over the object you want to track, click the Analyze button on the viewer's left side.
![]()
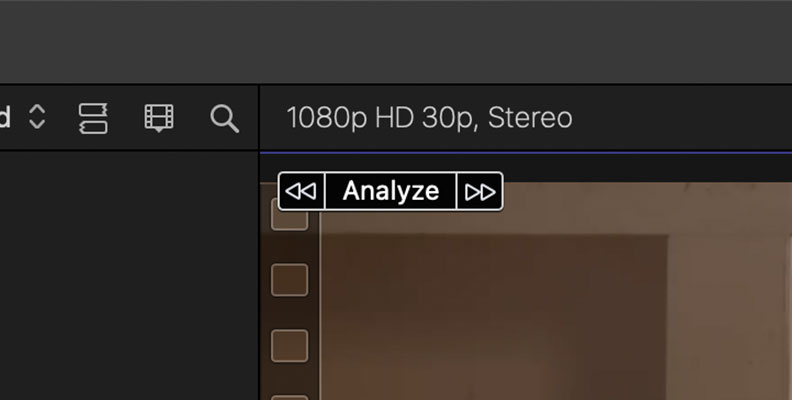
The analyze button has three options: track backward, forward, and forward and back. So, if you use a frame in the middle of the video for reference, click Analyze to track both ways.
![]()
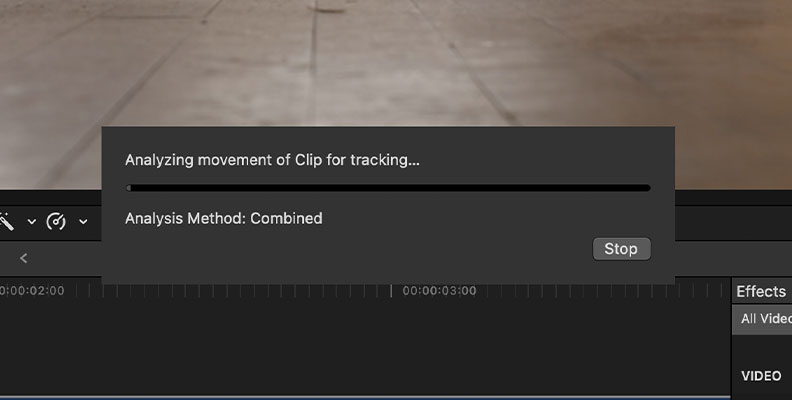
By default, the analysis method is set to automatic. Final Cut Pro will decide whether to use point cloud, machine learning, or both ways to track the object. You can manually change the tracking mode by clicking on the dropdown menu. For most situations, the Automatic mode will be more than enough.
![]()
The time to analyze it will depend on the length of your video. I recommend adjusting the tracker to the object so the tracking is as accurate as possible, and you won’t need to spend more time re-analyzing after readjusting the object tracker on specific frames if something goes off.
![]()
When the tracking process ends, go to the Inspector > Tracker and rename the tracking data by double-clicking Object Track to stay organized, especially if you will be tracking multiple objects. Preview, and once you are happy with the tracking data, click Done at the top right corner of the media viewer.
Step 3: Applying Tracking Data to Another Element
![]()
Search for your graphic or text and add it to the timeline, placing it on a track above the video clip you tracked. Move the playhead to the beginning of the clip and change the position and size of the inspector. Then click the transform button on the bottom of the viewer.
![]()
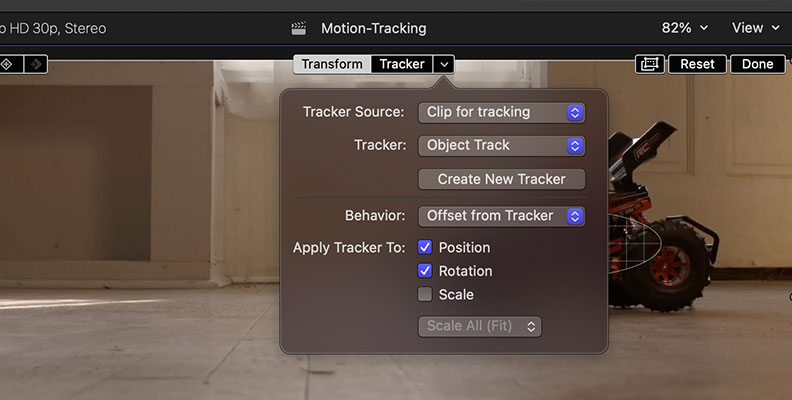
It will display a new tracker option at the top of the viewer. If you click Tracker, it will create a new object tracker, but the little arrow on the right will display all the tracking data you made.
To attach the tracking data to your graphic or title, click the arrow to display a dropdown menu with all the recorded tracking data and choose the one you need (here’s when labeling each track comes in handy). Preview the clip to ensure everything is correct.
Titles to Object
To attach a title to an object for motion tracking, go to the title browser, drag the title to the timeline, and adjust the length. From the inspector, type your text and choose a font, size, etc.
Choose the track with your title, hit Transform, and select the tracking data from the Tracker dropdown menu. You can attach callouts for names, prices, lower thirds, etc., and add multiple tracking points to a single clip.
Face Tracking
You can use motion tracking to add a title or icon to a face to show what a person is thinking about, change the face to an emoji, or even add a blur effect on people's faces for documentaries. You will add titles the same way as adding to objects, but first let’s see how to add a blur effect.
Open the effects library, search for the effect you want to use, and drag it to the viewer over the face of the person you want to hide. Final Cut Pro will identify it as a face and automatically create a face tracker. Click Analyze to record the data and adjust the area and the amount of blur you need.
Color Grading and Color Correction
You can use tracking data for color grading. First, create a new tracker for an object on your video clip and analyze it to get the data. Then, add a color correction tool such as boards, wheels, or curves. Add a shape mask, and you will see the shape and tracker link in the viewer. Select the tracking data from the Tracker menu. Then, you can start adjusting the color inside and outside the color masks.
Color grading tools can also help you isolate a tracked object by adjusting the brightness outside and outside the mask. You can play and create multiple tracking points to separate different elements or change the colors.


How to Do Motion Tracking in Final Cut Pro with Boris FX
Mocha Pro is a state-of-the-art planar tracker by Boris FX used in many Hollywood featured films. Mocha Pro allows you to create more advanced and complicated masks than Final Cut Pro Object Tracking. In all the Continuum FCP units, you will get Mocha Masking for the effects, including the Free BCC+ Looks filter.
Step 1: Apply a Continuum FCP Effect
![]()
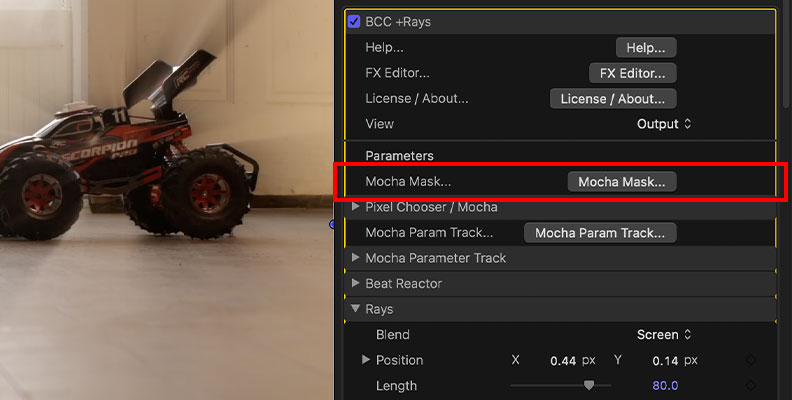
First, create a new project and organize the video clips in the timeline. Open your effects library and search for a BCC+ effect. Drag and drop the BCC+ effect into a video clip in the timeline. The clip will be in the entire frame, so to create a mask with Mocha, you need to go to the inspector and click on the Mocha Mask button under the effects settings. This will launch Mocha, where you will create and track your mask.
Step 2: Tracking with Mocha Pro
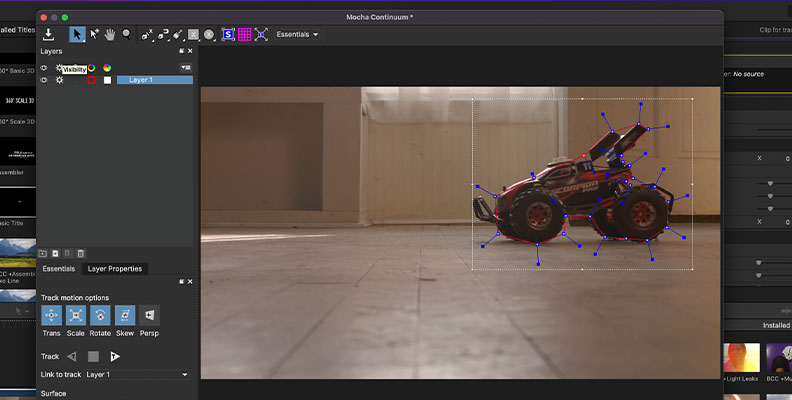
![]()
When Mocha Pro’s interface launches, your video clip is already imported into Mocha. You can quickly start masking by selecting an X-Spline tool and drawing a mask around the object you want to add to the effect. Create new tracking points with a left click and close the mask with a right click. You can create multiple layers and rename them to streamline your workflow.
Click the tracking buttons back and forward to track the movement of your object. With Mocha Pro, the process is fully automated, but you can stop the tracking and adjust the mask if you see something off.
When the tracking is complete, close the Mocha interface and click Save to return to Final Cut Pro. You’ll notice that Mocha already applied the tracking data to the mask, and you will only see the effect within the mask.
Final Thoughts
Motion tracking in Final Cut Pro is easy to use and effective, but using Mocha Pro from Boris FX Continuum allows you to create accurate masks for your effects that’ll make your footage look professional and unique. If you're still wondering how Mocha Pro can reduce your tracking and keyframing process, download the BCC+ Looks Freebie and try it yourself.
Good luck!


