


Filmmakers use many effects to add a vintage look to their films, to add distortion as if the film was damaged, dirty, or placed incorrectly in the projector. These techniques allow you to create an old movie feel, add immersive flashback transitions, and showcase a character's past or historical events.
In today's article, you’ll learn to apply film damage to your video clips to achieve a cinematic retro look from classic 16mm film.
Let’s dive in!
What is a Film Damage Effect
A film damage effect is a visual effect replicating an old film's imperfections and flaws of being damaged with time. The film damage effect adds elements to imitate this look with scratches, film grain, hair or fibers, dirt, dust, camera shaking, and flickering.
If you’re looking for the simplest and most effective way of creating this effect in your productions, look no further than the BCC Film Damage effect in Boris FX Continuum. BCC Film Damage has over 20 presets to apply quickly but also provides the tools to customize the filter to create unique effects and achieve the desired aesthetic.
How to Work with a Film Damage Effect: A Step-by-Step Guide
Let’s discover how to use the BCC Film Damage effect from Continuum. BCC Film Damage works on popular video editing software like DaVinci Resolve, Adobe After Effects, Premiere Pro, and Final Cut. The steps before applying the film damage effect can differ depending on your software of choice; however, the settings for BCC Film Damage are the same in every video editing software, which is what we’ll focus on.
Step 1: Set Up the Project in Your Video Editing Software
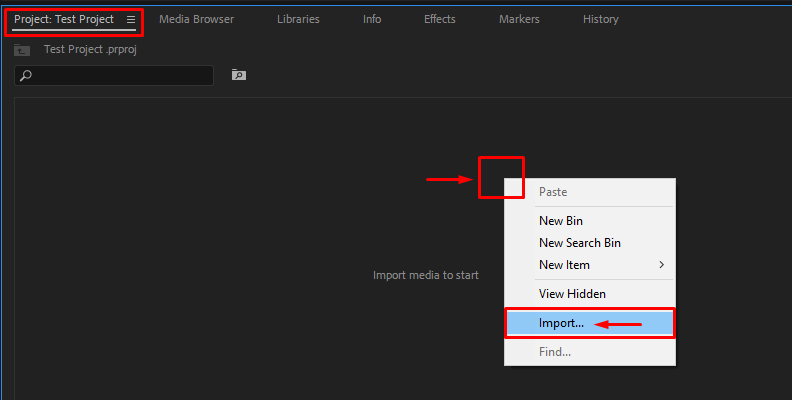
Open your composition software and create a new project or return to an existing one. Set your project settings, aspect ratio, resolution, frame rate, etc. Gather your media files and import all the video clips you’ll need for your video project. Drag the video clips to the timeline, organize and edit them to make the video project.
![]()
Step 2: Add BCC Film Damage Effect
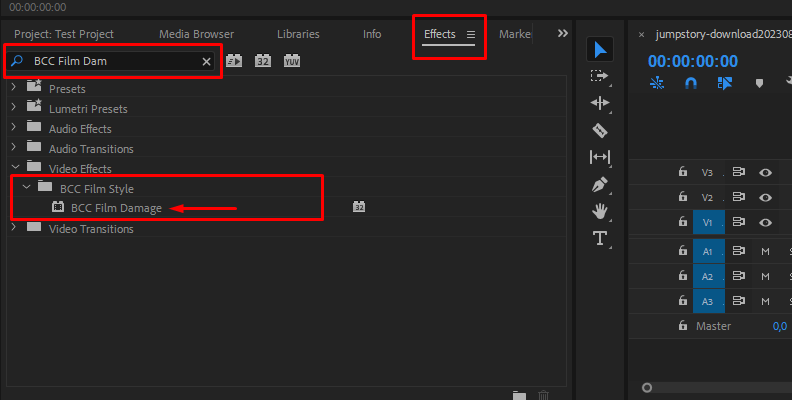
Go to your effects library and search for BCC Film Damage. It’s under the Boris FX Continuum library > BCC Film Style > BCC Film Damage. Or, if your host has a search box, type Film Damage to find it quickly.
![]()
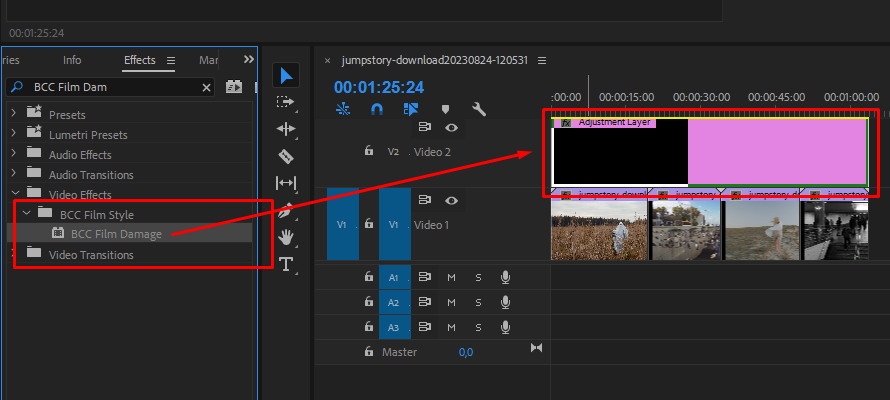
When you work with only one clip or want to add the film damage effect to a single video clip, drag and drop it to the clip in the timeline. However, if you want to apply film damage to all the clips on the timeline or just more control without affecting each clip, adding an adjustment layer track first is your best option.
![]()
There are different ways to add adjustment layers for each program, so check out how to do it in your software beforehand. For example, in After Effects and Premiere Pro, add an adjustment layer; in DaVinci Resolve, use an adjustment clip; in Vegas Pro, use an empty event, and so on. The objective is always the same: to add the film damage effect to that layer and adjust the parameters without affecting the original tracks with the video clips. It makes editing easier if you need to change something later.
Step 3: Working with Film Damage Presets
The default setting will be applied to your clips when you add the effect. Default settings are usually suitable for a quick damage filter, but the plug-in BCC Film Damage has many presets, so why not give them a look?
First, go to the effect controls and display BCC Film Damage. The presets are in the preset dropdown menu or the FX Browser. Click the FX Browse to preview them, select one, and click Apply to close the window to return to your editing software.
You can choose a preset to use as a base and edit each setting to create your own.
Step 4: BCC Film Damage Settings
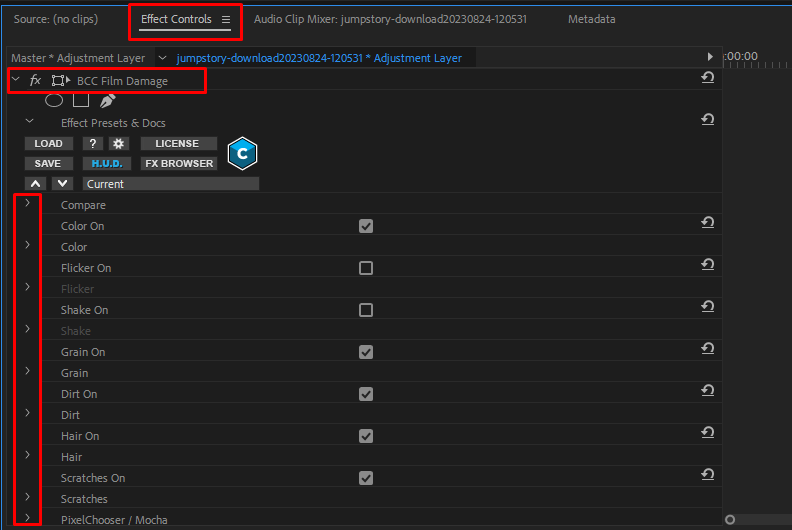
The first thing you can enable in the effects controls is the Compare mode to see how the video will look with the film damage effect. You can select to view the original and the filtered clip side by side or in a split-screen mode.
The following settings generate different types of film damage. Check the box for each one to enable its controls and make further adjustments.
![]()
Color. Adjust the overall color, brightness, contrast, and saturation, and add a tint color to the image.
Flicker. Enabling flickering will make the clip's brightness vary from frame to frame as if the lens from the projector were not receiving a constant amount of light, causing the flickering. Adjust the amount and speed to control the flickering behavior.
Shake. Make the image move up and down or side to side, simulating a misplaced film in the projector or a shaking camera. You can control the movement with the X and Y sliders to adjust the position. The movement will leave a blank space on the edges that you can fill with an Edge Type. Mirror will generate a mirror image of the adjacent pixels, Black will add a solid black bar on the edges, Transparent can allow a layer below to be exposed, and Smear repeats the pixels of the edges to smudge the image.
Grain. You can add grain to simulate the specks of traditional film, but keep in mind that it will add noise to the video clip. Add enough to provide the look but not too much that it affects the image quality. Enabling Monochromatic will generate grayscale specks, and disabling it will add color specks to the image.
Dirt. It simulates stains in the film from water, dust, or soil. You can adjust how many spots of dirt appear with density, radius, randomness, opacity, gradient, and color of the stains.
Hair. Some old films will have traces of fiber or hair. You can simulate this under Hair and add lines that mimic that vintage characteristic. Control its density, thickness, length, and width to create a realistic effect.
Scratches. Replicate scratches in the film by generating vertical lines. Adjust the number of lines with density, how much they remain on screen with Min and Max Lifetime, and their width, opacity, speed, and color.
PixelChooser. The PixelChooser allows you to use masks to select a specific image region to add the film damage effect and leave the rest of the image untouched. If you have Mocha Pro, you can launch it from there to use its advanced masking and tracking features.
Step 5: Render the Video
Preview the video and render it once you’re happy with the results.
Final Words
And that’s all there is to know about the film damage effect! If you're new to editing video and adding effects, choose a preset you like and apply it to your production. As you hone your craft, start tweaking the settings and create presets for future video projects.
Good luck!


