


Video transitions are post-production film editing techniques that can make your entire footage look more professional and carefully crafted. They can give a unique feeling to your sequence, drive your story forward, and establish the mood you want your audience to experience.
Video transitions are frequently used in film, television, animation, and YouTube content. Some transitions are made obvious to indicate that something is happening or about to happen, accentuating the scene, while others are smoother to move from one scene to the next.
In today's article, you’ll learn about this crucial post-production technique: how it was used in the past, and the tools at your disposal to use transitions to take your videos to the next level.
Let’s dive in!
What is A Dissolve Transition
Among the many types of transitions, you may have heard of dissolve transitions such as lap dissolve, fade in, or fade out. A dissolve transition is a video editing technique that gradually shifts from one scene to the next. It makes the first scene gradually disappear as the second image emerges, blending both scenes for a moment before the second one becomes visible.
In terms of length, a standard dissolve transition is usually between 24 to 48 frames with a duration of about 1 to 2 seconds. However, it will depend on what you want to show in your film and the relationship between the scenes.
Contrary to a regular cut, sometimes perceived as invisible, adding a dissolve effect between scenes helps you change from one image to another smoothly, attract attention to the scene, and even add other elements such as the passing of time.
Dissolving transitions can be an effective tool for appropriately progressing your storyline. However, if applied to every scene, some dissolves can feel overused and distracting. Learning how and when to use a dissolve transition to benefit your narrative should be essential in your post-production process.
The most frequent uses for a dissolve effect are:
Fading into a scene (intro) or out of a scene (usually the ending credits).
Create a smooth transition between the two shots.
Gradually matching two scenes, objects, or persons.
Portray a physical or psychological transformation.
Create an emotional connection between the two scenes.
Represent the passing of time.
Get in a character’s thoughts, dreams, or a flashback.
To summarize, a dissolve is a gradual transition between two clips over time to avoid jump cuts, while a regular cut happens abruptly.
History of Dissolve Transitions
Dissolves have been present in films since the old days. The classic technique was used to show that time has passed between the two shots or to go smoothly from one scene to the next. The first director credited with using a dissolve transition was George Méliès for his film Cinderella (1899), where he added a dissolve effect to change scenes.
In later years, directors used dissolves more creatively than just a transition between scenes. In The Wolf Man (1941), a dissolve transition was used to illustrate the physical transformation from human to werewolf. Citizen Kane (1941) is another film that uses dissolve transitions to create more emotional and dramatic scenes.
In the early days, dissolve transitions were created thanks to an optical printer. The process was more complex than today's because it involved playing two films simultaneously and combining them to record a new composition with the optical printer. However, video editors could only see how the transitions looked once the process was complete.
Today, video editors can easily add transitions to any video in editing software, such as Adobe Premiere Pro, VEGAS Pro, and more. And in some cases, video editors can preview the transition even before applying it.
Types of Dissolves Transitions
Among dissolve transitions, we can find several types. Here are the most common, though you can see and create dissolves variations with your software and third-party plug-ins.
Cross Dissolve
A cross dissolve involves a fade out of the first shot as the following image fades in, overlapping for a moment. It’s the most common type of dissolve transition.
Match Dissolve
The match-dissolve effect blends the shot with a second one but keeps the same composition in the frame. An excellent example of this type of video transition is in the ending scene from Spielberg's films Schindler's List (1993) and Saving Private Ryan (1998), where you see the scene moving to the present day but keeping the composition and characters in the same frame.
Fades
Fade in and fade out are transitions between a scene and a black or white screen. Fade ins are most common at the beginning of a film. However, fade ins can be used between scenes to present a different era or dreamlike sequence. Fade outs are often used to symbolize closure when the clip ends.
How to Add Dissolve Transitions with Continuum
New in Continuum - Particle Illusion Dissolve Transition
I will show you how to easily add a dissolve transition using Continuum. This tutorial works for every host that supports Boris FX plug-ins (Continuum is available for Adobe After Effects and Premiere Pro, DaVinci Resolve, Final Cut Pro, and VEGAS Pro, among others.)
Continuum is a set of plug-ins that features award-winning effects and transitions. It’s fully GPU-accelerated to make your work faster and easy.
You can get Boris FX Continuum transitions in different packs, units, and plans.
Continuum Full Suite
The Continuum Full Suite includes the complete package with more than 40 transitions, 300+ special effects, and thousands of presets that increase with each update. This suite has everything you need for your video composition projects: film grain, lighting effects, color correction, filters, and transitions.
Continuum Transitions Unit
Continuum can be purchased as units if you prefer a more affordable option. The Continuum Transitions Unit features 45+ wipe transitions and dissolves, over 500 presets, and easy-to-use controls. Set your videos apart from other editors with Continuum's swish pans, prism, light leaks, glow dissolves, crash zoom, grid wipe, Particle Illusion dissolve, and more.
FCP Transitions Unit
For Final Cut Pro users, you can get the Continuum FCP Transitions Unit, which includes 26 transitions with hundreds of presets and customizable settings to perfect the dissolve transition's timing and behavior. The FCP Units include popular dissolves such as video glitch dissolve, light leaks dissolve, blur dissolve, film glow dissolve, prism dissolve, and camera shake dissolve, among others.
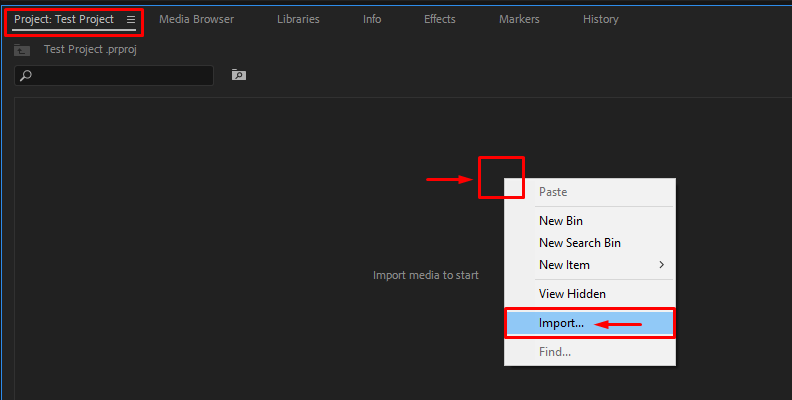
Step 1. Start A New Project and Import Your Video Footage
Launch your video editing software of preference.
Create a new project or open an existing one and import all your media files, including video, images, and audio you'll need for your project.
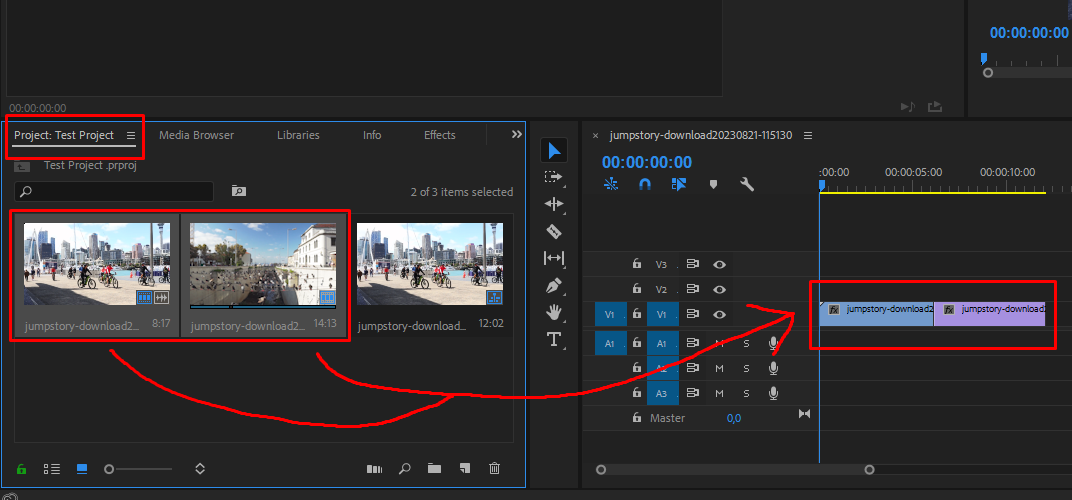
Step 2. Add Video Clips to the Timeline
Drag the media to your timeline and organize your sequence to create a coherent story. Edit the files if you need to cut or trim to fit your narrative, but remember to leave some space between the first and second clips to add the transition.
Step 3. Add Continuum Dissolve Transition to Your Footage
Now that you have all your clips and images organized on the timeline, you can add the dissolve transition. The Continuum Dissolve transitions are under the BCC Transition category in your Effects Library.
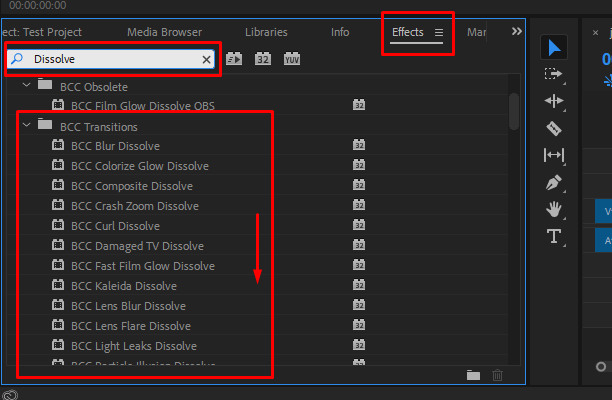
You can search for specific dissolve effects or type "Dissolve" to display all the dissolve transitions (including non-Continuum dissolve transitions.)
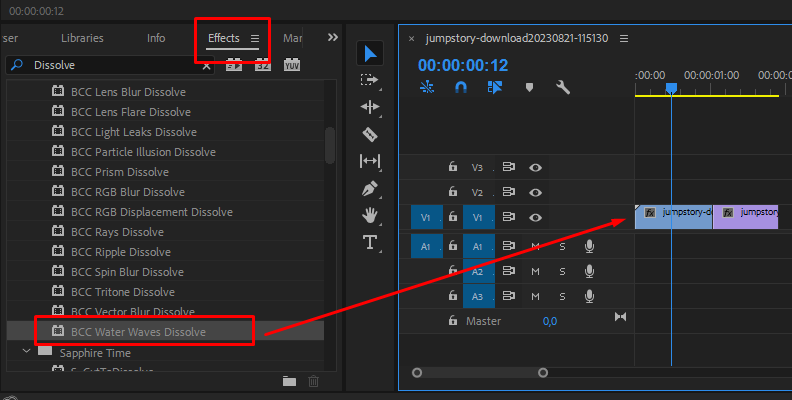
You can add a Continuum transition just by clicking and dragging it between two clips, two images, or between a clip and a still image. Depending on your editing software, applying a dissolve transition might differ or require extra steps, such as adding a default transition and replacing it with a Continuum transition.
Step 4. Dissolve Transitions Settings
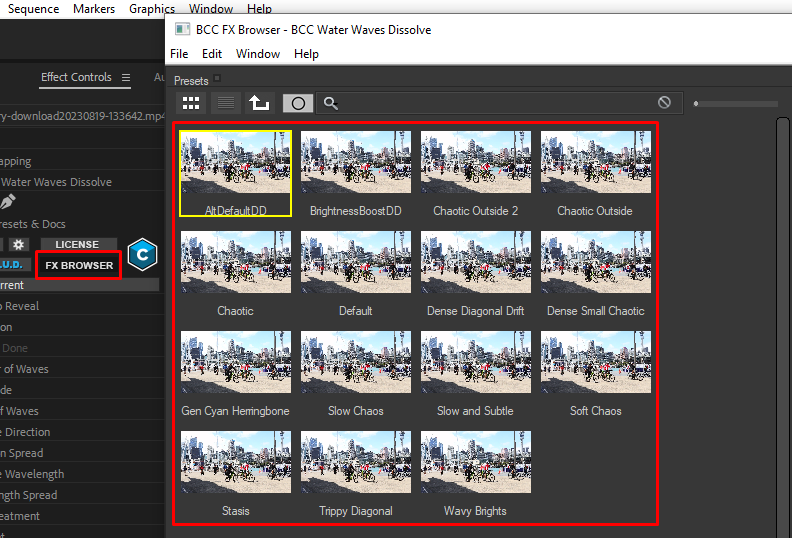
Like any Continuum effect, Continuum Transitions features an FX Editor that you can find within your effects panel control or inspector (wherever you have your effects settings in your video editing software).
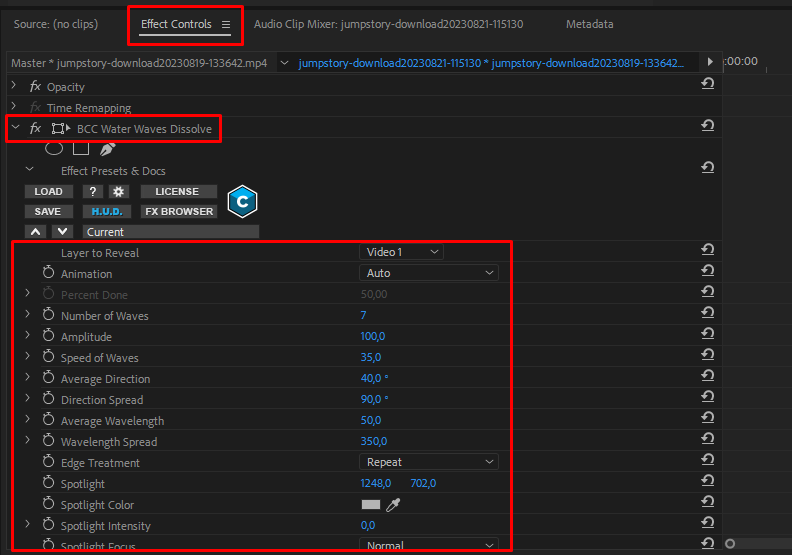
When you launch the FX Editor, you can select from many presets for each transition. Some transitions will also have parameters that you can tweak from the parameters window or the controls in the viewer.
When you finish adjusting the transition, press Apply in the bottom right corner to return to your video editing software interface. You can return to the FX Editor if you relaunch it from the effects settings.
Each transition has its own parameters in the FX Editor, so it will take a lot of time to tell you how to adjust each one (plus there are more than 40 transitions to explore.) I suggest you preview the transitions and choose a few you like. Start with presets and play with their settings as you feel the need to have full control over your transition's speed, duration, and behavior.
Step 5. Finalize Your Video
Preview your clips with the transitions and export your video when everything looks as you and your team expected.
Bonus Tips for Dissolve Transitions
Before wrapping up, I’d like to share a few tips on using a dissolve transition in your projects.
Plan your footage and record some extra time at the end of each scene.
Shoot your footage with an idea of where to use a dissolve transition.
Ensure there’s a purpose for adding a dissolve in your sequence.
Moderate the use of a match dissolve effect unless it’s for creative purposes.
Ensure you have enough handles on your video clips to add a dissolve transition when editing in your software.
Final Words
Dissolves have been in filmmaking since its conception. The only thing that’s changed is the way the director adds them in post-production. The process is now more seamless, and you can immediately see the result. However, the purpose is still the same: to change from one scene to the next, create a meaningful storyline, indicate that time has passed, shift to a surreal image, and end a scene.
Try Continuum for free and get a glimpse of a mix of dissolve transition effects, such as blur dissolve, film glow dissolve, and video glitch dissolve, to achieve unique transitions for your videos.
Good luck!


