


Recording vocals professionally is a must in most audio projects. Whether you want to record vocals for music, voiceovers, or podcasts, you can achieve good-quality vocal recordings using Cubase, an iconic and resourceful DAW for musicians and content creators alike.
In this Cubase recording vocals tutorial, you'll learn what equipment you need to achieve high-quality results, how to set up the recording in Cubase, and some pro tips to improve the sound of your vocal recordings.
Let’s dive in!
What Equipment Do I Need for Recording Vocals in Cubase?
You'll only need three basic audio gear items to record vocals: a microphone, an audio interface, and a digital audio workstation (DAW) like Cubase Pro. In the following sections, I'll list the must-haves and make other recommendations to get you started.
Microphone
The microphone is a crucial piece of gear for recording vocals for music. It is what captures the voice and allows it to be faithfully reproduced by your computer or DAW.
The most common mics for vocals are condenser microphones with large diaphragms due to their capacity to record every subtle variation in the vocal recording. Dynamic microphones are another popular choice because they are less sensitive to unwanted noises and can withstand loud sounds. Among the best microphones for vocals are the Rode NT1 and the Shure SM7B.
Audio interface
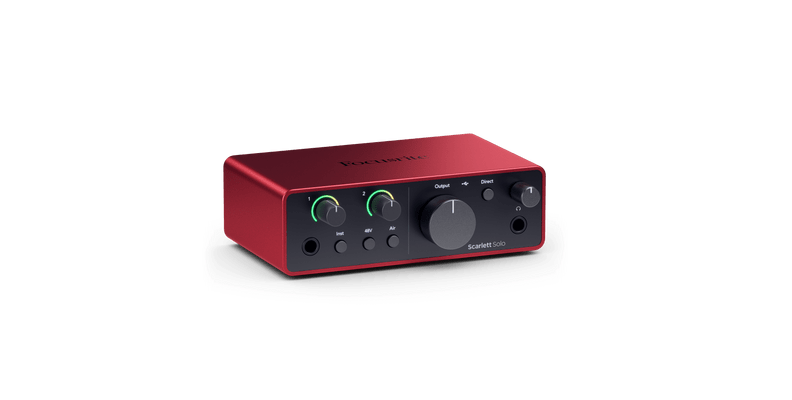
Audio interfaces are the bridge between your microphone and your computer. They convert the analog signal the microphone captures to digital data for your computer to read and playback.
There are many options for audio interfaces, depending on how many input channels you need, whether you need phantom power, etc. For beginners, one or two input channels would be enough. The Steinberg UR22C, Focusrite Scarlett Solo, or the PreSonus Studio 24c are good options.
Digital Audio Workstation (DAW)

A DAW is your virtual studio for making music and podcasts. It's where you record vocals, edit them, add effects, and mix the audio tracks. You can download a trial version to familiarize yourself with them and choose the one you prefer. The most popular DAWs are Cubase, Ableton Live, Logic Pro, and FL Studio.
XLR/USB cables
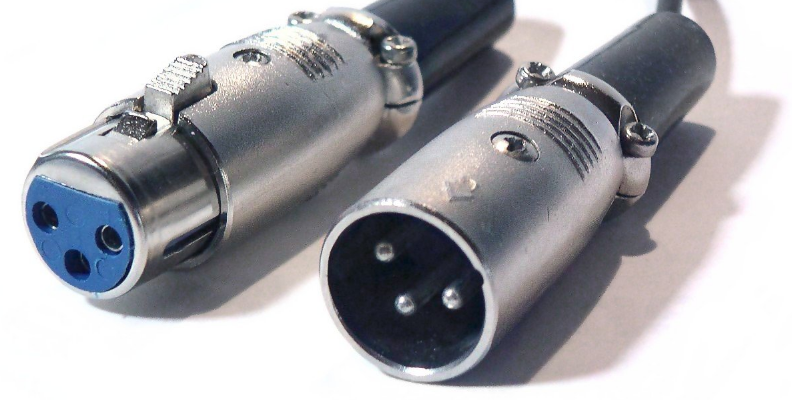
Depending on the microphone you're using, you will require a cable to connect it to your audio interface or computer. The most common for condenser and dynamic microphones are XLR cables. However, some mics use a 1/4 aux or USB connection. Remember that if your microphone works with a USB cable, it has a built-in audio interface, so you won't necessarily need an audio interface to record vocals.
Headphones
Headphones are important when recording music to avoid recording speaker feedback. They also help you monitor your voice and hear what is being recorded. Can you record without headphones? Yes, you can. However, it's preferable to use headphones to avoid audio bleeding.
In some cases, you can mute the other recorded tracks and lower the volume of your speakers so that only your voice is recorded. Not ideal, but it'll do the job.
Mic Accessories
The most common microphone accessories needed for vocal recordings are a mic stand to place the microphone and avoid capturing noises from movement, a pop filter to reduce plosives and other mouth sounds, and a shock mount to reduce the rumble of the condenser mic due to unintentional bumps or movement.
How to Set Up a Recording
Step 1: Connect Your Audio Equipment
Connect your mic to your audio interface using the XLR cable. Plug the audio interface into your computer using the cable provided and install its drivers.
Step 2: Set up Cubase for Recording
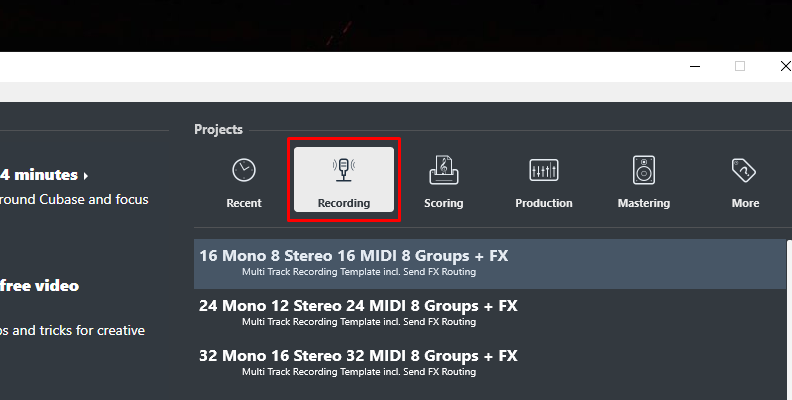
When you launch Cubase, you can start with a template from the Recording tab, which will have the tracks ready for recording, or start an empty project and add the audio tracks as needed.
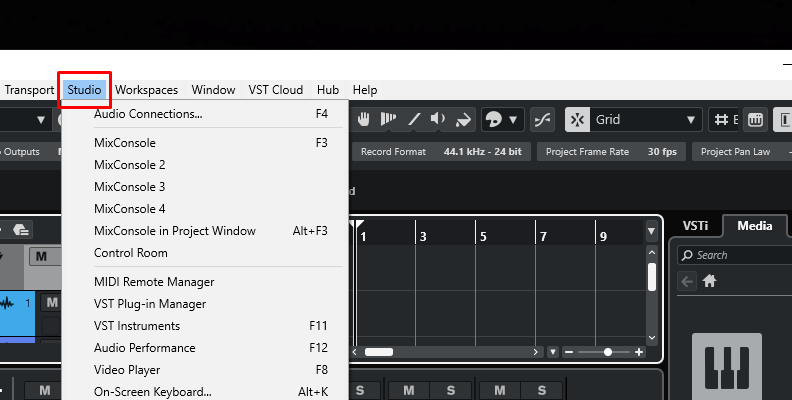
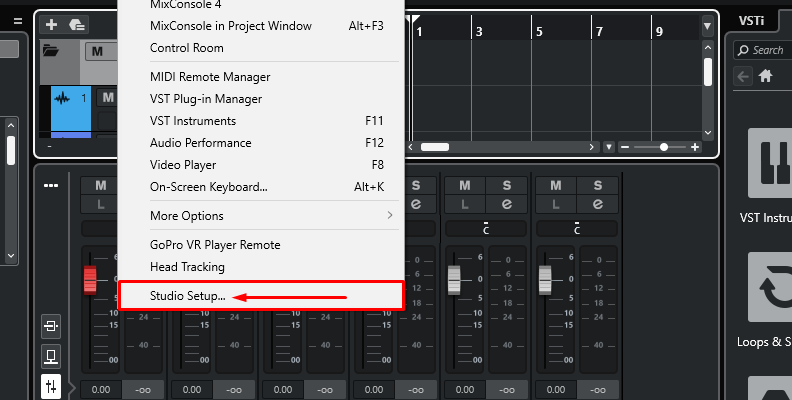
Once in the new project, you need to set your audio interface. Go to Studio > Studio Setup, and under Audio System, select your audio interface from the dropdown menu.
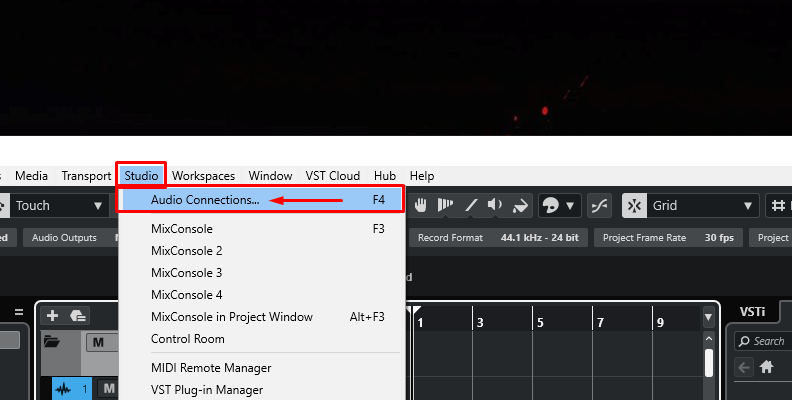
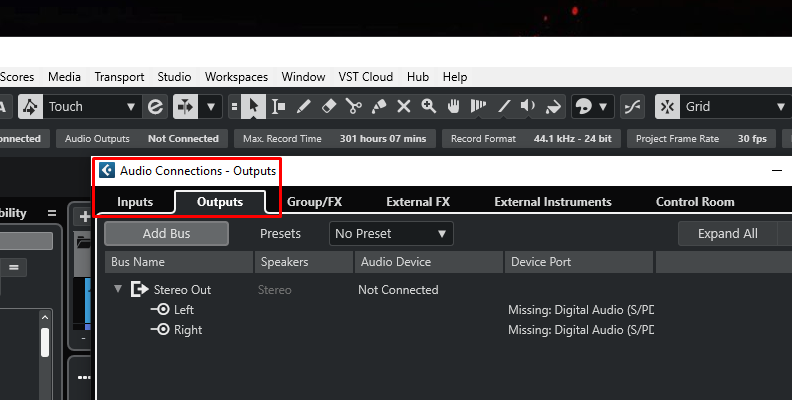
Now, it's time to set up the inputs and outputs in Cubase. Go to Studio > Audio Connections. The audio interface should be in the Inputs and Outputs tabs. If not, click on the Device Port and choose the right input channel from your audio interface.
Step 3: Adding and Setting Up the Audio Track for Recording
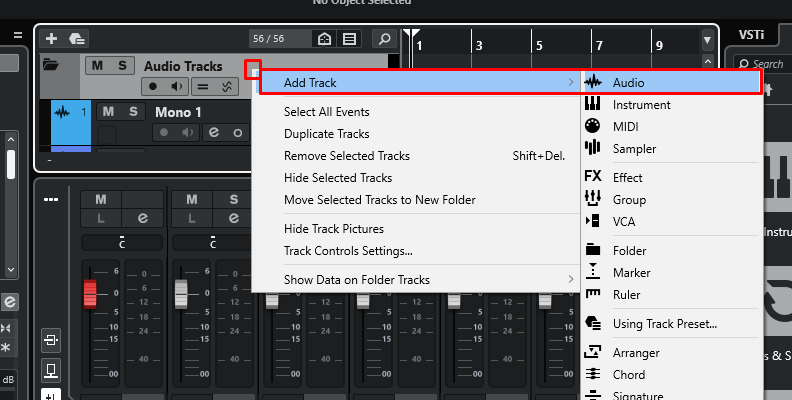
If you start with an empty project or need more audio tracks, you can create one by right-clicking the track panel and selecting 'Add Audio Track' from the menu.
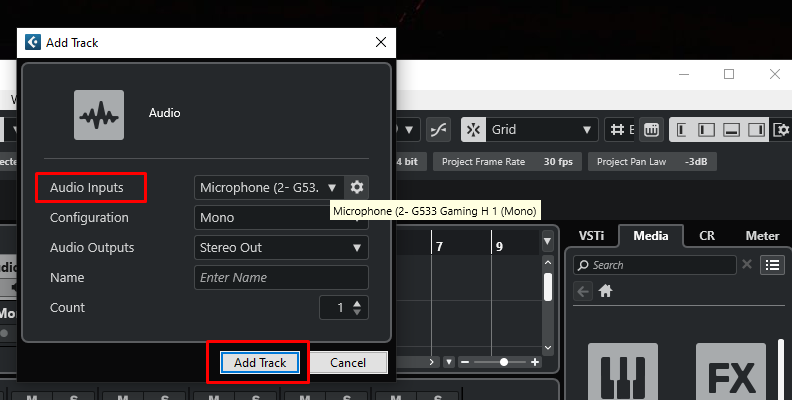
In the pop-up window, select the audio input where your microphone is connected to your audio interface. Choose mono in Configuration, name your track, and click Add track to finish.
Step 4: Monitoring and Checking Your Signal Level
You'll see a red button on the new track, which means the track is ready to record.
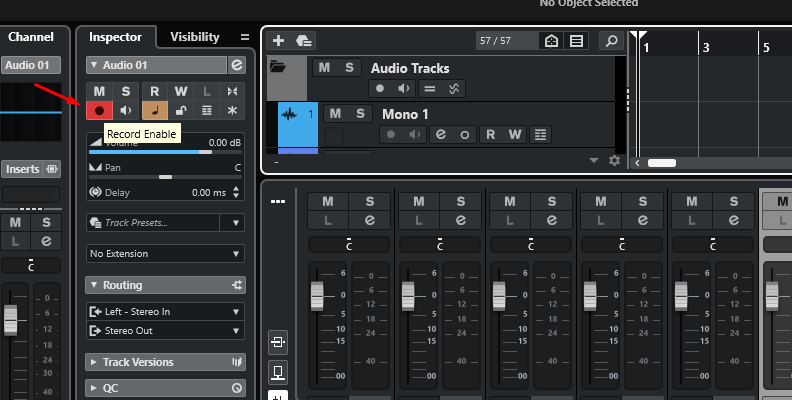
Press the speaker button to enable monitoring and see if the track receives an audio signal by speaking into the microphone. You should see the levels moving to the right of your track. Adjust the gain on your audio interface as you check the level meters on Cubase, ensuring you do not reach the high peaking levels.
Step 5: Record Your Vocals
Now you're all set! Enable the metronome in the transport panel, place the playhead where you want to start, and hit the record button. To stop recording, press the stop or record button again. You can now listen to the vocal track and begin to edit it.
Pro Tips on How to Make Your Recording Sound Better
There are always ways to make your recordings sound better! Use these tips to enhance the quality of the vocal sound.
Use tools and plugins to remove unwanted noises. CrumplePop plug-ins are AI-powered tools to help you eliminate unwanted background noises like wind, rumbles, pops, traffic, echo, and level audio.

Use third-party VST plug-ins to improve your music and vocal production. A few popular plug-ins are Auto-Tune for pitch correction, FabFilter EQ and compressors, iZotope's Ozone for mastering, and Waves' DeEsser.
You may also like: 9 Best VST Plugins for Cubase (Free and Paid)Explore and use Cubase's built-in effects. EQ helps you shape the sound by adjusting the low, mid, and high frequencies. Reverb can add space to the audio track, and compressors allow you to avoid abrupt changes in volume. Play with these effects and others, like Gate, Chorus, Distortion, and Delay, to achieve a good vocal sound.
Record in a quiet place or treat the acoustics of your studio.
Place the microphone at the right height and ensure the pop filter and stand are steady.
Hear It For Yourself
Advanced audio AI removes noise and boosts your vocal quality.
Toggle it on/off to hear the difference.
Remove Wind
Remove Noise
Remove Pops & Plosives
Level Audio
Remove Rustle
Remove Echo
Remove Wind
Final Words
Recording vocals on Cubase is straightforward once you complete the initial setup. Familiarize yourself with the DAW's environment first, then apply the pro tips and follow the steps outlined in this Cubase tutorial to record vocals confidently.
Good luck!


