


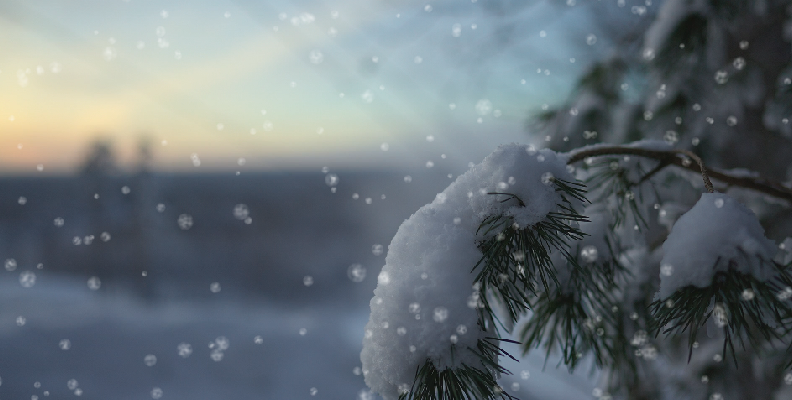
Shooting beautiful winterscapes is not always as easy as one may think: you must constantly look after your equipment, and sometimes, the weather does not cooperate. Thankfully, post-production software makes it easier to add snow, rain, smoke, and other elements that you cannot control in real life.
Today, you'll learn how to create breathtaking winterscapes using Adobe After Effects to add snow effects to your videos and photos.
Let’s dive in!
Create Realistic Snow Effect in After Effects

Adobe After Effects has tools to create quick and custom snow effects with the CC Snowfall effect and CC Particle World.
Step 1: Set Up Your Composition
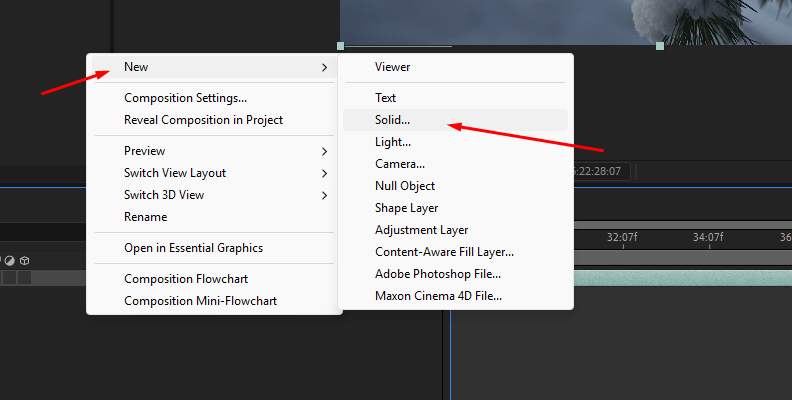
Start a new video project and import the video footage. Add a new solid layer to your composition, and select white for the snow color. Name it "Snow" to identify which layer contains the snow effect.
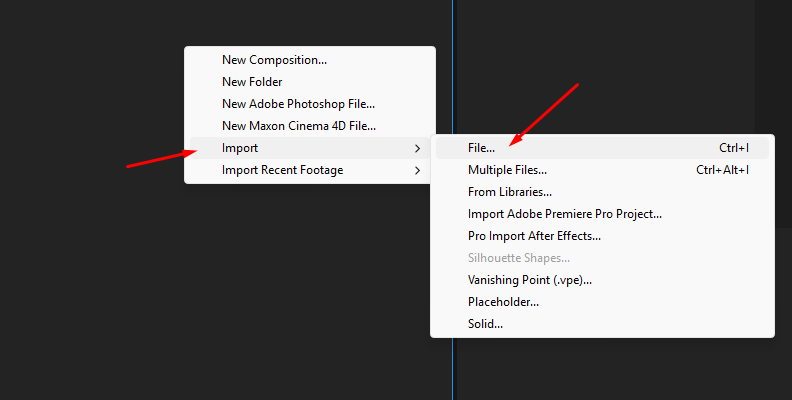
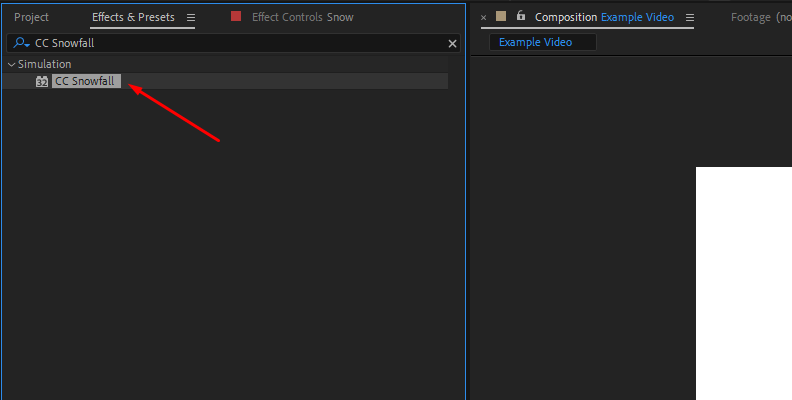
Step 2: Add the CC Snowfall Effect
Search for the CC Snowfall effect and drag it onto the solid layer. To view the snow effect over your video, go to the effect controls panel and uncheck the "Composite with Original" box.
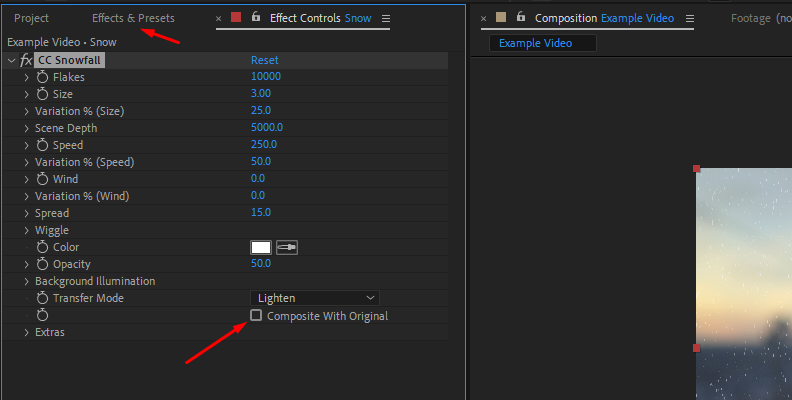
Now, simply adjust the settings to modify the appearance of the snow. Add more flakes, change their size and variation, adjust the speed, and create wind to move the snowflakes left or right.
Experiment until you achieve a natural effect of the falling snow.
Step 3: Improve the Snowfall Animation
If you want more control over the snow animation, use CC Particle World in the simulation effects instead of the CC Snowfall effect. Add it to the solid layer and drag the red circle to place the emitter where you want the snow to originate.
Adjust the snow birth rate and longevity. Display the Producer group settings to change the position and radius. Under the Particle settings, modify the particle type, color, and size. Use the Physics settings to adjust the animation style, velocity, and gravity.
You even use another layer as a texture for the particles' shape. This way, you can import a snowflake image and generate the snow based on it. It may not look realistic, but it can be useful for adding snowfall to an animation, logo, title sequence, or background.
CC Particle World can be more complex to master, but with practice, you'll learn how to use it to create particles in your compositions.
Create Realistic Snow Effect in After Effects with Continuum BCC Snow
If you want a more customizable effect to add a realistic snowfall effect to your videos, Boris FX Continuum includes BCC Snow, an auto-animated effect that composites snow over a video layer. This snow generator filter provides comprehensive settings to customize the snowfall, create drifts, and pile the snowflakes using an alpha channel.

Step 1: Add BCC Snow to Your Footage
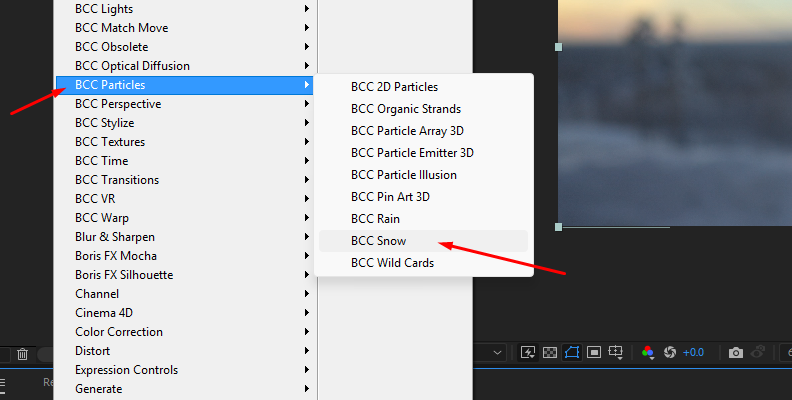
Import your video or image to your After Effects project. You can find it on the Effect menu, then BCC Particle > BCC Snow, or search it from the Effects and Presets panel and drag it to the video layer.
Step 2: BCC Snow Presets
When you apply the filter, you can start tweaking it immediately. However, Continuum always includes a few presets with all its filters, making presets a great place to begin. Click the FX Editor button and select a preset from the left panel to preview it. Click Apply to use a preset or Cancel to create a custom snow effect.
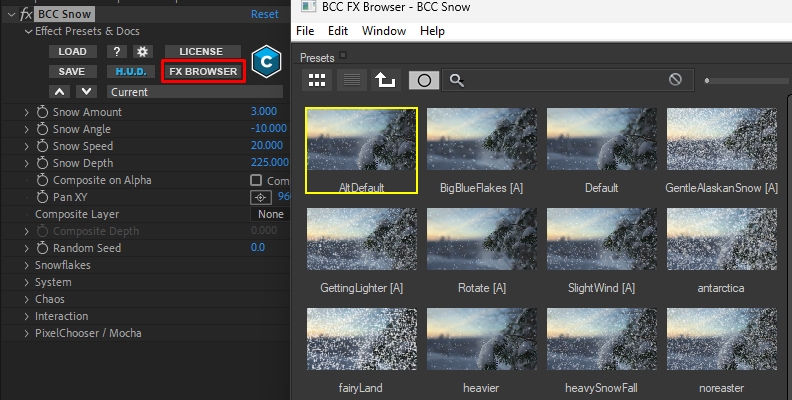
You can apply a preset and then adjust it to establish a starting point for the look you want to create.
Step 3: Create the Base for a Snowfall Effect
I’ll cover the main settings to help you understand how to create slow-falling snow, a windy snow effect, or sparkles. Whether you build custom snow from scratch or slightly modify a preset, knowing which parameter to adjust will be a lifesaver.
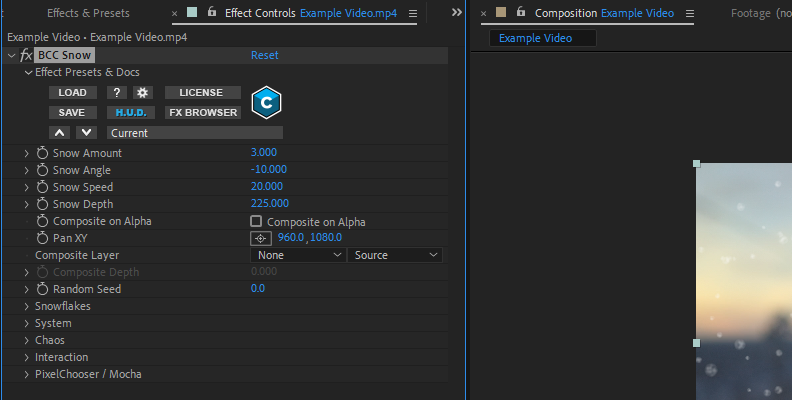
Adjust "Snow Amount" to control the density of the snowfall. If you want to create a heavy snowstorm, increase the amount to add more snowflakes. Decrease the amount to make a light snowfall with a few snowflakes, like it's just beginning to snow.
Direct the snowflakes' motion with "Snow Angle" and use "Snow Speed" to adjust the velocity at which the snowflakes move in the established direction. You can add depth to the snowfall with "Snow Depth." Play with these settings to achieve a base look for your snowfall.
The Pan XY controls let you move the point of view's position of the effect. You can also add more randomness to the snow generation by modifying the Random Seed parameter.
With this, you should have a basic start for a snow effect, but there’s more you can adjust.
Step 4: Craft the Snowflake Type
The Snowflake parameter allows you to shape your snowflake particles. You can change the color to add mystical purple snow for a sci-fi video, adjust the size of the snowflakes, and introduce size variation to enhance realism with a diverse range of sizes.
BCC Snow offers three options for changing the shape: Flake, Blur, and Sparkle. Each shape enables the character parameter to modify the particle's appearance. "Character" functions differently for each shape.
If you choose the classic Flake, Character controls how detailed or blurred the snowflakes appear.
When Blur is chosen, Character softens or hardens the particle edges.
With Sparkle, the Character parameter adjusts the length of the sparkle’s points.
Experiment with the "Opacity" and "Brightness Variance" settings to create unique snowflakes.
Step 5: Snow Effect Behavior
The following settings allow you to create more dynamic snowfalls for your videos. We’ll look at the System, Chaos, and Interaction parameters.
In the "System" settings, you can control how the snow particles behave in the animation. Modify the snowflake's lifespan to set the duration of each particle, adjust the generation width to spread or narrow the snowflakes, and add variation to the speed and direction to make the snowflakes fall at different speeds and angles.
Under the "Chaos" settings, you can add randomness for a more realistic snow effect, control the path of the snowflake animation, and adjust the variation of the wave motion. Adjust the frequency to set the number of waves the snowflakes create, and adjust the individual variation for a more natural effect.
With the "Interaction" settings, you can select another layer's alpha and luma channels as a map to determine how and where the snow accumulates in the footage. It makes a realistic effect of snow falling and gathering in a certain area.
Final Words
Snow effects in post-production can improve your winter shots and create animated Christmas postcards for your family and friends by adding realistic snowfall effects. After Effects tools are quick and easy to use, and when you feel its limitations, you can upgrade your editing toolkit with Continuum BCC Snow.
Get your Continuum free trial now!


