


There are many reasons to upscale a video from 1080p to 4K or from SD to HD quality. However, several reasons exist to convert a 4K video to 1080p as well.
In this guide, we'll talk about converting a 4K video to 1080p, whether that's a "downgrade" in every case, why you should consider doing it, and most importantly, the best way to do it and the top-choice tools for the task.
We've got much to cover, so without further ado, let's get straight into it.
Why Convert a 4K Video to 1080p?
Before getting into the exact methods and step-by-step tutorial on how to do this, it's first important to understand some of the main reasons behind the desire to downscale a video that's already high-resolution and crystal-clear.
Let's take a look:
- Storage space: 4K videos require significantly more storage space than 1080p videos. Converting to 1080p reduces the file size, making it easier to store and manage.
- Compatibility: Not all devices support 4K resolution. Converting to 1080p ensures broader compatibility with older devices, screens, and media players that might only support up to 1080p.
- Streaming and uploading: Uploading or streaming 4K videos requires a fast and stable internet connection. By converting to 1080p, you can reduce the bandwidth requirements, making it easier and faster to stream or upload, especially in areas with slower internet speeds.
- Editing and processing: Editing 4K videos demands more processing power and memory. Converting to 1080p can make the editing process smoother and less resource-intensive, especially on older or less powerful computers.
- Playback performance: 4K video playback can be demanding on hardware. Converting to 1080p can help ensure smoother playback on devices that struggle with 4K content.
- Cost of production: 4K video production and post-production can be more expensive due to higher requirements for storage, processing power, and equipment. Converting to 1080p can lower these costs.
- Distribution: Many video distribution platforms and services have lower costs or fewer restrictions for 1080p content compared to 4K content. This can make distribution simpler and more cost-effective.
- Audience reach: Not all viewers have 4K displays. Converting to 1080p ensures that a larger portion of your audience can view the content in high quality, even if they don’t have 4K screens.
- Battery life: On mobile devices, playing 4K videos consumes more battery power. Converting to 1080p can help conserve battery life, providing a better user experience for viewers on the go.
- Visual quality: For some content, the difference in visual quality between 4K and 1080p might be negligible, especially on smaller screens. Converting to 1080p can still provide a high-quality viewing experience without the extra resource demands of 4K.
How to Convert 4K Video to 1080p With BCC ReFramer
While your video editor or video editing tools, like After Effects, Premiere Pro, Avid, and other popular ones, offer built-in options to convert video files from a higher resolution to a lower one, it can often be a lot of work for imperfect results.
This is because some high-resolution cameras have settings that do not exactly match the aspect ratio of 1080p, yet most popular platforms require your content to be in 1080p.
So, assume that we want to keep a full frame and not "zoom in" into the 4K footage by cropping it just so we can match the 1080p frame. Doing this would lose us some important detail, but we can still make our footage fit the picture and also avoid black bars using BCC ReFramer.
Before we get into it, BCC ReFramer is a part of the Continuum creator pack by Boris FX.

You can download a free version of Continuum for your video editing software of choice, as it is available for all popular programs, including Adobe After Effects and Premiere Pro, Avid, DaVinci Resolve, Final Cut, VEGAS Pro, and more.
Once you download and install Continuum in your video editor, all hundreds of effects, transitions, and other tools, including BCC ReFramer will be available within your video editing program.
From there, all you need to do is follow these steps to ensure that your 4K video is properly downscaled to 1080p and that no black bars look unprofessional and distracting.
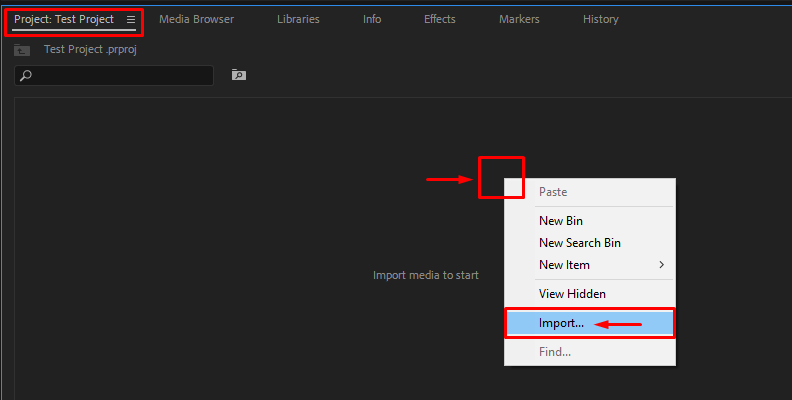
Step 1: Launch Premiere Pro, Create a New Project and Import Media
The first step is to launch the software of choice, in our case, Premiere Pro, and then import media. Import your 4K video that you wish to fit in a 1080p frame.
You can do this by going to the "Project" tab and right-clicking anywhere around where it says "Import media to start", then choosing "Import" from the list, as shown below.
Step 2: Create a Timeline/Sequence
Once your video is imported into Premiere Pro, you need to create a timeline/sequence out of it so that you can make edits, including applying effects. To do this, simply drag the video from the "Project" tab to the timeline area.
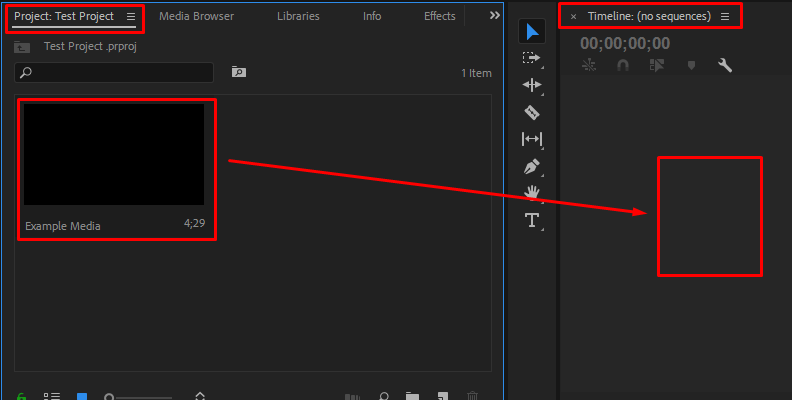
Now, the video is on your timeline and ready for editing.
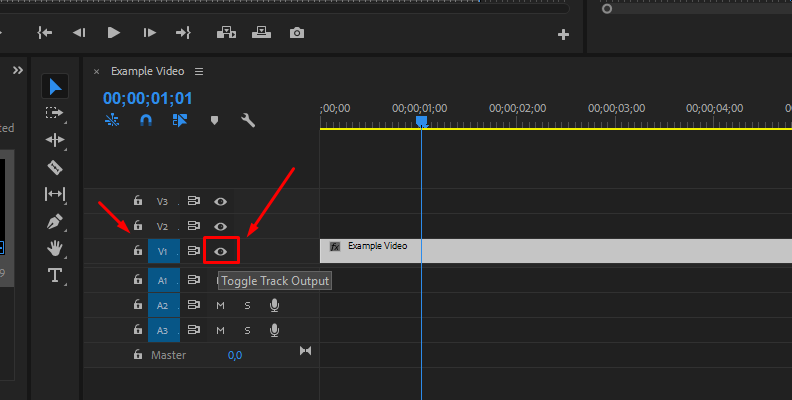
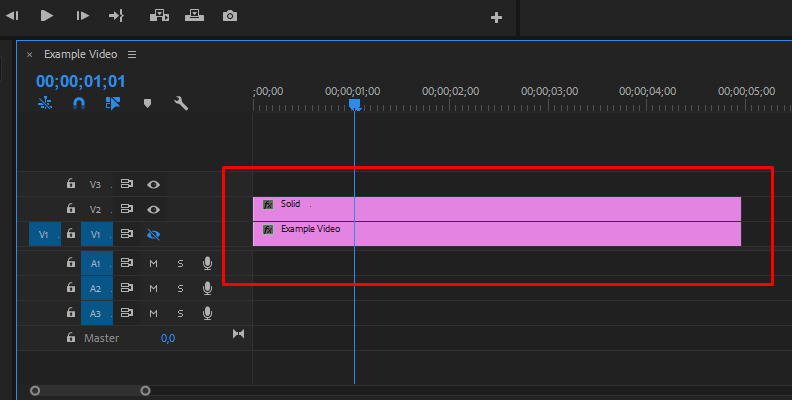
Step 3: Disable View and Add a New Solid Layer
Due to the way BCC Reframer works, we won't add the effect to the video as we would usually do, but instead, we'll create a new solid layer and add the effect to it instead.
First, we need to disable the view for our main video track.
We can do this by simply clicking the "eye" button right next to the video track name where we have our source video on our timeline.
Then, we can proceed and create a solid layer. You can use "Black Video" or "Adjustment Layer" in some cases.
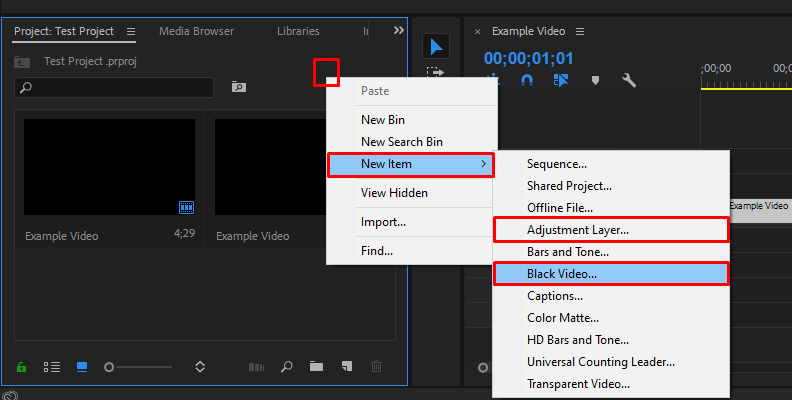
Make sure to position the new solid layer one video track above your source video, as shown in the image below. If your example video is on the V1 track we have a disabled view for, place the solid on V2.
Step 4: Add the Effect to Your Solid Layer
Now that we have the solid added to our timeline, it's time to apply the BCC Reframer effect. You can do this by navigating to the "Effects" tab and using the search bar to look up the "BCC Reframer" effect, as shown in the image below.
Once you find it (it is located under the BCC Image Restoration" folder), simply drag and drop the effect over the solid layer on your timeline.

Now, it's time to access the Effect Controls panel and adjust some settings based on your project's needs.
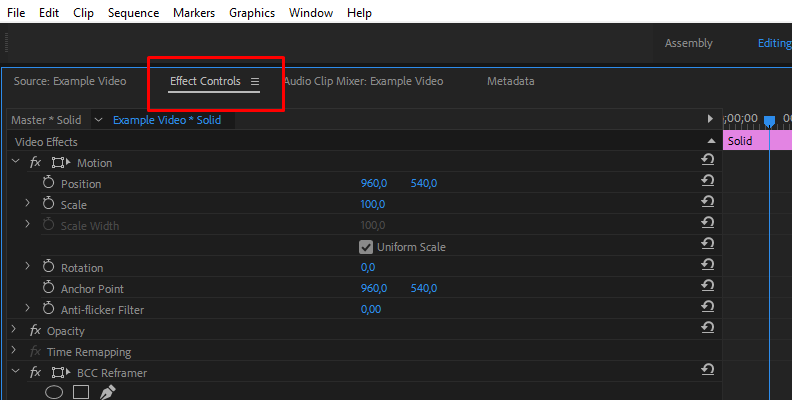
Since, in this case, we're using BCC Reframer to help with our conversion from 4K to 1080p, we'll focus mostly on the alignment and background tools offered.
The idea here is to be able to fit a full-frame 4K video without having to crop out any detail, but also be able to do that without getting black bars due to the size of the video being insufficient to cover the full frame without cropping and the difference in aspect ratios.
So, BCC Reframer's tools can help you easily downscale your 4K video and fit it into a 1080p frame. You can use Foreground Setup and Foreground Transforms control groups for the main fitting/framing, and the Foreground and Background Effect control group for ensuring the background is filled properly with blur and other effects that will smooth your transitions and make the content less harsh on the eye.
Once again, for a full explanation of each setting offered in the BCC Reframer effect controls panel, take a look at the BCC Reframer info webpage.
3 Best Video Converter Software in 2025
In this section, you'll find three choices for the best video converter software in 2025.
If you are willing to upscale or downscale video resolution, convert videos from HD to SD, or vice versa, all while having the choice to select multiple output formats, you've come to the right place.
Here are our top three choices:
Movavi Video Converter

Movavi is a popular software company that has a website offering both photo and video editing tools for all your needs.
One of the easiest video converter tools you can find on their website is the online video converter. There's also a desktop version of this video converter available for download, which is used mostly for larger files.
We've ranked Movavi number one due to the popularity of their tools, the reliability, and the simplicity of using them.
For example, for their video converter, all you need to do is open the website and upload a video by clicking one button. From there, you can choose to change the output format or reduce the size of the output file.
The conversion process doesn't take long as Movavi's servers are reliable, and that's an important factor in our overall rating.
Video Converter
Video Converter is another simple online tool that will help you downscale a video from 4K to 1080 in your desired target video format. It does what you would expect from a piece of software called Video Converter - it converts video!
Upon loading the website, you'll notice that you can choose to upload a video from Google Drive, Dropbox, or from your computer's local storage, as well as an online URL from anywhere the video is uploaded. This already makes most of the process quite simple and user-friendly.
You can directly choose which resolution to convert your video to, and you can even use the "Audio" tab if you need to change the quality of an audio file, or the format, even.
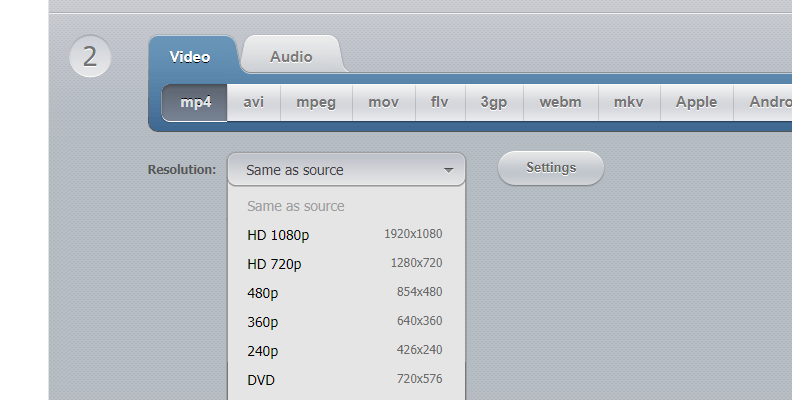
The website's design is not the fanciest, but it is very simple, works at high speed, and is not distracting. This makes it easy for users visiting for the first time to know immediately where to click and get their converted files in just a few seconds.
Overall, it is a simple and reliable tool with a lot of options regarding sizes and output file formats.
HD Convert
Last but not least, we have HD Convert, another useful piece of online editing software that you can use over and over again with multiple files that need converting, and the whole process requires just a few clicks.
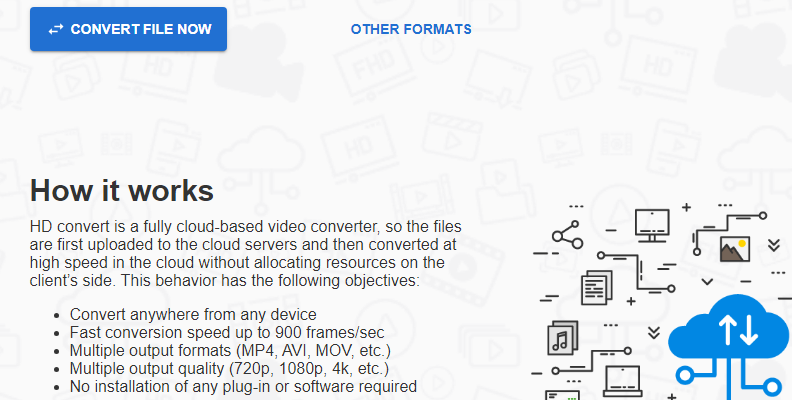
It works really quickly and there are multiple formats to choose from, but the best thing about HD Convert is that it has servers all around the world, meaning you will have lightning-fast uploads and downloads when you want to convert or upscale/downscale a video file.
Choose your desired output format and the video quality that you wish to get, and let the tool do its job in only a few seconds.
You can use HD Convert to convert videos that require a specific video codec to view or to change the file format for other accessibility reasons. Either way, the output video will be what you want it to be, so we highly recommend this video editing tool despite setting it in our "last" place on this list.
Final Words
That covers everything you should know about converting a 4K video to 1080p and some of the main reasons why you should consider doing such a "downgrade" to your files.
If you've already decided that you need to accomplish such a task, our guide has multiple methods available for you that will hopefully be enough for your future work.
FAQ
This section covers the most frequently asked questions and answers on the topic. Here, you will find concise answers to some of the questions that may still not be fully clear.
Can you really convert 4K video to 1080p without losing quality?
It's not possible to convert from 4K video to 1080p without losing quality since you're lowering the amount of pixels by so much. However, if you were going to watch the video on a 1080p screen anyway, you won't be able to notice the difference. In some cases, downscaling a 4K video to 1080p and watching it on a 1080p screen can be better and higher quality.
Why would I go from 4K to 1080p and "downgrade" my video?
There are numerous reasons to go from 4K to 1080p, such as saving storage space, making the video easier to edit and work with, as previewing 1080p requires fewer resources than previewing and replaying a 4K video, faster uploads, faster streaming, and much more that we cover in the first section of this guide.


