


Image editing is now more available than ever, with built-in smartphone cameras and apps providing numerous settings for taking breathtaking photos, and platforms such as Instagram allowing for on-the-fly edits that were once deemed professional work.
With the increase in social media popularity and overall dominance of the digital, online lifestyle, making edits to photos has become very common. Whether quickly removing a person from the background, using the blur image tool to censor a specific part, or retouching the colors slightly before posting, chances are you will need to do an edit like this sooner or later.
Blurring photos or simply adding a blur effect to a specific part of an image will be a task you encounter on your photo editing journey, whether professional or casual. That's exactly what we'll talk about in this guide, so let's get you prepared!
Here's what you need to know.
How to Blur Part of an Image with BCC+ Depth Of Field
Continuum is a renowned creator pack by Boris FX containing hundreds of useful tools and effects that will allow you to edit and improve your photos and videos professionally using filters, presets, transitions, and more.

Amongst the many available tools and options that Continuum provides its users, there's an effect called BCC+ Depth Of Field, which allows you to manually adjust the depth of field on your digital photo if it wasn't properly done or even present entirely during the shoot.
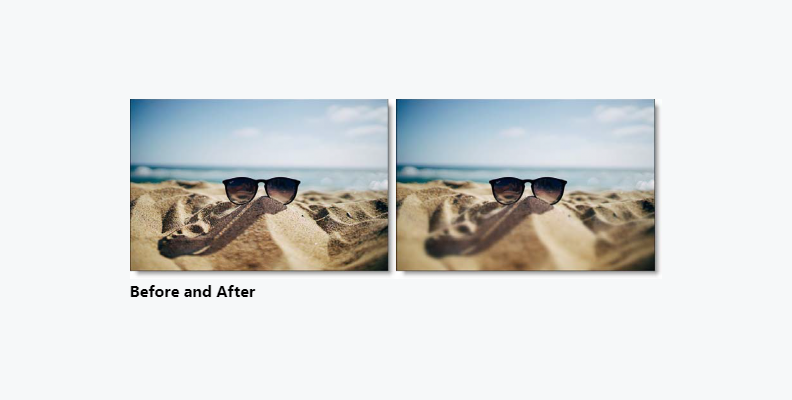
The BCC+ Depth Of Field effect will help you isolate and blur only one part of your image instead of the whole shot, allowing you to create professional-looking, immersive, and atmospheric photos that look like an expert has taken them.
In this section, you'll learn how to use BCC+ Depth Of Field to blur image parts effectively, in a more customizable way than what most blur tool options on various other apps offer.
Here's what you need to do:
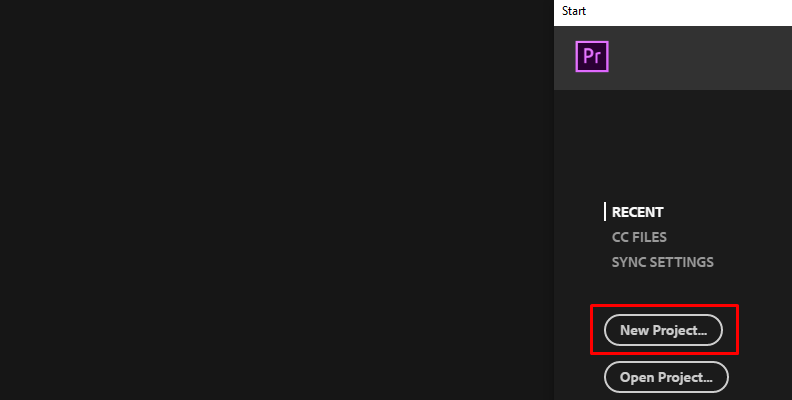
Step 1: Load Premiere Pro and Create a New Project
Launch Premiere Pro and click the "New Project" button on the home screen panel, as shown in the image below.
Pick your preferred project settings and finalize the project creation.
Step 2: Import Media (the Image You Want to Blur) in Premiere
To import media in Premiere, you need to open the "Project" tab and right-click anywhere on an empty area, then choose "Import" from the list of options, as shown in the image below.

Your computer's file browser window will open. From there, locate your image and import it within Premiere.
Now that the image is imported, you need to create a sequence with it.
To do this, simply drag it from the "Project" tab over to the timeline area.
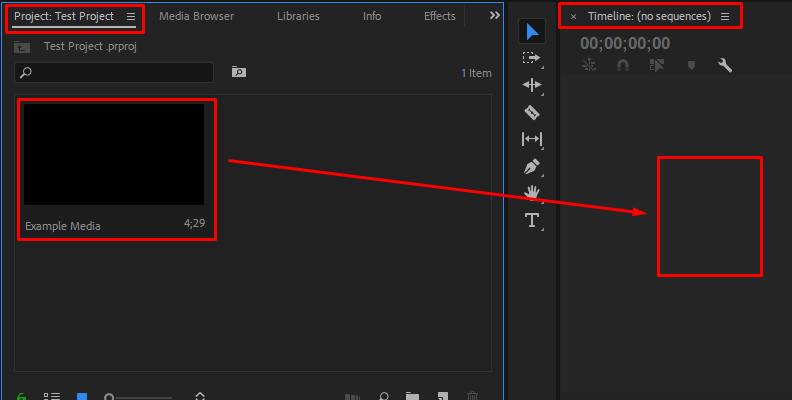
Now, you have a sequence (a timeline) that looks something like this.
Your next step is to add the BCC+ Depth Of Field effect to your image.
Step 3: Find BCC+ Depth Of Field and Add It as Effect
You can use various tools to blur images or to fix blurry images. However, if you don't want to have a completely blurred image and want to apply the blur to only a part of it, the BCC+ Depth Of Field effect is what you need to work with.
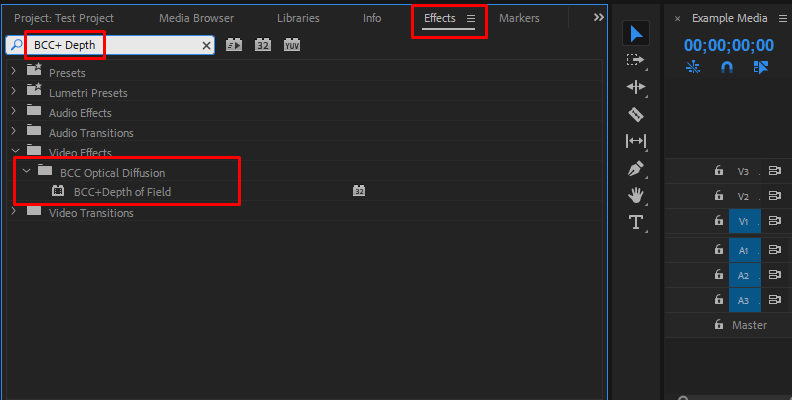
To add it, we first need to locate it in the "Effects" tab.
Click on the "Effects" tab and use the search bar to type in BCC+ Depth Of Field.
You will find the effect under the "BCC Optical Diffusion" folder, as shown in the image below.
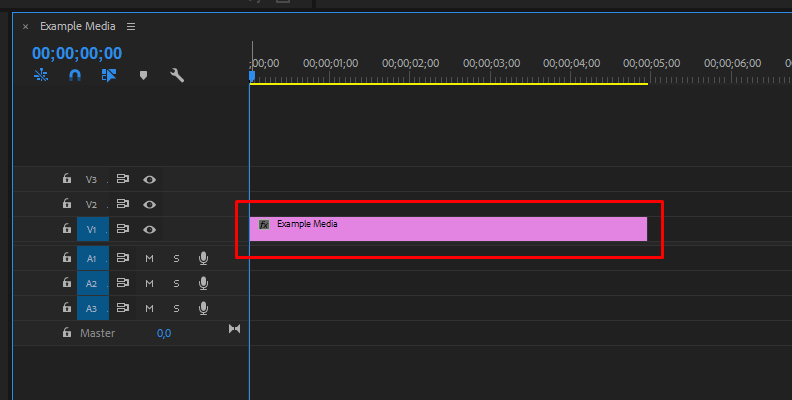
Once you locate it, simply drag and drop the effect over your image on the timeline.
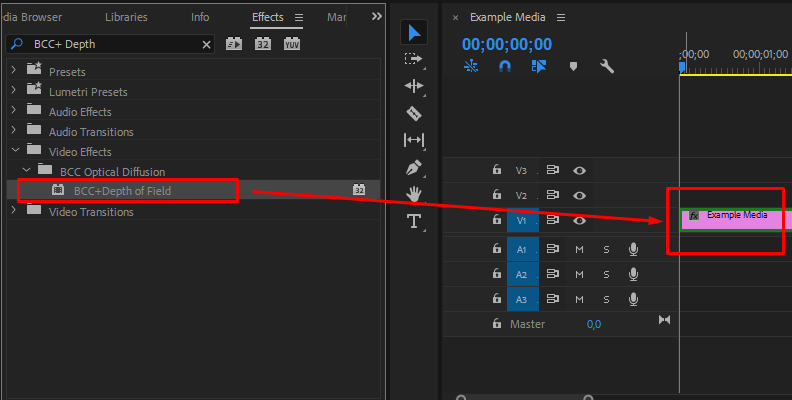
Now, the effect is applied to your image.
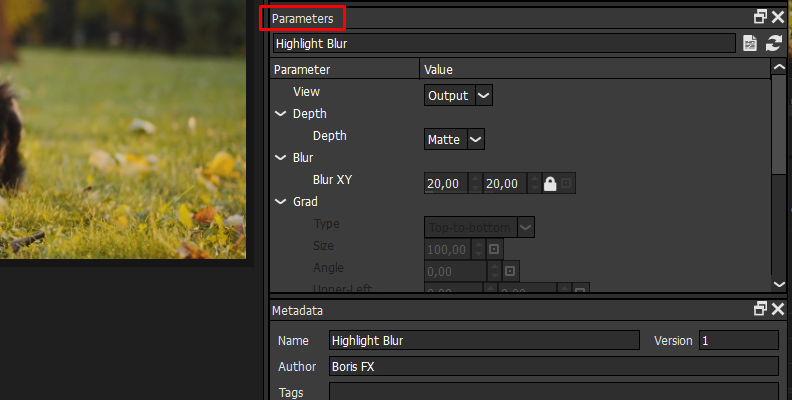
Step 4: Adjust in the Effect Controls Panel
Once again, when looking to blur photos with the BCC+ Depth Of Field effect, it's always helpful to refer to the official effect page where all settings are explained in detail.
After adding the effect to your image, open the Effect Controls panel by clicking on it in the top-left corner of the screen.
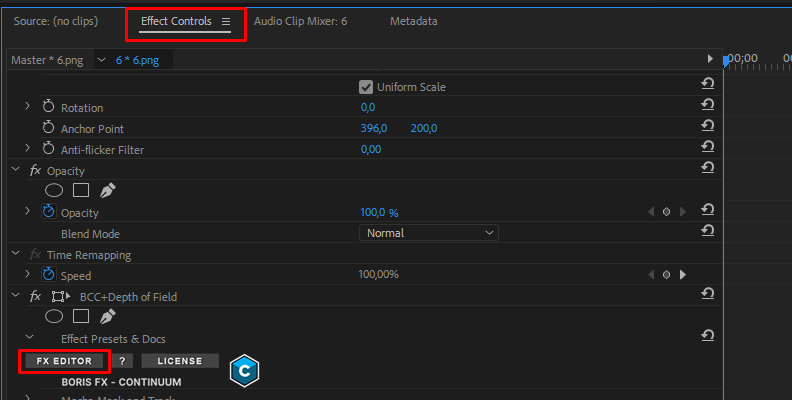
Then, you can click on the "FX Editor" button to open the FX Editor, where you can choose from various presets and parameters.
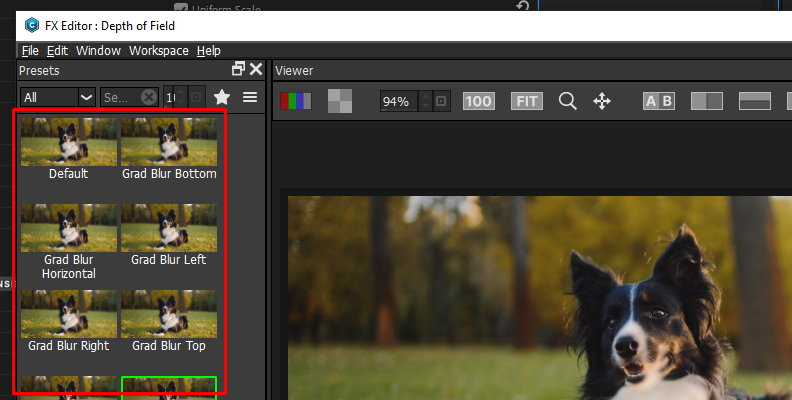
Choose what works best for your image and click the "Apply" button at the bottom-right corner to save the changes.
Then, you can render and export from Premiere Pro in your desired format.
That's all there's to it!
How to Blur Part of an Image with Photoshop
Adobe Photoshop is the go-to editing program for both beginners and experts. It allows you to do many different edits to an image, such as adding blur effects, distortions, noise, cartoon effects, and more.

For this specific task, we'll use the Gaussian blur effect combined with a selection tool to blur photo details only in specific parts of the image.
Here's what you need to do:
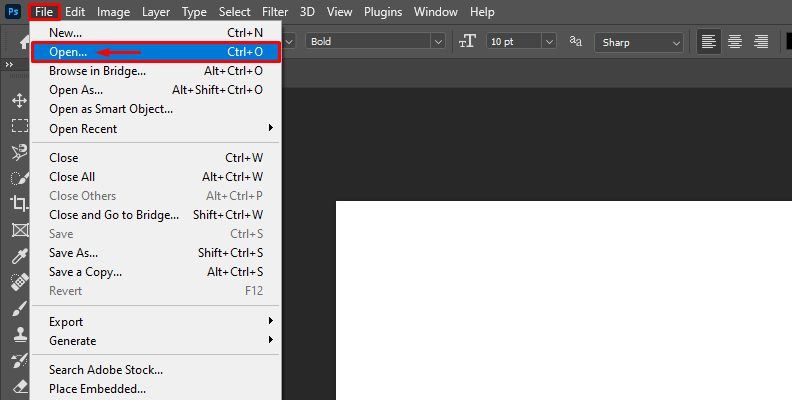
Step 1: Open Your Image in Photoshop
Your first step is to open the image in Photoshop. To do this, you can go to File -> Open and choose the image from your computer.
Step 2: Use a Selection Tool to Define the Area You Wish to Blur
The next step is to use a selection tool, like the Marquee Tool or the Lasso Tool, to choose an area of your image that you wish to blur. We do this because our task is not to end up with a blurred photo, but with only a desired area of it blurred.
If you were to blur a person's face, a car's license plate, or a sign in the background, simply select them using one of the two tools listed above and then go to Filter -> Blur -> Gaussian Blur.
If you want to simulate a depth-of-field effect, as we did in the previous section using the BCC+ Depth of Field tool, you need a slightly different approach.
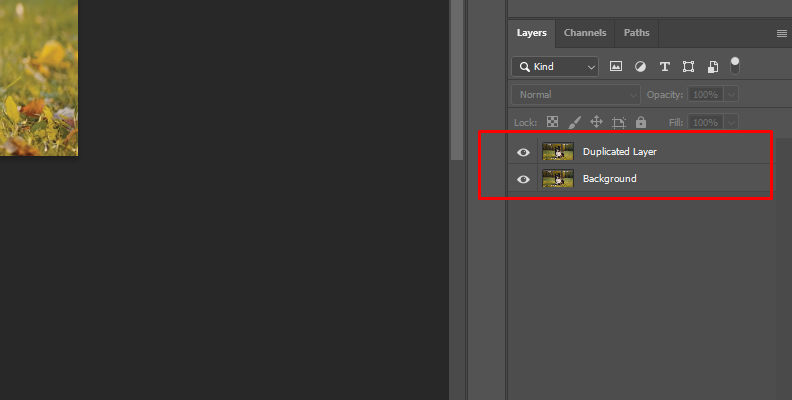
For this, it's first recommended to duplicate the main layer of the image that you imported.
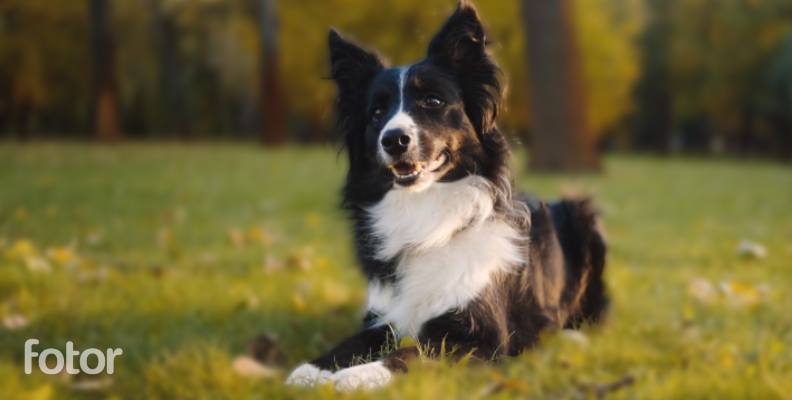
Then, select the duplicated layer and use the selection tool to select the part of that image that will remain unblurred. In our example, it's the dog in the photo.
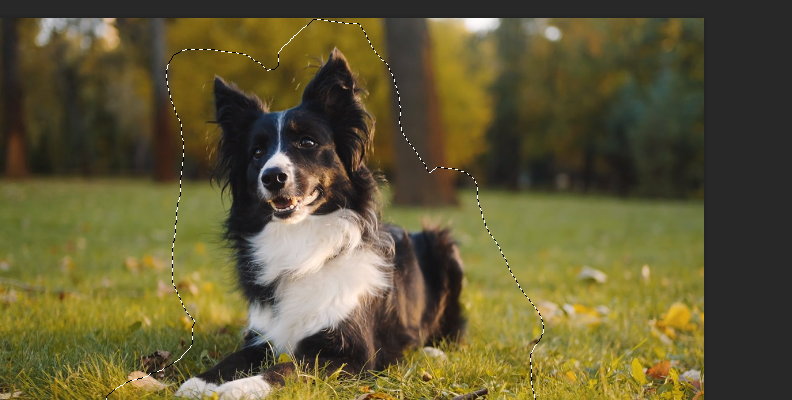
After selecting, you can refine the selection by going to "Select" -> "Refine Edge".
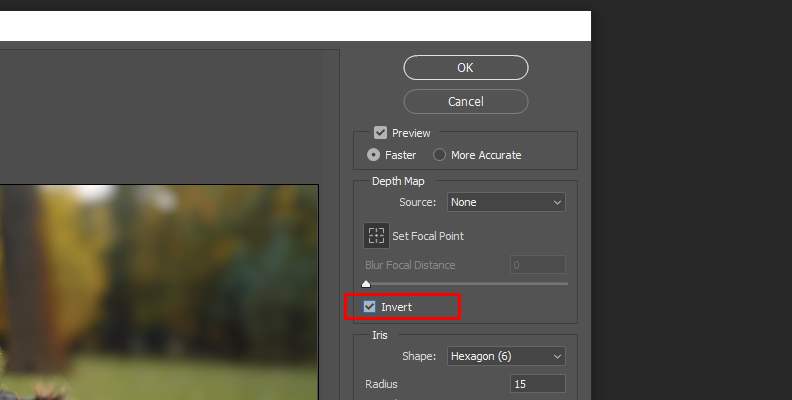
Now, with your selection active, go to "Filter" -> "Blur" -> "Field Blur".
Make sure to "tick" the "Invert" option so that your selection doesn't get blurred, but the background instead.
Step 3: Adjust, Refine, Export
Your final step is to adjust the settings, such as Radius, Rotation, Blade Curvature, and others until you get the results you want.

When done, click the "OK" button and save the changes to your image. Render and export the photo, and that's all there's to it!
There's a lot more attention to detail you can put into this to make it look as refined and professional as possible, but even the basics we just did are enough to make our subject "pop" out more as the center of attention in the image.

The 2 Best Apps for Blurring Part of an Image
If you don't have access to Adobe Photoshop or Boris FX's Continuum, you can use an online photo editor to easily blur a part of an image without spending too much time.
Here are our top choices we recommend you use whenever you're looking for a free app to blur unwanted objects or anything else in your photo's background.
Fotor
Fotor is a free online tool you can use as a photo editor for many different tasks, including anything that has to do with a blur tool.

When you open the website, you can expand the "Photo editing tools" section and choose the "Blur Background" tool from the list of options.
This will take you to a user-friendly page where all you need to do is an image upload.

Once you upload your image, Fotor's AI will analyze the image and separate your subject from the background. Then, you can simply use the blur slider to adjust the amount of blur added to the edited photo.
Download and save your photo. (Remember, it will be watermarked unless you're using the pro/paid version.)
That's all there's to it!
Kapwing
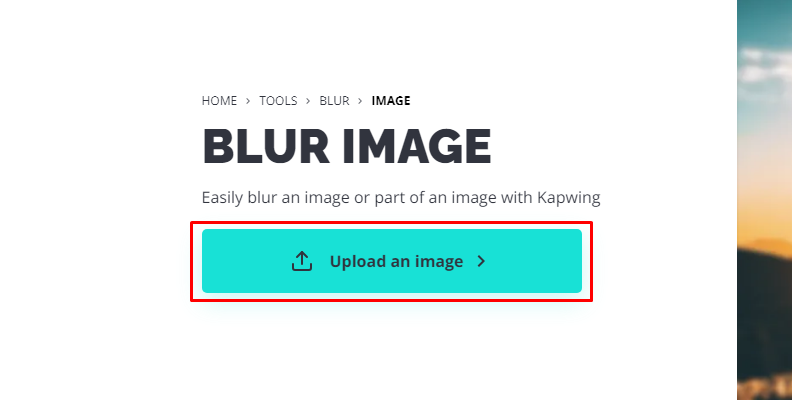
The Blur Image section of Kapwing's website is a great choice when you need to do an edit like this quickly.
Upload a photo by clicking the upload button.
Then simply head over to the edit tab on the right side to use a blur tool or other tools you may need to enhance your image further.

You can also use the AI background remover tool to get some help from AI when it comes to selecting the background, and then add the blur through the edit tab.
Please note that some of Kapwing's features are limited when using the free version of it.
Final Words
That's all you need to know about blurring a part of an image using two very popular methods.
Hopefully, this will help you with your work in the future.
We thank you for reading and wish you the best of luck!


