


We're surrounded by noise. So, when it comes to recording audio, getting a noise-free recording can prove to be more challenging than expected.
Fortunately, there are two ways to deal with unwanted noise: record the audio again or clean it up during post-production. Ideally, the best option is to prevent noise from creeping in during the recording process. However, when time constraints and other factors come into play, you may be left with noisy audio that needs to be fixed.
In this article, you will learn how to remove background noise using Ableton noise reduction plug-ins, as well as third-party alternatives. Furthermore, we will explore the differences between a noise gate plug-in and a denoiser, so you can choose the best option for your needs.
Let’s dive in!
How to Remove Background Noise with Ableton
Ableton Live is a complete DAW (digital audio workstation) and is among the most popular in the producer community.

It comes with built-in plug-ins that will help you remove background noise. Depending on your type of noise, you can try several noise reduction methods in Ableton Live.
Some of these methods are dedicated plug-ins for noise reduction, but there are some tricks that you can do with other plug-ins to remove unwanted noise. Combining these methods can give you better results and enhance quality.
Method 1: Ableton Live EQ
EQ is essential in music production and audio engineering. It can help you manage specific frequencies where background noise is present, and is a go-to option for vocal recordings with frequency noises like hum and rumble.
Ableton Live features several EQs that you can use, depending on your version. EQ Eight is one of the best tools for music production and sound design in Ableton Live, but it’s only available in the Standard and Suite versions.
For Ableton Live Lite and Intro, you can use another third-party EQ.
Follow these steps to reduce unwanted background noise with EQ Eight.
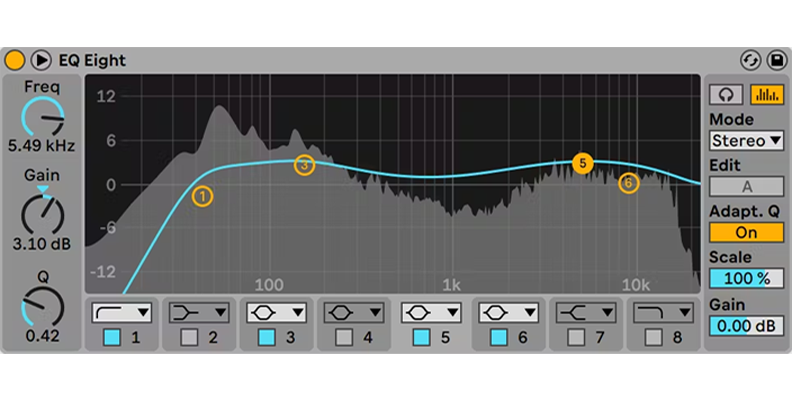
Step 1: Add EQ Eight to your chain in Audio Effects > EQ > EQ Eight.
Step 2: Select the part of your audio track with noise and play it back. You should see the waveform on the spectrum where the noise is present. Enable the band by checking the box and selecting a filter from the dropdown menu. Playback the audio to hear which one works best.
Step 3: You can manually boost or cut frequencies by clicking and dragging the point in the EQ UI.
Step 4: Play the audio track and listen carefully. Trust your ears until you find the right setting where the audio noise is removed.
EQ Eight works better to target frequencies in the low or high end of the spectrum. If you're a podcaster recording at home, it will help you with ambient noises like AC and fans. You can reduce the harsh sound from amps by cutting the higher frequencies for instruments like guitars, but be careful not to cut other desired frequencies, affecting your music's sound and quality.
Method 2: Noise Gate
If background noise is mainly present in quiet parts but not audible during speech or other sounds, use the built-in Noise Gate plug-in in Ableton Live.
What Gate does is reduce the volume level of the background noise to remove it. Think of it as a gate that closes when the noise becomes audible.
Noise Gate is available in the Intro, Standard, and Suite versions of Ableton Live.
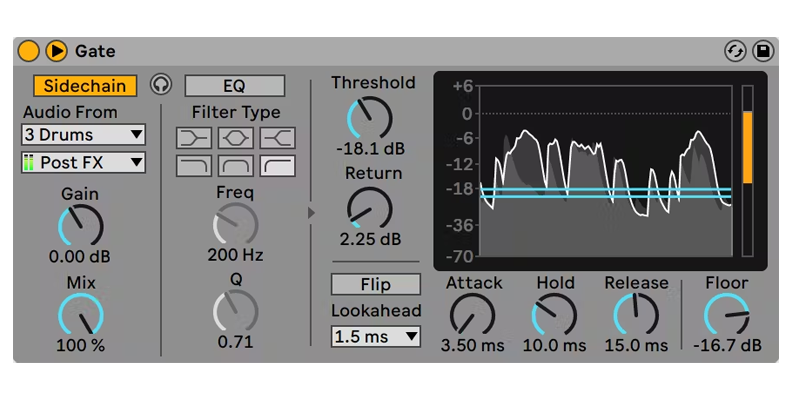
Step 1: Search for Gate in your Audio Effects > Gate and add it to your audio track.
Step 2: Let me explain what each of these knobs does and how they affect each other.
The Threshold knob is one of the main things you need to set in Gate. It determines at which level the gate will open to let the audio signal pass through. Set the Threshold to a level where the unwanted background noise is not audible but does not affect your voice or other instrumentals. You can play the audio to find the noise level when there's silence and adjust the threshold above it.
The Return defines the difference between the levels at which the gate opens and closes.
Flip becomes handy when you have high-pitched noises. It will invert the gate to let the audio signal pass when it’s below the threshold.
Adjust the Attack to set how fast the gate will open once it reaches the threshold level. A short attack can result in sharp sounds. Set it higher for a softer sound.
Hold determines how long the gate will remain open after crossing the threshold.
When the Hold time is due, the Release time will determine how long it takes to close the gate.
With Floor, you can adjust the amount of noise reduction when the gate closes.
Step 3: Find the balance to mitigate the background noise smoothly.
Method 3: Reduce Ambience Preset
Ableton Live features a Multiband Dynamics plug-in that allows you to adjust the dynamic range of an audio signal. It provides up to two dynamic processing types in three independent frequency bands. This means that it can take over six types of dynamic processing simultaneously.
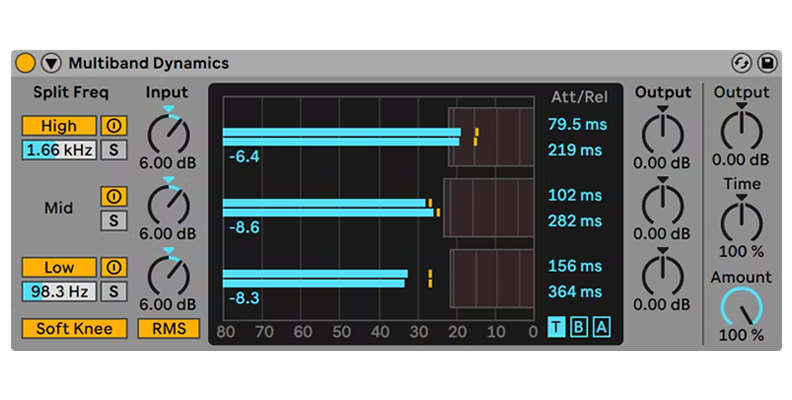
You would usually use Multiband Dynamics for mastering. However, Ableton Live features a Reduce Ambience preset that can help you remove noise by combining downward compression and expansion to make a loud and quiet signal quieter.

Once again, Multiband Dynamics is only available on Ableton Live Standard and Suite editions.
Step 1: You can directly search for “Reduce Ambience” or go to Audio Effects > Multiband Dynamics > Reduce Ambience. Add it to your audio track with noise.
Step 2: By default, Reduce Ambience separates the low-mid and high frequencies, with the higher frequencies set with fast attack and release times. You can get away with the preset default settings and only adjust the amount knob. But if you're curious and like to tweak things, you can adjust the threshold settings to fine-tune the noise reduction.
Step 3: You can place Reduce Ambience at the start of the processing chain and combine other plug-ins like EQ and a compressor.
Method 4: Denoise with Drum Buss
Drum Buss is a drum plug-in to help you shape a punchier sound, but producers have found a trick to use it to reduce background noise when applied to other tracks besides drums. Sadly, Drum Buss is not available in Ableton Live Intro and Lite.
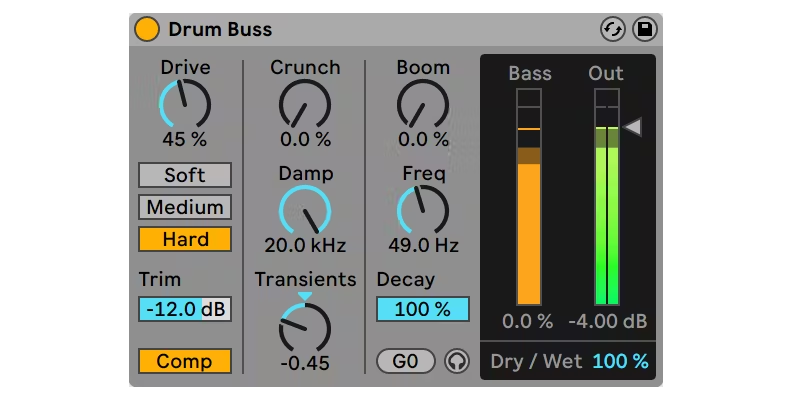
Step 1: Search for Bus Drums in your Audio Effects and add it to your audio track chain.
Step 2: Your focus will be on the Transients knob. While the plug-in is designed to emphasize or de-emphasize the transients in a drum track, setting it to negative values can remove background noise volume and room reverb.
Step 3: For a more accurate reduction with Drum Buss, add an EQ to the chain and play the part of the audio with noise. Find the frequency of the background noise and set the Damp knob in the Drum Buss at that frequency.
Step 4: Adjust the Transients and playback the audio to find the best settings.
How to Remove Background Noise with Ableton Using 3rd-Party Plug-ins
There are plenty of third-party plug-ins compatible with Ableton Live. If you're using the Lite or Intro versions, which are missing most of the plug-ins above, you can remove noise with these third-party plug-ins. Below, you'll find some paid plug-ins as well as free alternatives.
CrumplePop AudioDenoise
You will need premium plug-ins to ensure a sharp and clean sound for your audio recordings. CrumplePop is a cleanup suite of plug-ins that removes noise to achieve studio-quality sound in your audio recordings. Their plug-ins use AI technology to analyze your audio and identify noise from speech.
These advanced features can remove noises, even sounds that overlap with your voice, without affecting it.
These steps will guide you in removing noise with AudioDenoise from CrumplePop.
Step 1: Go to Plug-ins > CrumplePop Complete > AudioDenoise Complete and place it on your audio tracks chain.
Step 2: AudioDenoise will automatically detect background noise and apply noise reduction, but you can adjust the Strength knob to control the amount. And that’s it!
Usually, this will be enough to improve the clarity of your mixes. However, here are some things you can do to further enhance their quality.
If your audio level drops after the reduction, you can raise the Output slider to bring it up.
You can set how much of AudioDenoise you want in the Low, Mid, and High frequencies for a more precise reduction with the bottom knobs.
Create presets if you record in a lousy environment often or for each speaker if you work with podcasts. You can load the preset the next time you record and save time editing.
You can also use CrumplePop's Voice Enhance, which handles move issues than just simply removing noise. It removes echo and other problematic sounds while also enhancing the quality of the voice.
External Sample Editor
You can set any audio editor you want to edit in Ableton Live, like Audacity, Audition, or iZotope RX. I’ll show you how to remove noise using Audacity's noise reduction features inside Ableton Live, but the process is similar if you're using iZotope RX or Audition.
Step 1: Set Audacity as your default sample editor. Open your preferences with "CTRL/CMD + ," and click the File Folder tab. In the Sample Editor option, click Browse and search for Audacity.
Step 2: Select an audio track in your timeline to see the Clip View. Click the Edit button to launch Audacity.
Step 3: On Audacity, select a part of the track where you hear only the background noise. Go to Effects > Noise Reduction and click Noise Profile. Audacity will identify noise and remove it from the rest of the track.
Step 4: Select the audio track and go to Noise Reduction once again. This time, adjust the settings at the bottom: Noise reduction, Sensitivity, and Frequency smoothing. Preview the track as you adjust, then click OK.
Step 5: Go to File > Export > Export as WAV. Leave the same name and click save. It will overwrite the original file.
Step 6: Close Audacity and go back to Ableton Live. Click on your audio clip to refresh it, and you should have the new audio without background noise.
Free and Pay What You Want Plug-ins
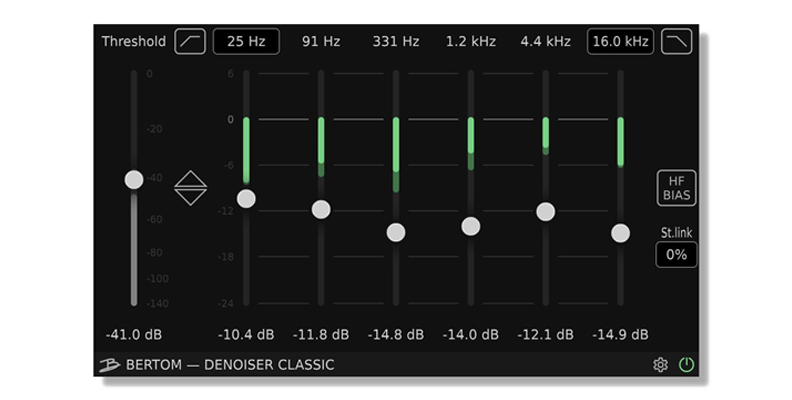
Some alternatives for individual plug-ins are Bertom Audio Plug-ins, which offer pay-what-you-want EQ, denoiser, and compressor, plus Denoiser Pro with individual per-band thresholds and an adaptive mode.

Another good suite of free plug-ins is ReaPlugs from REAPER. The suite comes with EQ, Gate, compressor, and more that you can download and use on Ableton Live.
To use these plug-ins, download and install them first, then rescan your plug-ins inside Ableton Live. Since most Gate and Denoiser plug-ins have the same parameters, you can use the above guides for reference.
Noise Gate vs Denoiser
Both Noise Gate and Denoiser aim to eliminate background noise, but their approach is different. A noise gate will remove all the noise below a set threshold, only from quiet parts. Once the gate opens, the noise will become audible.
The denoiser will act on all the tracks and remove noise from silences and speech. Usually, you will get by with only a denoiser, but you can always complement a denoiser with a noise gate to remove unwanted noise professionally.
Final Words
Removing noise in Ableton Live is about using the right tool for the type of noise you're dealing with. While the built-in plug-ins can do a decent job, using third-party noise-reduction plug-ins like CrumplePop is your best bet, as it can save you a lot of time and effort.
CrumplePop offers a variety of tools that cater to specific types of noise, including general background noise, wind noises, plosive sounds, traffic, clipping, echo, and even rustle noises caused by lapel mics. This gives you more control over the noise reduction process and ensures that your audio sounds clear and professional.
In addition, the CrumplePop Levelmatic tool helps you level your audio after noise reduction, making sure that all parts of your recording are at a consistent volume. This can save you time during post-production and ensure that your final product sounds polished and well-balanced.
Download a free trial with CrumplePop and find out how you can eliminate background noise automatically.
Good luck!


