A glow is an effect that adds brightness to a part of an image, creating a glowing aura around a focal point. This valuable effect can replicate natural lightning, neon light effects, and other creative looks, giving your work a sense of realism.
In this tutorial, you'll learn to create amazing glow effects in Adobe After Effects with two options. In the first part, we'll use the default Glow Effect, and in the second, the powerful Continuum BCC+ Glow plug-in.
Let’s dive in!
Pros and Cons of Creating Glow Effects in After Effects
Adobe After Effects has a built-in glow effect, which you can experiment with to add glow to your photos and videos. But before we jump to the next section, I want to address the pros and cons of the built-in glow effect in After Effects.
The first advantage is that it’s accessible to every After Effects user because it comes built-in with After Effects. There is no need to download and install external programs.
Glows can add an aesthetic look to your photos and videos, creating more eye-catching compositions.
The Glow effect is versatile and can be used on images, videos, logos, and text layers.
It’s easy to apply and configure for a quick and basic glow.
As for the cons, the Glow Effect can be hard to customize, requiring a lot of trial and error and time to find the perfect look.
If you want to create a creative glow effect, you need to work with multiple layers and effects, which will make your project heavier and slow your computer down.
If you’re not careful, you can overuse the effect and make it look unnatural.
It has limited controls for brightness, contrast, and color correction.
Animating the effect can be complicated and time-consuming using keyframes.
How to Create Glow Effects in After Effects

Let’s begin with the tutorial for the built-in Glow Effect in Adobe After Effects.
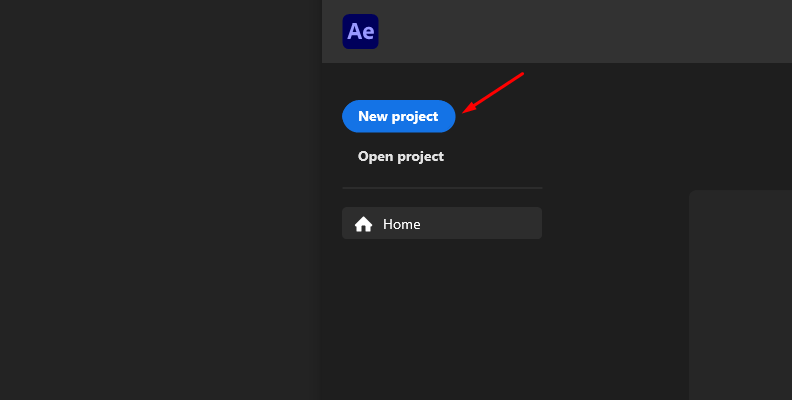
Step 1: Create a New Project
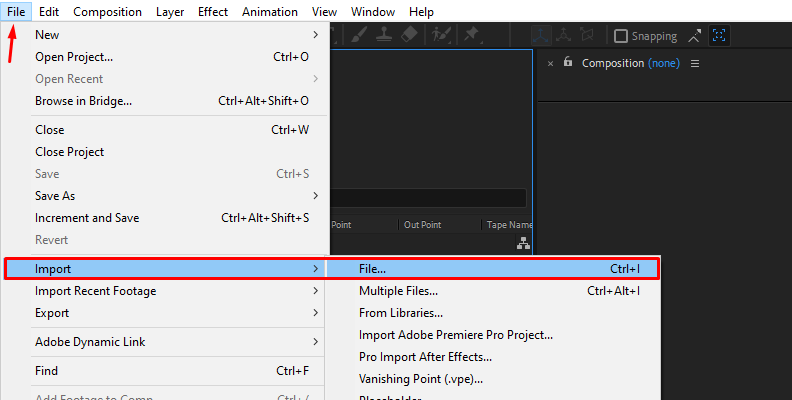
Start a new project in Adobe After Effects, and import the image you want to use for the tutorial. To import files into After Effects, click and drag them from the finder or explorer windows or go to the menu File > Import and browse your project files.
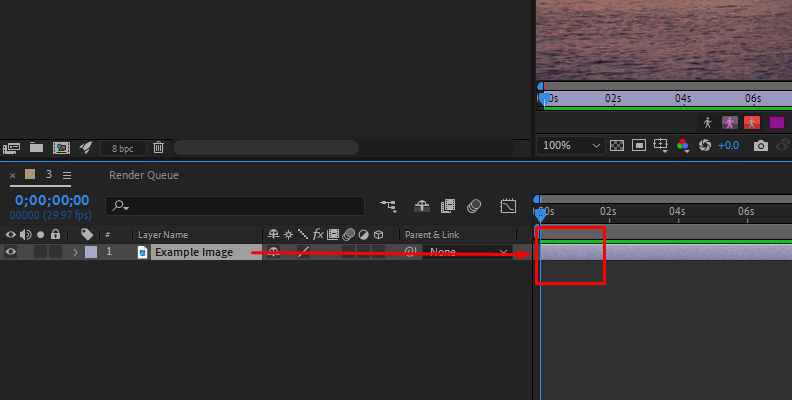
Drag the image to the timeline to create a new composition with the size of the original footage, and organize your layers.
Step 2: Add the Glow Effect
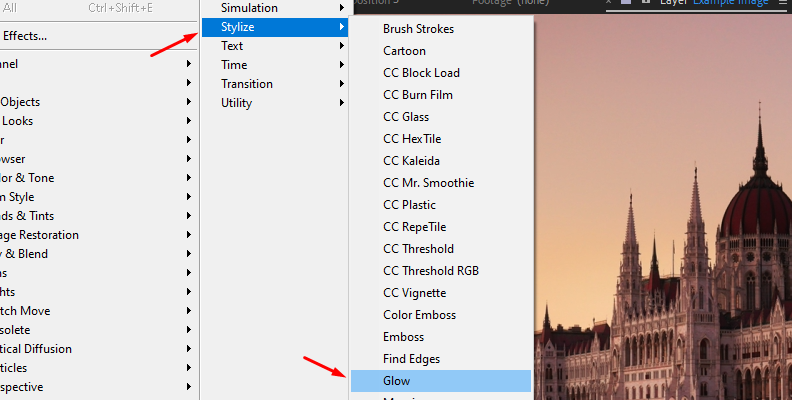
Search for the effect in the Effects & Presets panel and drag it to the layer, or select the image layer and add the glow effect from the upper menu Effect > Stylize > Glow. You should see the default setting in action.
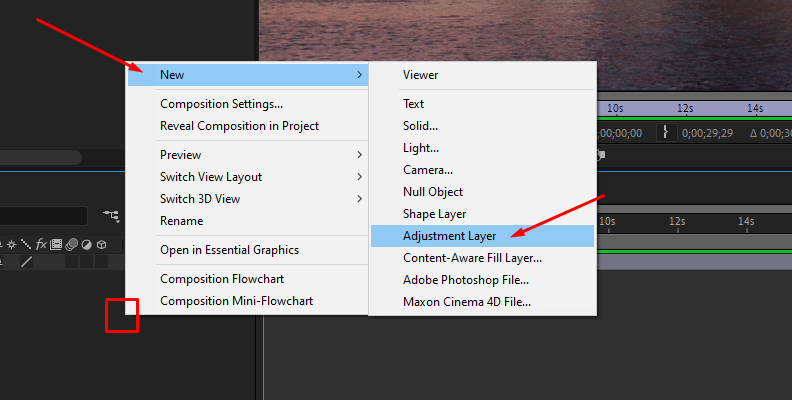
You can add an adjustment layer above your original footage to apply glow. It will prevent some issues that may occur with the alpha channel.
Step 3: Set Up the Glow Effect
Open the effect controls panel to see the Glow Effect parameters. Three main settings will control the final look of your glow effect: Glow Threshold, Glow Radius, and Glow Intensity. These settings have no universal value, so you must play and experiment with your footage each time to get great glow results.
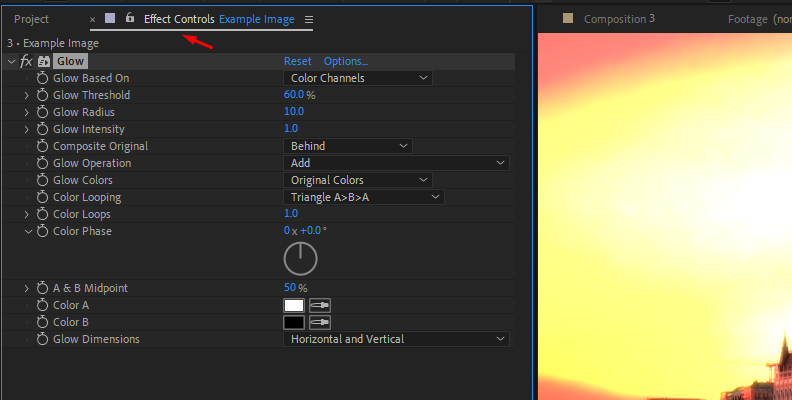
The Glow Threshold sets the percentage of brightness at which the glow won’t affect the image. Lowering the Glow Threshold will make it brighter, and a higher threshold will reduce the glow in the image.
The Glow Radius parameter determines how much the glow expands from the bright areas of the image. For a softer glow, increase the radius value. If you prefer a sharper glow, then reduce the Glow Radius.
To control the brightness of the glow, use the Glow Intensity parameter. Higher values will create a bright glow, and lower values will dim it. You can start from the default and increase or decrease it to find the desired look.
Step 4: Adjust the Glow Colors
You can create the glow effect from the original layer colors, but if you want to add more complexity, you can select different colors to create a mix and gradient effect.
Start by changing the Glow Color to A&B Colors. It will allow you to select two glow colors for the Color A and Color B options below. Use the color picker or eyedropper tool to choose the glow colors from the image.
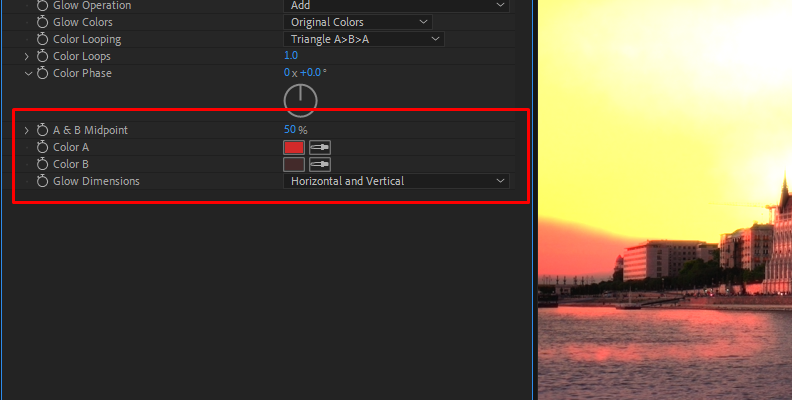
In the drop-down menu Color Looping, choose how to cycle the selected colors to create the glow gradient.
Adjust the Color Loops to create a multicolor ring with your selected colors and Color Phase to choose which color cycle begins the loop.
Step 5: Animate Glow
You can animate the effect by keyframing the parameters in the effect controls. The process is simple yet time-consuming, especially with longer footage.
Select the parameter you want to animate and click the stopwatch on the left. Move the playhead to a different frame and change the value of that parameter. You’ll see a point (the keyframe) appear in the timeline. Continue the process until you create the desired animation. Play the composition and adjust or move the keyframes to change the animation.
Step 6: Final Touches
To enhance the glow effect, stack other effects in the layer or use a different adjustment layer. Some examples of effects you can experiment with are an extra layer of glow, blur, or color correction.
How to Create Glow Effects in After Effects with Continuum BCC+ Glow
In this second part of the tutorial, you’ll add a glow in After Effects with the Continuum BCC+ Glow effect. This filter creates glows on part of your image with intuitive compositing controls for more customization.
Step 1: Arrange Your Composition
Create a new project or open an existing one. Import all the footage you need and create a new composition. Arrange the order of the layers in the timeline.
Step 2: Apply BCC+ Glow Filter
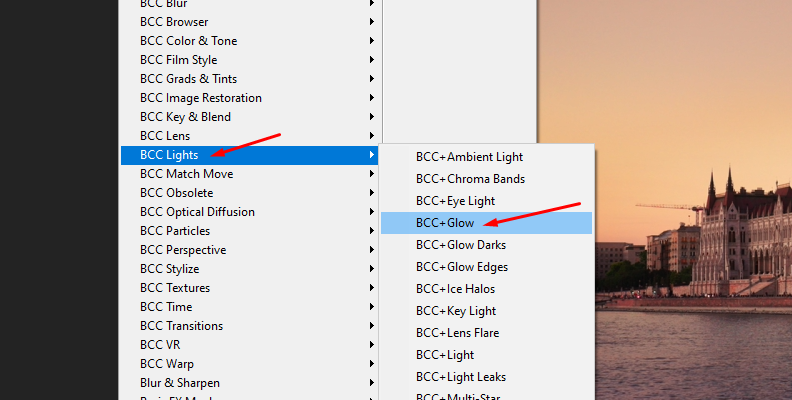
With the image layer selected, go to Effect > BCC Lights > BCC+ Glow to apply BCC+ Glow to the layer. You can add it from the Effects panel by searching BCC+ Glow and dragging it to a chosen layer.
Step 3: Starting From a Preset
The Continuum effects feature an FX Editor that allows you to retrieve existing presets and create new ones. Click the FX Editor at the top of the effects control to launch the preset library and editor.
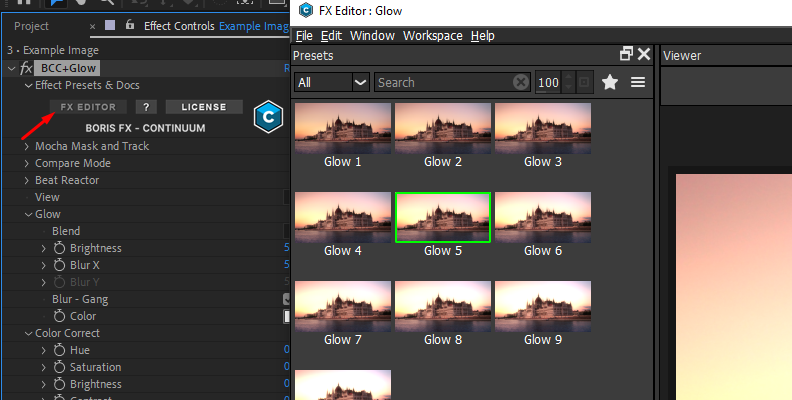
Select a preset from the left panel and adjust the effect from the right panel.
Step 4: Modifying a Preset or Starting From Scratch
The effect controls are divided into groups to adjust the filter. The main parameters are Glow, Color Correction, and Matte.
Under Glow, you can select the blending mode of the glow effect and the brightness for the intensity of the glow. You can customize the blending modes in multiple ways: add blur to smooth the overall glow effect and change the color by selecting from the color picker.
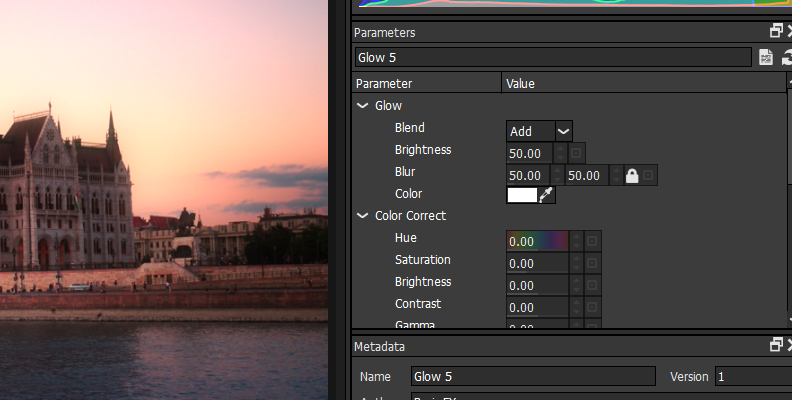
BCC+ Glow has a color correction tool built-in. In this parameter group, you have several controls to customize your glowing effect.
Adjust the Hue to cycle through the color hue of the image. You can then set the image's saturation, brightness, contrast, and gamma. Then, you can get more creative looks by adjusting the temperature to make the colors cooler or warmer, adding cyan or magenta into the image, and adding or subtracting red, green, and blue.
Step 5: Modifying the Matte
A matte is generated with the effect to limit the glow effect, but you can customize the generated matte to fit your needs and decide what part of the image will be affected by the glow.
First, change the view to Matte to see the changes you make. Then, move to the Matte parameter group and use the position, range, and blur to modify the matte. The white areas are where the glow will affect the image.
Step 6: Animate the Glow Effect
Continuum filters feature Mocha for masking and tracking the effect. Mocha allows you to restrict the effect to a certain object or mask area and track an object in movement, making the animation process faster than keyframing frame by frame.
Open the Mocha Mask and Track parameter and click Mocha Mask to launch the Mocha IU. You should be in the essential workspace. If not, change it from the Workspace menu.
Use the spline tools in the main toolbar to create a shape around an object where you want to restrict the effect or keep it unaffected (you can invert the layer in the effects control panel). If you're going to track the mask layer, use the Track Motion Options to select what you want to track (translation, rotation, scale, etc.) and click the track forward or backward buttons.
To export the masks and tracking data, click File > Save. You can now exit Mocha and return to Adobe After Effects.
Display the Pixel Chooser/Mocha parameter group to adjust the mask settings. Adjust the intensity of the Mocha matte and the opacity of the mask. Use the feather slider to blend the image and mask transition.
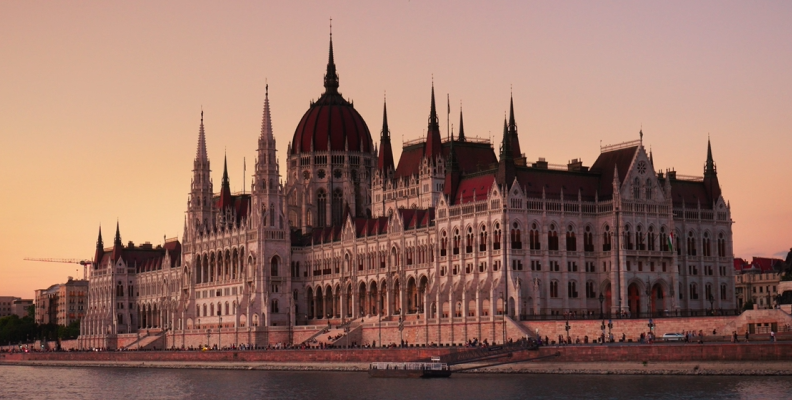
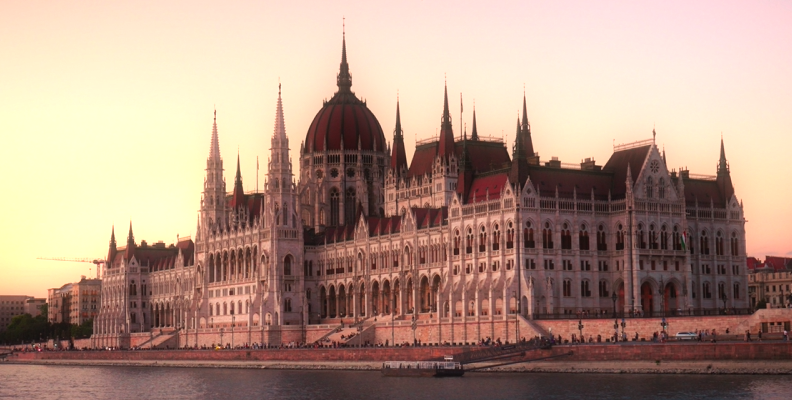
Take a look at our before and after images:
Final Words
Now, you can create amazing glow effects for your compositions, photos, and videos! The Adobe After Effect built-in glow is simple to use, and BCC+ Glow will allow you to enhance and customize to achieve the desired glow effect.
To start producing glow in After Effects with BCC+ Glow, download Continuum and start a free trial to discover everything that Continuum has to offer.
Good luck!


