


In music production, background noise is a problem.
Whether it's fan noise, traffic noise, electronic interference, or other background noise, when it creeps into your audio recordings, it reduces the overall quality.
If you're a Logic Pro user, in this post, we've got you covered.
We show you how to deal with background noise. In this article, we'll look at several ways to remove background noise in Logic Pro using both internal and external tools.
Four Noise Reduction Methods for Unwanted Background Noise
Let's first look at four methods to remove background noise from your audio recordings in Logic Pro.
For the first three methods, we'll use an example audio track that has background noise in it.
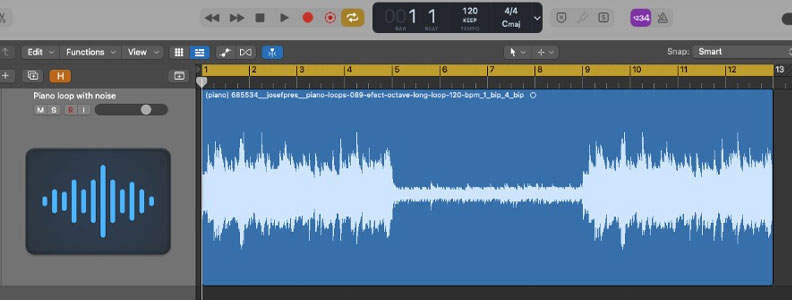
Our example audio track consists of a simple piano melody (the larger waveform) and a section of unwanted background noise (the smaller waveform).
Let's look at how to remove the background noise.
The first method is the cleanest approach because it will completely remove the unwanted noise.
It's the ideal approach when you have audio regions of a track that contain only noise (like our example) as you can eliminate those sections of track.
Remove Background Noise From Audio Regions of Your Track
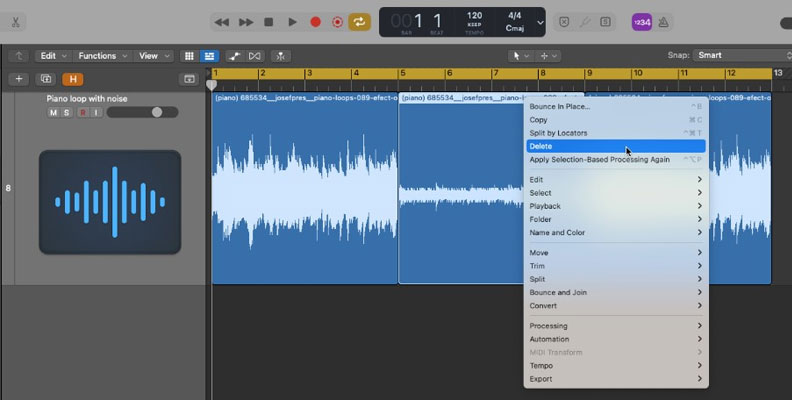
Step 1: Select the Scissors Tool from the Logic Pro menu.
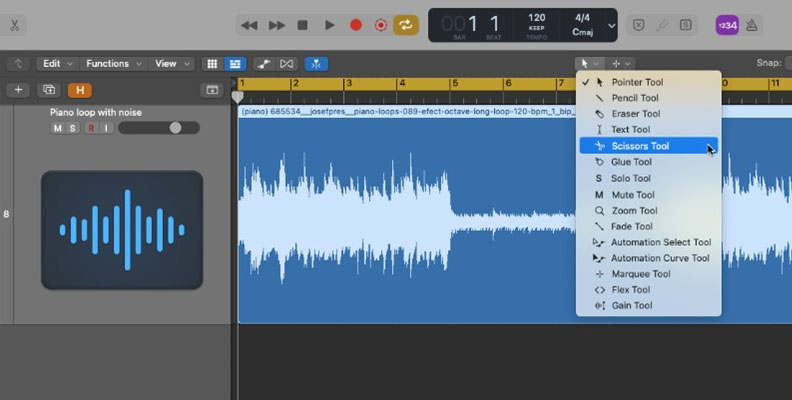
Step 2: Using the Scissors Tool, identify the beginning and end of the audio region of your track that contains the noise you want to remove.
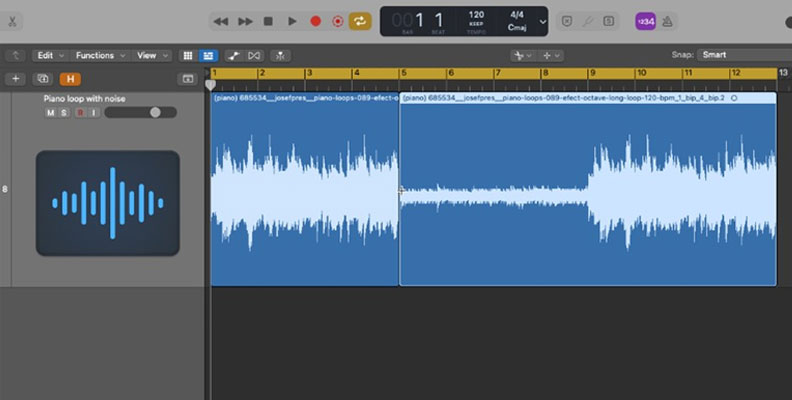

Step 3: Delete the section of track that contains background noise.
Select the Pointer Tool.
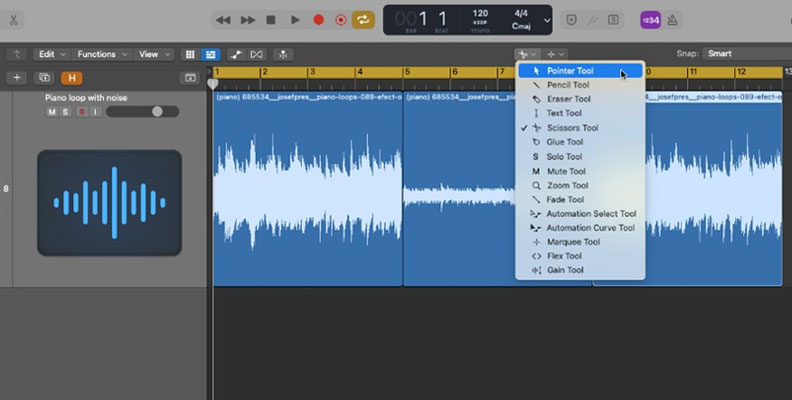
Select your noisy audio region and delete.
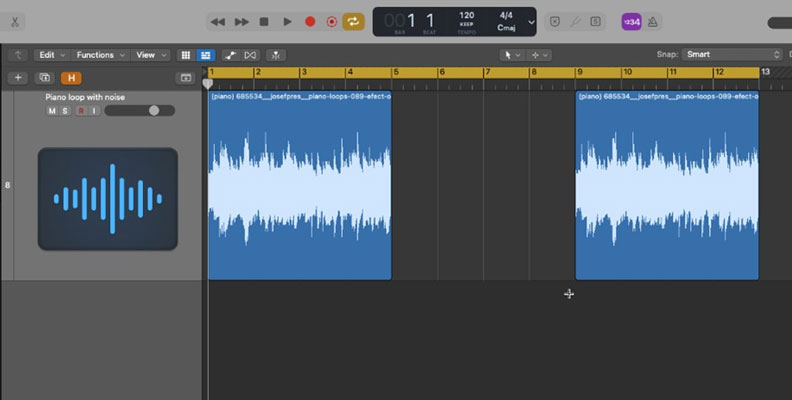
There you have it! You've completely removed the unwanted background noise from your track.
Create Smoother Transitions Between Retained and Deleted Sections of Audio
Once you've removed the unwanted noise, listen to your track and make sure it sounds OK.
Do you notice any 'pops' or 'clicks' where your deleted section starts and finishes? Or does it sound a bit unnatural to have your melody suddenly cut out (and then start again) at the beginning (and end) of the deleted section?
If so, there's a neat way of getting around this in Logic Pro. You can gradually transition into and out of the deleted section by fading out and fading in.
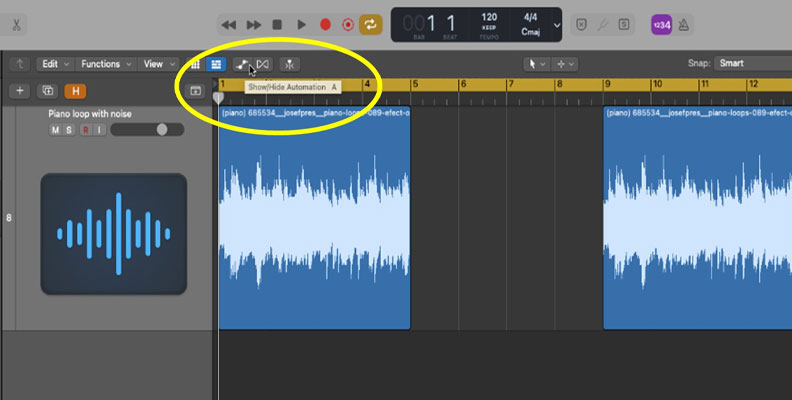
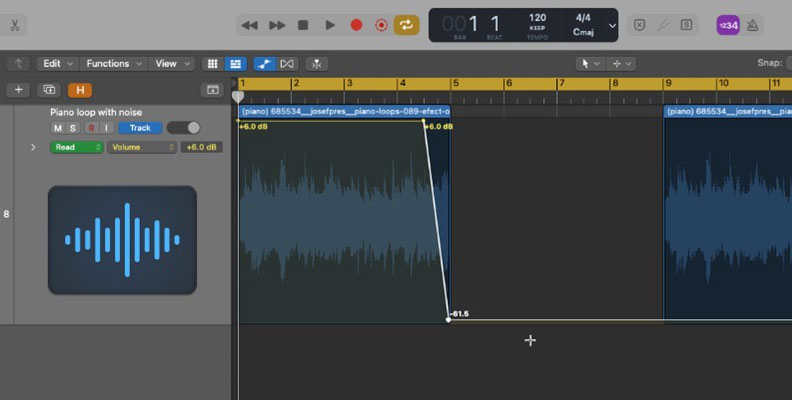
Step 4: Fade out and into your deleted section.
Toggle on the Show/Hide Automation button.
Select Volume automation.
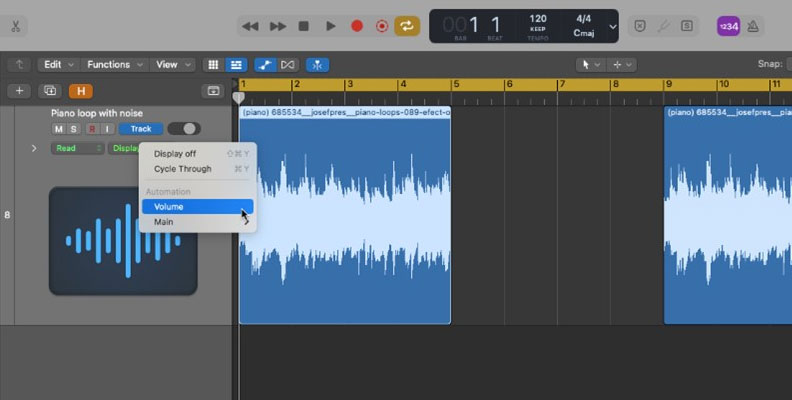
Set volume points on the yellow automation line to set up your volume fade out.
Similarly, set volume points to set up your volume fade in.
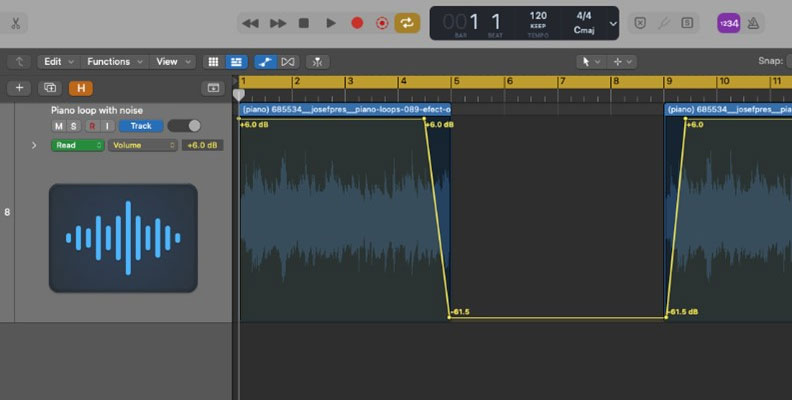
Fading out and in will give you a smooth transition between the retained and deleted sections of your audio track.
You should now have clean-sounding audio with no background noise during the 'quiet' sections, i.e., when there's no melody being played.
To learn more about how to fade out in Logic Pro, check out our tutorial.
While the first method completely removes background noise in Logic Pro, the second method reduces background noise but may not completely remove it. This is useful when:
- You have several quiet sections of audio, but you don't have the time to manually delete each one (as shown in method 1.)
- You don't have quiet sections of audio, but rather sections where the melody is still playing at a reduced volume, so the background noise is more evident.
In these situations, you may prefer to just reduce background noise rather than eliminate it. You may also want flexibility in adjusting the degree of noise reduction applied, depending on the volume dynamics of your audio and the amount of background noise that's present.
The easiest way to do this is to use a plug-in.
Fortunately, Logic Pro has a convenient plug-in for the job, but it's a legacy plug-in, so you'll first need to find it.
Using Logic Pro X's Legacy Denoiser Plug-In to Remove Background Noise
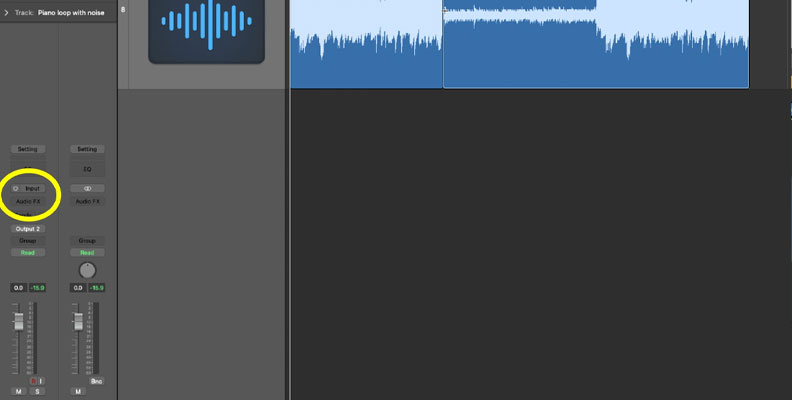
Step 1: Identify and activate your audio track's FX plug-ins.
You can find this in the header region of your track.
Step 2: Select Logic Pro X's noise reduction plug-in.
The Logic Pro plug-in that we'll use is Denoiser. As mentioned, this is a legacy plug-in so you'll need to hold down the Option (Alt) key as you select the FX plug-ins box.
A list of Logic Pro's legacy plug-ins will appear and you'll need to select Denoiser.
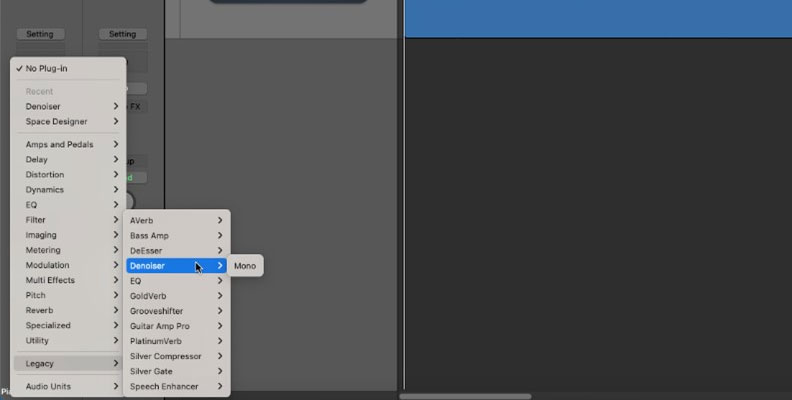
Once selected, you'll see the Denoiser plug-in highlighted in the FX plug-ins box and the Denoiser control panel will appear.
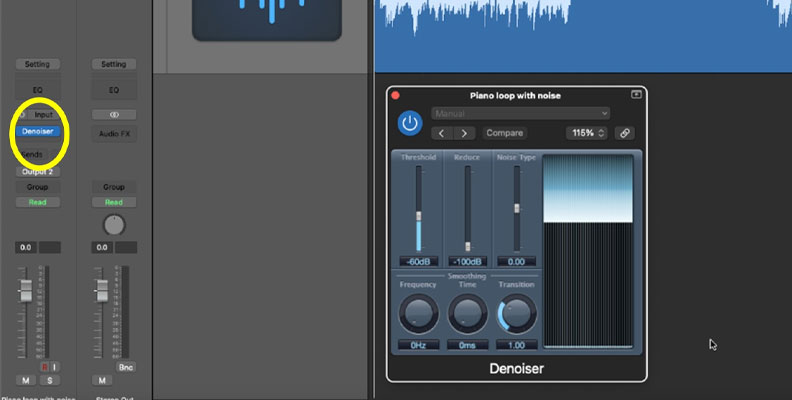
Denoiser Setup
Step 3: Adjust the Denoiser settings to achieve your optimal level of noise reduction.
There are three main settings in the Denoiser plug-in.
First, the 'threshold' slider allows you to set the level below which you want to reduce your signal amplitude, i.e., it's the level below which noise signals are reduced in your audio files.
Be careful when setting the threshold—if it's too low, not only will you reduce your noise signal, but you'll also reduce the signal of audio that you want to retain. This is because the setting applies across the whole of the audio region selected, not just the quiet or noisy parts.
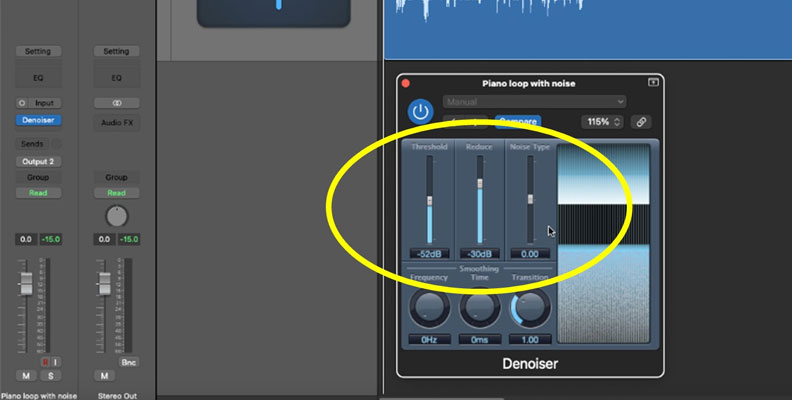
Second, the 'reduce' slider sets the amount of noise reduction that you want to apply below the threshold. You can try different combinations of threshold and reduce slider settings in deciding what sounds best.
Third, the 'noise type' slider sets the type of noise that you want to reduce—a value of zero reduces white noise (equal frequency distribution), while positive and negative values reduce harmonic (bass) noise and hissy noise, respectively.
The first two settings are expressed in dB, while the third is expressed as an absolute value.
It takes some trial and error to get these settings right—listen to how your audio sounds as you adjust the different settings and choose what works best.
In our example, setting the threshold slider at at -52 dB, the reduce slider at -30 dB, and the noise type slider at zero produces reasonably good results.
Method 3
While the Logic Pro X legacy Denoise plug-in is convenient and produces fairly good results, it's quite a 'blunt' tool.
As mentioned, the Logic Pro X Denoise settings apply across the whole of your audio file in a blanket manner, so if you have varying levels of noise in your audio, it's difficult to get the settings just right. You may need to accept more noise in some audio regions or attenuate your main signal more than you would like.
Fortunately, there are some excellent plug-ins available that are more sophisticated and do a much better job of noise reduction than the Logic Pro X Denoise. One such plug-in is CrumplePop's AudioDenoise.
Hear It For Yourself
Advanced audio AI removes noise and boosts your vocal quality.
Toggle it on/off to hear the difference.
Remove Wind
Remove Noise
Remove Pops & Plosives
Level Audio
Remove Rustle
Remove Echo
Remove Wind
AudioDenoise uses advanced AI algorithms to remove hiss, background noise, and hum from audio files. It can handle varying levels of noise in your audio file, so it acts as much more than merely a noise gate plug-in.
AudioDenoise works seamlessly with Logic Pro, but also with a range of other market-leading audio and video production software including Audacity, Pro Tools, GarageBand, Adobe Audition, and DaVinci Resolve.
Using CrumplePop's AudioDenoise to Remove Background Noise
We'll use AudioDenoise for our third method. It's easy to set up and use.
Step 1: Install AudioDenoise from the CrumplePop website.
AudioDenoise forms a part of the suite of plug-ins available from CrumplePop. It's a paid plug-in, but you can access every CrumplePop plug-in with one convenient subscription. There's also a free trial period that you can take advantage of.
Just go to CrumplePop's website and follow the instructions to install AudioDenoise.
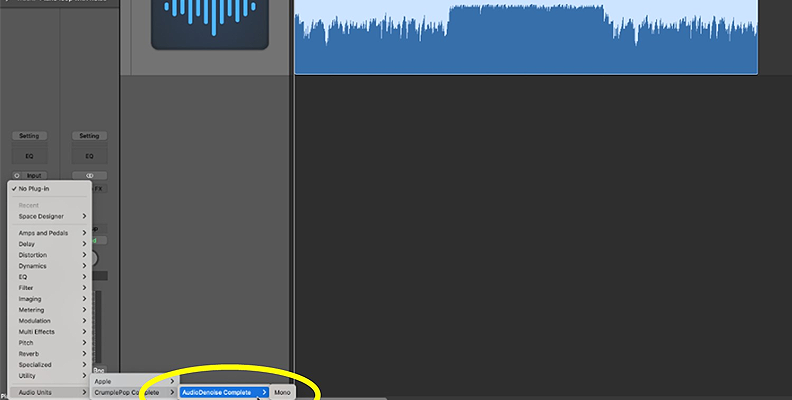
Step 2: Select AudioDenoise.
Once you've installed AudioDenoise, it will appear as a plug-in in the FX plug-ins menu of your audio track—select this to activate it.
AudioDenoise Setup
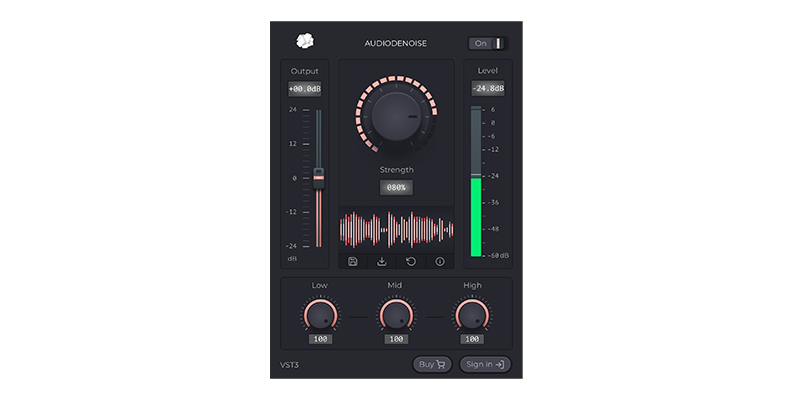
Step 3: Adjust the level of AudioDenoise.
AudioDenoise is very easy to use—it's as simple as adjusting the level of the 'strength' knob to get your desired level of noise reduction.
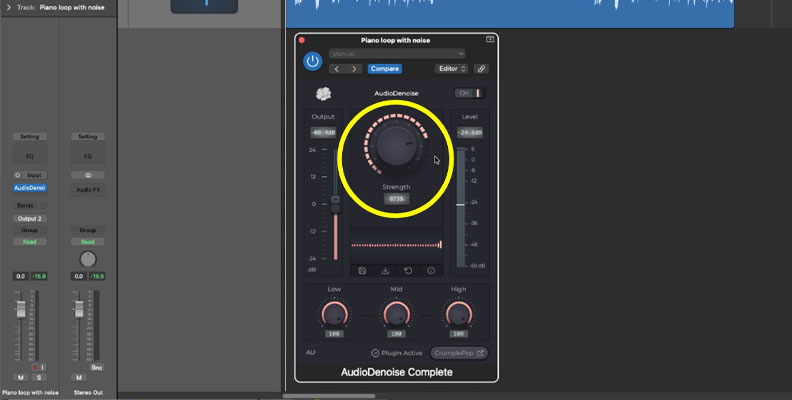
Play around with the strength and other levels in AudioDenoise to remove background noise while still retaining the quality that you want for your audio. You should notice much better results than you were getting from Logic Pro's Denoiser plug-in.
Method 4
While the first three methods we've looked at reduce noise during post-production, a good starting point is to try and eliminate noise from entering your recordings in the first place.
There are several sources of noise that can affect your recordings, including:
- External disturbances like street noise or distant voices
- Noise from fans, air conditioners, and other sources of background noise in or near your recording premises
- Noise from equipment in your audio workflow caused by power supplies, cables, or poor interconnects
- Noise and sound distortions from echos or reflections in your recording premises
There are many steps that you can take to reduce noise coming from these and other sources—just check out our tips and guidelines on preparing your room for recording.
Alternative Plug-Ins in Logic Pro
There are, of course, other ways to reduce background noise besides the methods we've discussed—let's look at some.
Using Logic Pro's Noise Gate Plug-In to Remove Background Noise
You can use Logic Pro's Noise Gate plug-in to reduce background noise.
First, select and add it to your track in the same way as you do for Denoise.
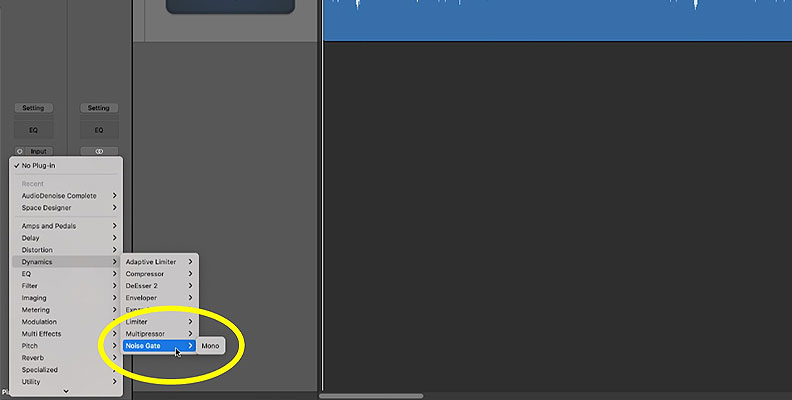
Step 1: Select Noise Gate from your track's plug-in menu.
Noise Gate is in the Dynamics section of the plug-in menu.
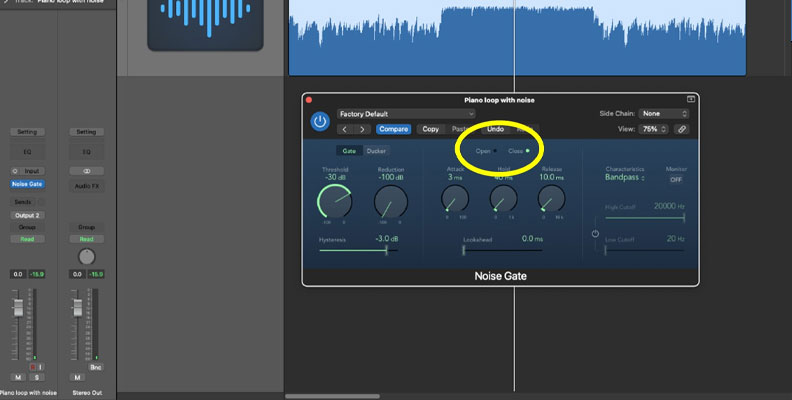
Step 2: Adjust the Noise Gate parameters.
Just as for Denoise, there are some key levels to adjust in Noise Gate. The main adjustment in the noise gate is to the threshold knob. This works in a similar way to the threshold slider in Denoise—signals that fall below the threshold level will be attenuated.
In our example, a level of -30 dB works well.
Once you've set your threshold level correctly, you'll notice that when the region of audio that you want to hear is playing, the noise gate will open.

When a region of audio that you don't want to hear is playing (i.e., noise), your noise gate will close—as the name suggests, Logic Pro's Noise Gate works by opening and closing your audio playback (i.e., starting and stopping noise reduction) depending on the parameters that you set.
Noise Gate is a great alternative for reducing background noise in Logic Pro. As with all tools, however, the effectiveness of the Logic Pro noise gate depends on your circumstances and how you set up its parameters (using trial and error).
Using CrumplePop's Suite of Noise Reduction Plug-Ins to Remove Background Noise
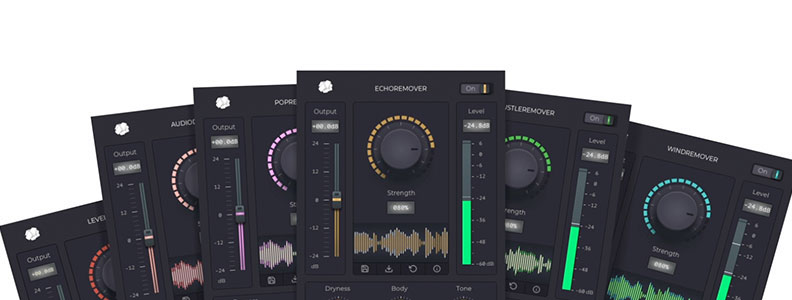
In addition to AudioDenoise, CrumplePop offers an excellent range of other plug-ins for reducing different kinds of background noise.
They're all easy to set up and use and you can access them under a single subscription. As with AudioDenoise, they use sophisticated algorithms (including AI) to achieve superb results.
CrumplePop's WindRemover and TrafficRemover, for instance, are great for reducing background noise from outdoor recording sessions.
CrumplePop's PopRemover and RustleRemover are excellent for removing plosives that occur when recording speech or rustling that often accompanies lavalier microphone recordings.
If you need an external plug-in for Logic Pro to help, CrumplePop has everything you could need.
Conclusion
In this post, we've looked at several ways to remove background noise from your audio recordings in Logic Pro.
Remember, first try to minimize background noise during your recording process.
If noise creeps into your recording, then you'll need to deal with it during production.
Depending on the type of background noise that you're trying to reduce, it's easy to keep background noise to a minimum using the tools available within Logic Pro, or better still, using excellent external tools from innovative providers like CrumplePop.


