Speed change is a common effect used in the art of video editing: in films, it can add an emotional impact, and in commercials or content creation, it can generate more engagement.
In the early days of filmmaking and video production, speed changes had to be prepared in advance. The footage had to be shot at higher frames and high-speed cameras. While it’s still recommended, especially planning the scenes that will be sped up in post-production, you can do it more easily with post-production software and tools like DaVinci Resolve.
In this tutorial, you’ll learn how to speed up a clip in DaVinci Resolve. This skill will allow you to create time-lapse or breath-taking slow-motion action scenes.
Let’s dive in!
Speed Up a Clip in DaVinci Resolve
There are different ways to speed up and change the speed of a video in DaVinci Resolve. Here, you will find the most effective methods to achieve it.

Method 1: Change Clip Speed Window
Step 1: Import your video footage and create a timeline.
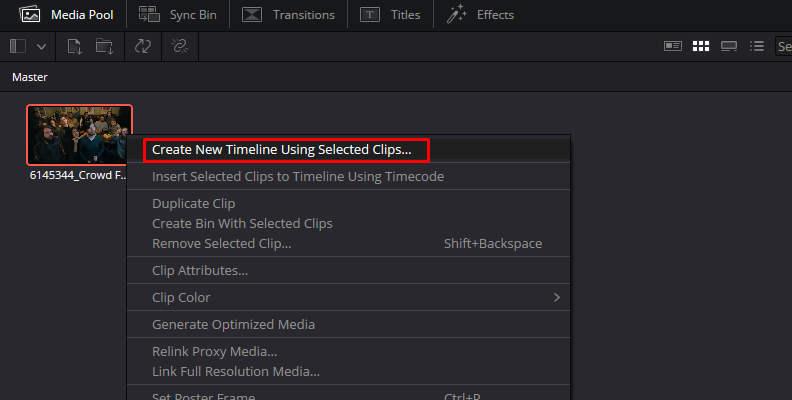
Step 2: Right-click on the clip you want to speed up and select Change clip speed.
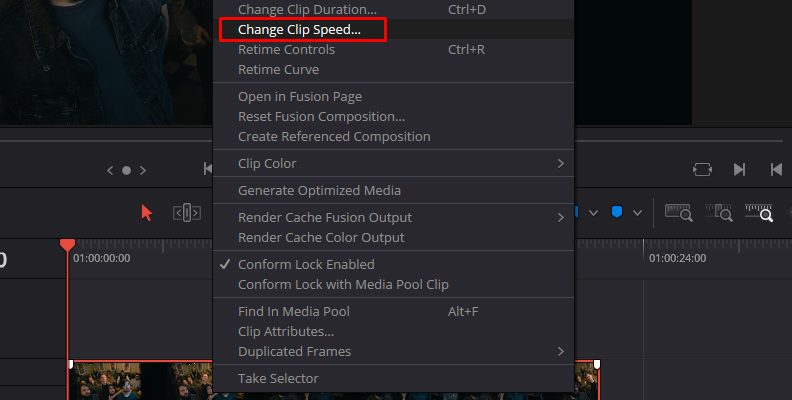
Step 3: You start with the original clip’s speed at 100%. Increase the Speed percentage value to speed up the video or decrease the values to slow it down.
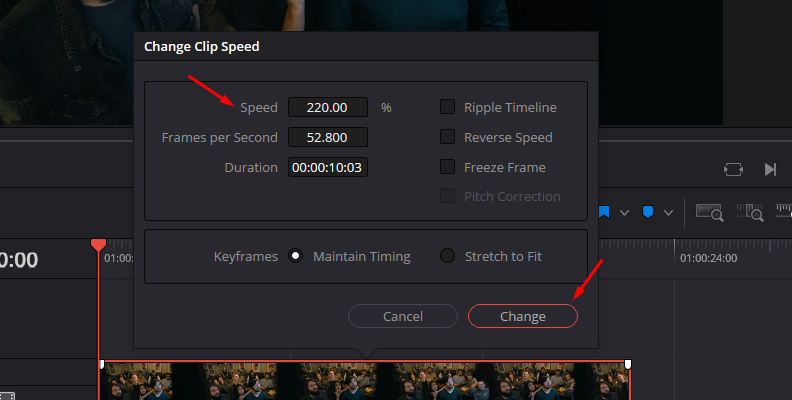
You can also adjust the Frame per Second value. When you change one, the other will adapt, and the new length of the video clip will appear in Duration.
Step 4: You have other options in the Change Clip Speed to consider.
Check the Ripple Timeline checkbox if you want the following clips in the timeline to accommodate the new speed-up clip’s size. This is helpful when you don’t have to worry about a defined time length for your project.
The Reverse Speed checkbox will speed up the video playing backward. You’ll notice the speed and Frames per Second values turn to negative.
Freeze Frame will change the clip to a single freeze frame according to where the playhead was when you select this option.
Checking the Pitch Correction box (usually by default) will apply pitch correction to the audio attached to the video clip.
Step 5: If you have keyframes in the video clip, there are some keyframe options at the bottom of the Change Clip Speed window that you can adjust. The first option, "Maintain Timing," will keep the previous keyframes intact and in their original position. If you choose "Stretch Keyframes," DaVinci Resolve will be compressed to fit the new speed duration. Create a compound clip before changing the speed for better results when you use keyframes.
Step 6: Click OK.
This method speeds up the entire video clip. Try the other methods if you need to speed up only part of the video.
Method 2: Retime Controls
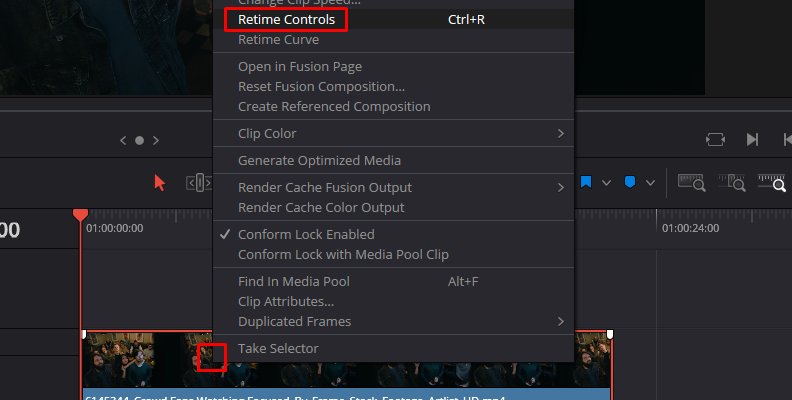
Step 1: Right-click the clip and select Retime Controls or with the keyboard shortcut Ctrl+R on Windows or Command+R on Mac. The Speed controls will appear above the clip.
Step 2: Click the little arrow next to the percentage to open a drop-down menu with several speed change options.
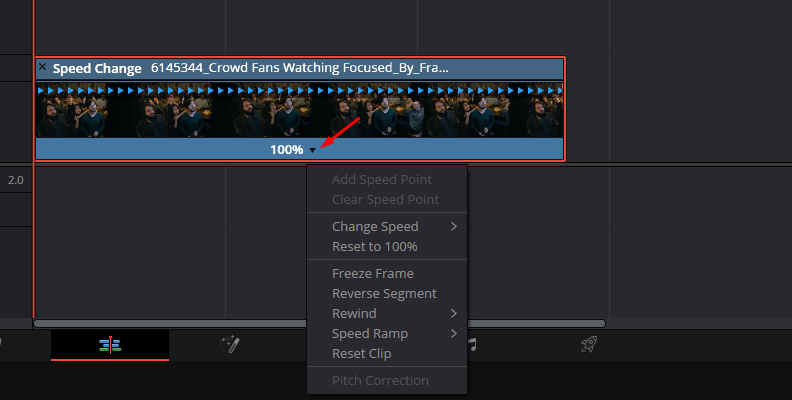
Step 3: To change the speed of the whole clip, select Change Speed and choose the percentage. A value below 100 will slow the video, and above 100 will speed it up. If you don't like the result, you can reset the value speed to 100% or the clip entirely and make changes again.
Step 4: To speed up part of the video clip, you can create speed points where you want to change the clip's speed. To add speed points, place the Playhead where you want to change speed and select “Add Speed Point.” It will add a keyframe and new retime controls.
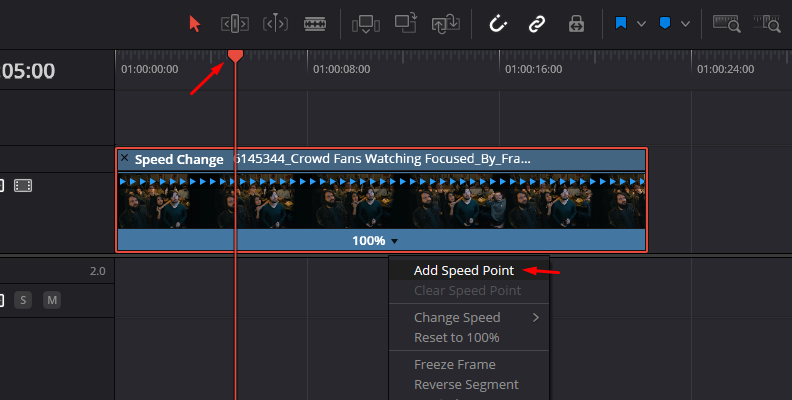
Click the little arrow to adjust speed percentage, or click and drag the handle that divides the clip.
Step 5: The Retime Controls also allow you to use a Freeze Frame, Rewind the video, and create a speed ramp up or down.
Method 3: The Retime Curve
The Retime Curve allows you to ease the speed ramping or abrupt changes in the video clip, smoothing the transition from normal speed to speed up or slow motion.
Step 1: Right-click the clip, then click "Retime Curve."
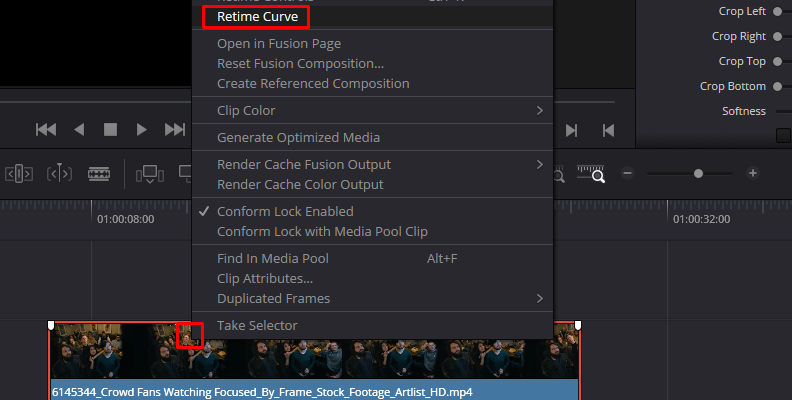
Step 2: The curve will appear under the video track. Now, you can move the playhead and add a keyframe by clicking the diamond icon. (If you don't see the curve, expand the video track).
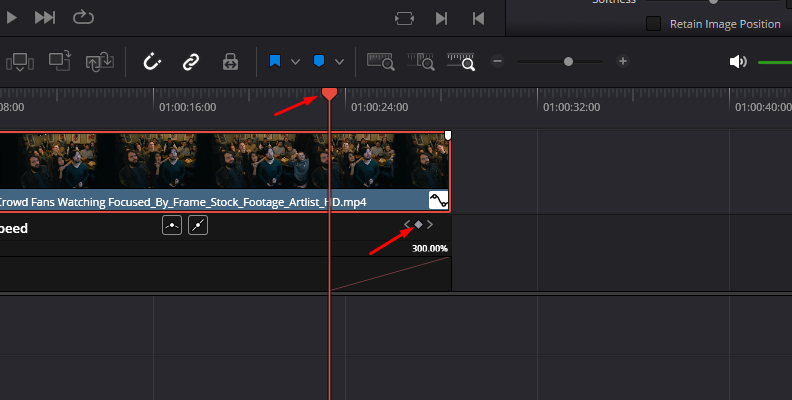
Step 3: Click the Bezier icon to see the handles around the keyframe. Click and drag the handles to smooth the speed change.
Speed Up a Clip in DaVinci Resolve with BCC Optical Flow
BCC Optical Flow plugin uses optical flow technology to estimate motion between two frames and synthesize a new frame in between. It mixes previous and next frames and optical flow to create smooth slow-motion or high speed footage.
To follow this tutorial, you’ll need our Continuum plugins installed. You can download the Continuum free trial and get started.

Step 1: Apply BCC Optical Flow to the Clip
Open the Effects browser and search for Optical Flow within the Open FX category. Click and drag the effect to the desired video clip.
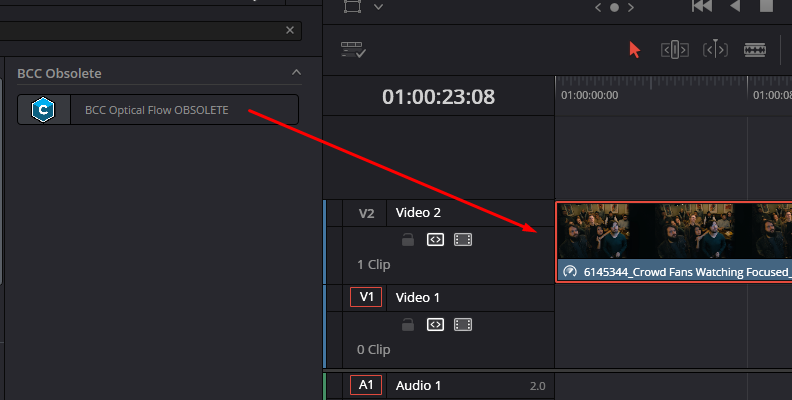
Step 2: Try on a Few Presets
Go to the Inspector panel and open the Effects tab to see the BCC Optical Flow parameters. At the top, you have the FX Browser. This will launch another UI where you can select a few presets and where your personal presets will be stored when you create one.
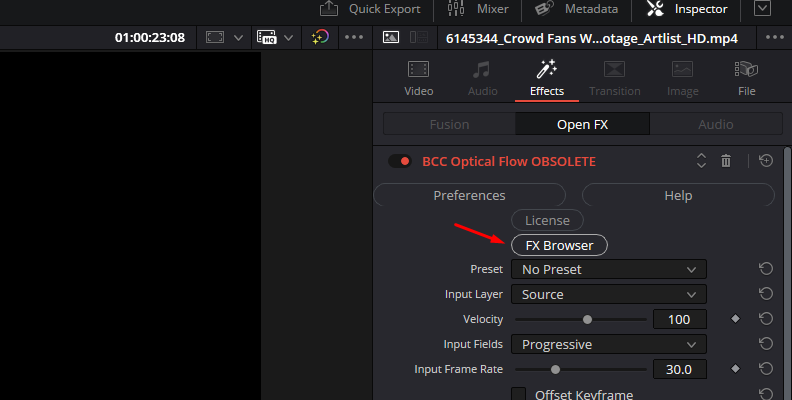
Step 3: BCC Optical Flow Parameters
Set the Velocity setting to make speed adjustments. Values below 100 slow the clip, while values above 100 speed it up. If you leave the value at 100, the video will play at its normal speed.
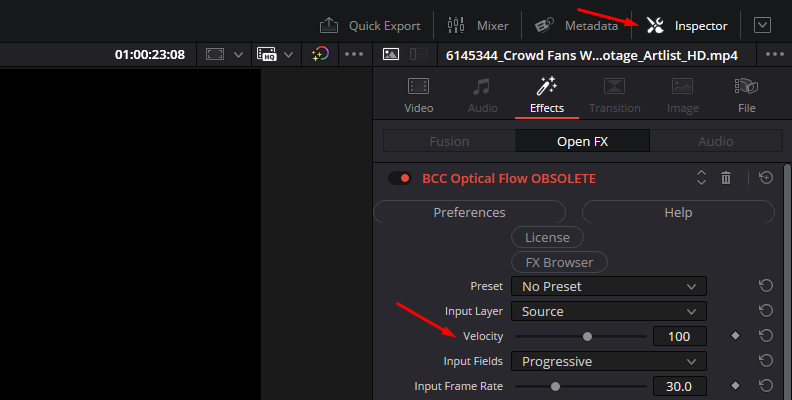
The Input Frame Rate needs to be the frame rate of the original clip. If unsure of the original frame rate, right-click the clip and select “Clip Attributes.” It will make better speed up videos with fewer jitters and artifacts.
Step 4: Fine-Tune BCC Optical Flow
Sometimes, artifacts will still appear in the footage. The last parameters in the filter will help you smooth the speed change.
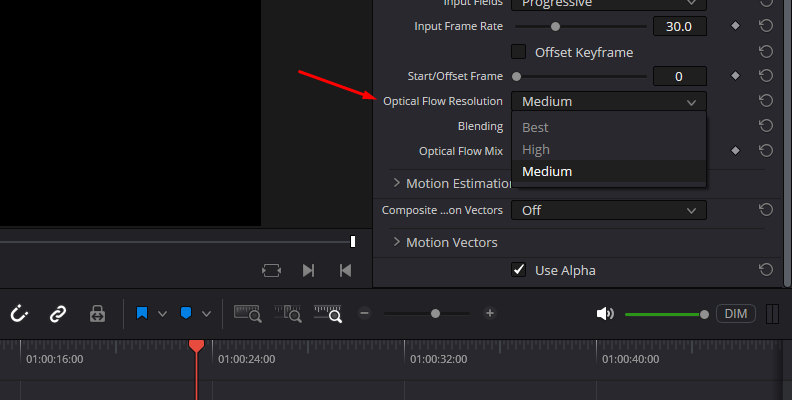
Optical Flow Resolution lets you choose between Best, High, and Medium. You can also set the blending modes and the Optical Flow Mix to select between a mixture of blending frames and Optical Flow synthesis. If changing the resolution does not improve the video clip, try using the Motion Estimation settings.
Step 5: Render Video
The best option to preview BCC Optical Flow is to render the video. This plugin is very demanding and requires a lot of power from your computer. Once the video is rendered, make the adjustments you need.
Final Words
Learning how to use video speed to your advantage to add emotional impact to a scene or make a long scene more entertaining are tools that, as a video editor, will develop with time as you use them. You’ll soon identify multiple speed points while shooting and think of how certain moments would make a great speed ramping or slow-motion action scenes. Be careful not to overuse the speed change technique: add it when required or when it brings something interesting to your videos.
Continuum BCC Optical Flow is a quick way to change clip speed in DaVinci Resolve. You can also work with the rest of the Continuum filter to make your videos look even better!
Good luck!


