Matte Assist ML
Automatically generates a matte over time based on single or multiple keyframed roto shapes or input mattes using machine learning object segmentation and propagation.
Using A Roto Node
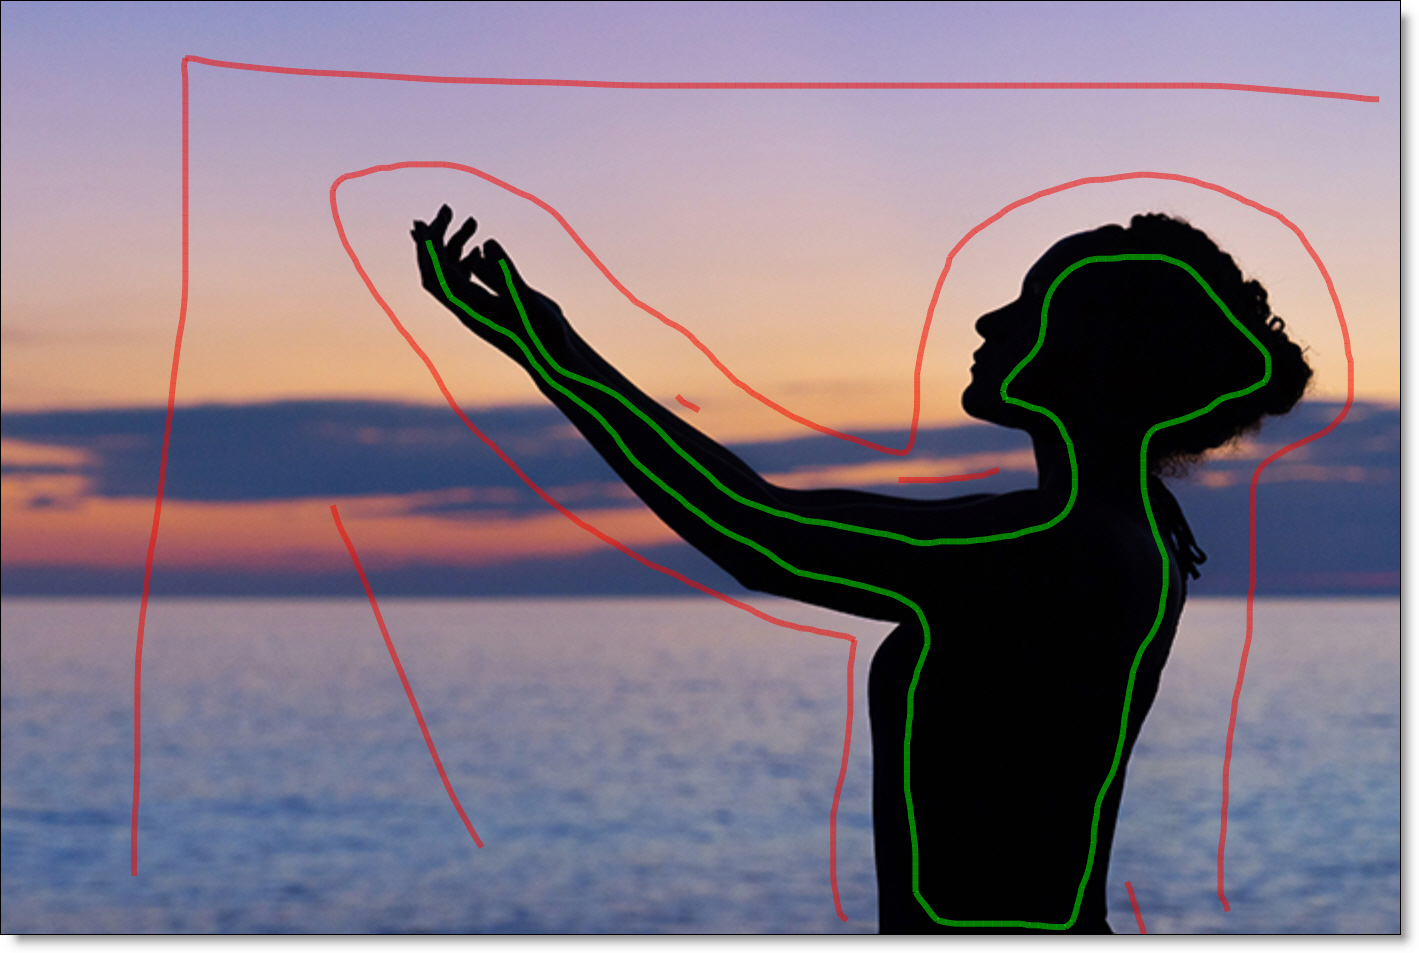
1 Add a Roto node and create a shape around the object where you want to generate a matte. To start with, there only needs to be one keyframe.
Note: Each top level item (shape or layer) in the Object List is considered a separate object. For best performance when using multiple shapes for one object, place the shapes within a layer.
2 Add a Transform > DOD node between the source and Roto node and set the DOD boundary to encompass the range of motion of the object to be matted. Do not animate the DOD.
A smaller DOD provides faster performance and better matte edge quality in the Matte Assist ML node.
3 Add a Matte Assist ML node from the Nodes > Key tab, connect the DOD output into the Matte Assist ML input and the Roto node’s Data output into the Matte Assist ML Data input.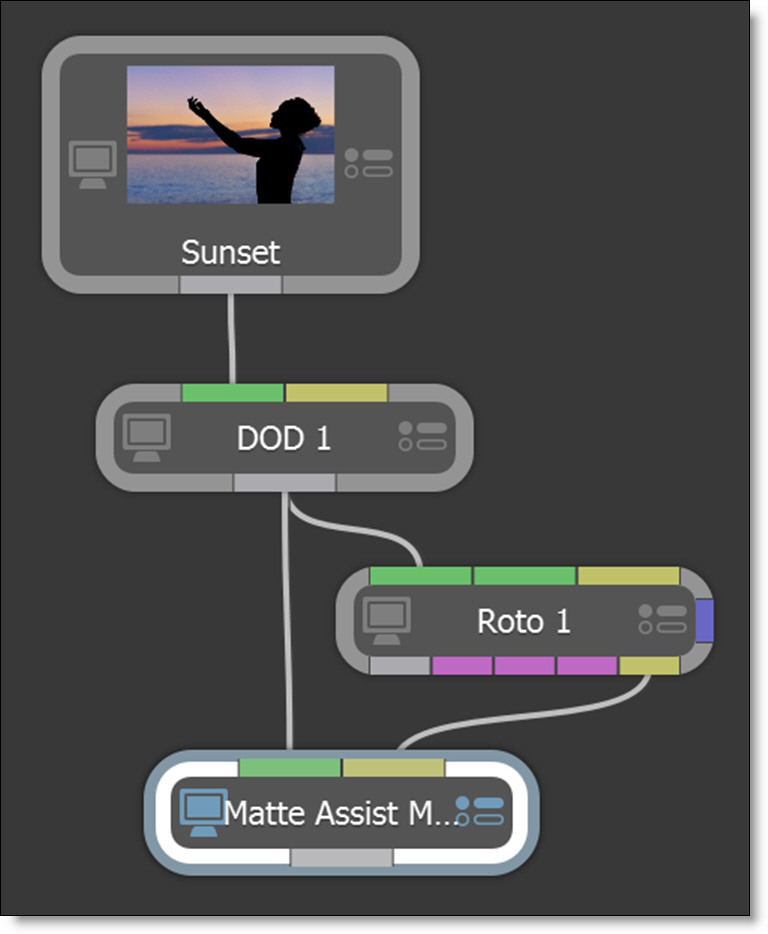
4 In the Matte Assist ML node, set the Mask Source to Roto.
Note: If you jump to another point in time, please be aware that Matte Assist ML always calculates the matte from frame 1, so it can take some time to update depending on the length of the sequence.
5 Play the sequence to generate the matte.
6 If the matte is not accurate enough, go to the frames where it is not correct and create more shape keyframes.
7 Play the sequence again to generate the revised matte.
Matte Assist ML generates a binary matte. To create a more natural edge with partial opacity, you can use Matte Assist ML in conjunction either Power Matte or Trimap plus Power Matte.
8 Connect the DOD output to the Power Matte input and the Matte Assist ML node into the Power Matte > Aux Matte input.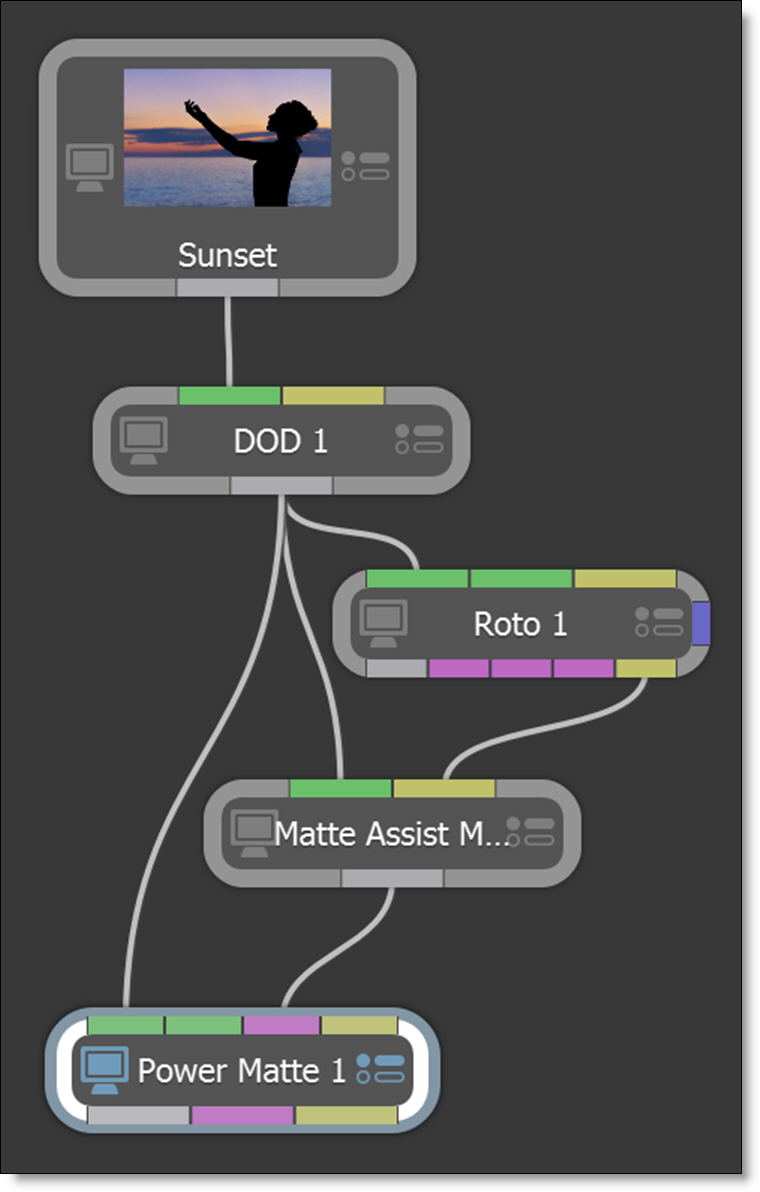
9 Set the Power Matte > Aux Trimap to Trimap.
Power Matte now uses the Aux Trimap input as a trimap source and more natural edges are generated.
10 If you need a larger edge area to be considered as partial opacity, use the Trimap node between Matte Assist ML and Power Matte. For more information on using the Trimap node with Power Matte, see the Power Matte Trimap Input tutorial.
Using Input Alpha
Generates a matte throughout the sequence using single or multiple input alpha reference frames. Input Alpha is meant to be used for matting a single object. For matting multiple objects, use the Matte Assist ML > Mask Source > Roto option.
1 Connect an image with alpha or a node that generates alpha into a Transform > DOD node.
2 Set the DOD boundary to encompass the range of motion of the object to be matted. Do not animate the DOD.
A smaller DOD provides faster performance and better matte edge quality in the Matte Assist ML node.
3 Connect the DOD node into a Matte Assist ML node.
4 Make sure the Mask Source is set to Input Alpha.
5 Set the Reference Frames to Frame and enter the frame you want to propagate the matte from in the Frame field.
6 Play the sequence to generate the matte.
If the matte is not accurate enough, set Reference Frames to Markers and create markers at frames where the matte was not accurate enough.
7 To create a marker, click the Markers > + icon in the Node > Options tab.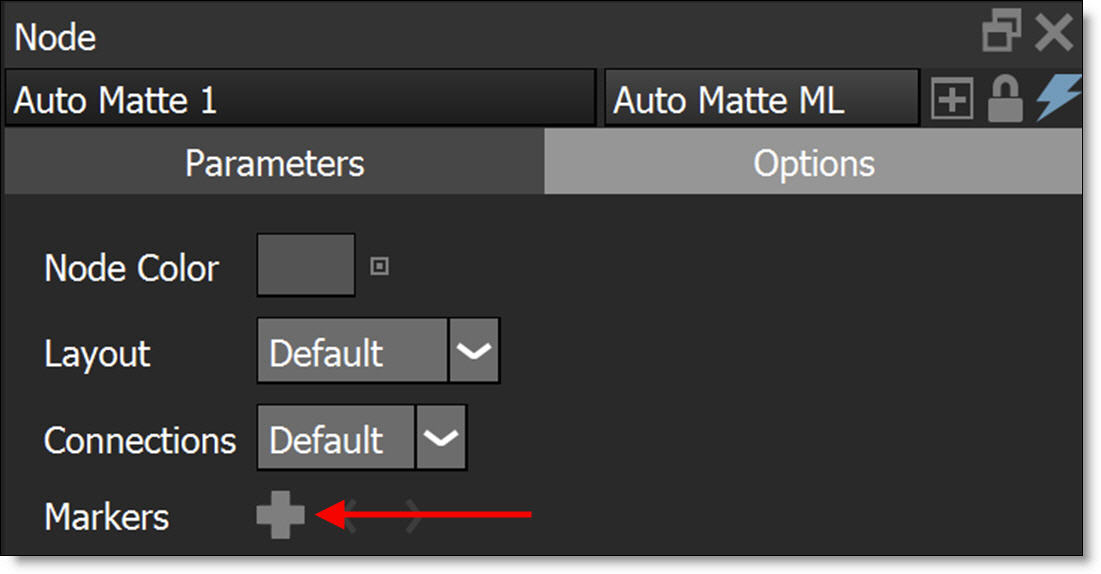
Matte Assist ML will now use the marker frames as keyframes while generating the matte.
8 Play the sequence again to generate the revised matte.
Using Input Alpha with EZ Mask
1 Connect an image into an EZ Mask node.
The Foreground brush is selected by default.
2 Go to the first frame of the sequence and with the left mouse button, click and drag green foreground strokes inside the area where you want to create a matte.
3 Next, select the Background brush and draw a stroke around both the outer edge of the object and the rest of the background. You can also draw background strokes by right-clicking and dragging.
As you finish drawing background strokes, a matte is generated.
4 Press the A key to view the alpha overlayed on the image.
5 Add additional foreground and background strokes as needed to refine the matte.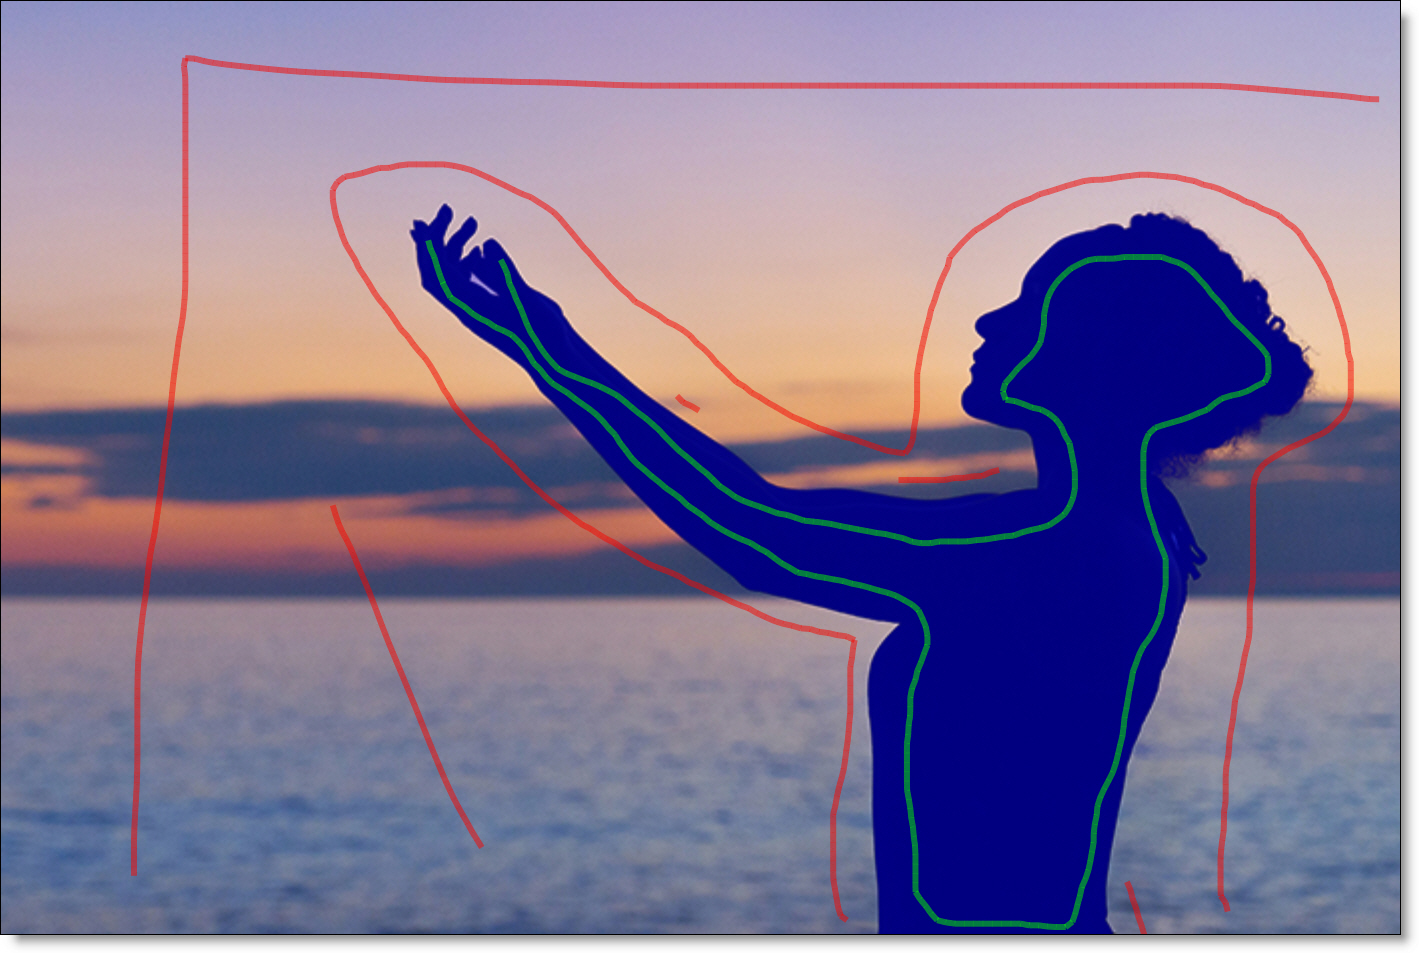
6 Add a Transform > DOD node between the source and EZ Mask node and set the DOD boundary to encompass the range of motion of the object to be matted. Do not animate the DOD.
A smaller DOD provides faster performance and better matte edge quality in the Matte Assist ML node.
7 Connect the EZ Mask output into the Matte Assist ML input.
8 In the Matte Assist ML node, make sure the Mask Source is set to Input Alpha.
9 Play the sequence to generate the matte.
If the matte is not accurate enough, create additional EZ Mask keyframes.
10 Select the EZ Mask node and create EZ Mask keyframes at frames where the matte was not accurate enough.
11 To take advantage of the keyframes, connect the EZ Mask Data output into the Matte Assist ML Data input.
12 Set the Matte Assist ML > Reference Frames to Keyframes.
13 Play the sequence again to generate the revised matte.
Matte Assist ML will now use the additional keyframes while generating the matte.
Using Input Alpha with Mask ML
1 Add a Transform > DOD node to the source and set the DOD boundary to encompass the range of motion of the object to be matted. Do not animate the DOD.
A smaller DOD provides faster performance and better matte edge quality in the Mask ML and Matte Assist ML nodes.
2 Add a Mask ML node from the Nodes > Key tab and connect it to the DOD node.
The Add tool is selected by default.
3 Click within the object where you want to create a matte.
With each click, a green point appears and a matte is generated.
4 Press the A key once to view the generated matte as a blue overlay.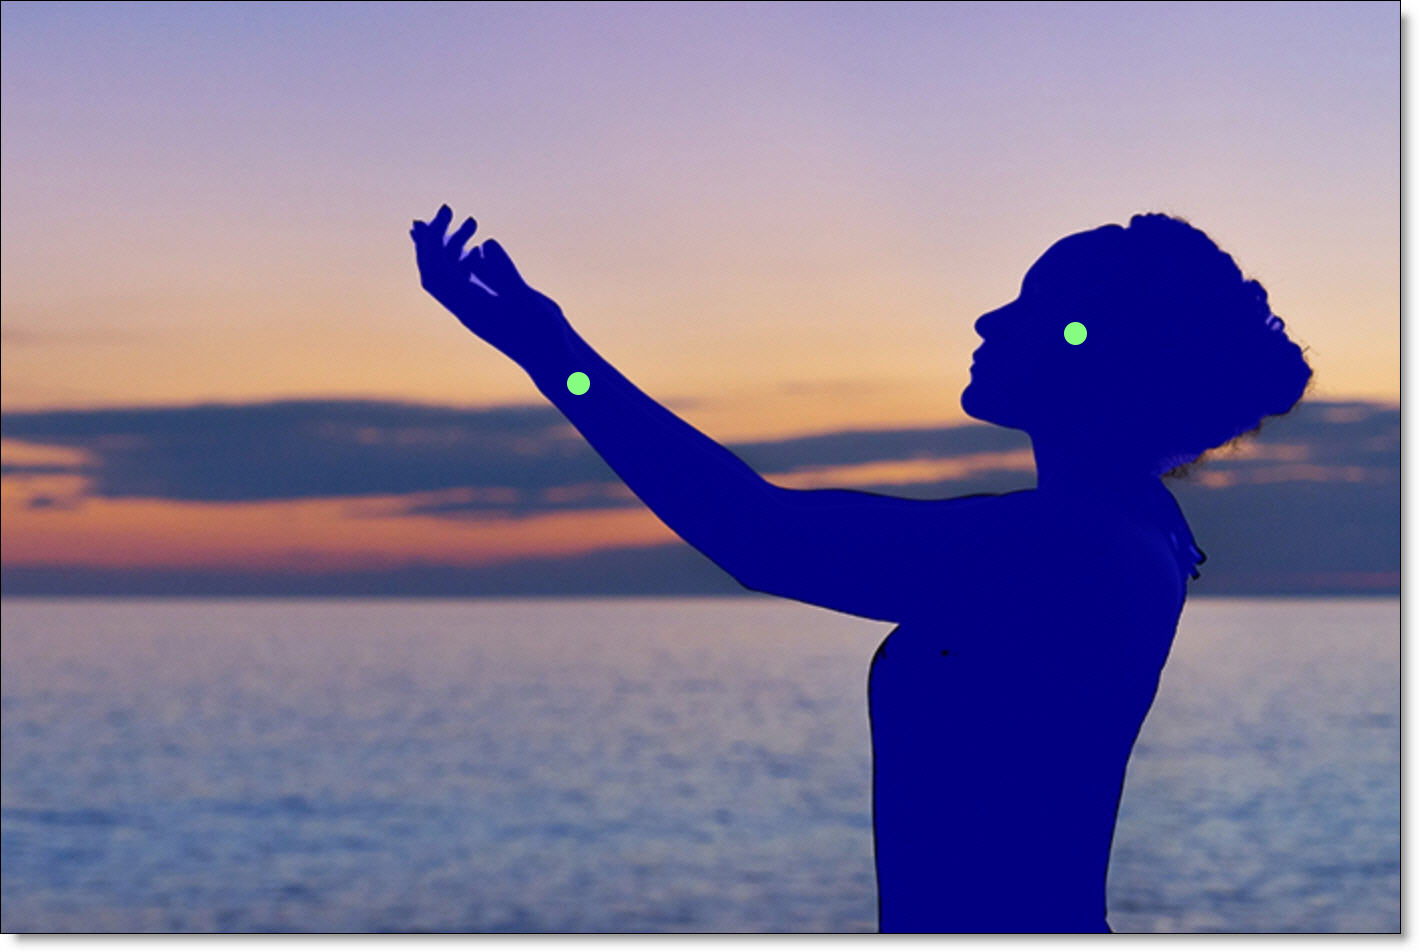
5 Add additional points as needed.
6 If you see areas of alpha outside of the selected object, right-click or select the Subtract tool and click on those areas.
To mask an object without using the Add and Subtract tools, use the Rectangle tool.
7 Select the Rectangle tool and drag out a box around the object you want to mask.
8 Connect the Mask ML output into the Matte Assist ML input.
9 In the Matte Assist ML node, make sure the Mask Source is set to Input Alpha.
10 Play the sequence to generate the matte.
If the matte is not accurate enough, create additional Mask ML keyframes.
11 Select the Mask ML node and create keyframes at frames where the matte was not accurate enough.
12 To take advantage of the keyframes, connect the Mask ML Data output into the Matte Assist ML Data input.
13 Set the Matte Assist ML > Reference Frames to Keyframes.
14 Play the sequence again to generate the revised matte.
Matte Assist ML will now use the additional keyframes while generating the matte.