File Handling
Cineon/DPX Log Session Workflow
To ensure that Cineon/DPX images display correctly, use the workflow outlined below.
Note: Silhouette tries to figure out whether a DPX file is logarithmic or linear based on the file’s header information. Sometimes the program used to create the DPX file writes the wrong information into the header causing Silhouette to think it is Logarithmic when it is Linear and vice versa. To explicitly set whether or not the file is Logarithmic or Linear, see the Edit Source > Interpretation section for more information.
Working in Linear Space
Our preferred Cineon/DPX Log workflow is to use linearized Cineon/DPX Log images in a Float session.
1 Load a Cineon or DPX clip and create a Float session.
2 Use the default Color Management > Cineon/DPX Working Space preference setting of Linear.
This converts log Cineon/DPX files to scene linear.
3 Make sure that the Display Options icon is enabled in the Viewer.
Silhouette automatically tries to determine the colorspace based on the data in the file and other information from the header. If a colorspace can’t be detected, Linear will be selected.
4 In the Color Management toolbar located below the Display Options icon, make sure that the Colorspace is Linear and the View Transform is sRGB.
These settings will ensure that the linearized Cineon/DPX images will look correct in the Viewer. If you’d like, you can also adjust the Gain (exposure) and Gamma of the image.
5 To adjust the brightness of the image in the Viewer, use the Viewer > Display > Gain and Gamma settings.
Working in Log Space
If you would like to work with Cineon/DPX images in log space, you can bypass Silhouette’s Cineon conversion. This allows you to work with the raw Cineon/DPX files without a conversion.
1 Load a Cineon or DPX clip and create a Float session.
2 Set the Color Management > Cineon/DPX Working Space preference setting to Log.
This keeps the Cineon/DPX files in log space.
3 Make sure that the Display Options icon is enabled in the Viewer.
4 In the Color Management toolbar located below the Display Options icon, make sure that the Colorspace is Cineon and the View Transform is sRGB.
These settings will ensure that the log Cineon/DPX images will look correct in the Viewer. If you’d like, you can also adjust the Gain (exposure) and Gamma of the image.
5 To adjust the brightness of the image in the Viewer, use the Viewer > Display > Gain and Gamma settings.
Video Fields and 3:2 Pulldown
When working with footage that contains video fields, you have the option of either deinterlacing or removing 3:2 Pulldown.
Note: With sources imported using the plug-in, field handling is managed by the host application.
Working with Video Fields
1 Import some video media that contains fields and create a session.
2 Click on the imported clip in the Sources window.
3 In the Object window, select Deinterlace from the Field Handling pop-up menu.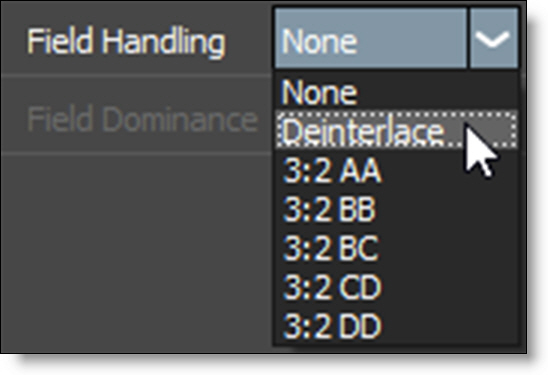
4 Choose Even (NTSC) or Odd (PAL) deinterlacing from the Field Dominance pop-up menu.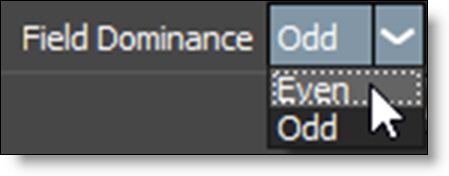
5 Press the F button in the Timebar located at the bottom right of the Viewer to expand the Timeline and increment in fields (half frames).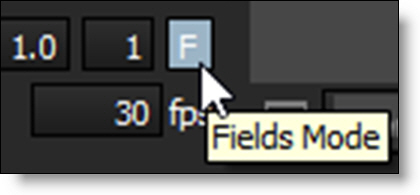
6 Edit whatever node you are working on in field mode.
7 When it is time to render, select Field Handling > Interlace and Field Dominance > Even (NTSC) or Odd (PAL) in the Render Options window.
Working with 3:2 Pulldown
1 Import some 3:2 based media and create a session.
2 Step through the beginning of your clip and determine the first field blended frame using the 3:2 setting in the chart below.
First frame with field blending | 3:2 Setting |
|---|---|
1 | BC |
2 | BB |
3 | AA |
4 | DD |
5 | CD |
3 Click on the imported clip in the Sources window.
4 In Object window, select the appropriate 3:2 setting from the Field Handling pop-up menu.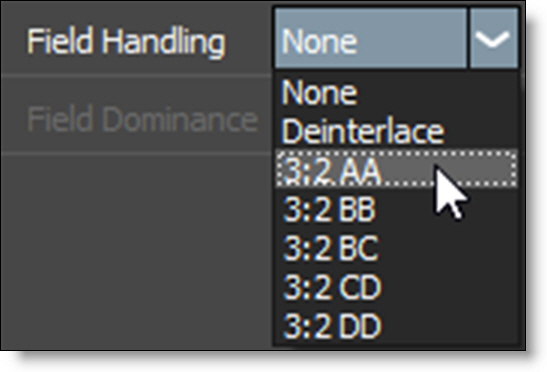
5 Choose Even (NTSC) or Odd (PAL) deinterlacing from the Field Dominance pop-up menu.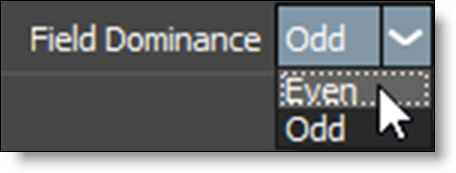
6 When you choose the 3:2 value, the length of your clip changes in the Sources window.
7 Change the Session > Settings to reflect the new clip length.