Expressions, Command-Line & Customization
Expressions
Silhouette offers both scripting and expressions as tools for customizing and automating the animation process. While scripting requires programming skills, expressions allow artists to create complex animations and link parameters, perform math functions, and use variables without having to write code. This makes expressions a more accessible option for artists who may not have programming skills, while still offering a high degree of control and flexibility.
Advanced scripting users should check out the Silhouette Integration and Customization Guide.
Link A Parameter In The Same Node
1 Drag and drop from one parameter name to another. For instance, drag from Red to Blue in the Color Correct node.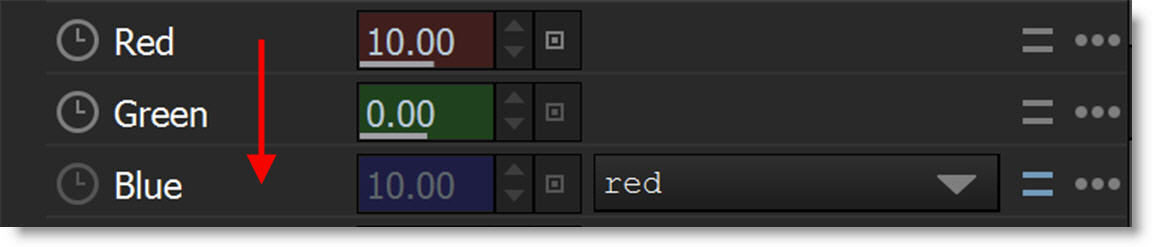
The Enable Expression icon (=) is enabled, the parameter name "red" appears in the expression editor, the Animate (clock) icon to the left of the label is grayed out, the value field is disabled, and the evaluated value is displayed. In this case, Blue now has the same value as Red.
2 Add a - sign before red and press Enter.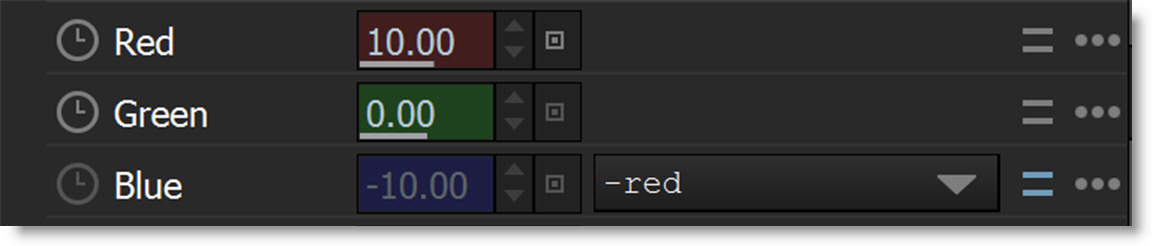
The Blue value will now be the inverse of Red. This is an easy way to create a temperature adjustment.
Link A Parameter From A Different Node
The easiest way to link parameters between different nodes is by using drag and drop, but you will need two Node windows.
Drag and Drop
1 Start by locking the Node > Parameters tab to the current node using the Lock Node icon.
2 Open a second parameter window by clicking the Add Dock icon.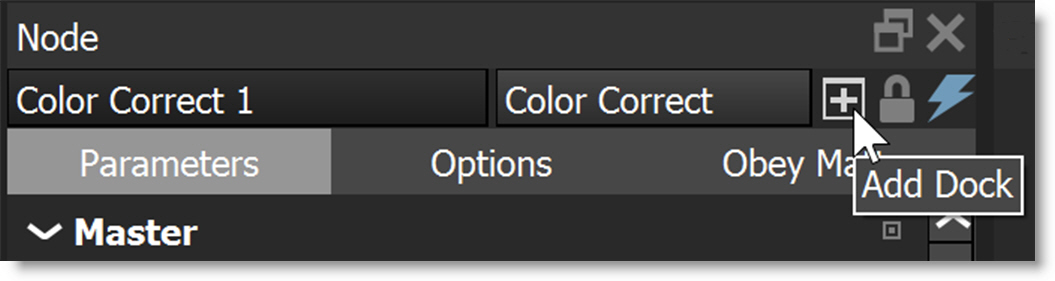
A second Node window named Node 2 appears nested in the Node window, but the two Parameters windows need to be placed side by side to perform the drag and drop.
3 Click and drag the Node 2 tab at the bottom of the Node window and drop it to the left of the current Node window.
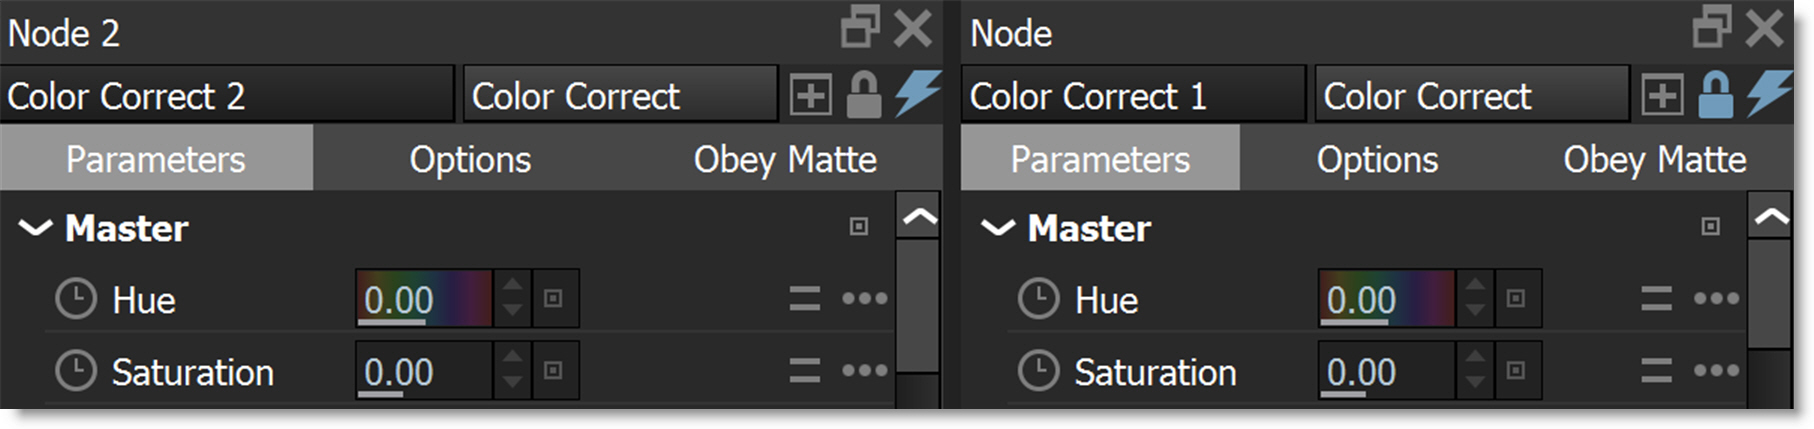
4 Drag and drop a parameter name in one node to another parameter name in the other node. For instance, drag the Hue parameter in Color Correct 1 to Hue in Color Correct 2.
Note that the expression in Color Correct 2 > Hue is: Color_Correct_1.hue. The spaces in the node name are replaced with underscores and the node name and parameter are separated with a period.
Copy and Paste
In addition to drag and dropping parameter names between nodes, you can alternatively copy the expression reference from the source node parameter and paste it into target node parameter.
1 Select Copy Expression Reference from the source node parameter options.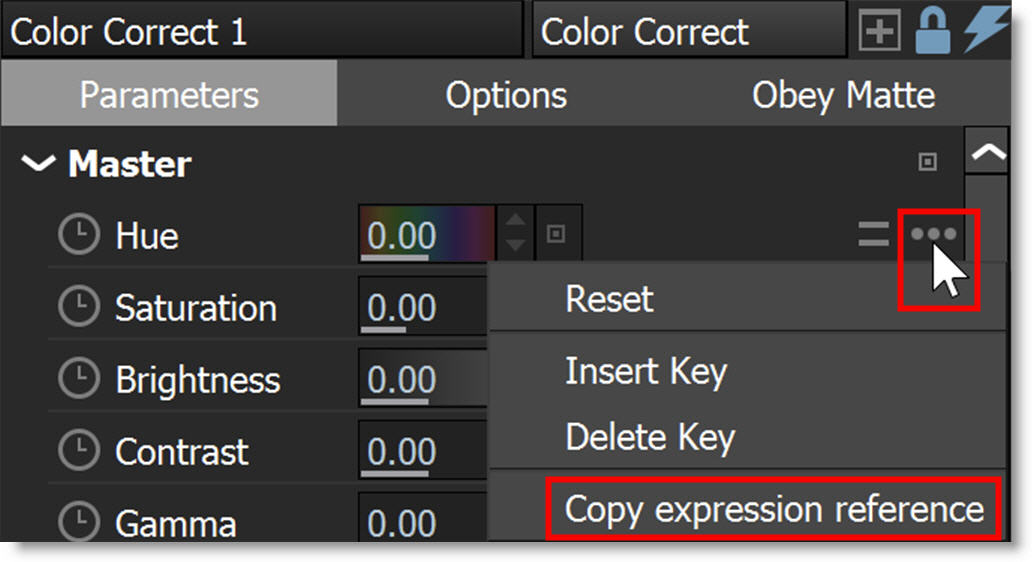
2 Activate Enable Expression on the target node parameter.
3 Click in the expression field and paste the result.
Display Which Nodes Are Connected Via Expressions
1 Click the = icon at the top of the Trees window to show which nodes are connected via expressions.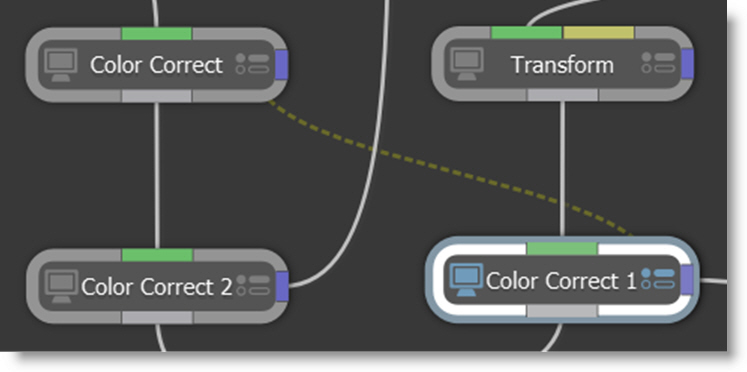
2 Hover over the dashed, yellow line to see the expression.
Expression Editor - Single or Multi-line Display
The Expression Editor by default uses a single line display.
1 In single line mode, press Enter or Tab to set the entered expression.
2 If you need more than one line for scripting, click the down icon.
The multi-line display opens.
3 In multi-line mode, press Esc to set the entered expression.
Command-Line
Silhouette on the command-line allows you to execute projects with a variety of commands to control the rendering process.
1 Open a Terminal window.
The Silhouette command-line program is named sfxcmd and is located in the following locations depending on your operating system:
• Linux: Location determined at installation
• Macintosh: /Applications/SilhouetteFX/Silhouette[version]/Silhouette.app/Contents/MacOS
• Windows: C:\Program Files\SilhouetteFX\Silhouette[version]
2 Use the cd command to navigate to the location of the sfxcmd command-line program.
3 Type the following command:
• Mac: ./sfxcmd
• Windows: .\sfxcmd.exe
• Linux: ./sfxcmd
The Silhouette command-line options are displayed in the Terminal window.
Command-line options are of the form: -option value, where value may be optional. Required arguments are in pointy brackets (< >) and optional arguments are in brackets([ ]). If the value must be from a list of possible values, the available values are separated by |. The basic form of the sfxcmd argument is: sfxcmd <projectname> [options] The project name should either be the first or last command and if not, should be preceded by the -project flag.
4 To render a project called vfx-125-02.sfx located at D:\SFX\projects, type: .\sfxcmd.exe D:\SFX\projects\vfx-125-02.sfx
Note: The command-line examples in this tutorial are for Windows. For Mac and Linux, use sfxcmd instead of sfxcmd.exe.
By default, the project is rendered using the settings in the project unless changed by command-line options.
5 To render every other frame, use the -step command as follows: .\sfxcmd.exe D:\SFX\projects\vfx-125-02.sfx -step 2
Use -range or -f to specify single or multiple ranges of frames to render and - -start to override the starting frame number of the rendered frames.
6 The vfx-125-02 project starts at frame 1 and has a duration of 78 frames, but you want the rendered files to start at 1001. To do this, type: .\sfxcmd.exe D:\SFX\projects\vfx-125-02.sfx –range 1-78 –start 1001
If your project has multiple sessions, you would need to target one of the sessions to render. If you are too lazy to open up the Silhouette user interface to determine the session name, you can use the -info command.
7 To print information about the overall project, type: .\sfxcmd.exe D:\SFX\projects\vfx-125-02.sfx -info
When –info is used, rendering is disabled and the project information is displayed.
Project: D:/SFX/projects/vfx-125-02
FileSource: bg.[0001-0078].rgb
FileSource: engine.[0001-0078].rgb
FileSource: bg_big.rgb
FileSource: gas.[0001-0078].rgb
FileSource: lens.[0001-0078].rgb
FileSource: parts.[0001-0078].rgb
FileSource: ship.[0001-0098].rgb
Session: vfx-125-02-v1
Size: (2048, 1556)
Aspect: 1.0
Duration: 78.0
Start: 1
Rate: 24.0
Work Range: (1.0, 78.0)
Node: zMatte
Node: Roto - Garbage
Node: Screen Smoother
Node: Roto Holdout
Node: engine.[0001-0078].rgb 2
Node: Tracker
Node: Math Composite 1
Node: engine.[0001-0078].rgb 2
Node: bg.[0001-0078].rgb
Node: gas.[0001-0078].rgb 1
Node: Math Composite 2
Node: lens.[0001-0078].rgb
Node: Math Composite 4
Node: parts.[0001-0078].rgb
Node: Composite
Node: Output
Node: ship.[0001-0098].rgb 2
Session: vfx-125-02-v2
Size: (2048, 1556)
Aspect: 1.0
Duration: 78.0
Start: 1
Rate: 24.0
Work Range: (1.0, 78.0)
Node: zMatte
Node: Roto - Garbage
Node: Screen Smoother
Node: Roto Holdout
Node: engine.[0001-0078].rgb 2
Node: Tracker
Node: Math Composite 1
Node: engine.[0001-0078].rgb 2
Node: bg.[0001-0078].rgb
Node: gas.[0001-0078].rgb 1
Node: Math Composite 2
Node: lens.[0001-0078].rgb
Node: Math Composite 4
Node: parts.[0001-0078].rgb
Node: Composite
Node: Output
Node: ship.[0001-0098].rgb 2
8 To render the vfx-125-02-v2 session from the vfx-125-02 project, type the following: .\sfxcmd D:\SFX\projects\vfx-125-02.sfx -session vfx-125-02-v2
There are lots of possibilities, so see the Command-Line chapter for a complete list of options and descriptions.
Keyboard Customization
Keyboard shortcuts can be customized by using a text editor to modify a Python script located in the scripts folder of your Silhouette installation.
To modify your Silhouette keyboard shortcuts:
1 Go to the scripts folder of your Silhouette installation.
2 For Windows, go to C:\Program Files\BorisFX\Silhouette[version]\resources\scripts.
or
3 For Linux, go to the user determined Silhouette install location and then navigate to Silhouette[version]/resources/scripts.
or
4 For Macintosh, go to /Applications/BorisFX/Silhouette[version], right-click on Silhouette and select Show Package Contents.
A new Browser window opens.
5 In the new Browser window, go to Contents/Resources/scripts.
Inside the scripts folder, you will find a keybinds.py file. As a precaution, it would be a good idea to make a backup of this file.
6 Make a copy of the keybinds.py file and rename the copy keybinds.py.bak.
7 Using a text editor, open the keybinds.py file.
8 Scroll down and replace the existing shortcuts with those of your choosing.
9 Save the file.
10 Restart Silhouette for the new keyboard shortcuts to be active.