EZ Mask
Description
EZ Mask is an easy to use interactive matting tool capable of isolating almost any object in an image--even when dealing with fine hair detail, smoke, or reflections. Mattes are created on single frames and are useful as input to the Matte Assist ML node where the matte is propagated over time or to limit strokes in the Paint node.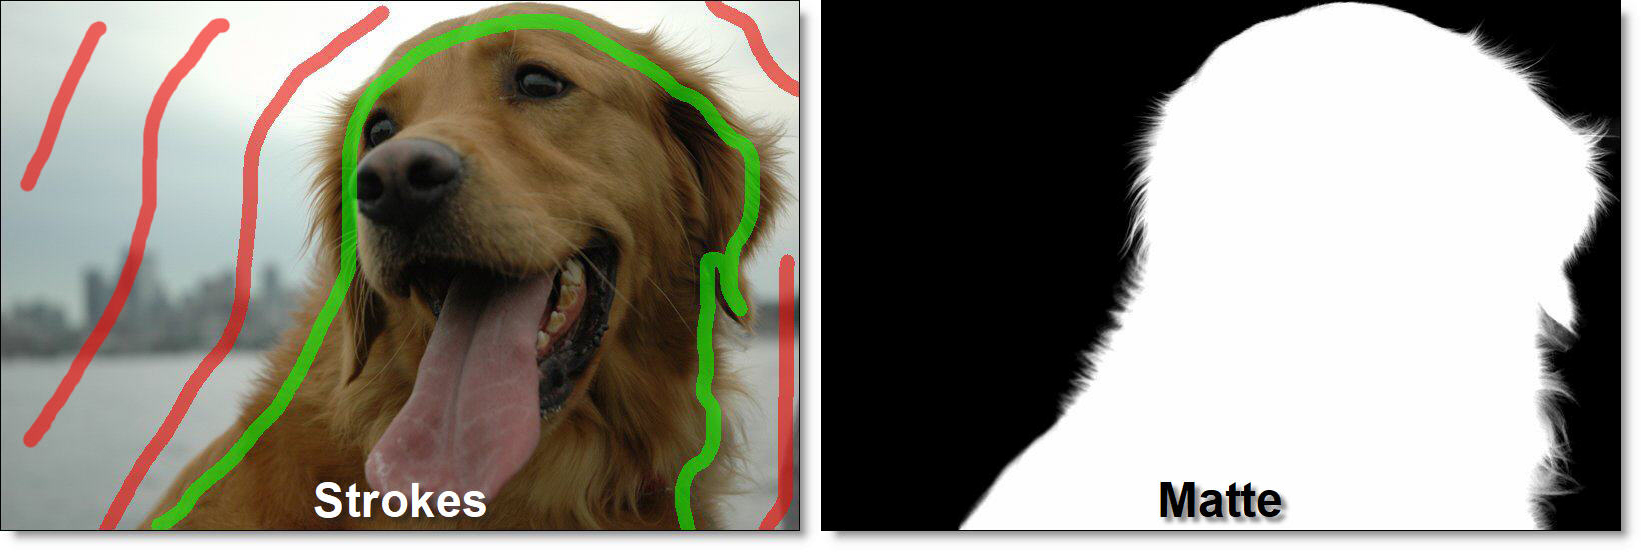

To work this magic, EZ Mask iteratively estimates the transparency value for every pixel in the image, based on a small sample of foreground (what you want to isolate) and background pixels marked by simple strokes on the image.
Go to the EZ Mask tutorial to see how it works.
Node Group
Key.
Trimaps
EZ Mask creates masks by using a trimap--a pre-segmented image consisting of three regions of foreground (what you want to isolate), background and unknown. Strokes are used to define foreground and background with unmarked sections in between considered unknown areas where partial opacity values are computed.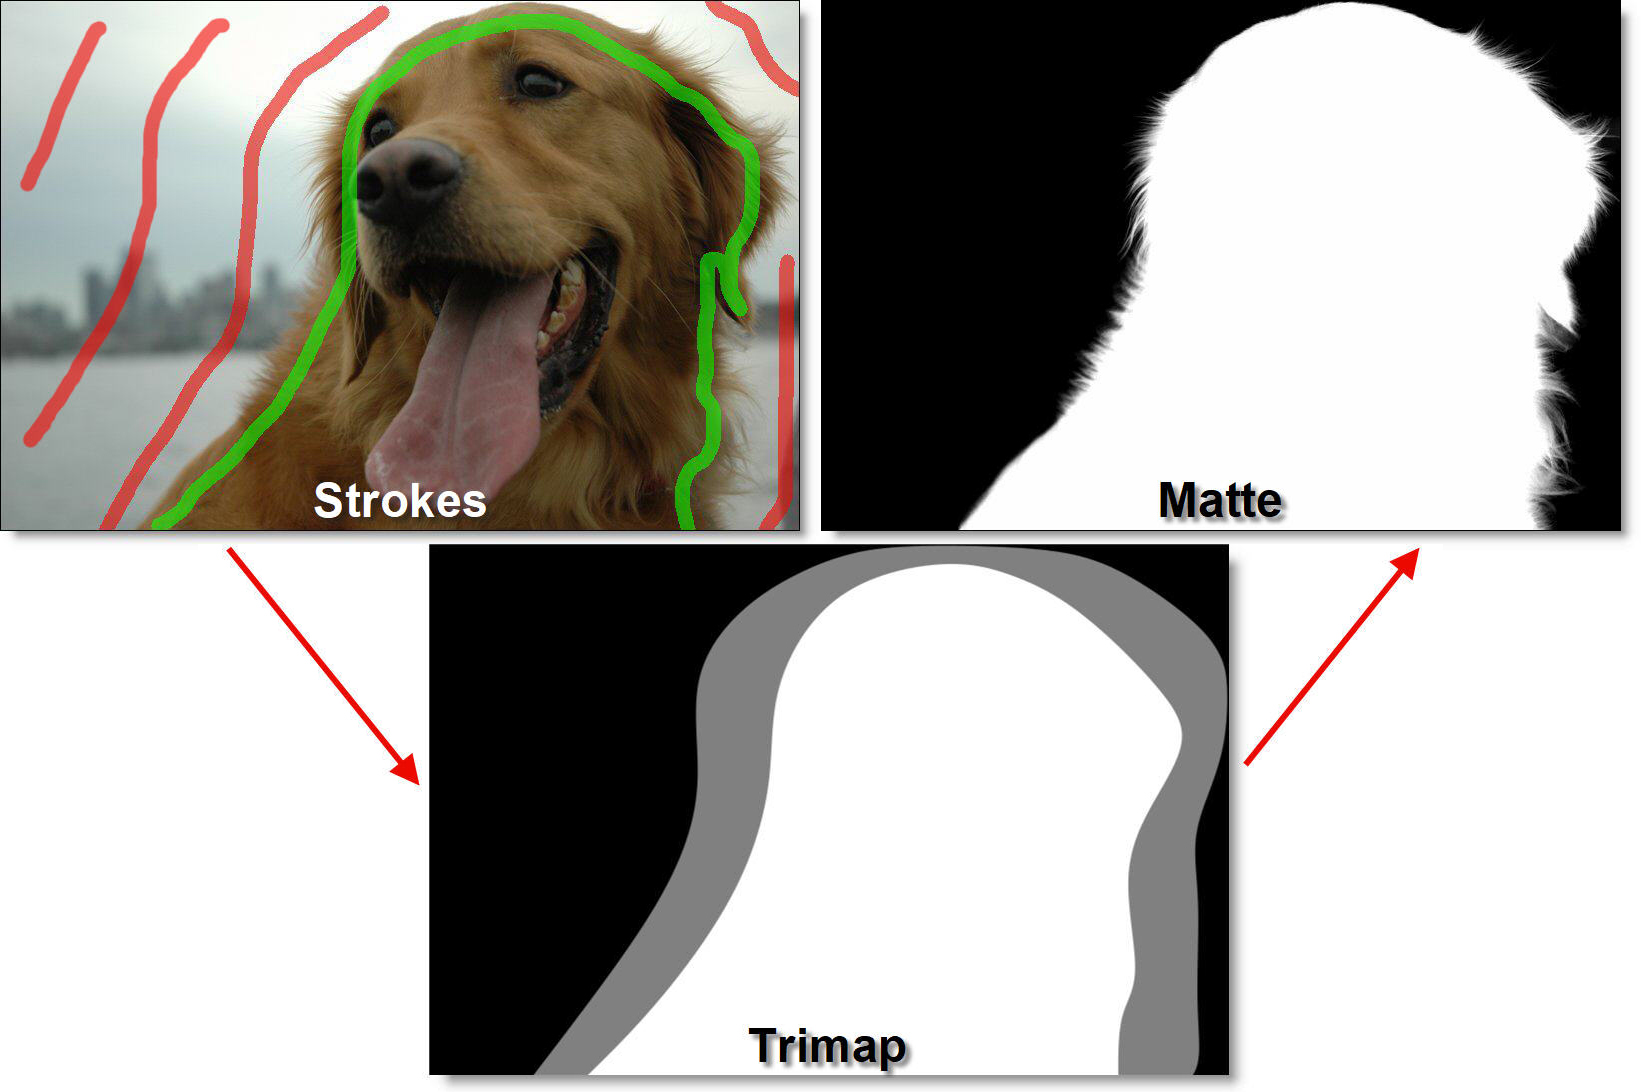

Using the strokes, EZ Mask generates an intermediate matte result called a Trimap. White signifies solid foreground, black is complete background and gray is unknown area.
Stroke Trimap Tips & Tricks
• Make sure you draw enough foreground strokes (what you want to cut out) and background strokes (what you want to get rid of). A good technique is to draw an inner foreground stroke within the object you are extracting and an outer background stroke outside the object.
• The strokes should be near the boundary of the object, but not right up against the edge.
• If the foreground or background has varying colors, the strokes should cover those colors.
• When viewing the matte, if you see gray areas in the foreground object that should be completely white, make additional foreground strokes in those areas. If you see gray matte areas in the background that should be completely black, make additional background strokes.
• The general rule is to not put different foreground and background strokes too close together unless you need to.
Warning: If you only provide a few sparse strokes, EZ Mask will take longer to process with a less accurate result.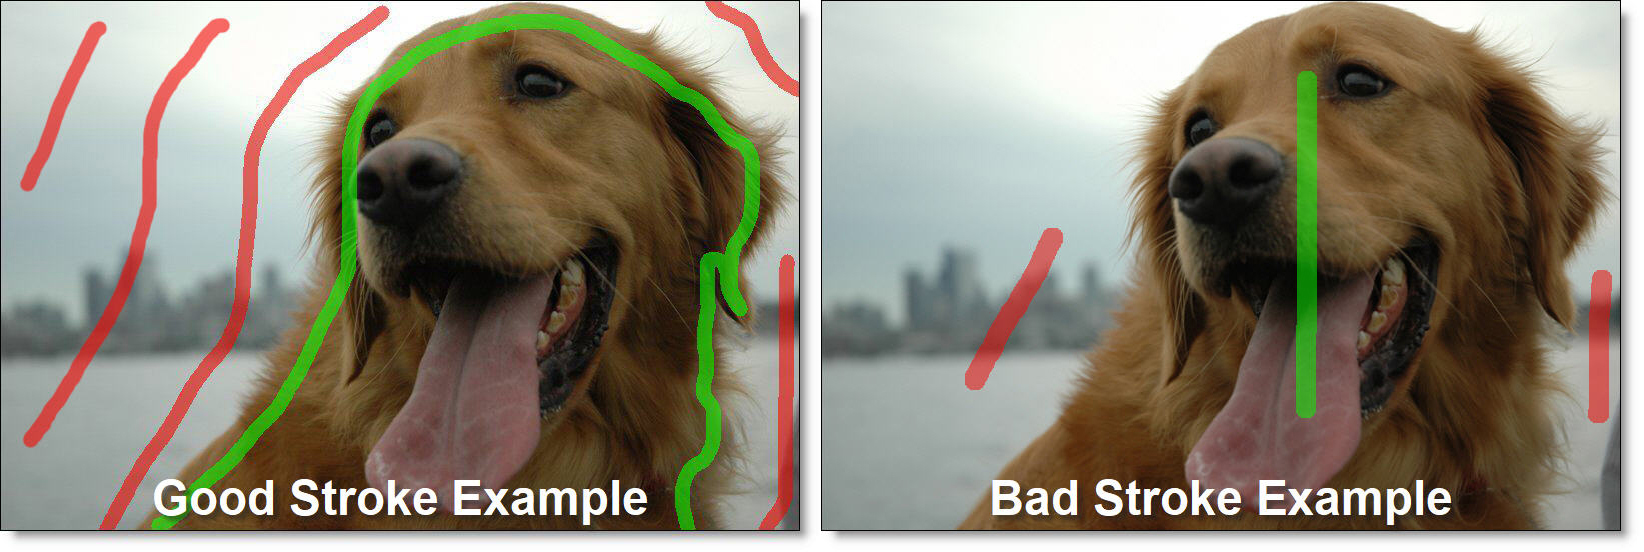

Brushes
When the EZ Mask node is selected, a number of different brushes are selectable from the Toolbar to the left of the Viewer.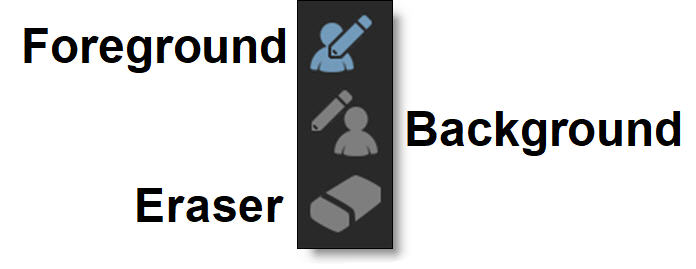

Foreground (Shift-F)
Click the Foreground icon and draw to mark the foreground area--the region to cut out. With each click and drag of the mouse, a green line is drawn.

Note: If you Shift-click with the left mouse button and then click in a different location, a straight line is drawn. If you keep Shift depressed while clicking, you will create interconnected straight lines.
Background (Shift-B)
Click the Background icon and draw to mark the background area. With each click and drag of the mouse, a red line is drawn.

Eraser (Shift-E)
Erases existing brush strokes.

Brush Size
Sets the size of the brush by holding Ctrl/Cmd and dragging in or out.
Brush Opacity
Adjust the brush stroke opacity with the Viewer > Blend Amount.

Deartifact
Blurry artifacts can be generated while attempting to extract objects that have drop shadows, similar colors to the background or out of focus edges. Deartifact can be used to limit these artifacts.
Accuracy
The accuracy of the generated matte can be increased with this control. When foreground and background strokes are close together, setting the Accuracy to Higher or Full will result in a more accurate matte.
Note: It is best to work with EZ Mask at the Accuracy setting that you will be rendering at.