Sessions
A session in Silhouette is where composite, rotoscope and paint. Typically, you may have a job that requires you to work on multiple shots. A session would be created for each shot that you will work on. You can have as many sessions as you want, but can only work on one session at a time.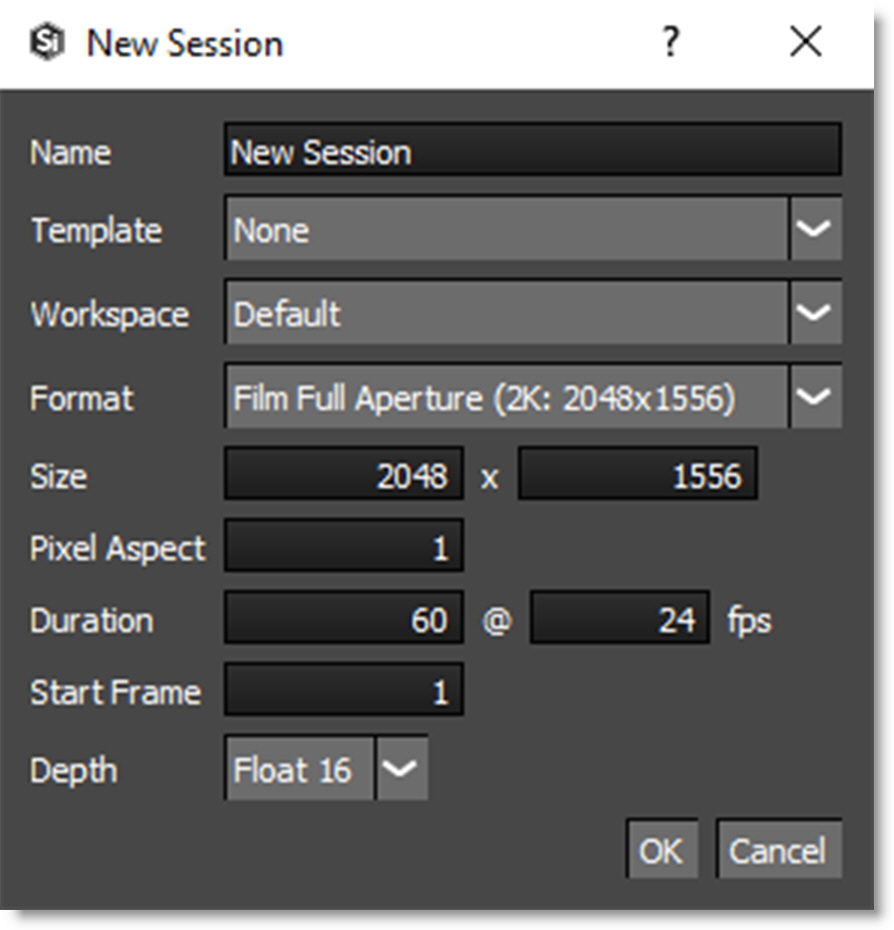
Go to the Creating Sessions tutorial to see how it works.
New Session
You must create a session before you can start working with your footage. It describes the resolution, bit depth, duration, frame rate and aspect ratio as well as what nodes you will be using. You can create a new session by:
1 Selecting a clip in the Sources window and pressing either Ctrl/Cmd-N, selecting Session > New Session or clicking the New Session icon at the bottom of the Sources window.
2 Dragging the clip thumbnail from the Sources window to the Trees window.
Note: If an in and out point has been marked for a source clip, the marked duration will be used for the session duration. For more information on source clip in and out points, see Source In and Out Points.
Editing Sessions
Once you have created a session, you can change its settings at any time by either 1) Selecting Session > Session Settings or 2) Pressing Ctrl/Cmd-Shift-S. In either case, the session window opens and you can change the settings.
Switching Sessions
To switch between sessions, select it from the pop-up at the top of the Trees window or from the Session > Current Session menu.
Deleting Sessions
Delete a session using the Session > Delete Session menu. Whatever is the currently selected session is deleted.
Session Window
The Session window has a variety of settings for format, image size, pixel type, and frame rate. You can choose one of the preset formats or create a custom format.
Name
Determines the name of the session.
Template
Templates are presets for automatically adding nodes to the session and selecting a workspace.
Composite
Automatically adds an Output node to the Source and selects the Composite workspace.
Paint
Automatically adds Roto, Paint and Output nodes to the Source, connects the Roto > Data output to the Paint > Data input and selects the Streamlined workspace.
Roto
Automatically adds Roto and Output nodes to the Source and selects the Streamlined workspace.
Workspace
Selects a Silhouette workspace. A workspace is a snapshot of the user interface layout.
Format
A number of preset formats can be selected from the Format pop-up menu. When one of the options is selected, the session fields are preset with the appropriate data. See the Appendix C - Session Formats chapter for a complete listing of all format presets.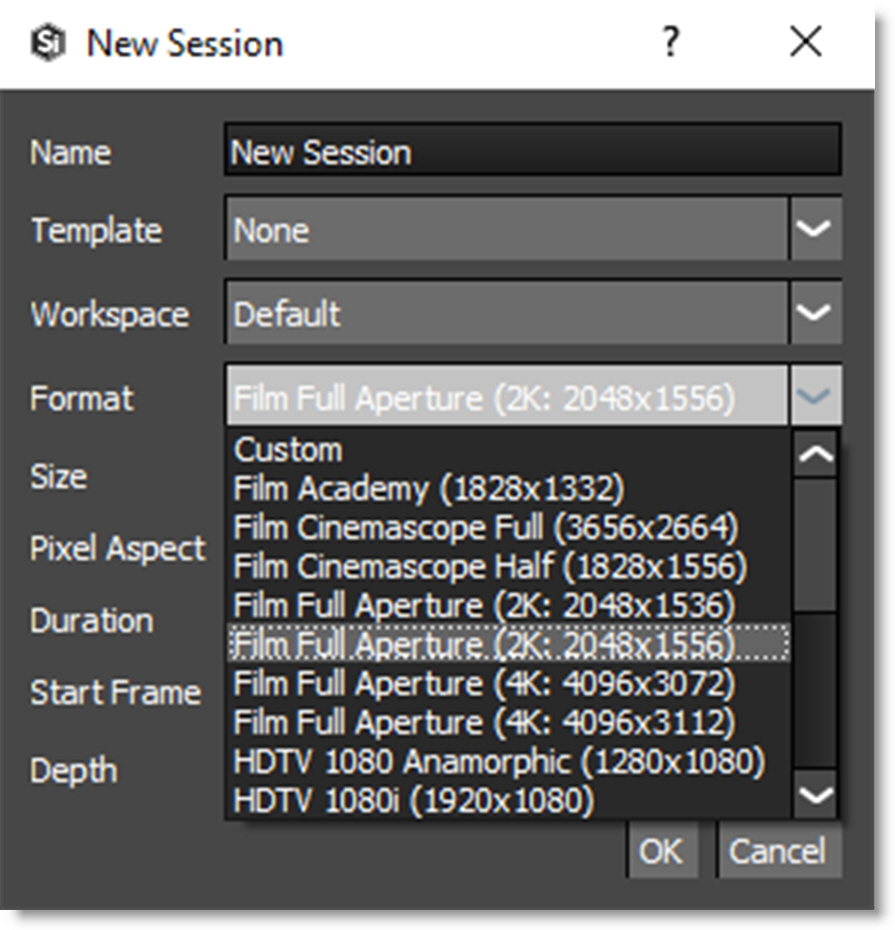
Format Presets
• Custom
• Film Full Aperture (4K: 4096x3112)
• Film Full Aperture (4K: 4096x3072)
• Film Full Aperture (2k: 2048x1556)
• Film Full Aperture (2k: 2048x1536)
• Film Cinemascope Full (3656x2664)
• Film Cinemascope Half (1828x1556)
• Film Academy (1828x1332)
• HDTV 24p (1920x1080)
• HDTV 1080i (1920x1080)
• HDTV 1080, Anamorphic 1280x1080
• HDTV 720p (1280x720)
• NTSC (640x480)
• NTSC (648x486)
• NTSC DV 720x480)
• NTSC DV Widescreen (720x480)
• NTSC D1 (720x486)
• NTSC D1 Square Pixels (720x540)
• PAL D1/DV (720x576)
• PAL D1/DV Square Pixels (768x576)
• PAL D1/DV Widescreen (720x576)
Size
Width
Sets the width of the image.
Height
Sets the height of the image.
Pixel Aspect
Sets the pixel aspect ratio of the image.
Duration
Sets the length of the session.
FPS
Sets the frame rate of the session.
Start Frame
Sets the start frame for the session. The Player, Timeline and Render Options incorporate this value into their numbering.
Depth
Sets the bit depth of the session.
8 bit
Sets the bit depth to 8 bits per channel.
Float 16
Sets the bit depth to 16 bit floating point. Use for film sessions using OpenEXR, DPX and Kodak Cineon files. Float 16 will have slightly less precision than Float 32 but will take up much less memory.
Float 32
Sets the bit depth to 32 bit floating point. Use for film sessions using OpenEXR, DPX and Kodak Cineon files. Float 32 will be higher precision than Float 16, but will take up much more memory.
OK
Creates a new session in the Trees window. When you click OK, the session is automatically created.