


BCC+ Vector Blur Dissolve
Category: BCC Transitions
Effect Name: BCC+ Vector Blur Dissolve
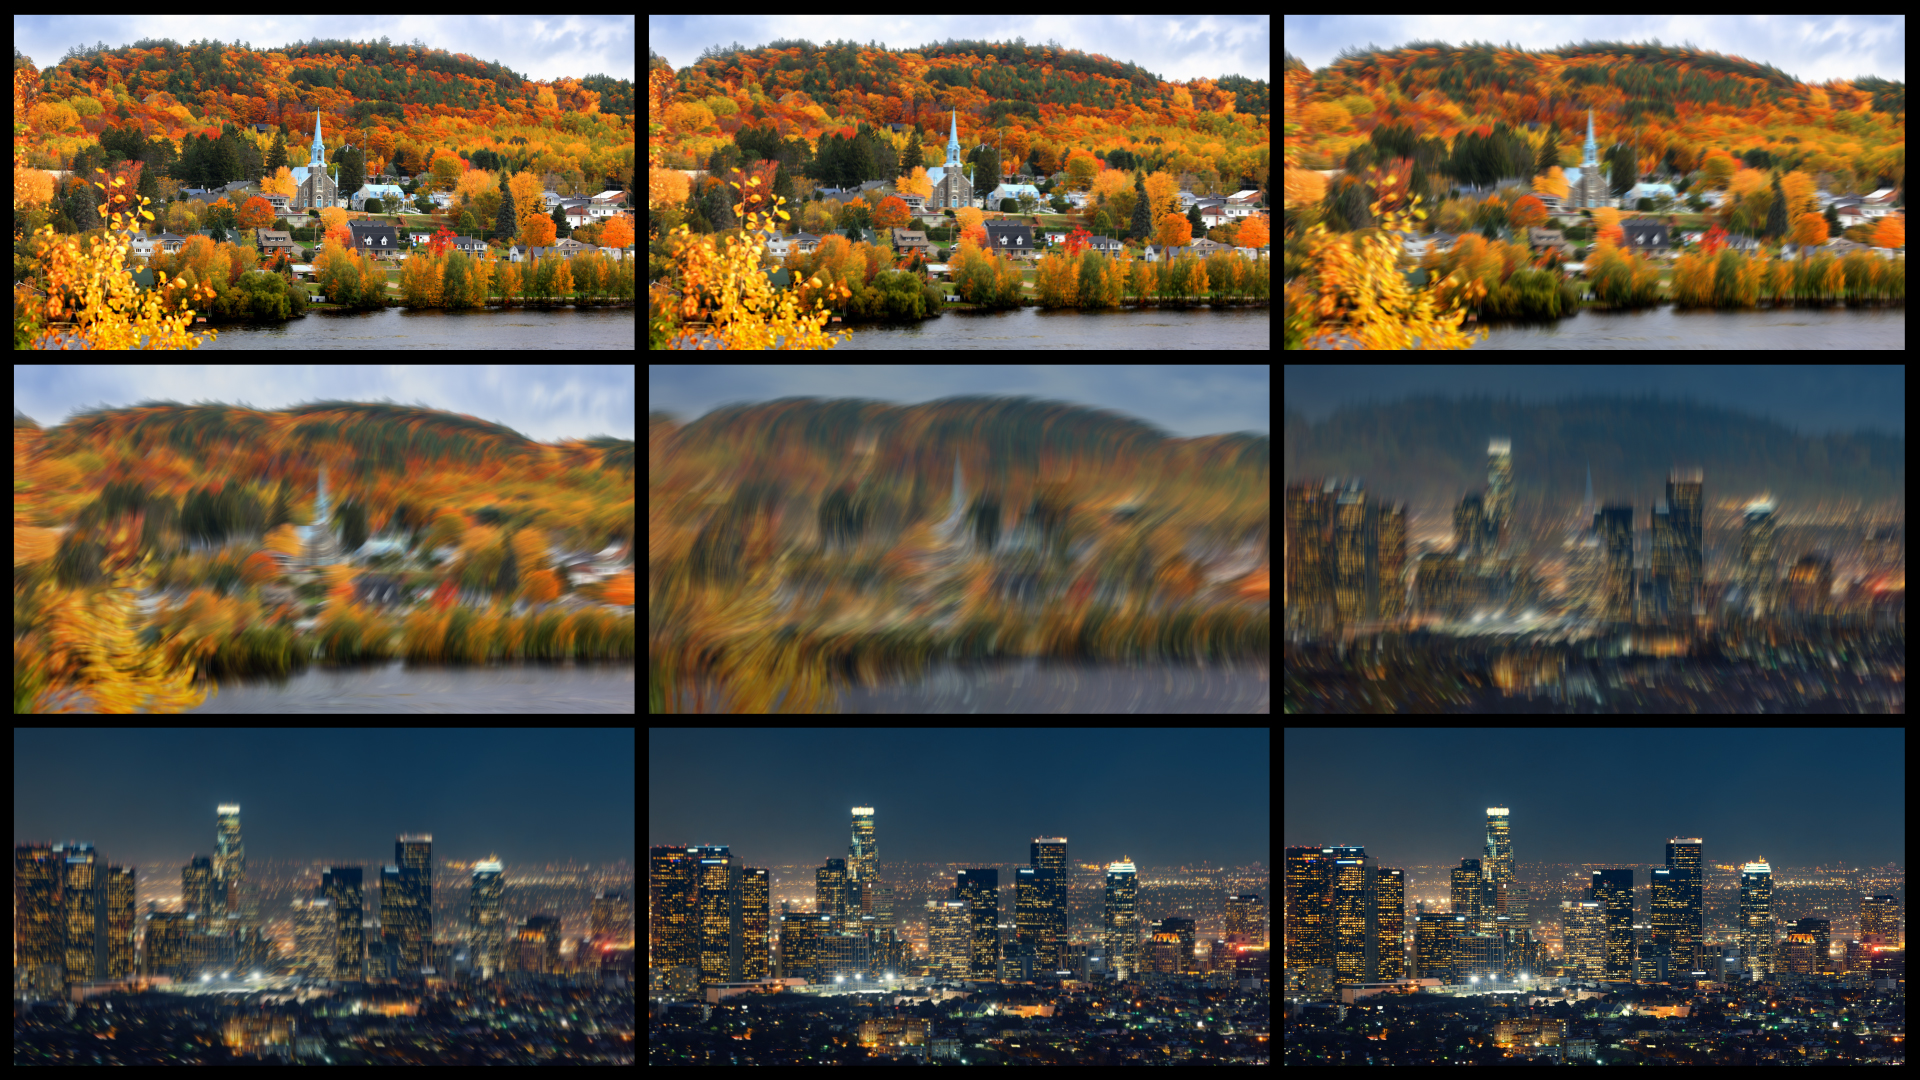
The BCC+ Vector Blur Dissolve filter, part of the BCC Transitions category, transitions between two clips using directional, motion-inspired blurring that stretches and smears image detail as one shot gives way to the next. The result is a smooth, energetic transition that works especially well with fast-paced edits, motion graphics, action footage, and sequences where a stronger sense of movement is desired.
Working with the Filter
FX Editor and Presets
- Use the FX Editor to load or save presets for reuse.
- To load a preset: Open the FX Editor, select a preset from the Presets panel, and click Apply to return to the host application.
- To save a custom preset: While in the FX Editor, click the Create Custom Preset icon in the parameter list, enter a preset name, and click Done. Additionally, a custom preset can be saved from the main menu bar by selecting File->Save Preset.
- To import custom presets from another drive: While in the FX Editor, select File->Import Preset from the main menu bar.
- Animation: Menu controlling what drives the animation of the transition.
- Auto: Automatically generates a transition based on the transition length (when used as a transition) or the clip length (when used as a filter).
- Manual: Requires the user to set keyframes to control the transition progression. Can be useful in customizing the exact timing of the transition or when applying the filter as a stylized effect as opposed to a direct NLE-style transition.
- Layer to Reveal: This layer selection popup is not relevant when you have applied the filter as a true NLE-style transition and it will be hidden or disabled in that context. When applied as a normal “effect” as opposed to a transition, however, this menu is used to select the “Incoming” or “Reveal” layer for the transition.
- Percent Done: When the Animation menu is changed to Percent Done then this slider can be manually keyframed to control the transition progression.
- Vector Type: Determines how the information derived from the Vector Map is interpreted to generate the vector field used by the blur.
- Value: Uses the values of the selected map channel to determine the direction and magnitude of the generated blur vectors.
- Gradient: Uses changes between neighboring values in the selected map channel to determine the direction and magnitude of the generated blur vectors.
- Blur Length: Sets the overall distance that pixels are displaced along the generated vectors and therefore determines the apparent length of the blur or streaks.
- Angular Offset: Rotates the direction of the generated vector field by the specified angular amount.
- Bias: Shifts the balance of the generated vector values to alter how the displacement is distributed across the vector map.
- Falloff: Controls how strongly the vector blur diminishes as the vector-map values move away from the regions producing the strongest displacement.
- Cycles: Controls the number of directional cycles generated when interpreting the vector map, increasing the frequency of directional changes as the value is increased.
- Gradient Flattening: Reduces variations in the vector map gradient to create smoother and more uniform vector directions.
- Edge Mode: Determines how edges of the filtered frame are handled.
- Transparent: Sets the edge of the result to become transparent.
- Repeat: Sets edge pixels to generate opaque pixels along the edge of the result.
- Reflect: Reflects pixels back into the result to generate opaque pixels along the edge of the result.
- Wrap: Wraps edge pixels to generate opaque pixels along the edge of the result.
- Vector Map: Determines the source layer or image that is analyzed to generate the vector field used to control the direction and length of the blur.
- Channel: Determines which image component of the selected Vector Map is used to generate the vector field.
- Red: Derives the vector map from the red channel of the selected image.
- Green: Derives the vector map from the green channel of the selected image.
- Blue: Derives the vector map from the blue channel of the selected image.
- Alpha: Derives the vector map from the alpha channel of the selected image.
- Luminance: Derives the vector map from the luminance values of the selected image.
- Hue: Derives the vector map from the hue values of the selected image.
- Saturation: Derives the vector map from the saturation values of the selected image.
- Map Softness: softens the selected vector map before it is analyzed, reducing abrupt changes in the resulting vector field and producing smoother blur transitions.
- Enable: Enables/disables the Prism color-separation effect.
- Short Color: Sets the color applied to the shorter-distance portion of the vector blur.
- Mid Color: Sets the color applied to the middle-distance portion of the vector blur.
- Long Color: Sets the color applied to the longer-distance portion of the vector blur.
- Vector Map Layer: Determines which image in the transition is used as the source for generating the vector field.
- Blur Source: Uses the image currently being processed by the blur as the source for the vector map.
- Source Layer: Uses the outgoing source image as the vector map.
- Reveal Layer: Uses the incoming reveal image as the vector map.
- Apply Blur To: Determines which component of the transition receives the Vector Blur effect.
- Dissolve: Applies the vector blur to the composited dissolve result as the transition progresses.
- Outgoing: Applies the vector blur only to the outgoing image.
- Incoming: Applies the vector blur only to the incoming image.
- Incoming and Outgoing: Applies the vector blur to both the incoming and outgoing images.
- Off: Disables the Vector Blur processing.
- Reverse Blur on Reveal: reverses the direction of the vector blur applied to the incoming image so that its blur direction opposes the outgoing image during the transition.
- Hue: Rotates the hue of the image.
- Saturation: Sets the saturation of the image.
- Brightness: Sets the brightness of the image.
- Contrast: Sets the contrast of the image.
- Gamma: Sets the gamma of the image.
- Temperature: Sets the color of the image to be either warmer or cooler.
- Cyan/Magenta: Adds either Cyan or Magenta to the image. Dragging the slider to the right makes the image more magenta and dragging the slider to the left makes the image more cyan.
- Red: Adds or subtracts red from the image.
- Green: Adds or subtracts green from the image.
- Blue: Adds or subtracts blue from the image.
- Ease In: Controls how quickly or slowly the transition advances at the beginning of the transition.
- Ease Mid: Controls how quickly or slowly the middle of the animation progresses.
- Ease Out: Controls how quickly or slowly the transition advances at the end of the transition.
- OSC Enable: Only visible in hosts that support heads up display widgets for manipulating these controls directly on screen. Enables/Disables on screen controls.
- GPU Rendering:Specifies how the effect is rendered.
- Default: Uses product-wide default of 16 bit half-float GPU rendering.
- 16 Bit Float: Manually force 16 bit half-float GPU rendering.
- 32 Bit Float: Manually force 32 bit full-float GPU rendering.
- Disabled: Forces CPU rendering.
Vector Blur Group
The Vector Blur group creates directional streaking by displacing pixels along a vector field whose direction and magnitude are derived from the selected vector map.
Prism Group
The Prism group adds color separation to the vector blur by assigning different colors to shorter, middle, and longer portions of the generated blur streaks.
Color Correct Group
The Color Correct group provides controls for adjusting the color and tonal characteristics of the transition result.
Animation Tuning group
These parameters control the overall timing of the transition. On hosts which permit on-screen heads up display widgets (such as AE, Premiere, and Avid) you should never need to modify these sliders directly since they can be configured in a more convenient and intuitive manner by manipulating the widgets directly in your comp/preview pane. On hosts without heads up display widgets you can use these sliders directly to fine tune your animation timing, taking advantage of the View Ease Curve option to help visualize the animation rates.
