


L-cuts and J-cuts are two video editing techniques that are essential to any filmmaker's editing skill set. In today’s article, you’ll learn what J-cuts and L-cuts are in video editing, what their differences are, when to use each one, and how to use them.
Let’s dive in!
What Are J Cuts and L Cuts?
J-cuts and L-cuts are two popular split techniques that shift the audio and video at different points in time. A J-cut plays the previous scene's audio before you actually see the new scene, whereas an L-cut carries the first scene's sounds over into the next one.
J Cut
In a J-cut, the audio from the next scene begins to play before the visuals change. A common example is a scene in which two people are talking. The first scene shows the first speaker, then you hear the other person's voice before the shot cuts to the second speaker. You hear the audio first, before the visuals.
If you’re wondering why it’s called a “J-cut”, the answer is simply because of how it looks in the timeline of your video editing software. The audio clip is moved to the left under the main footage, making a J shape with the second footage’s audio and video.
You may hear other names such as “Audio Under”, “Audio Lead”, or “Audio Advance”, but they all refer to the same thing: a J-cut.
L Cut
An L-cut works opposite to a J-cut. In an L-cut edit, the audio from the preceding scene continues into the next scene. So, you keep hearing the primary footage audio as the visuals change. For example, when a character starts to tell a backstory. The character begins recounting what happened, and the scene shifts to the past as the dialogue continues.
Its name comes from the L shape resemblance in the timeline of your software. In an L-cut, the audio from the first clip is dragged to the right beneath the second video clip, creating an L-shaped arrangement of the audio and video from the first footage. If you ever hear an editor ask for a “Post-lapped audio”, they are referring to an L-cut.
The purpose of using J-cuts and L-cuts is to blend audio between shots without being obvious. The transitions and cuts should be subtle but impactful. These two split cuts can also be used together in the same scene to maintain a good rhythm and avoid monotony.
When to Use J Cuts and When to Use L Cuts
You can use J and L cuts however you like; it's up to your artistic choice. However, there are some established uses where they convey a stronger meaning. Let’s explore some examples of when to use J-cuts and L-cuts.
Introducing New Characters
Use a J-cut when introducing a new character to hear their voice before seeing them, creating anticipation.
Smooth Scene Transition
When shifting from a quiet scene to a noisy one. Use a J-cut so the audience can hear the crowd, traffic, music, or other sound effects start playing before the visual, making the transition less jarring.
Opening Scenes
Create suspense at the beginning of a scene with a J-cut to catch your audience's attention, and use sound to build anticipation for what’s about to come.
Ending a Scene
When you’re ending a powerful or meaningful scene, an L-cut can carry the mood of the previous scene to another one by letting a sound from the previous scene linger for a few seconds in the next one.
Dialogue Scenes
Both J-cuts and L-cuts are techniques that video editors use to keep the flow of the conversation. Use a J-cuts to hear a person speaking before seeing them on screen. An L-cut can be used to show the other character's reaction as the person continues speaking. The key is to cut in the middle of the sentence and shift shots between speakers.
Tutorials
Tutorial and instructional content are the perfect projects for J-cuts and dialogues. Use them to show visuals of what the speaker explains step by step, then transition to the instructor speaking.
Film Openings
Another great example from movies is the use of a J-cut to transition from the intro sequence to the first scene. The audience subconsciously anticipates the next scenes while the opening credits are still on screen.
Cliffhangers
Another use for L-cuts in film and television is cliffhangers, which are especially helpful for episodic content. L-cuts are great for the last scene, fading to black as a final sound plays in the black screen. Something like a car crash, a scream, or a gunshot. It creates a dramatic ending that leaves the audience expecting more.
Montages
A montage sequence uses multiple shots in a short time. Add L- and J-cuts to transitions between shots to make the montage more dynamic and engaging.
J Cuts vs L Cuts
J-cuts and L-cuts may seem similar, but they are two sides of the same coin. They’re both super useful, and using one does not negate the use of the other. You can use both in the same scene! Here’s a summary to highlight their differences.
Shape on the editing timeline:
- J-cut has a J shape because the audio from the second scene starts early under the first scene.
- L-cut has an L shape because the audio from the first scene ends late under the second scene.
Viewer experience:
- J-cut leads the viewer into the next scene.
- L-cut keeps the viewer grounded in the previous scene. Best for:
- J-cut for setting the next scene or building tension.
- L-cut to show emotional reactions, dialogue flow, and cliffhangers.
How to Do J Cut and L Cut Transitions with BCC Cross Dissolve / Film Dissolve

Almost any video editing software has tools for making cuts. For this tutorial, I’ll use Boris FX Continuum in Premiere Pro to create J-cut and L-cut transitions.

You can download a free trial of Continuum and use it with your supported software, such as Premiere Pro, DaVinci Resolve, Final Cut Pro, Avid Media Composer, and more, to follow this tutorial.
Step 1: Create a New Project and Import Media
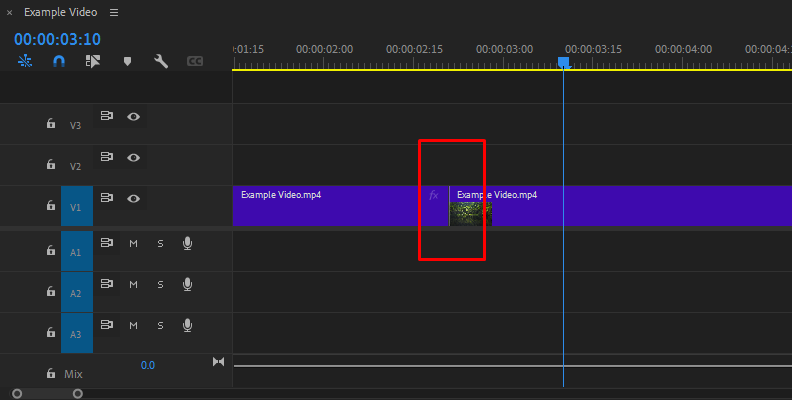
Open Premiere Pro or your software of choice and create a new project. Import the media and arrange the sequence in the timeline. Place the two clips together or make a split where you want to create the cut.
Step 2: Adjust Audio Track
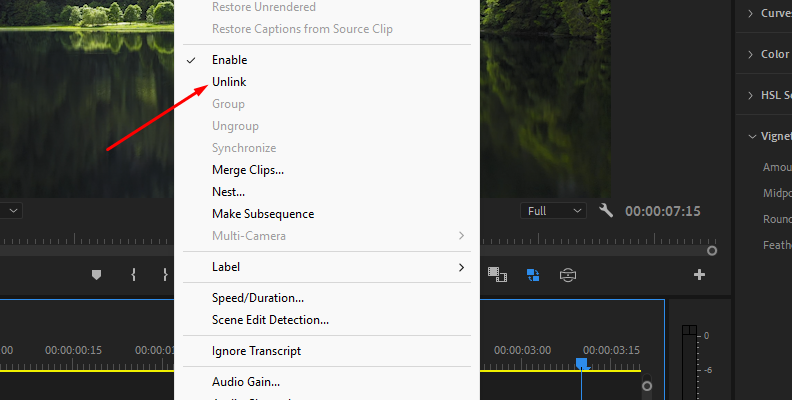
Once you have all your clips and the sequence in place, unlink the audio and video clips so you can move each one independently. Right-click the clips and select “Unlink”.
Now, you can bring t the second clip’s audio earlier in the timeline for a J-cut or extend the first clip’s audio to make an L-Cut.
Play with different lengths of the J and L. A simple change in seconds can make a big difference in your final video.
Step 3: Add BCC Transitions
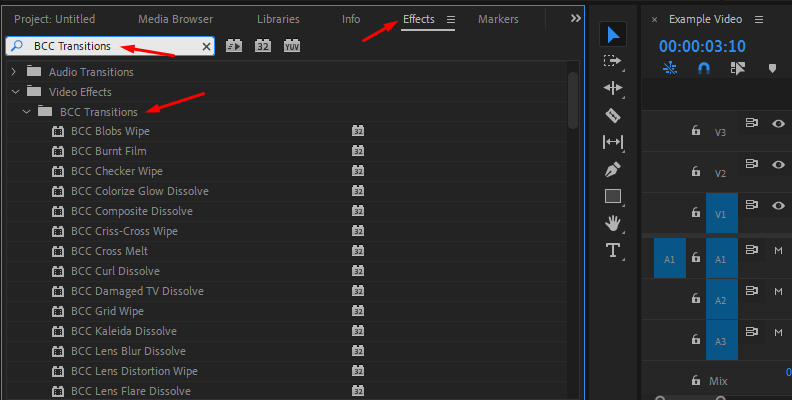
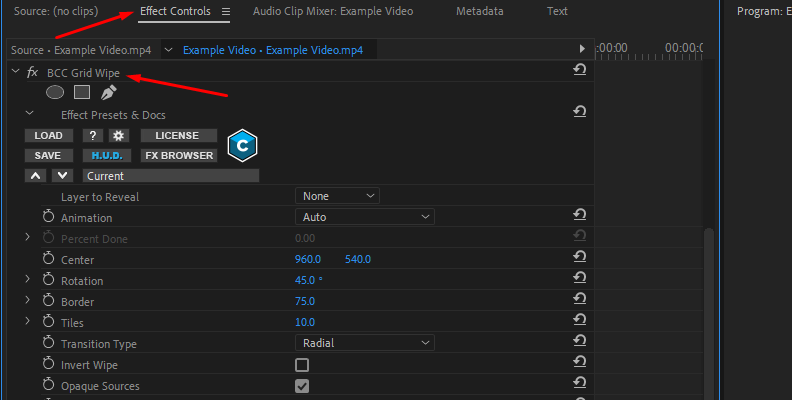
Next, to make the visual even smoother and impactful, add a BCC Transition from the Continuum plugins. Go to the Effects Library > Video Transitions > BCC Transitions.
Click and drag the dissolve you like and drop it between the two clips. You can customize the transition in the Effect Controls Panel and open the FX Editor to select presets and fine-tune the BCC transitions.
Final Words
These two split techniques can enhance the storytelling of any video; they’re often not obvious, but that’s probably where the magic lies. Experiment with different uses, durations, and dissolve transitions, like those in Continuum, to create more cinematic films.
Good luck!
FAQ
Why Are They Called J and L Cuts?
They get their name from the shape the audio and video clips make in the post-production editing timeline. With a J cut, the audio from the next video sits under the first video clip, forming a J. With an L cut, the audio from the first video extends below the second video clip, forming an L.


