













 Marco Sebastiano Alessi |
August 21, 2026
Marco Sebastiano Alessi |
August 21, 2026


Audio automation is a powerful tool to dynamically adjust tracks, plugins, and master parameters, bringing static levels to life and energizing your mix. This article explains audio automation, when to use it, its types, and step-by-step instructions.
Let’s dive in!
What Is Audio Automation?
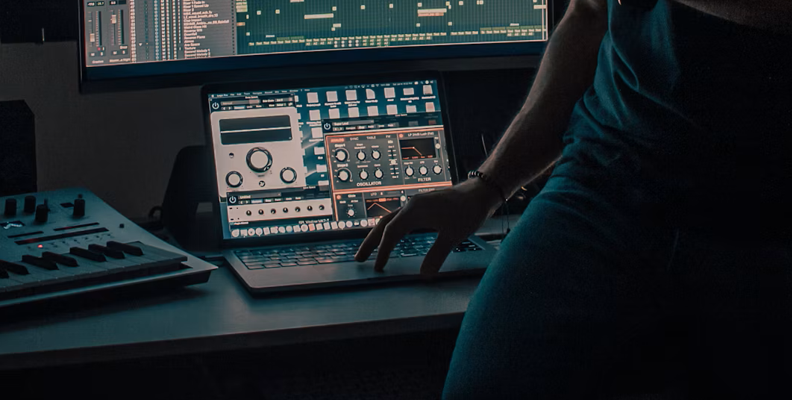
Audio automation is the process of having your digital audio workstation (DAW) or video editor automatically adjust audio settings—like volume, panning, or effects—over time. It acts like keyframes for sound, allowing precise and hands-free control so your mix changes dynamically as the track plays.
Audio automation was born of the need to change multiple parameters during a song when bouncing the mix. In the early days of audio recording and mixing, if you wanted to make multiple adjustments over time, you needed multiple people to move the knobs and faders. The more parameters, the more hands and people were required.
Today’s digital music production makes audio automation more accessible, requiring only a few instructions in your DAW. This opens creative possibilities with almost limitless automation of any track, plugin, or master bus parameter. What once took multiple hands at a mixing desk is now programmable.
When Should You Use Automation?
Audio automation is your essential tool for adjusting track, plugin, or send parameters seamlessly through time. It improves mixing efficiency and enables creative enhancements with minimal manual effort. Audio automation is generally best reserved for the late stages of the mixing process, once your static levels, panning, EQ, and compression are locked in.
Here are some popular uses of audio automation, and with creativity, many more can be discovered.
Highlight specific sections of your song. For vocal tracks, you can raise the volume level of the lead vocal track on certain sections, like the chorus, or on specific words that can add more impact to the emotion of the song. Instrument solos are another great way to ensure your melody hooks stand out in the mix by automatically boosting their volume during specific parts.
To create time-based effects. You can add movement to delays and reverbs. Instead of keeping them active on the whole track, you can automate the send levels to make them active only during parts where they can add more emotional depth to your song.
Bypassing plugins. Automation lets you activate plugins at a specific moment to add the effect. A common example is to automate a distortion plugin on a guitar track to be active only during the intro, then stay out for the rest of the song.
Direct focus. Automate panning to widen stereo tracks during the song's climax, move an instrument left or right, or add movement to effects.
Create fades at the end. Automate the master fader to create a fade out at the end of your tracks.
Correct technical audio issues. It’s not all about creativity and dynamic mixes. Audio automation can also be used to address level inconsistencies that compression alone cannot handle or to avoid overcompression by using light compression.
Types of Audio Automation
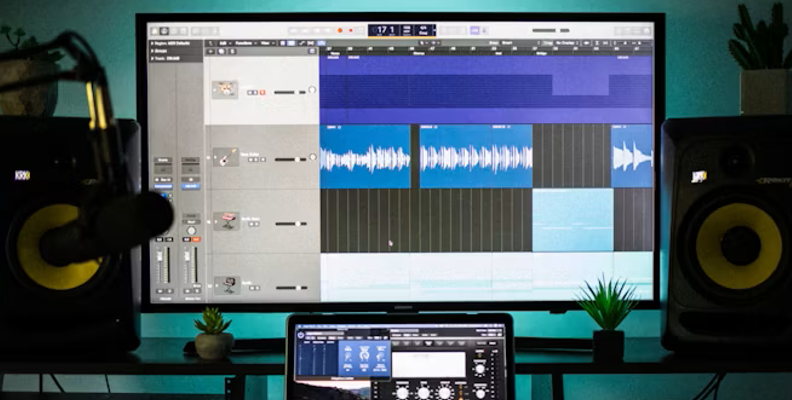
Let’s discuss the parameters that can be automated. Nearly any variable is customizable in a modern DAW, expanding your creative control.
Volume Levels
It’s the most popular use of audio automation for automatically balancing audio levels. It allows you to highlight audio elements in the track over time (raising their volume) or hide them (decreasing the volume). Examples are riding a vocal, bringing up a guitar for the solo, and building tension before the chorus.
Panning
With panning automation, you can move your sound across the stereo image between left and right channels to create a sense of movement or space in your crowded mix. You can make elements move around the listener for a climactic experience, such as swirling pads around you. Or move instruments to keep the listener’s attention. For example, give the spotlight to a flute in a dense arrangement by moving it across the stereo field.
Mute
Mute automation can be used to toggle a track on or off automatically, creating dramatic stops during transitions and isolating tracks at specific emotional points. It can also help clean up the silent parts of noise.
Effects
Automating the parameters of plugin effects is where automation can transform your balanced mix into an immersive sonic experience. By programming your DAW to twist knobs, slide faders, and flip switches inside your effects simultaneously and over multiple tracks as the project plays.
Some examples include:
- EQ automation: automate the cutoff frequencies of high- and low-pass filters to create filter sweeps or vocal effects.
- Compression automation: automate parameters such as threshold to increase or decrease compression over time.
- Saturation: automate the individual parameter to make a vocal track warmer only during verses.
- Distortion: bypass the distortion effect mid-song.
Send/AUX
Instead of automating the effect on the track itself, you can automate the path to the effect with the send levels to control how much of a dry signal is sent to an aux track, like a reverb or delay track. A common example is automating the mix/wet knob of a reverb plugin.
How Audio Automation Works in a DAW
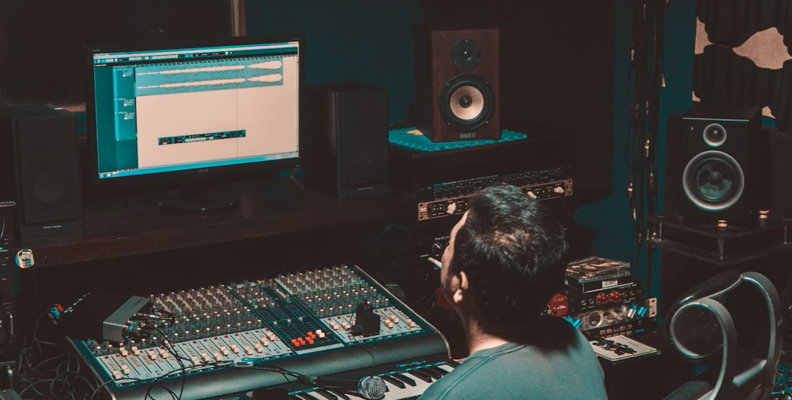
The automation process is similar for most DAWs: select parameters, then draw or record data using automation modes. Your DAW remembers and executes these commands every time you play back. The following section focuses on Samplitude, but many aspects are similar across other DAWs.
In Samplitude, display and recording are controlled via automation curves. You can add an unlimited number of automation curves to each track, object, and master, and edit and draw them.
Samplitude also features several automation modes, as do most DAWs. Automation modes define how automation data is stored and displayed in your DAW. The available automation modes are:
- Off: If the off mode is selected, the automation is disabled.
- Read: With read mode enabled, all recorded automations are played back. It’s the default automation mode in a track.
- Touch: When touch mode is selected, automation recording starts when you touch a control parameter with your mouse or external controller. Recording stops when you release the control, and the parameter returns to its previous value.
- Latch: Latch mode also records as soon as you touch a control in your DAW, but when you release the control, the automation continues with the new value until you stop playback or change the automation mode.
- Overwrite/write mode: In write mode, it overwrites existing data as soon as playback begins.
- Trim mode: A special automation mode in Samplitude to edit existing volume automation relatively. It can only be used to edit volume automation.
Step-by-Step: How to Use Audio Automation
Now, let’s see audio automation in action with Samplitude. Follow along using the free trial on your projects for hands-on practice.

Step 1: Create an Automation Curve
Volume and pan automation curves can be easily created by clicking the volume and pan buttons in the track header, or by using the shortcuts Alt + K for volume and Alt + P for pan.
As soon as you press the volume or pan button, a new lane will appear beneath the audio track, showing the volume or pan automation curve.
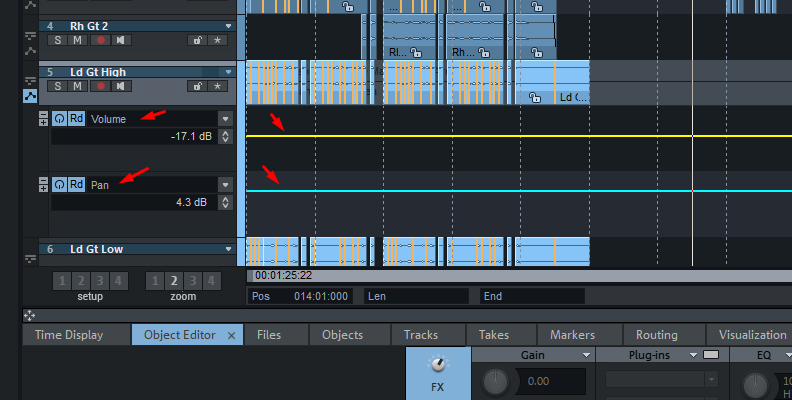
This is the automation lane, where all automation curves will appear. You can hide and reveal this lane with Ctrl + Alt + Enter or by pressing the Show automation lanes button on the bottom left of the track header.
For a plugin, you can enable automation from the plugin UI. Press Crtl + Alt + the parameter control. For example, if you want to automate the Gain of one of the bands in the EQ116 plugin, press Ctrl + Alt + click the Gain control. You should see a new automation curve in the automation lane with the EQ116 parameter.
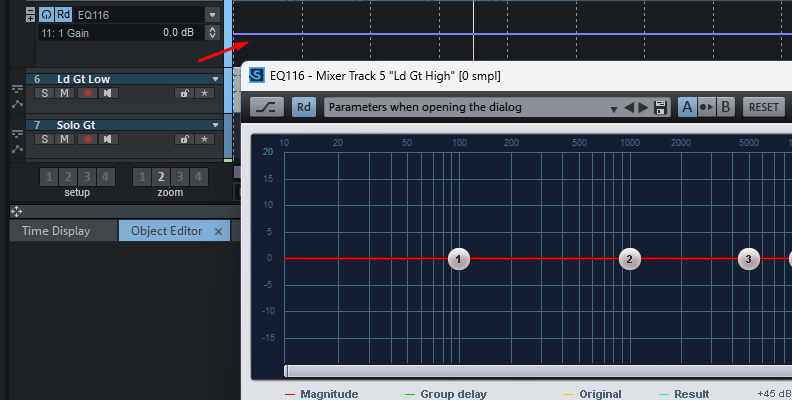
Step 2: Choose the Automation Mode
In the curve's track header, you will see a button labeled Rd. It means automation is set to read. Right-click the button to select an automation mode to record data.
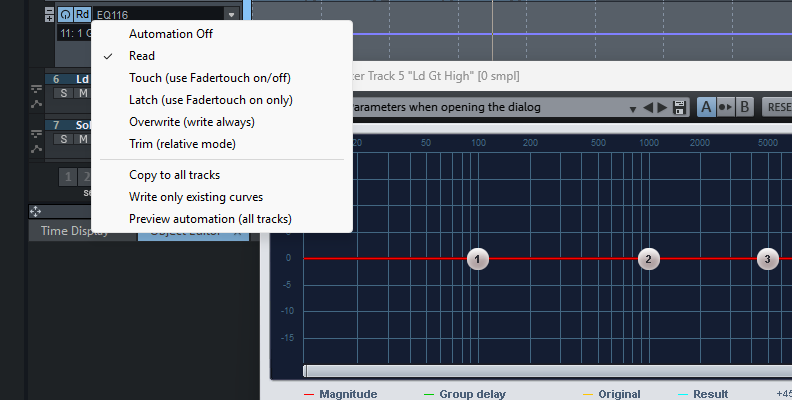
If you just left-click the button, it will automatically change to Touch (T) so you can start playing the track and make changes as you touch the faders.
Step 3: Record Real-Time Automation
In Touch mode, press play to start playback of the track. Listen to the track and adjust the fader of the chosen parameter at the moment you want, and Samplitude will record those movements in real time, adding keyframes to the curve.
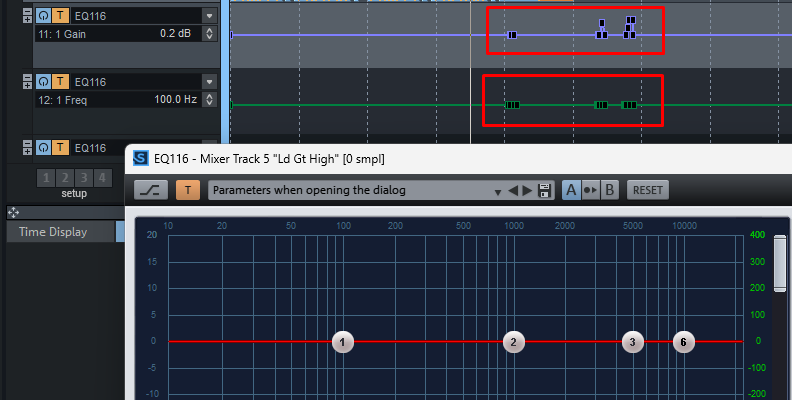
For plugins, you can enable control automation from the top left corner of the plugin. You may see a “Rd” (Read mode) button that you can click to switch to T (Touch). Play the song and make the adjustment in real time.
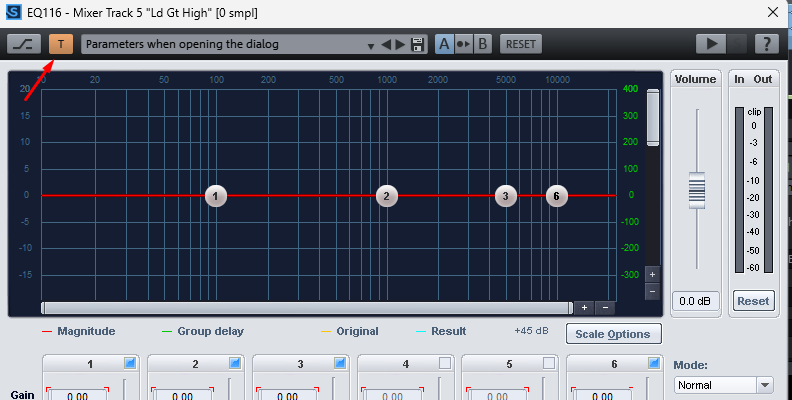
For some plugins that do not show the automation button. Select the Plugin menu in the top-left corner and click “Automate next parameter”, which will instantly record automation data for the next parameter you modify.
Step 4: Edit and Draw Manually
You can manually edit or draw the automation from scratch if you prefer a more surgical approach. Go to the toolbar and click the arrow tool (Universal Mode) to display all available tools and select the Draw Automation tool.
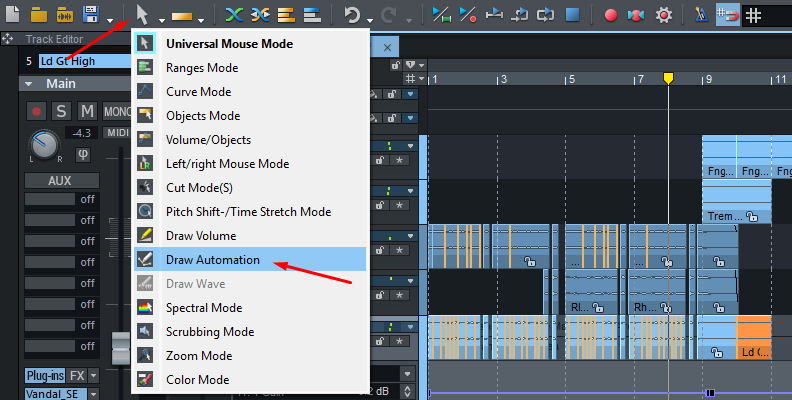
Now, click anywhere in the curve to add a point. You can also drag the Draw Automation tool up and down to change values or left and right to change timing.
To remove points, you can use the Curve Mode tools to select one or multiple points, then press Delete.
Step 5: Object Automation
One of Samplitude's greatest strengths is its object-oriented workflow. When you only want to automate a specific phrase, word, or audio clip without cluttering the entire track lane, you can do it within an object.
- Select the specific object you want to edit and double-click it to open the Object Editor.
- Select the FX tab. On the left side of the panel, you will see an Automation column. Select Show, then click the dropdown menu to select a parameter to automate. If you select an Effect, the effect’s parameter will display in the second dropdown menu.
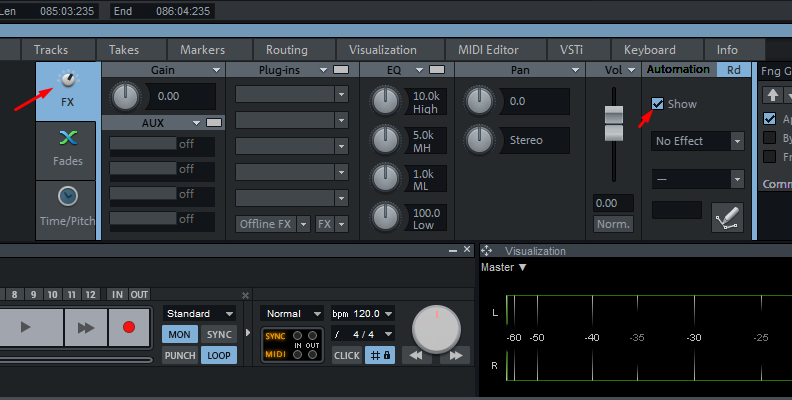
- Click the Draw Automation button below, then draw a curve to change the values directly in the object.
Final Words
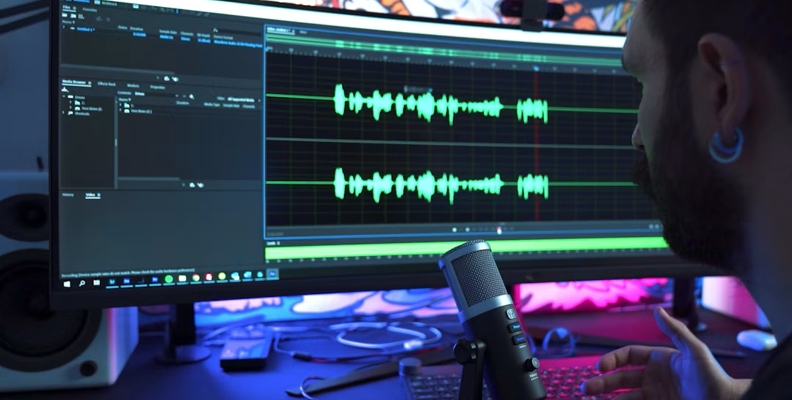
Audio automation is a tool that any audio engineer, audio track mixer, or producer should learn to use as it can breathe new life into any mix. If you haven't used it yet, now is the time to start! First try with volume level adjustments and the master fader, and then make more complex audio automations with your EQ, compressor, and plugin effects.
Good luck, and stay creative!
FAQ
What should you automate in a mix?
Any parameter you want to change over time in a song. The most critical type of automation is volume, which can both highlight elements or fix audio issues. Panning for spatial arrangements, time-based effects, and EQ and compression for filter sweeps, deesing, or clean-ups.
Is automation better than compression?
They’re different tools for different tasks. But they can be a good team when paired together. Automation can be good when you want to preserve transients, making something sound bigger without squashing the other sounds. It does not mean it’s better than compression.