Mask ML
Mask ML is an easy to use point and click, single frame mask generator utilizing machine learning object segmentation. A single click selects a defined segment of the image while successive clicks add adjacent areas to the object. The masks are useful as input to the Matte Assist ML node where the mask is propagated over time or to limit strokes in the Paint node.
A text-prompted object detection workflow is also possible where masks are auto-generated in Mask ML and then propagated in Matte Assist ML--usable via UI or command line. This unlocks a fully automated workflow: prompt, segment, propagate, render. For most shots, it’s hands-off. But when objects deform or occlude heavily, a few manual keyframes may still be needed.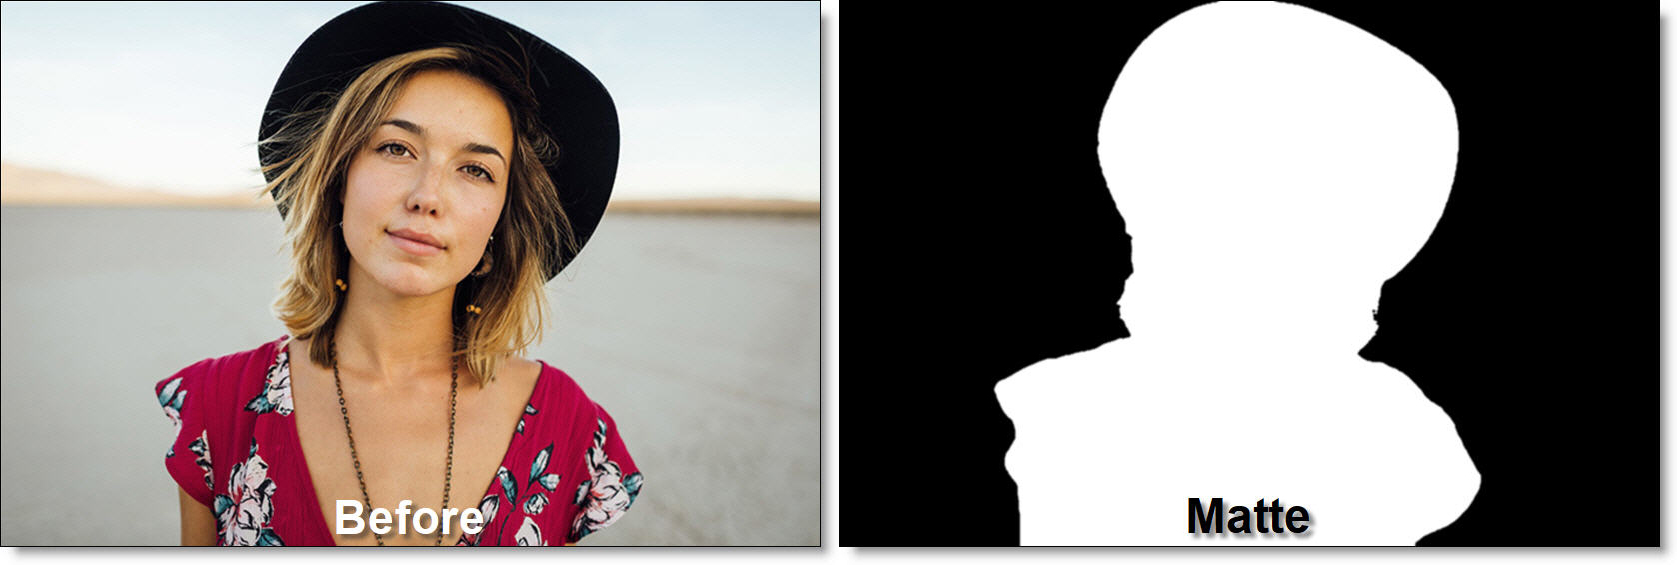
Single Object
1 Add a Transform > DOD node to the source, set the boundary around the object to be masked and animate it if needed.
Note: On Linux, animation of the DOD’s size is not supported.
A smaller DOD provides faster performance and better edge quality in the Mask ML node.
2 Add a Mask ML node from the Nodes > Key tab and connect it to the DOD node.
The Add tool is selected by default.
3 Click within the object where you want to create a mask.
With each click, a green point appears, a mask is generated, an alpha overlay appears and an object is automatically created in the Object List. 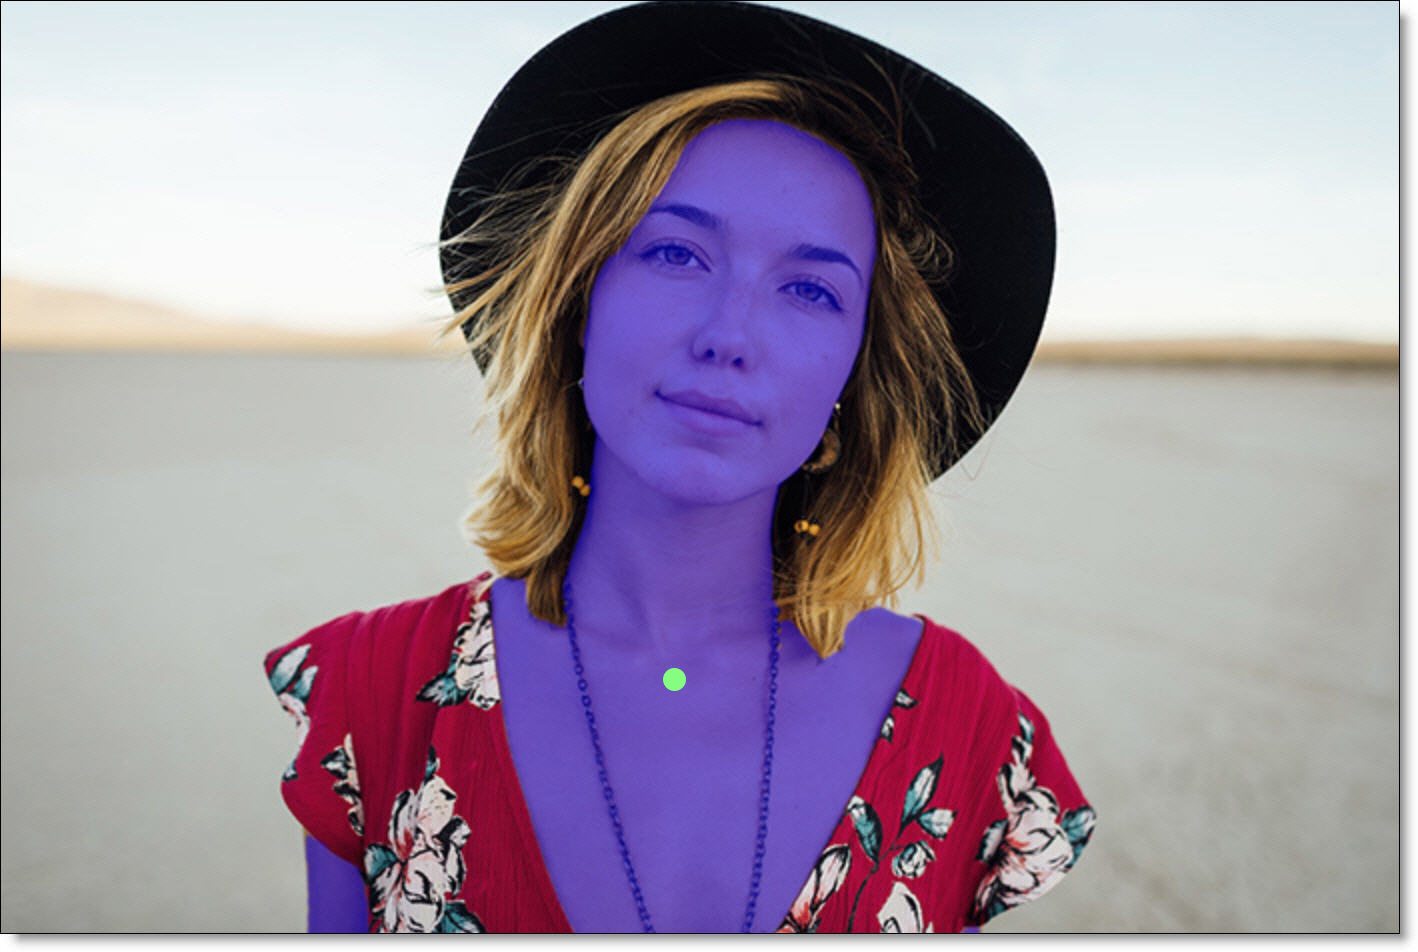
4 Add additional points as needed.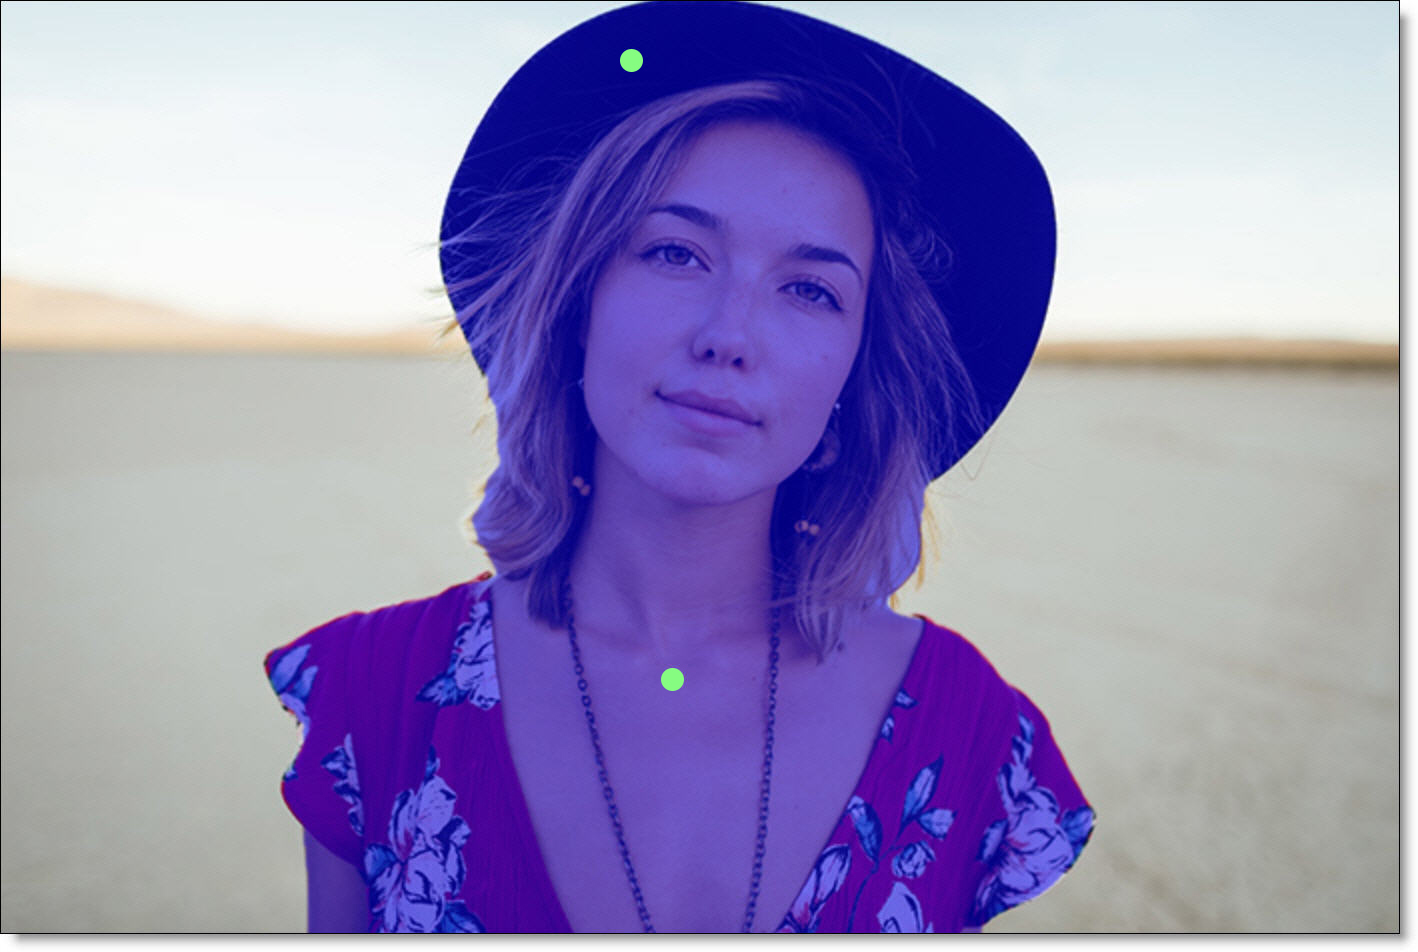
5 To delete a point, Ctrl/Cmd-click on it.
6 If you see areas of alpha outside of the selected object, right-click or select the Subtract tool and click on those areas.
To mask an object without using the Add and Subtract tools, use the Rectangle tool.
7 Select the Rectangle tool and drag out a box around the object you want to mask.
8 If at any time you want to turn off the display of the strokes, click the Overlay icon above the Viewer or press 0 (the number zero) shortcut key.
Multiple Objects
Mask ML supports multiple objects in the Object List, allowing them to be treated independently and tracked separately in Matte Assist ML.
1 Add points to mask a portion of the image.
With each click, a green point appears, a mask is generated, an alpha overlay appears and an object is automatically created in the Object List.
2 Click the Add Object icon in the Object List.
A new object appears in the Object List.
3 Click on a different portion of the image to create another mask.
4 Select an object reveals its controls and changes apply only to the selected object.
5 Use the Object List to rename, delete, or toggle visibility per object.
When Mask ML and Matte Assist ML’s data ports are connected and Matte Assist ML > Mask Source > Cryptomatte is selected, each Mask ML object is considered a separate object and tracked separately.
Automate Mask ML And Matte Assist ML With Text Prompts And The auto-matte.py Script
Silhouette includes a script that can be used with the command-line renderer to automatically find and mask objects using a text prompt.
1 In a Terminal window, navigate to the Silhouette install folder.
2 Enter the following command:
• Mac: Silhouette.app/Contents/MacOS/sfxcmd -render -xscript Silhouette.app/Contents/resources/scripts/auto-matte.py input_sequence.#.png --prompt <prompt1\nprompt2> --output output_sequence.#.exr
• Linux: ./sfxcmd -render -xscript resources/scripts/auto-matte.py input_sequence.#.png --prompt <prompt1\nprompt2> --output output_sequence.#.exr
• Windows: sfxcmd.exe -render -xscript resources\scripts\auto-matte.py input_sequence.#.png --prompt <prompt1\nprompt2> --output output_sequence.#.exr
auto-matte uses Mask ML with a text prompt to detect objects and then Matte Assist ML to automatically propagate them through your input sequence. Multiple prompts can be used by separating them with \n.
Note: The sfxcmd -xscript argument executes a script and then passes the remaining command-line arguments to it in sys.argv.
3 To see the full list of options for the auto-matte script, use the following command: sfxcmd -xscript auto-matte.py -h
4 Use the --frame <#> switch to specify which frame the object detection is performed on. This is useful if you want to process multiple objects and they happen to overlap on the first frame.
5 Use the --refine switch to insert a Matte Refine ML node after the Matte Assist ML node for enhanced edge detail.
6 Use the --cryptomatte switch to output Cryptomatte data to a multi-part EXR sequence. Your output sequence extension must be .exr for this to work.
Note: --refine and --cryptomatte are mutually exclusive.
7 The -save <path> switch can be specified before -xscript to tell Silhouette to save the project after running the script, but before rendering.
Normal sfxcmd arguments for controlling the frame range can be used.