Paint
Description
Paint is a high dynamic range, non-destructive, 2D raster based paint system designed from the ground up to handle the demands of feature film and television production. Whether it’s image restoration, dustbusting, wire and rig removal or just plain paint, Silhouette provides simple and sensible tools to get the job done.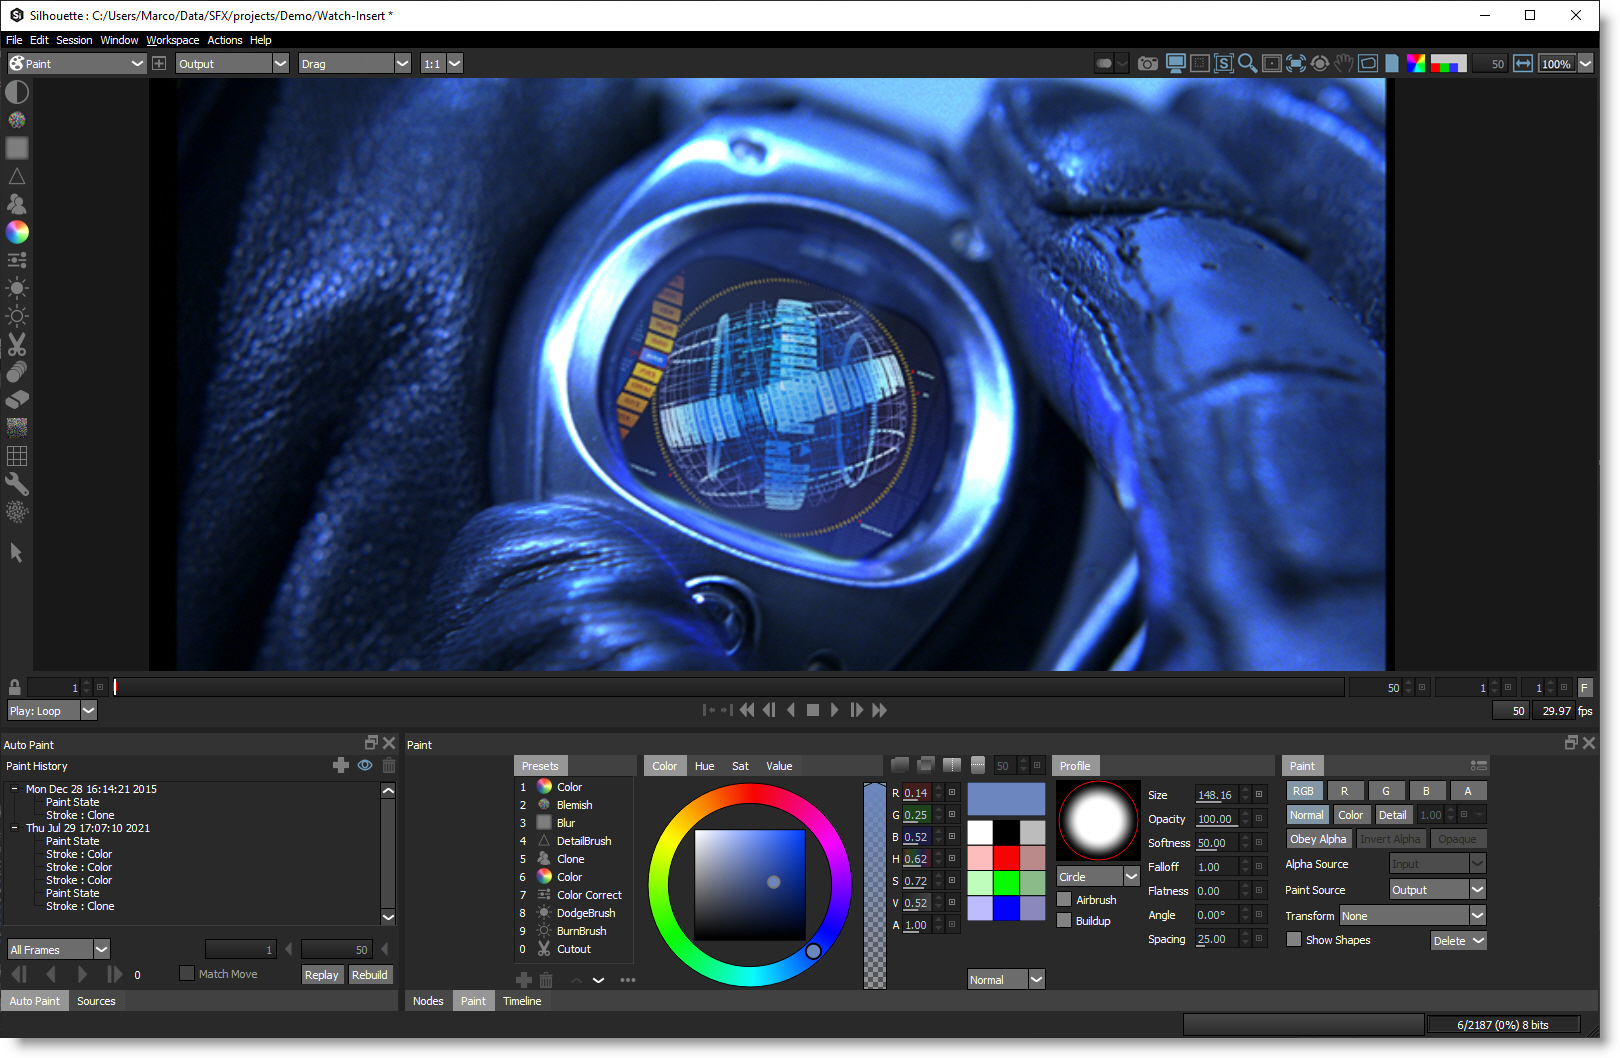
Black & White, Blemish, Blur, Burn, Clone, Color, Color Correct, Cutout, Detail, Dodge, Drag, Eraser, Grain, Mosaic, Repair and Scatter brushes are available for any task. As you paint, every action you make is recorded as events. These events can be selectively played back on the same frame, different frames, multiple frames and with or without tracking data applied. This makes for a very powerful and versatile Auto Paint feature that provides the flexibility of vector paint with the speed of a raster paint system.
Warning: To store painted frames to disk, you must change frames in the Timebar. The current frame’s paint is also saved with a save operation or an autosave.
Go to the Using Paint tutorial to see how it works.
Node Group
Image, Silhouette.
Best Practices
• Use one Paint node per source clip.
• Organize your painted strokes by creating and naming groups in the Auto Paint window--especially for complex paint jobs.
• Resist the urge to connect multiple Paint nodes to a source clip. Working in this manner will produce unreliable Rebuild results--especially if you jumped from one node to another while painting.
Controls
Various non-animateable controls are organized into Presets, Brush, Profile and Paint tabs.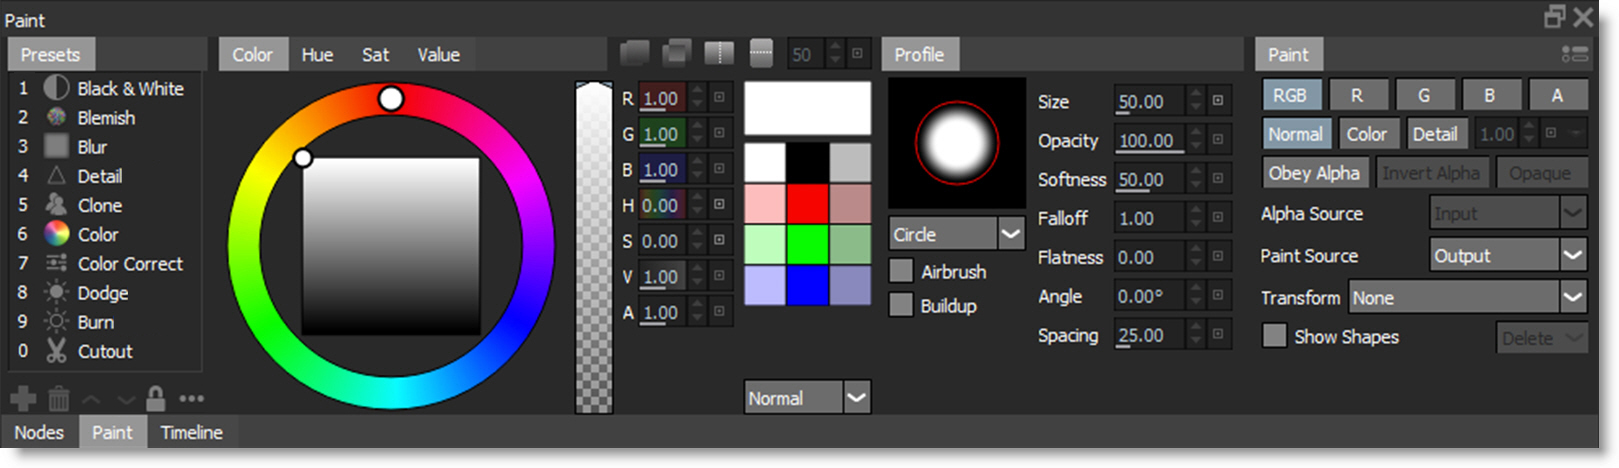
Presets
Save brushes and their settings as a preset. Presets display the brush icon and name, can be renamed, reordered, imported or exported.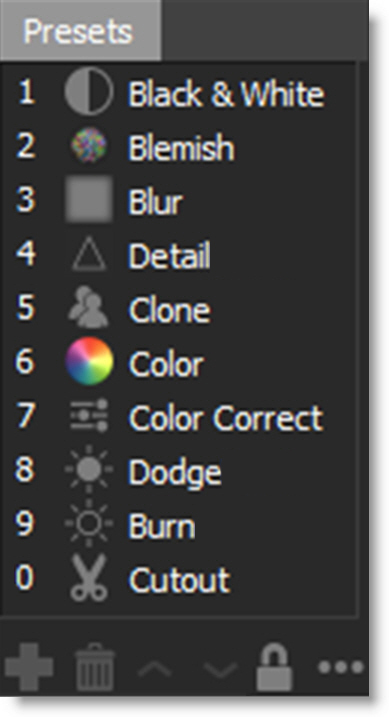
Once created, you can use the Alt-0 through Alt-9 keyboard shortcuts to quickly select one of the presets.
Add Preset
Adds a preset for the current brush and its settings. Once a preset is added, it continually updates until deselected or a new brush is selected.
Selecting / Deselecting Presets
Select Preset
Click on a preset to select it and it will become highlighted.
Deselect Preset
Deselect a preset by Ctrl/Cmd-clicking on a selected preset or click on a blank area below the presets.
Delete Preset
Press the Delete icon or the Delete key to delete the selected preset.
Edit Preset
Select a preset and change the brush controls.
Move Up / Down
Move Up
Move the selected preset up.
Move Down
Move the selected preset down.
Rename
Rename a preset by double-clicking on the preset name to enter edit mode, type a new name and hit Enter.
Lock Preset
Locks the presets so that they don’t update as brush parameters change.
Preset Options
Presets can be imported, exported or deleted.
Import Presets
Import previously exported presets.
Export Presets
Export the current set of presets.
Clear Presets
Deletes all presets.
Brushes
A number of different brushes are selectable from the Paint toolbar to the left of the Viewer.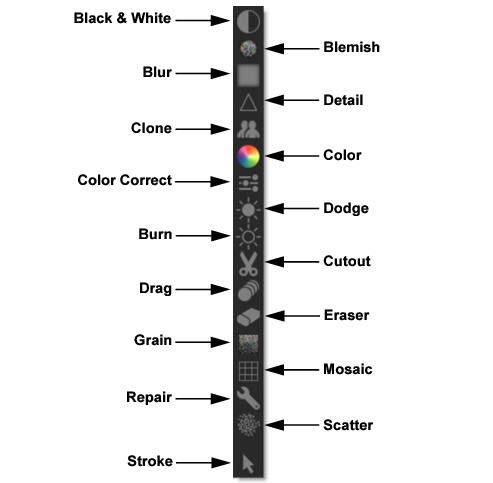
Once a brush is selected, its controls appear on the left side of the Paint window.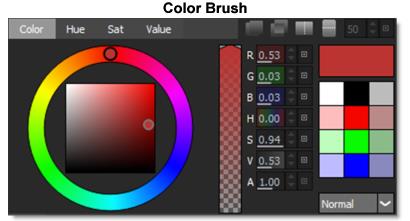
To paint with a mouse, click and drag on the screen. To paint with a pen and tablet, just press and drag.
Drawing Straight Lines
If you press Alt, click and then click in a different location, a straight line is drawn. This will work with any brush type. If you keep Alt depressed while clicking, you will create interconnected straight lines.
Black & White (B)
The Black & White brush converts color images to black and white simulating the look of black and white photographic filters.
Mode
Selects the method by which the color image is converted to a monochrome image.
Luminance
Creates a monochrome image using the brightness of the image.
Average
Creates a monochrome image using the average of the red, green and blue channels.
Red
Simulates a red filter in black and white photography.
Green
Simulates a green filter in black and white photography.
Blue
Simulates a blue filter in black and white photography.
Yellow
Simulates a yellow filter in black and white photography.
Orange
Simulates a orange filter in black and white photography.
Blemish (Shift-B)
The Blemish brush is useful for removing facial blemishes on film originated footage. It combines the Blur and Grain brushes.
Blur (Ctrl/Cmd-B)
Blurs the image.
Radius
Sets the amount of blur to be applied.
Burn (Alt-Shift-B)
Darkens areas in the image.
Exposure
Sets the brightness of the brush.
Range
Shadows, Midtones, Highlights, Full
Targets the Burn operation to either shadows, midtones or highlights as well as the entire range when set to Full.
Clone (C)
Paints with sampled pixels from an image with the ability to grade (color correct), blur, sharpen or warp the clone source.
Go to the Clone Brush tutorial to see how it works.
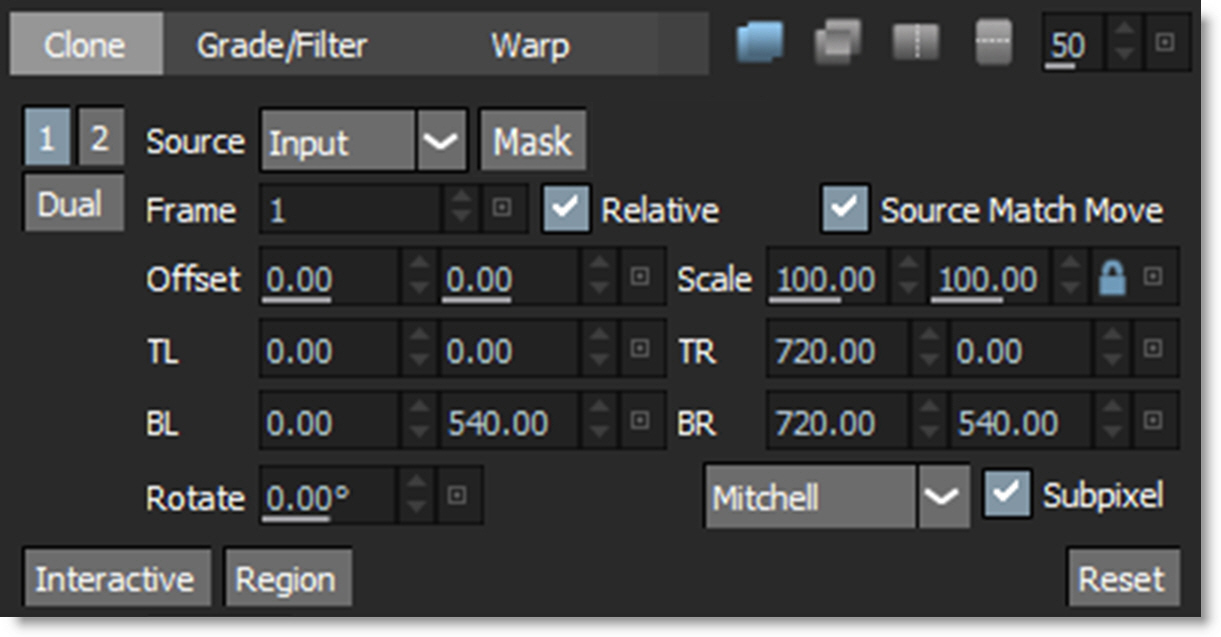
The controls for the Clone brush are split into three tabs: Clone, Grade/Filter and Warp. The Clone tab deals with the selection, timing and transformation of the clone source. The Grade/Filter tab contains color correction (grade), blur and sharpening parameters. Last, the Warp tab has warp related controls.
Clone
Setting the Clone offset on the same image:
1 Press and hold down the Shift key and then click, drag and release the mouse and then the Shift key. The first click sets the clone source and where you drag and release is the Clone target.
or
2 Press and hold down the Shift key. Click once to set the clone source and click once again in a different location to set the Clone target.
To reset the Clone offset, press Shift and without moving the cursor, click your mouse or tap your pen on the screen once.
Setting the Clone offset on different images:
Oftentimes, you need to align the same feature in two different images of a clip when painting with the Clone brush.
1 In the Clone controls, select Output, Foreground or Input 1-5 in the Source pop-up menu and then set the Frame parameter to choose which source frame to paint from.
2 Press the ‘ key (located to the left of 1 key).
The clone source image automatically appears in the Viewer.
3 Set the Onion Skin mix to 100.
4 Click on the clone source feature that you want to paint from.
The Clone target image automatically appears in the Viewer.
5 Click on the Clone target feature that you want to paint on.
The Clone offset is set.
Source
Picks which image will be used as the clone source.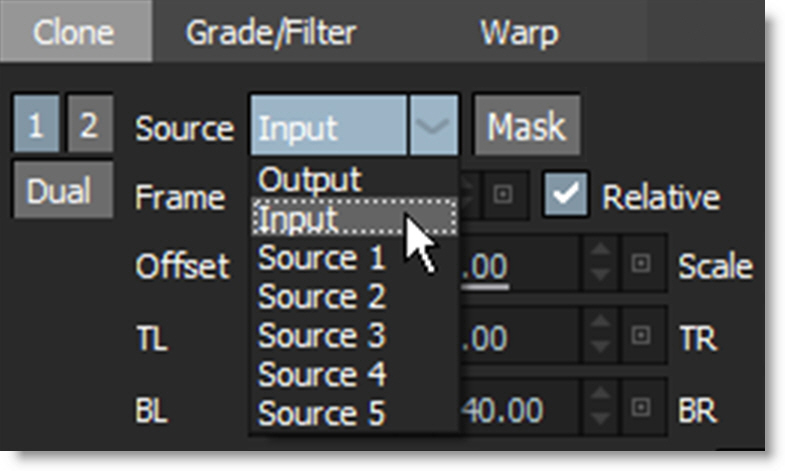
Output
Clones from the previously painted areas.
Input
Clones from the input image.
Source 1-5
Clones from the clips assigned to the Source 1-5 inputs.
Mask
Masks the clone source input using its alpha channel.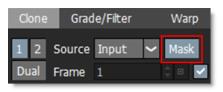
When enabled, the Clone brush only paints using the masked area of the clone source. In addition, when transforming the clone source, both rgb and alpha channels are transformed.
Note: Do not enable the Source > Mask if there is not an alpha channel. Otherwise, there will not be a result when painting a stroke.
View
The View pop-up menu, which only appears when using stereo sources, determines which view the clone source will come from.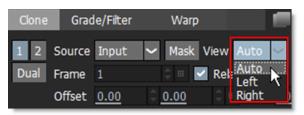
Auto
The clone source is determined by the stereo view mode that has been selected at the top of the Viewer.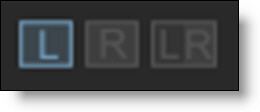
For instance, if the Left View is selected above the Viewer, the clone source comes from the Left View. If the Right View is selected, the clone source comes from the Right View. If the Left/Right View is selected, the clone source comes from both the Left and Right Views so you can simultaneously Clone on both views at the same time.
Left
The clone source comes from the Left View.
Right
The clone source comes from the Right View.
Frame
Choose which frame number of the clone source to paint from. By default, the Frame field displays the actual frame number that you are cloning from. Alternatively, a frame offset can be displayed instead. This behavior is controlled with the Paint > Clone > Absolute Frame Numbers preference.
Relative
When the Relative box is checked, the clone source Frame value remains relative to the current frame. So, if the Frame value is different than the current frame, the offset between the two is maintained.
When Relative is unchecked, the clone source is painting from a single frame defined by the value entered in the Frame field.
Transform Controls
The Transform Controls allow you to position, scale, rotate, skew and corner-pin the clone source.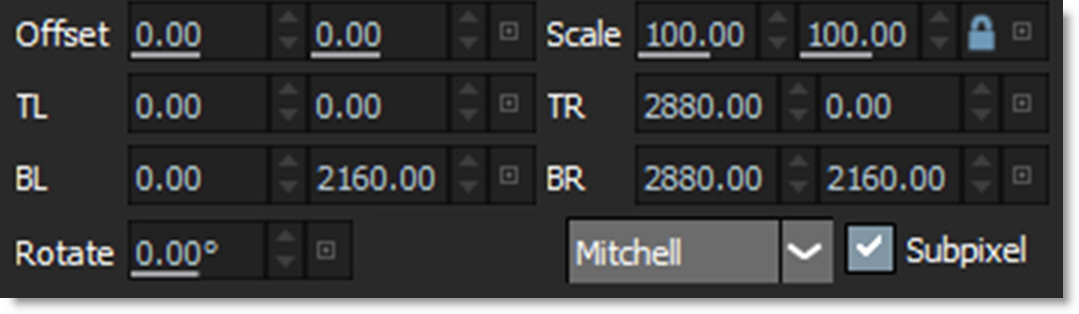
Source Match Move
Source Match Move allows you to apply the selected tracked layer to the clone source. This is useful for when you have a single frame, clean plate that needs to be tracked to match the motion of the clip you are painting on.
Note: To Match Move the clone source during event playback, you will need to:
1) Connect the Data output of a Tracker node or other node that contains trackers, like Roto, into the Paint node’s Data input.
2) In the Tracker, track an object and apply the tracker to a layer.
3) Select a tracked layer in the Paint tab’s Transform pop-up menu.
4) Enable Clone > Source Match Move prior to painting.
For more information on playing back paint strokes, go to the Auto Paint tutorial.
Offset
Sets the horizontal and vertical position of the clone source.
Scale
Sets the horizontal and vertical scale of the clone source. Typing in negative values will flip or flop the clone source.
Corner-Pin
• TL
Sets the horizontal and vertical position of the top left corner point.
• TR
Sets the horizontal and vertical position of the top right corner point.
• BL
Sets the horizontal and vertical position of the bottom left corner point.
• BR
Sets the horizontal and vertical position of the bottom right corner point.
Rotate
Sets the rotation of the clone source.
Nudging the Clone Source
The clone source can be nudged using the Arrow keys. One press of the Arrow key moves the clone source 1 pixel. Using the Shift key in conjunction with the Arrow keys moves the clone source 10 pixels. Ctrl plus the Arrow keys moves the clone source one tenth of a pixel. These nudge values can be changed in the Preferences menu located in File > Preferences > Nudging on Windows and Linux or Silhouette > Preferences > Nudging on Mac. Holding an Arrow key down slides the clone source.
Q (Translate), W (Rotate), E (Scale)
Pressing Q, W or E and then clicking and dragging will translate, rotate or scale the clone source. Pressing Q, W or E a second time deactivates the mode. Also, the position of the cursor when W or E is pressed sets the anchor point for the rotation or scale operation.
Note: Onion Skin mode is automatically activated once the Q, W or E keys are pressed.
Corner-Pin
When Interactive mode is enabled, you can corner-pin the clone source by dragging the handles on the corners of the image. Alternatively, you can select and move the corner points without being in Interactive mode using Ctrl/Cmd-1,2,3 or 4 to select the top left, top right, bottom right and bottom left corner points. Then, use the mouse, pen/tablet or Arrow keys to move the points. Pressing Ctrl/Cmd-1,2,3 or 4 a second time deactivates the mode.
Note: The cursor must be placed within the Viewer to nudge the corner points with the Arrow keys.
Clone Transform Nudging Keyboard Shortcuts
Shortcut | Action |
|---|---|
Arrow keys | Moves the clone source by 1 pixel |
Shift-Arrow keys | Moves the clone source by 10 pixels |
Ctrl/Cmd-Arrow keys | Moves the clone source by one tenth of a pixel |
Hold down Arrow keys | Moves the clone source continuously |
Q, W, E then Arrow keys | Translates, Rotates or Scales by 1 pixel |
Q, W, E then Shift-Arrow keys | Translates, Rotates or Scales by 10 pixels |
Q, W, E then Ctrl/Cmd-Arrow keys | Translates, Rotates or Scales by 1/10 of a pixel |
Ctrl/Cmd-1 then Arrow Keys | Nudges the top left corner point |
Ctrl/Cmd-2 then Arrow Keys | Nudges the top right corner point |
Ctrl/Cmd-3 then Arrow Keys | Nudges the bottom right corner point |
Ctrl/Cmd-4 then Arrow Keys | Nudges the bottom left corner point |
Clone Transform Keyboard Shortcuts
Shortcut | Action |
|---|---|
Q | Activates / Deactivates translation of the clone source |
W | Activates / Deactivates rotation of the clone source |
E | Activates / Deactivates scaling of the clone source |
Q, W, E then Ctrl/Cmd | Translates, Rotates or Scales in finer increments |
Ctrl/Cmd-W | Rotates without setting the anchor point |
Ctrl/Cmd-E | Scales without setting the anchor point |
Ctrl/Cmd-1-4 | Selects the top left, top right, bottom right and bottom left corner points so they can be moved |
. (Period key) | Sets the anchor point |
Interactive
Activates the on-screen controls.
Turn off Interactive mode when you want to Paint. When Interactive is selected, you can position, scale, rotate, corner-pin and skew the clone source using the on-screen controls.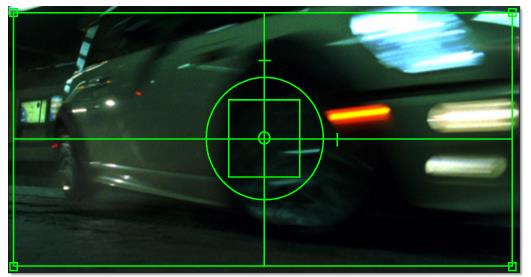
Clone Transform On-Screen Controls
Shortcut | Action |
|---|---|
Drag within large center circle | Moves the clone source |
Shift-drag within large center circle | Constrain clone source movement horizontally or vertically |
Drag the center square horizontal and vertical halfway points | Scales the clone source horizontally or vertically |
Drag a center square corner | Proportionally scale the clone source |
Drag large center circle | Rotate the clone source |
Ctrl/Cmd-drag large center circle | Rotates the clone source with finer control |
Drag handles on corners of image | Corner-pins the clone source |
Drag dash above large circle | Skews the clone source horizontally |
Drag dash to the right of large circle | Skews the clone source vertically |
Region
Changes the position and size of the on-screen control rectangle which allows the effect of the corner-pin to be controlled from a specific area. The center of the new region also becomes the anchor point for scale and rotation.
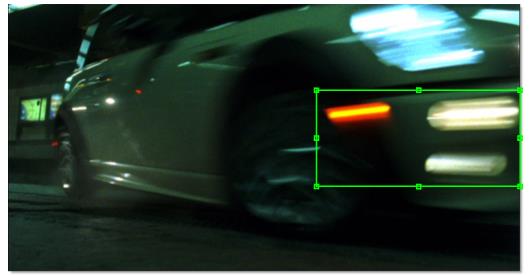
Using a Region
1 Press Region.
2 Click and drag around an area of interest.
A region appears.
3 Turn on Interactive and adjust the Clone transform.
Now, when you adjust the Clone transform, the region is used.
Region Shortcuts
Shortcut | Action |
|---|---|
Click and drag | Creates a region |
Alt-click and drag | Creates new region when one already exists |
Click and drag inside a region | Moves the region |
Drag the region handles | Resizes the region |
Tap outside a region box without dragging | Resets the region to full screen |
Clone Transform On-Screen Controls With Region Set
Shortcut | Action |
|---|---|
Drag within region | Moves the clone source |
Shift-drag region | Constrains the clone source movement horizontally or vertically |
Drag edge handle | Scales the clone source horizontally or vertically |
Shift-drag corner or edge handle | Proportionally scale the clone source |
Ctrl/Cmd-drag on corner handle | Rotate the clone source / Continue holding Ctrl to adjust with finer control |
Drag on a corner handle | Corner-pins the clone source |
Ctrl/Cmd-drag on edge handle | Skews the clone source |
Filter
Chooses the filtering method when transforming the clone source. Mitchell is the default.
Point
The Point filter is not the highest quality, but fine for scaled images.
Quadratic
Quadratic is like Point, but more blur with fewer artifacts. It offers a good compromise between speed and quality.
Cubic
Cubic is the default filter in Photoshop. It produces better results with continuous tone images, but is slower than Quadratic. If the image contains fine details, the result may be blurrier than desired.
Catmull-Rom
This produces good results with continuous tone images which are scaled down, producing sharp results with fine detailed images.
Gaussian
Gaussian lacks in sharpness, but is good with ringing and aliasing.
Mitchell
A good balance between sharpness and ringing, Mitchell is a good choice when scaling up.
Sinc
Keeps small details when scaling down with good aliasing.
Subpixel
When activated, subpixel positioning is used when moving the clone source.
Grade/Filter
The clone source can be color corrected (graded), blurred or sharpened.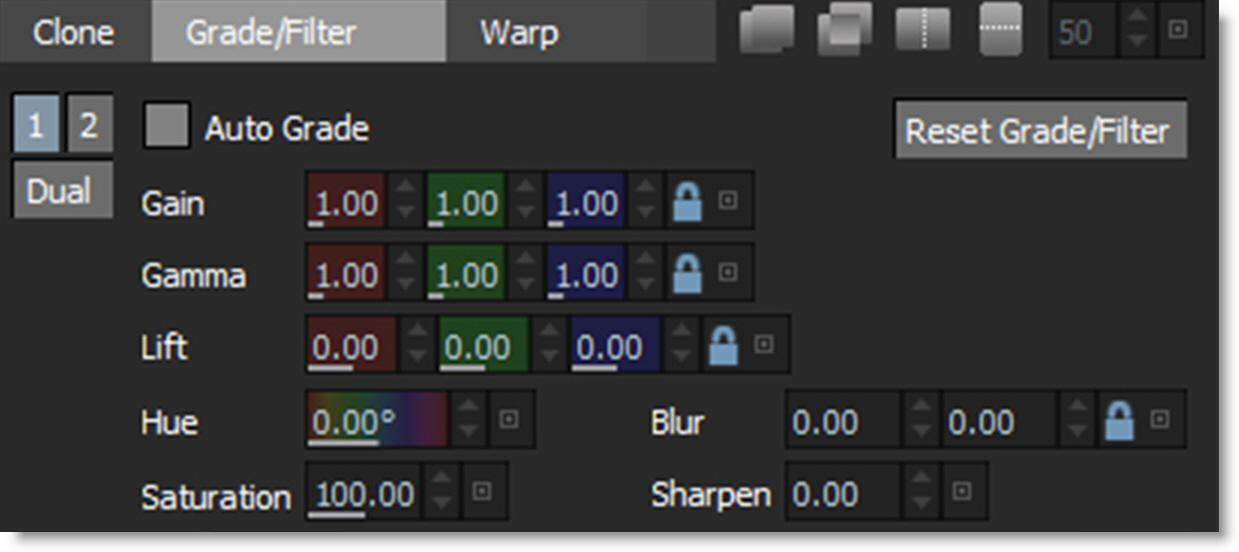
The parameters are ganged together by default. To deactivate Gang, press the Lock icon located to the right of each parameter group.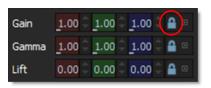
Auto Grade
Auto Grade automatically grades the clone source to match the location you are painting.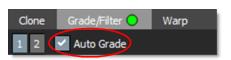
Note: The Gain, Gamma, Lift, Hue and Saturation controls are disabled when using Auto Grade.
Gain
Red
Multiplies red values.
Green
Multiplies green values.
Blue
Multiplies blue values.
Gamma
Red
Adjusts red gamma values.
Green
Adjusts green gamma values.
Blue
Adjusts blue gamma values.
Lift
Red
Adds red values.
Green
Adds green values.
Blue
Adds blue values.
Hue
Adjusts hue.
Saturation
Adjusts saturation.
Blur
Blurs the clone source.
Sharpen
Sharpens the clone source.
Reset Grade/Filter
Resets all Grade/Filter controls.
Note: Once a Grade/Filter parameter has been adjusted, a green dot appears to the right of the tab to indicate that a change was made.
Warp
Warp allows you to warp specific image areas using pins, while leaving other areas untouched. Adjustments can range from subtle nip and tucks to something more obvious like repositioning an arm or leg.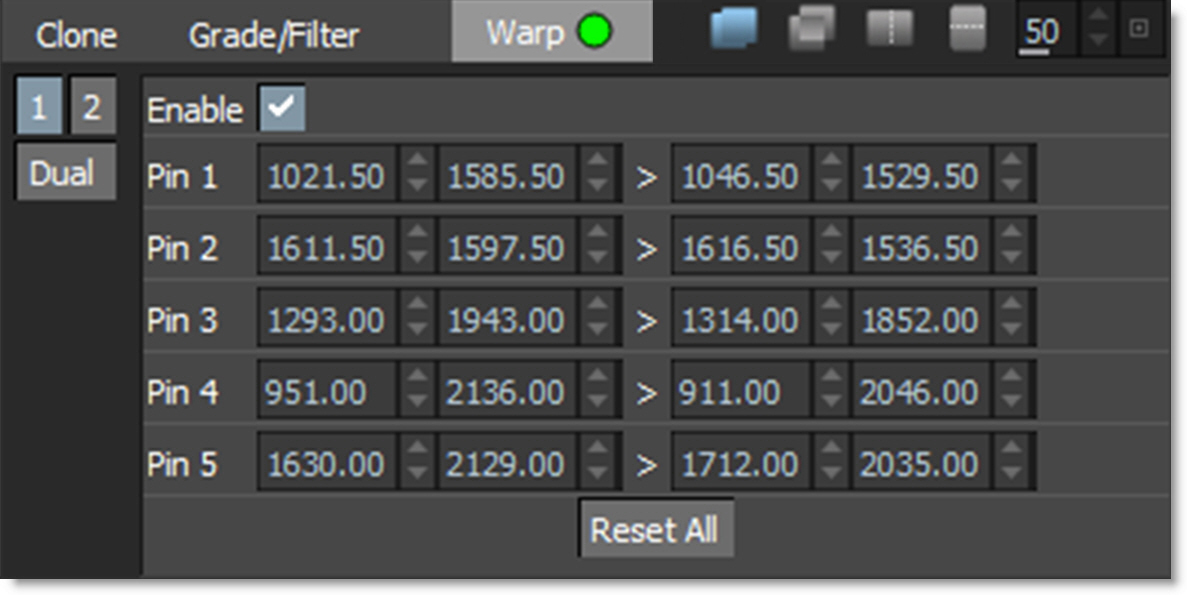
Enable
Enables/disables warping. This is useful to turn the warping effect on and off.
Pin 1 - 20
A total of 20 pins can be added to an image. To create a pin, click-drag on the image. Pins have a source (green circle) and target (red circle). The farther the target is dragged from the source, the more the image warps. Click-releasing on the image sets a tack which constrains the warp.
Pin and Tack Radius
Each pin and tack has a radius which determines its strength. Hover over a pin to display the radius. Shift-drag the radius to adjust it.
Transform
Selects point trackers and tracked layers from the input Tracker node and match moves the pins based on the input tracker data.
Note: Once a Warp parameter has been adjusted, a green dot appears to the right of the tab to indicate that a change was made.
Clone > Warp Keyboard Shortcuts
Shortcut | Action |
|---|---|
Click-drag on image | Creates a pin |
Click-release on image | Creates a tack |
Click-drag pin (source or target) | Moves the pin (source or target) |
Shift-drag pin (source or target) | Moves both pins (source and target) |
Ctrl/Cmd-drag pin radius | Adjusts pin radius with all radii displayed |
Hover over pin, Shift-drag pin radius | Adjusts pin radius with only selected pin radius displayed |
Alt-drag on a tack | Converts a tack to a pin |
Right-click > Remove Pin | Deletes the pin |
Right-click > Make Tack | Converts a pin to a tack |
Dual Clone
Dual Cloning allows you to paint from two different frames simultaneously, using separate Transform, Grade/Filter and Warp settings. To Dual Clone, create two Clone presets using the 1 and 2 button presets on the left side of the Clone tab.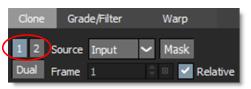
To save a preset, click on one of the numbered presets and adjust the Clone controls. This includes the Clone Source, Frame Offset, Transform, Grade/Filter, and Warp settings. Once you have different settings for the two presets, press the Dual button to enable both presets simultaneously.
When you do so, a Mix control appears to the right of the Clone controls. Mix sets the relative opacity of the two clone sources.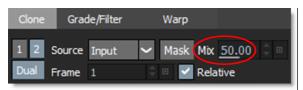
When you paint, both Clone presets will contribute to the painted result.
Note: You can use the Shift-Alt-1 and Shift-Alt-2 keyboard shortcuts to quickly select one of the Clone presets.
Reset
Resets all Clone brush transform controls.
Color (Shift-C)
Paints the image with the current color.
Picking Colors from the Screen
Colors can be picked off of the screen using a couple of different techniques.
1 Hover over an area in the Viewer and press the . (period key). The area inside the brush diameter is sampled and averaged when choosing the color.
2 Right-click picks a color from a single pixel.
3 Right-click-drag and drawing a box averages the colors within it.
Color Palette
The Color, Hue, Sat, and Value tabs as well as the Sliders provide you with four different methods for selecting a color.
Color
The ring sets the hue while the inner square sets the value (brightness) and saturation.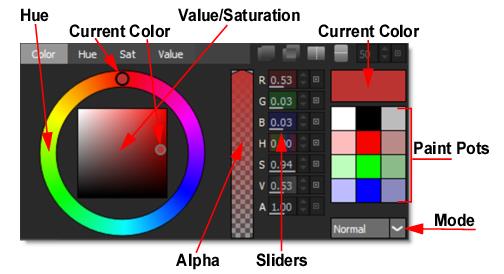
Hue
The hue is selected from the vertical hue bar while the saturation and value are chosen from the large square.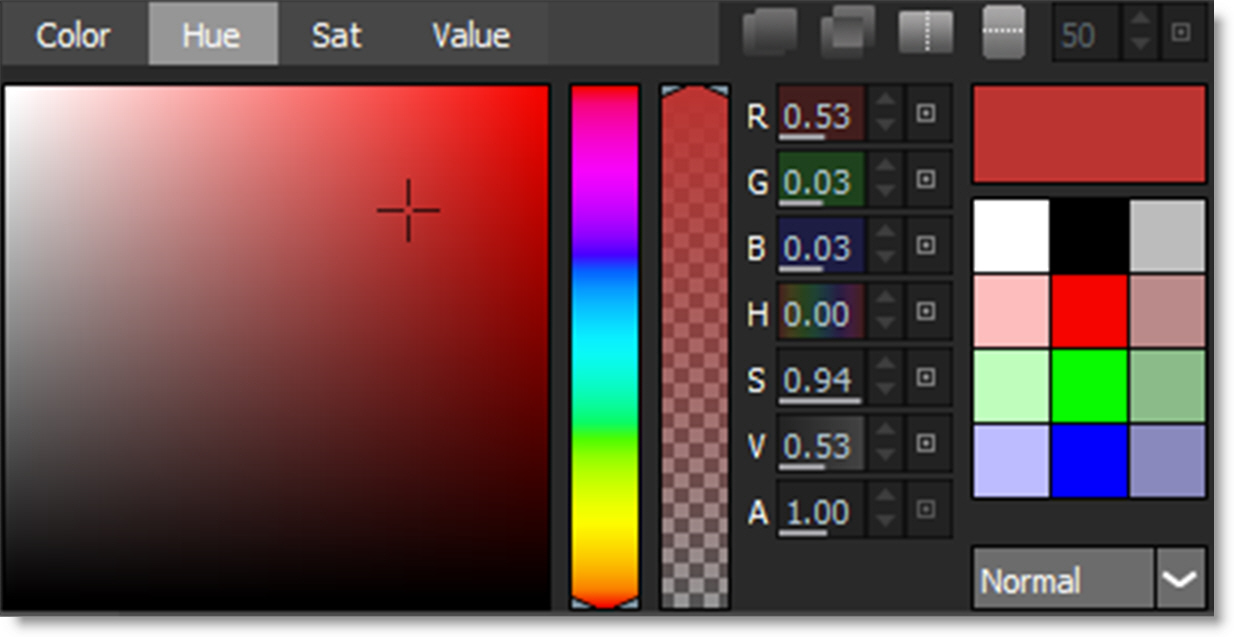
Sat
The saturation is selected from the vertical saturation bar while the hue and value are chosen from the large square.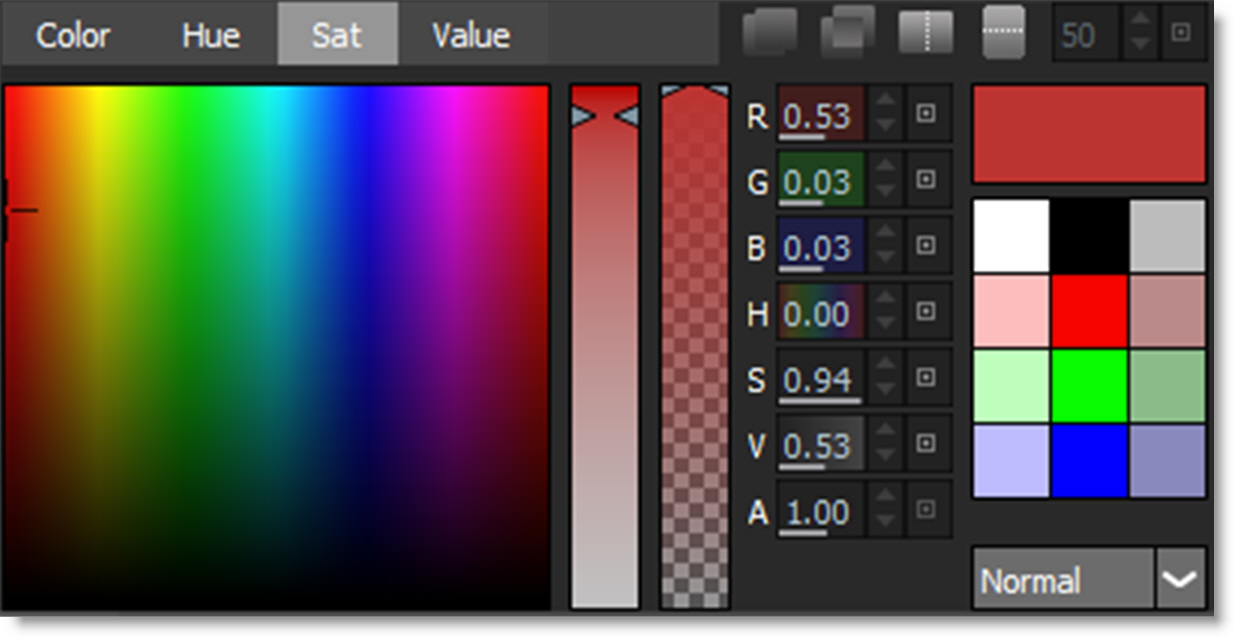
Value
The value is selected from the vertical value bar while the hue and saturation are chosen from the large square.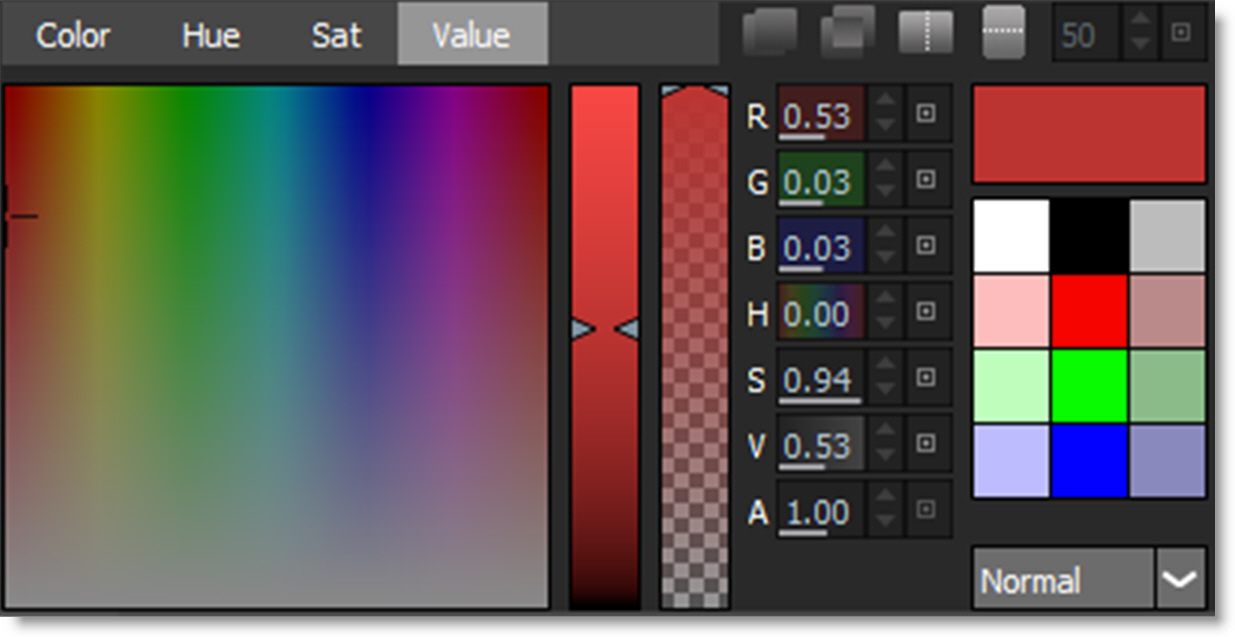
Hue, Sat or Value Picker
Depending on which tab is selected in the Color Palette, the vertical bar to the right of the palette controls the hue, saturation or value of the selected color.
Alpha
The second vertical color bar slider to the right of the Color Palette controls the level of the painted alpha when Paint > A (alpha) is selected. An alpha value of 0 paints black, a value of 100 paints white, while a value in between paints a level of gray.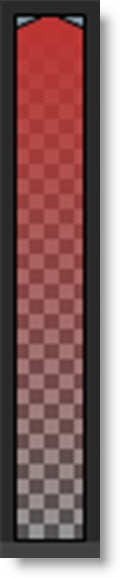
Sliders
Numeric sliders can adjust the current color using R, G, B, H, S, V and A parameters.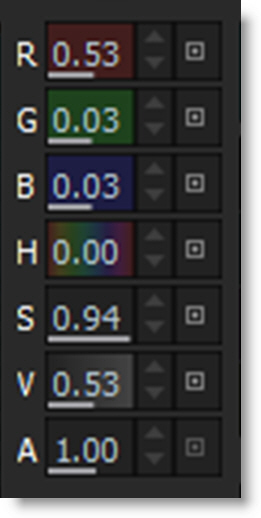
Current Color
Displays the currently selected color.
Mode
Selects how color is applied to the image.
Normal
The Current Color is added to the image.
Tint
The Current Color is used to tint the image by replacing hue and saturation.
Hue
The Current Color is used to tint the image by only replacing hue.
Luminance
Replaces the luminance of the image while leaving hue and saturation unaffected.
Lighten
Pixels darker than the paint color are replaced, and pixels lighter than the paint color do not change.
Darken
Pixels lighter than the paint color are replaced, and pixels darker than the paint color do not change.
Paint Pots
Favorite colors can be stored in the paint pots by dragging and dropping from the Current Color. Click on one of the paint pots to make it the current color.
Color Correct (Alt-C)
The image is painted using color adjustments.
Hue
Rotates the hue.
Saturation
Adjusts saturation. Positive values saturate, negative values desaturate.
Brightness
Adjusts brightness. Positive values brighten, negative values darken.
Contrast
Adjusts contrast. Positive values increase contrast, negative values decrease contrast.
Center
Adjusts the contrast curve to weigh it more towards shadows or highlights. A lower value means a brighter range.
Gamma
Adjusts gamma. The gamma adjustment leaves the white and black points the same and only modifies the values in-between. Positive values darken the midtones, negative values lighten the midtones.
Red
Adds or subtracts red.
Green
Adds or subtracts green.
Blue
Adds or subtracts blue.
Cutout (Alt-Shift-C)
Cuts out a portion of the image based on a rectangular selection, taking into account alpha if it exists, and paints using the cutout.
If one is not defined, you can click-drag to create a source region. When a source region already exists, press Shift to display it and then optionally drag to create a new one. The source region can be reset by Shift-clicking or right- clicking without dragging.
Cutout Keyboard Shortcuts
Shortcut | Action |
|---|---|
Click-drag | Creates a source region when none exists |
Shift-drag or Right-click-drag | Creates a new source region |
Shift | Displays source region |
Shift-click or Right-click | Resets source region |
Ctrl/Cmd-drag boundary | Scales the cutout |
Ctrl/Cmd-Shift-drag boundary | Rotates the cutout |
Type
RGBA
Creates a cutout based on the RGBA channels.
RGB
Creates a cutout based on the RGB channels.
Scale
Scales the cutout.
Rotation
Rotates the cutout.
Detail (Alt-D)
Sharpens or smooths by decomposing the image into coarse, medium and fine detail layers. This results in selective sharpening, detail enhancement and edge aware smoothing.
Coarse
Adjusts the coarse detail layer. Increasing the value sharpens while decreasing the value smooths.
Medium
Adjusts the medium detail layer. Increasing the value sharpens while decreasing the value smooths.
Fine
Adjusts the fine detail layer. Increasing the value sharpens while decreasing the value smooths.
Gang
The Coarse, Medium and Fine values can be ganged together. When ganged, adjust the Coarse slider to affect all values simultaneously. This will generate an overall sharpening effect if the numeric fields are increased and an overall smoothing effect if decreased.
Range
Shadows, Midtones, Highlights, Full
Targets the Detail operation to either shadows, midtones or highlights as well as the entire range when set to Full.
Dodge (Alt-Shift-D)
Lighten areas in the image.
Exposure
Sets the brightness of the brush.
Range
Shadows, Midtones, Highlights, Full
Targets the Dodge operation to either shadows, midtones or highlights as well as the entire range when set to Full.
Drag (Shift-D)
Smudge or smear an area of the image. When the brush first starts, it makes a copy of the area under the brush, then on subsequent samples it stamps that area down in the new location with a blend.
Mix
Mix is the initial blend amount of the smudged area.
Decay
Determines how much of the Mix to use on the next stamp and reduces the Mix percentage with each sample.
The defaults are Mix = 50% and Decay = 90%. So, the first stamp will be a 50/50 mix of the brush start sample and the new sample, then the next will be 50% * 90% of it, etc. until it eventually fades away entirely.
Eraser (Shift-E)
Erases previously painted brush strokes.
Grain (G)
Paints grain onto the image.
Size
Sets the size of the grain.
Red Size
Controls the size of the red grain.
Green Size
Controls the size of the green grain.
Blue Size
Controls the size of the blue grain.
Amount
Sets the intensity of the grain.
Red Amount
Controls the intensity of the red grain.
Green Amount
Controls the intensity of the green grain.
Blue Amount
Controls the intensity of the blue grain.
Softness
Sets the softness of the grain.
Red Softness
Controls the softness of the red grain.
Green Softness
Controls the softness of the green grain.
Blue Softness
Controls the softness of the blue grain.
Monochrome
When enabled, the grain is monochrome. In this mode, parameters that have no effect are grayed out.
Mosaic (M)
Divides the picture up into square tiles.
Size
Controls the size of the square tiles. A small size value will create many square tiles.
Repair (R)
Paints the image with the color level sampled at the beginning of each stroke.
Scatter (Shift-S)
Scatters pixels in a random fashion.
Radius
Sets the amount of scattering.
Stroke (S)
Displays all strokes. Strokes can be selected by clicking or drag selecting in the Viewer. Hold Shift to add to the selection and Ctrl to toggle the selection. As strokes are selected, they are highlighted in the Viewer and the Paint History.
Brush Compare Modes
Four brush compare modes preview brush settings prior to painting. You can choose from Onion Skin, Align, Vertical Split and Horizontal Split.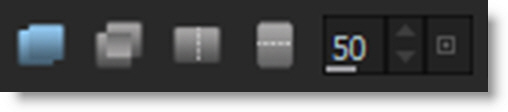
The Caps Lock key toggles the compare modes on and off.
Note: The compare modes are not available for the Drag, Repair, and Cutout brushes. Onion Skin and Align mode only work with the Clone brush.
Onion Skin
Onion Skin does a mix, as defined by the Mix value, between the brush preview and source image. When using the Clone brush, it is a mix between the clone source and target. A value of 100 displays the clone source while a value of 0 displays the clone target.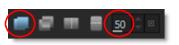
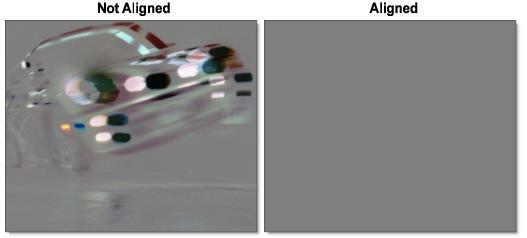
Align
Align inverts the clone source and mixes it with the foreground, creating an embossed effect when similar images are not aligned. When perfectly aligned, the Viewer appears gray or black depending on the state of the Paint > Clone > Alignment Type preference.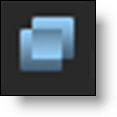
Vertical Split
Compares the brush preview and source image using a Vertical Split. Move your cursor into the image area over the split line and when the cursor changes to a double-arrow, click and drag to move the split line. The split line may not be obvious, so white triangles on the edges of the Viewer will help you find it.
The split is useful for determining the brush settings prior to painting.
Note: The | key (vertical bar) keyboard shortcut snaps the vertical split position to the cursor position.
Horizontal Split
Compares the brush preview and source image using a Horizontal Split. Move your cursor into the image area over the split line and when the cursor changes to a double-arrow, click and drag to move the split line. The split line may not be obvious, so white triangles on the edges of the Viewer will help you find it.
The split is useful for determining the brush settings prior to painting.
Note: The | key (vertical bar) keyboard shortcut snaps the horizontal split position to the cursor position.
Profile
You can customize your brush settings in the Profile tab.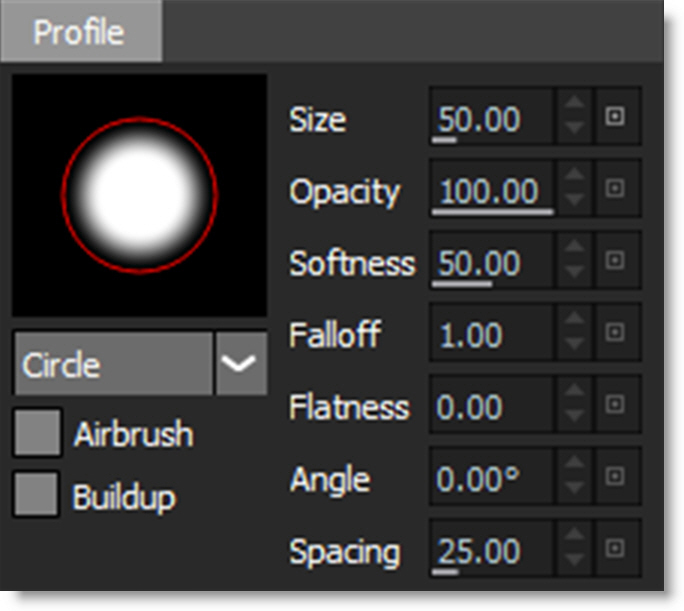
Profile
A circle or square brush can be selected from the pop-up menu.
Circle
The brush profile is set to a circle.
Square
The brush profile is set to a square.
Airbrush
When on, brush samples are generated at 30 samples/sec as long as the mouse button or pen is held down.
Buildup
Allows the opacity to accumulate so it doesn't get clamped by the Opacity parameter value.
Size (Ctrl/Cmd-drag or [ ])
Sets the size of the brush. The brush can also be resized in the Viewer with the bracket keys, [ and ], or by holding Ctrl/Cmd and dragging the brush outline.
Opacity (Ctrl/Cmd-Alt-drag)
Sets the opacity or transparency of the brush.
Softness (Ctrl/Cmd-Shift-drag)
Sets the brush softness.
Falloff
Controls the feather contour of the brush.
Flatness
Sets the flatness of the brush.
Angle
Sets the angle of the brush.
Spacing
Sets the brush spacing.
Paint
The Paint tab contains controls that affect how paint is applied to the image.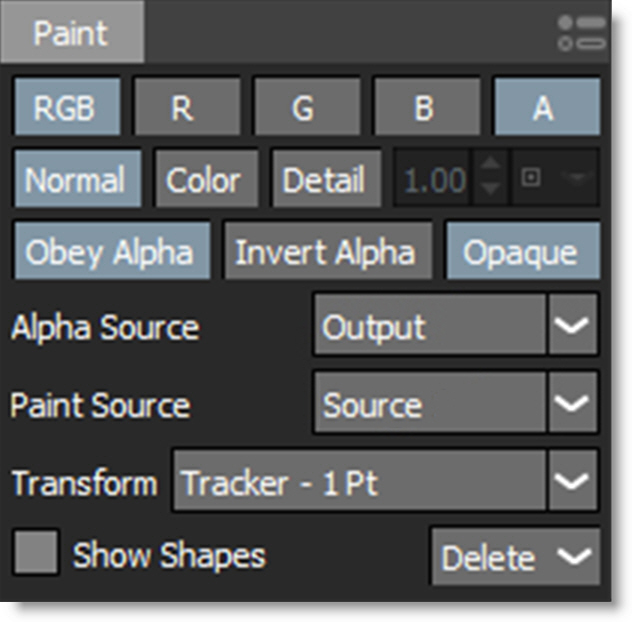
RGB
The selected brush paints on the RGB channels.
R
The selected brush paints on the red channel.
G
The selected brush paints on the green channel.
B
The selected brush paints on the blue channel.
A
The selected brush paints on the alpha channel.
Detail Separation
Separates the image into color and detail layers. The color and detail layers can be painted separately or simultaneously. Painting on the color layer preserves detail while painting on the detail layer preserves color.
Note: With the exception of Cutout and Eraser, all brushes can be used in the Color and Detail modes.
Normal
Paints on the color and detail layers simultaneously.
Color
Paints on the color layer. The color layer can be viewed by selecting View > Color Layer or pressing the 8 keyboard shortcut.
Detail
Paints the detail layer. The detail layer can be viewed by selecting View > Detail Layer or pressing the 9 keyboard shortcut.
Detail Level
Determines the detail layer to be used. 0 is coarse, .5 is medium and 1 is fine.
Detail Preset
The pop-up menu to the right of Detail Level provides coarse, medium and fine detail presets.
Coarse
Presets the detail to the coarse layer.
Medium
Presets the detail to the medium layer.
Fine
Presets the detail to the fine layer. The fine layer typically includes details such as skin blemishes, pores, hair, and wrinkles.
Alpha
Obey Alpha
When enabled, the intensity of the alpha channel controls how much the image will be affected by a particular paint operation. At any given pixel in the image, the more transparent the value in the alpha channel, the more transparent the application of the paint operation.
Invert Alpha
Inverts the alpha channel used for the Obey operation.
Opaque
Enabled once the A button is turned on, the Opaque control ensures that a solid paint stroke is created when painting into the alpha channel. When Opaque is off, the brush will also affect the alpha channel. So, it's possible to blur and drag the alpha channel, for instance.
Alpha Source
Selects which input source to use when Obey is enabled.
Input
Obeys the alpha from the Input.
Source 1-5
Obeys the alpha from the Source 1-5 inputs.
Output
Uses the Paint node’s output alpha as the obey alpha source. This option is handy for painting temporary alpha to control where you paint in the RGB channels.
Paint Source
Selects either Input or Output as the paint source.
Input
The brush paints from the input. For instance, this is useful for painting multiple strokes to perform a constant color correction or blur adjustment.
Output
The brush paints from the Output, with each new stroke affecting what was previously painted.
Note: Paint Source is not available for the following brushes: Clone, Cutout, Mosaic, Repair and Scatter.
Transform
Selects point trackers and tracked layers from the input Tracker node, or other nodes that contain trackers, for use in match moving paint strokes or the clone source during event playback.
Show Shapes
Shape outlines from a Roto node can be displayed in a Paint node. To do so, connect a Roto node’s Data output into a Paint node’s Data input and enable Show Shapes.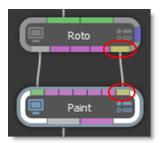
Delete
Delete all paint strokes and restores the original unpainted frames.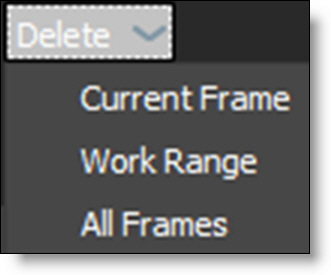
Current Frame
Sets the range to the current frame.
Work Range
Sets the range to the in and out points in the Timebar.
All Frames
Sets the range to the entire frame range.
Paint Preferences
Seldom adjusted Paint controls can be accessed by clicking the Paint Preferences icon.
Auto Paint
Auto Paint is a highly unique automated paint feature that records all paint activity with tight integration of both point and planar trackers. Paint strokes can be match moved or stabilized giving Silhouette the speed of raster paint with the repeatability of vector paint. The beauty of the system lies in the automatic recording of the paint strokes and brush settings. Individual paint strokes can be selected and repeated over many frames, as well as deleted. If the original footage changes, the entire paint history can be used to rebuild the painted shot automatically. Go to the Auto Paint tutorial to see how it works.
Paint History
The Paint History contains all of the “events” for the current session. Events are things like paint strokes, brush profile changes, brush parameter changes, other paint states, etc. A selection of events essentially becomes a macro and can be played back over a range of frames.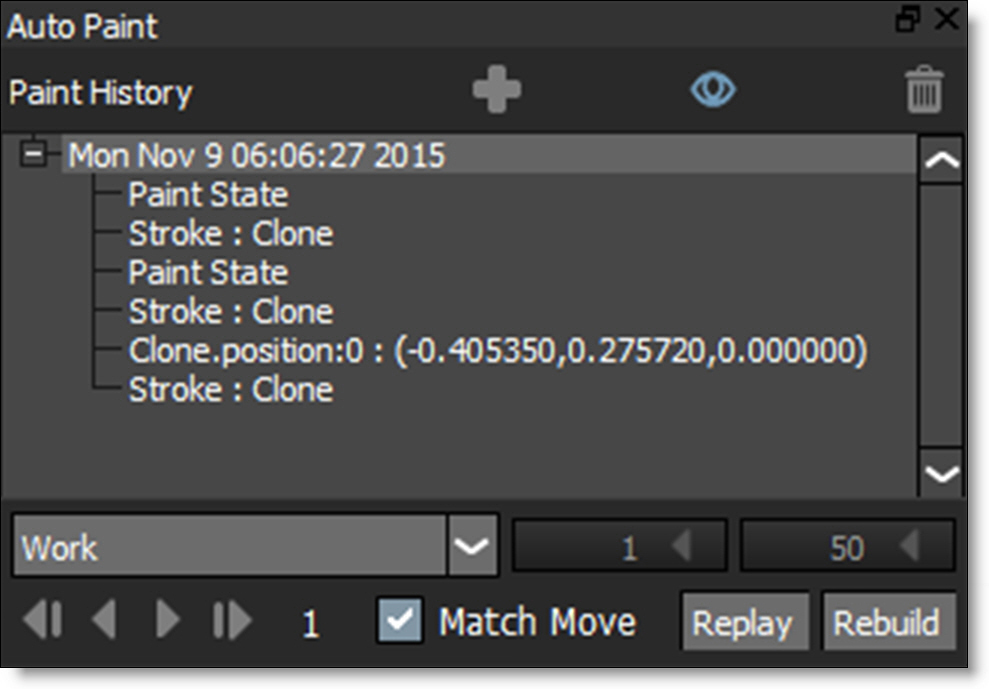
Groups are created each time painting is started on a frame and are recorded with the current time stamp. So the first time you begin painting on frame 1, for instance, a renameable “event group” containing a current time stamp is created. Then, events are created for the current paint state: channels/flags, brush, brush profile, and brush parameters. And finally, a new stroke event is created for the new stroke. After the first stroke, state changes are stored in their own events (ie. brush size, opacity, etc).
Add Group
Manually adds a paint event group. Manually creating groups is useful for organizing your painted strokes so that they can easily be identified at a later time.
Note: Normally, one paint group is created while painting on a frame. If you leave the frame and come back to it later, another group will be created automatically.
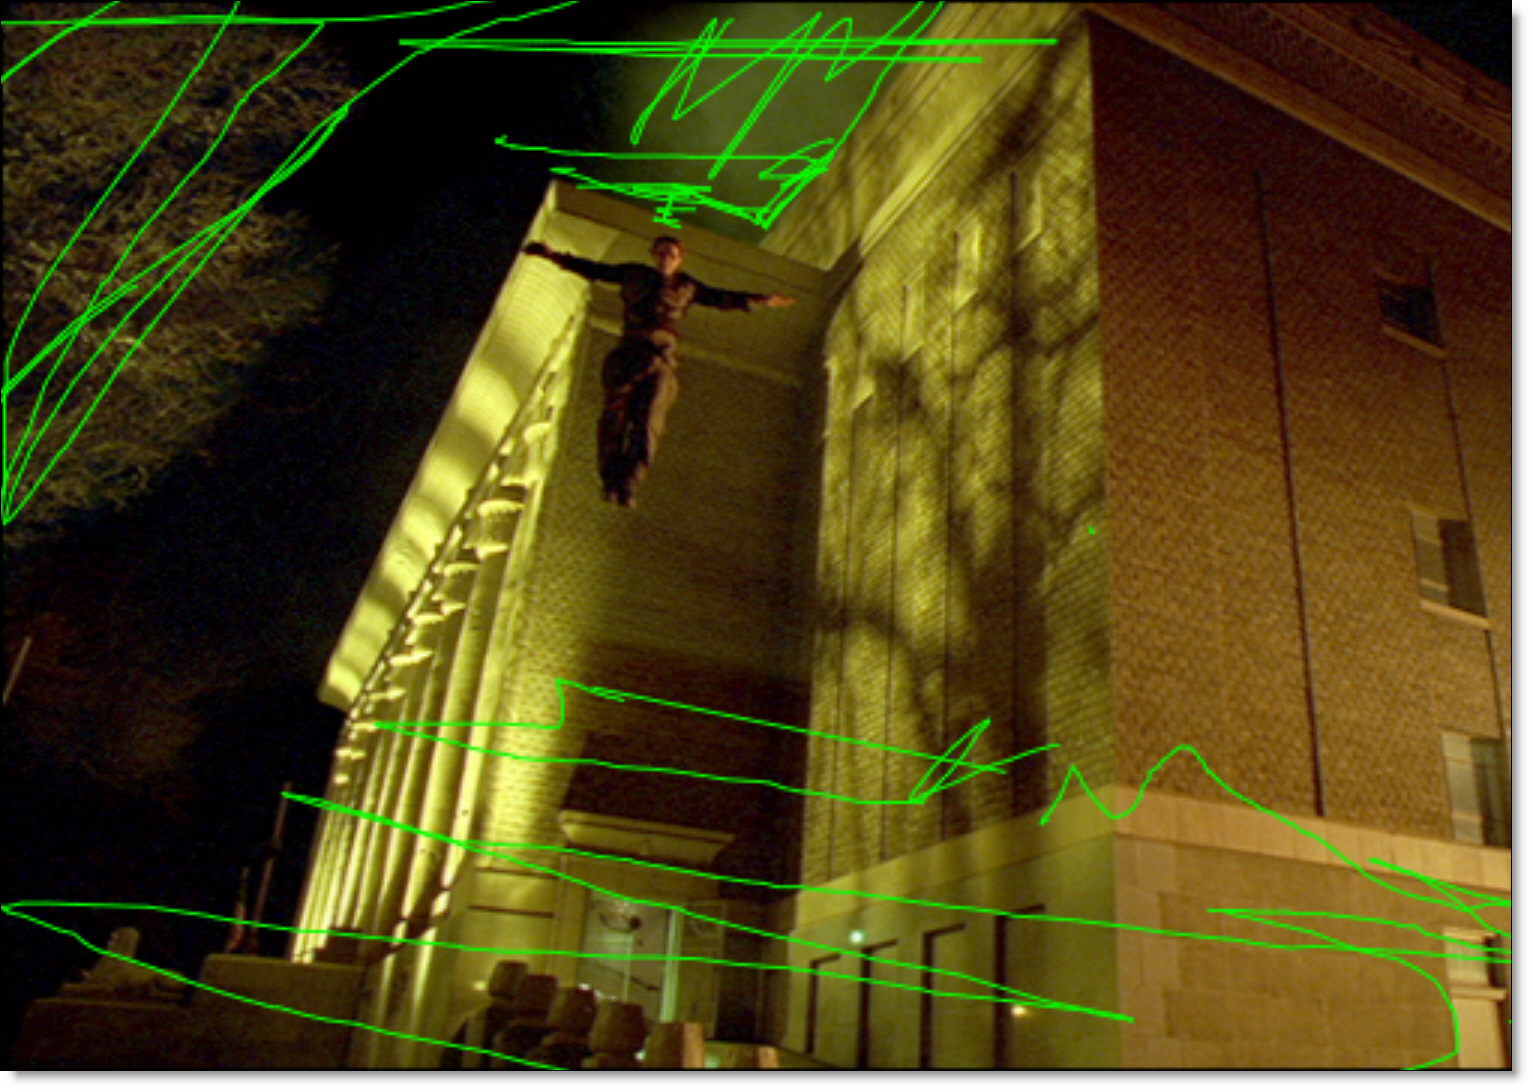
Show Strokes
When you make a selection in the Paint History, the strokes are highlighted green in the Viewer when Show Strokes is enabled--the default.
Delete
Press the Delete icon or the Delete key to delete selected events.
Groups and Events
• A date and time stamp is an automatically created group that contains the events for frame 1. Later, if you leave and come back to frame 1, there will be a new group created with a new time stamp. This will keep track of what changes were made and when.
• Groups can be renamed by double-clicking, typing a new name and hitting Enter.
• The first time you do something on a frame, events that snapshot the current paint state are recorded. This is so that if you need to rebuild the frame, everything that is needed is in the Paint History for each frame.
• Groups that have + icons indicate you can expand them to see their contents.
Event Playback
Frame Range
Defines the frame range for Event Playback and Rebuild operations.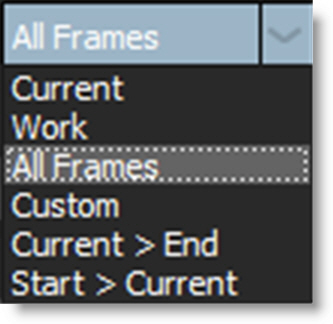
Current
Sets the range to the current frame.
Work
Sets the range to the in and out points in the Timebar.
All Frames
Sets the range to the entire frame range.
Custom
Sets a custom range as defined by the numeric entry fields. To quickly set custom in/out points, press the arrows in the numeric fields to enter the currently parked frame.
Start>Current
Sets the range to the start frame ending at the current frame.
Current>End
Sets the range to the current frame ending at the end frame.
Play Selected Events Forward/Backward
Plays selected events in the Paint History either forward or backward.
In the Paint History window, select the paint event group or a sub set of the paint events you want to play back. You will see the strokes highlight green in the Viewer. Then, select the desired frame range and press either the Play Selected Events Forward or Backward icon.
The number to the right of the play icons represents the number of selected items in the Paint History.
If a layer with tracking data applied is selected and Match Move is enabled, the selected strokes will be match moved when played back.
Note: To Match Move the clone source during playback, you will need to select the layer and enable Clone > Match Move prior to painting.
Step Selected Events Forward/Backward One Frame
Steps selected events in the Paint History either forward or backward one frame at a time.
Match Move
Match Move allows you to apply the selected tracked layer while playing back paint events.
Duplicate
Duplicates strokes from one view to another for the current frame. If a layer with a stereo offset is selected prior to duplicating, the stereo offset is taken into account when duplicating the strokes.
Note: Duplicate only appears when in a stereo project.
Replay (Ctrl/Cmd-Alt-R)
Replays the last stroke. This can be used to apply the last stroke with changed settings and/or on a different frame.
Rebuild
Rebuilds the paint events for all frames defined in the Frame Range in the order in which they were painted. This is useful if you replace your footage with a different color correction than the original and want the result of painting with the Clone brush to match the new footage.
Stereo Paint
In general, painting on stereo images is the same as painting with mono images. The stereo view mode determines whether you are painting on the Left View, Right View or both the Left and Right Views at the same time.
To paint on both the left and right views simultaneously, select the Left/Right view and make sure the Edit In Both Views icon is enabled. When disabled, the left or right view is painted individually.
In the Timebar, red markers are displayed for painted frames in the Left View, blue markers for the Right View and green markers for frames painted in both the Left and Right View.
Go to the Stereo Paint tutorial to see how it works.
Paint Brush Shortcuts
Shortcut | Action |
|---|---|
B | Selects the Black and White brush |
Shift-B | Selects the Blemish brush |
Ctrl/Cmd-B | Selects the Blur brush |
Alt-Shift-B | Selects the Burn brush |
C | Selects the Clone brush |
Shift-C | Selects the Color brush |
Alt-C | Selects the Color Correct brush |
Alt-Shift-C | Selects the Cutout brush |
Alt-D | Selects the Detail brush |
Alt-Shift-D | Selects the Dodge brush |
D | Selects the Drag brush |
Shift-E | Selects the Eraser brush |
G | Selects the Grain brush |
M | Selects the Mosaic brush |
R | Selects the Repair brush |
Shift-S | Selects the Scatter brush |
S | Selects the Stroke tool |
Paint Settings Shortcuts
Shortcut | Action |
|---|---|
Ctrl/Cmd-drag left/right | Sizes the brush |
[ and ] | Sizes the brush |
Ctrl/Cmd-Shift-drag | Sets the brush softness |
Ctrl/Cmd-Alt-drag | Sets the brush opacity |
Shift-Alt-1 and Shift-Alt-2 | Selects the Dual Clone brush setups |
Shift+Ctrl+1 | Toggle Dual Clone mode on/off |
‘ (located to the left of 1 key) | Displays the clone source and then the Clone target so that you can click on each to set the Clone offset |
Caps Lock | Toggles Onion Skin mode on and off |
. (period key) | Picks colors off of the screen |
Right-click | Picks a color off of the screen from a single pixel |
Right-click-drag | Picks a color off of the screen by drawing a box and averages the colors within it |
Alt-click-click | Draws a straight line |
| key (vertical bar) | Snaps the vertical or horizontal split compare position to the cursor position |
Alt-0 through Alt-9 | Select one of the presets |
Paint View Menu
Shortcut | Action |
|---|---|
1 | View the Output |
2 | View the Input |
3-7 | View Source’s 1-5 |
8 | View Color Layer |
9 | View Detail Layer |
P | View Paint Only |
Node Parameters
When the Paint node is being edited in the Trees window, parameters specific to the Paint node can be adjusted in the Paint > Node parameters.
Paint Only Alpha
Selects either a hard or soft edged alpha channel when using the Paint Only output.
Hard
Creates a hard edge alpha channel around brush strokes.
Soft
Creates a soft edge alpha channel around brush strokes.
Node Outputs
Output
Outputs the result of the paint node.
Paint Only
Outputs only the painted portions of the frame along with an automatically generated alpha channel (where the brush painted). This will allow you to seamlessly composite the painted areas in a Composite node without having to do a difference matte.