Playback and Caching
Silhouette can cache frames into RAM to guarantee real-time playback.
Cache Frames
1 Play your source clip to cache it into RAM.
Once the clip is played through once, it will then play in real-time if enough RAM is available. At the bottom right corner of the interface, there is a numeric readout (Cache Display). It displays the number of frames loaded into RAM, the maximum frames that can be cached, the percentage of RAM currently being used as well as the session’s bit depth.

If your clip is longer than the maximum frames that can be cached into RAM, the clip will not play in real-time.
2 Change the Timebar > First Frame and Last Frame to a duration less than the maximum number of frames in the Cache Display so that you can achieve real-time playback. Play the source clip after the new, shorter duration has been set.
 Play the source clip after the new, shorter duration has been set.
Once the clip is played through once, it will then play in real-time.
Preload Frames
Source frames can also be automatically cached in a background thread. The amount of preloaded frames is controlled by a Cache > Preload Frames preference with the default value being 10 frames.
1 Select File > Preferences on Windows and Linux or Silhouette > Preferences on Macintosh.
2 Go to the Cache group.
3 If you’d like, you can change Preload Frames to a higher value.
4 Click Apply.
Increase Amount of Frames During Playback
There are number of ways to increase the amount of frames that can be played back in real time.
1 Enable the Viewer > ROI (Region of Interest) to work on a sub-region of the image.
2 Select File > Preferences on Windows and Linux or Silhouette > Preferences on Mac and increase the %Total Physical RAM parameter in the Cache preferences (requires a restart of Silhouette to take effect). Please note that setting the % Total Physical RAM too high could cause instability if running other memory intensive programs.
3 In the Roto node, change the View from Output to Foreground.
4 Shorten the length of the clip by adjusting the First and Last Frame in the Timebar.
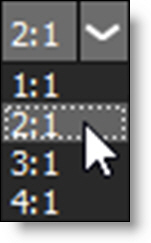
5 Change the proxy setting to 2:1, 3:1 or 4:1.

6 If you are working with high resolution files in a non-Paint Float session, change the session depth to 8 bits while you work, then switch back to Float for rendering.
Note: When painting, do not use a proxy setting other than 1:1 and make sure that you remain at the session’s original bit depth. Otherwise, the cursor changes to a prohibition icon (circle-backslash).