Render Options
Render
All Output Nodes
Renders all output nodes.
Selected Output Nodes
Renders the current output node.
Output nodes determine the file format, file name, disk storage location, and channels to be rendered. The Output nodes should be edited to your specification before rendering.
Range
Range determines which frames will be rendered. The numeric entry fields to the right of the range pop-up display the frame range to be rendered, but can also be used to enter a specific frame range if Custom has been selected.
All
Renders the entire frame range.
Work Range
Renders the frame range in and out points in the Timebar.
Current Frame
Renders the current frame.
Custom
Renders a custom frame range as defined by the numeric entry fields.
Output Start Frame
The rendered frames will start with this number.
Field Handling
Enables field rendering.
None
No field processing takes place.
Interlace
Interlaces the two separate fields within a single frame.
Field Dominance
Select either Even or Odd field dominance depending on whether you are working with NTSC or PAL images.
Even
Use for NTSC images.
Odd
Use for PAL images.
Resolution
Lowers the image resolution for faster rendering.
1:1
1:1 keeps the image quality at full resolution.
1:2
1:2 lowers the image resolution by 1/2.
1:3
1:3 lowers the image resolution by 1/3.
1:4
1:4 lowers the image resolution by 1/4.
Data Window
Determines the rendered image size.
Session
Renders the session size.
ROI (Region of Interest)
Renders the ROI.
Note: The ROI only renders when ROI is enabled. Otherwise, the session size is rendered.
When rendering EXR files:
• The ROI becomes the data window and the session becomes the display window.
• The ROI window is rendered along with the ROI window’s coordinates. This will allow you to automatically composite the ROI window into its proper location. For all other file formats, the ROI window is padded out to the session size.
DOD (Domain of Definition)
Renders the DOD.
Note: For non-EXR images, disable Crop/Pad in the Output node to render the DOD or the ROI.
Preview
Opens a Preview window that displays each rendered image as well as render statistics. With the Preview window open, press the R, G, B, and A (alpha) keys to toggle viewing of the respective channels or C to view the RGB channels.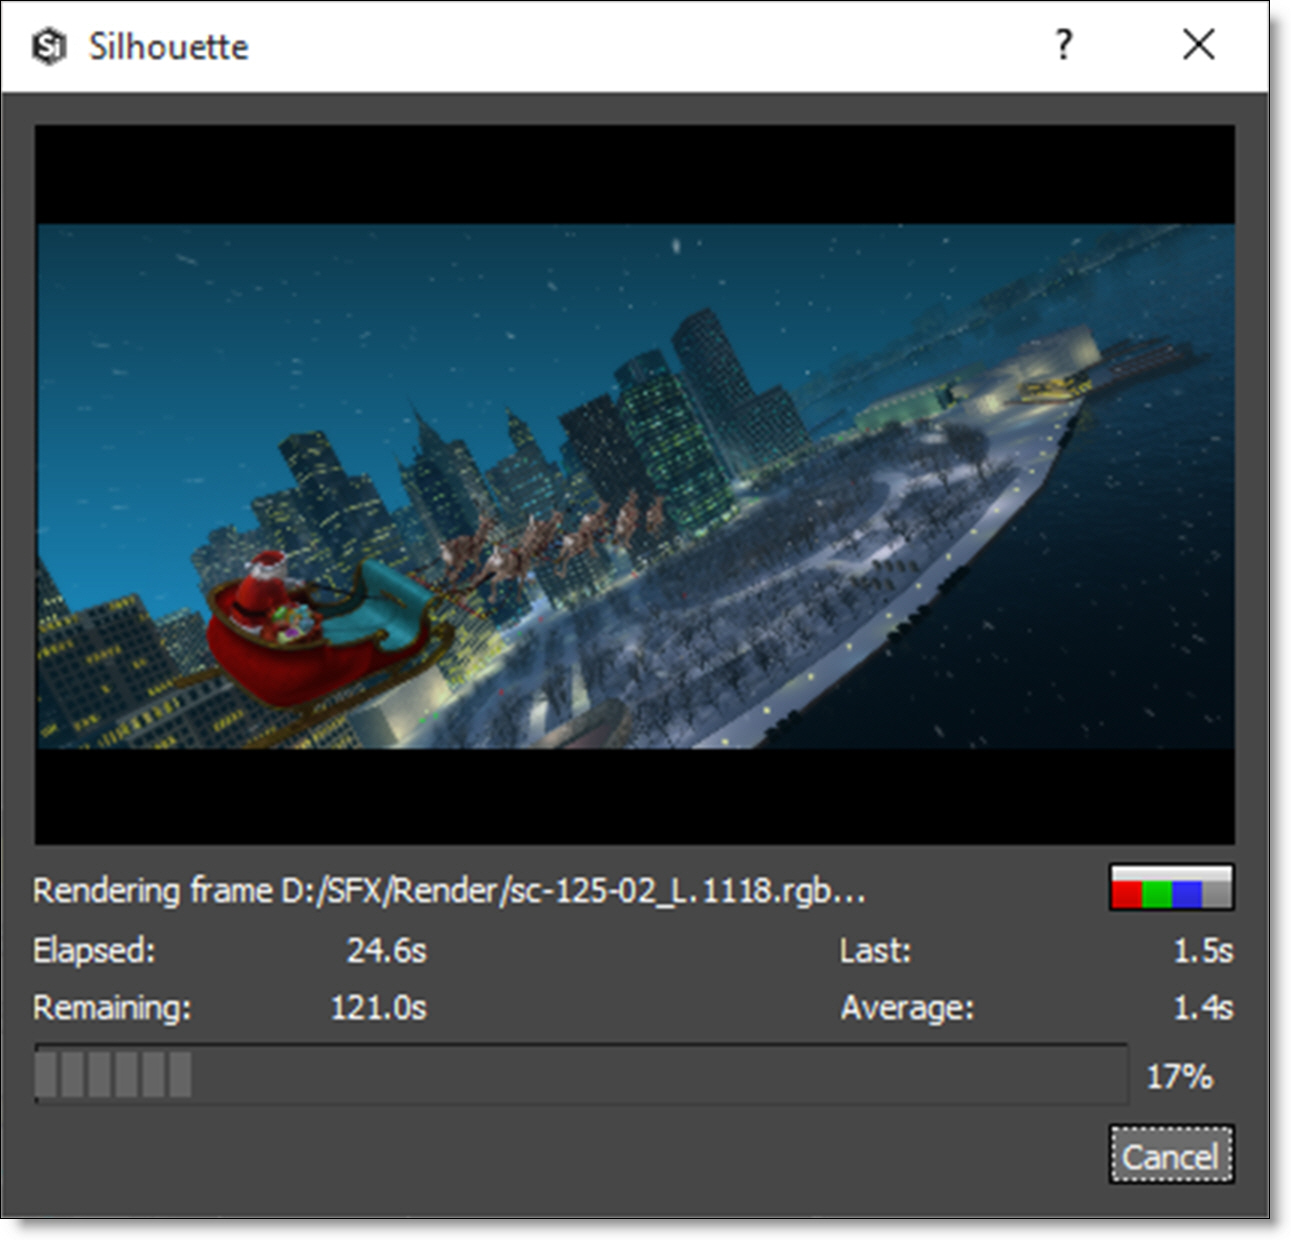
Validate
When selected, rendering is aborted if a Paint node’s data can’t be found.
Table 1: Render > Preview Shortcuts
Shortcut | Action |
|---|---|
R | Displays the Red channel |
G | Displays the Green channel |
B | Displays the Blue channel |
A | Displays the Alpha channel |
D | Displays the Depth channel |
C | Displays the RGB channels |
Send to RV
If enabled, after rendering, the clip is loaded into Tweak Software’s RV playback tool--if installed. The “Send to RV” option appears when the RV > Command preference is set.
Render
Renders using the current settings.
Apply
Saves the current settings and closes the Render Options window without rendering.
Cancel
Closes the Render Options window.