The composition of a black-and-white image can evoke countless feelings. By working with lights and shadows, you can create films and art that bring back memories and emotions for different people.
Today, I’ll show you how to make a clip black and white in DaVinci Resolve. Resolve is famous for its advanced color tools, so we’ll look at some methods to achieve these effects, including one secret weapon from the Continuum plug-ins.
Let’s dive in!
How to Make a Clip Black and White in DaVinci Resolve
DaVinci Resolve is known for its advanced color grades and color correction tools. I'll guide you through two easy steps to make a clip black and white. The two methods are easy to follow, and anyone of any editing skill level can learn how to use them.

Method 1: Decrease Saturation
The first method is one of the easiest ones. You decrease the saturation values to make the image black and white. This is a quick method for when you don’t need much control over the color channels.
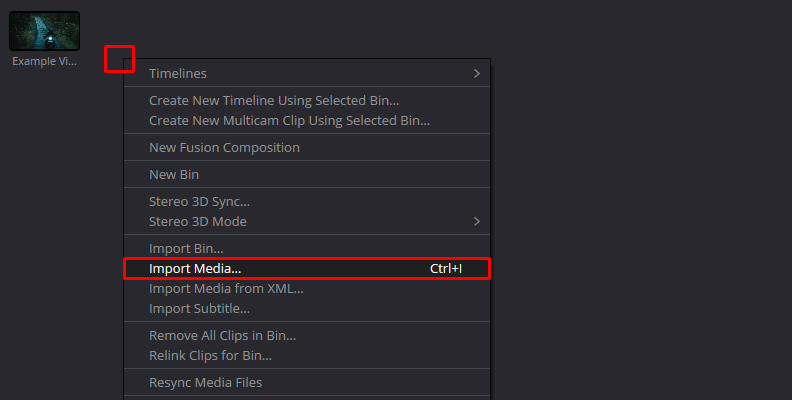
Step 1: Import Videos
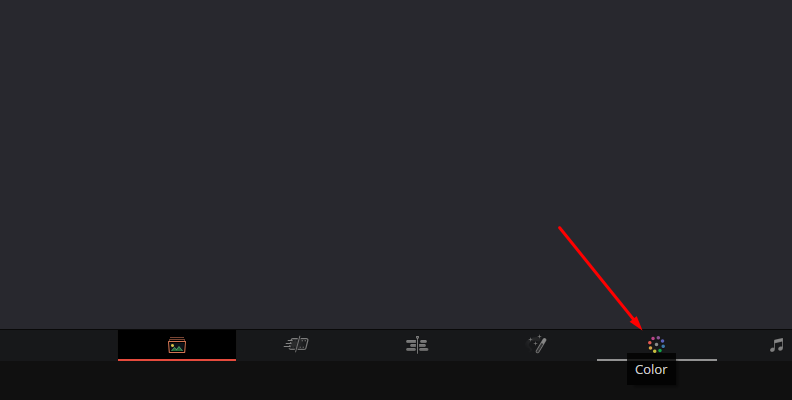
Import your videos and create a new timeline. Then, click the Color tab from the bottom menu to switch to the Color workspace, where all color-related tools are.
Step 2: Open the Color Wheels Tab
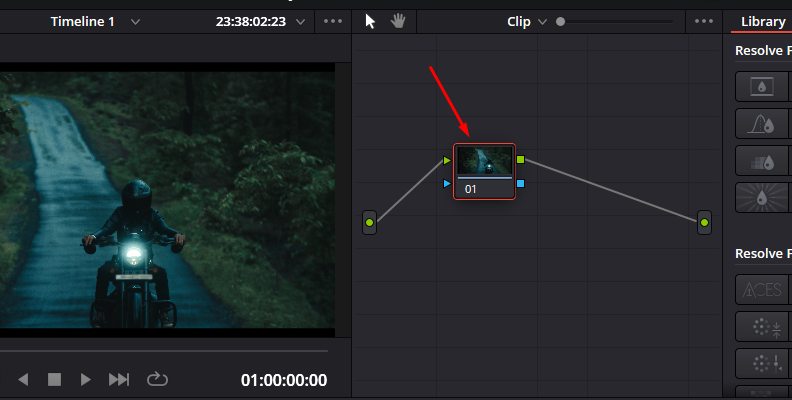
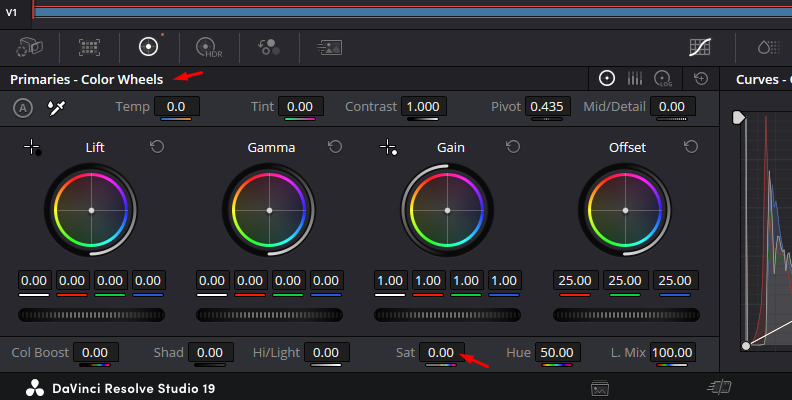
On the Color page, click the node with your clip and select the Color Wheels tab from the color toolbar. On the bottom part of that tab, below the color wheels, you’ll see the Saturation setting (Sat), which is by default at 50. Decrease it to 0 to make the clip black and white.
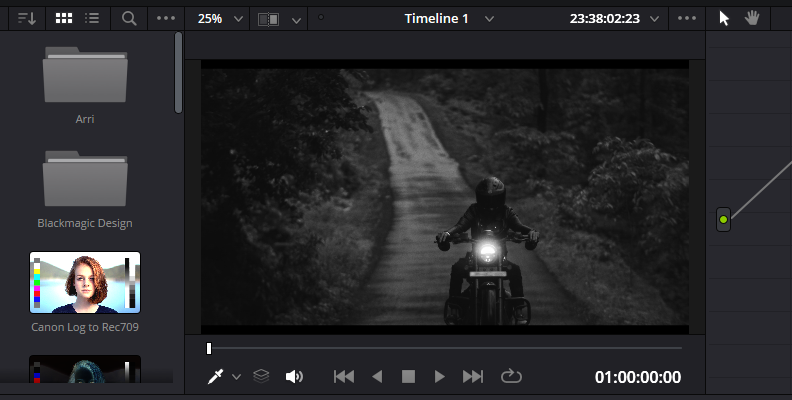
Method 2: Monochrome Mode
The Monochrome mode allows you to adjust each color channel to create the black-and-white look you want for your photos and videos.
Step 1: Import Clips to Timeline
Import the clip you want to make in black and white, create a new timeline, and go to the Color page.
Step 2: Add a New Node
Right-click on the grid, choose Add Node > Corrector, and place the new node next to the first one in the sequence. I recommend making color balance adjustments in the first node before continuing.
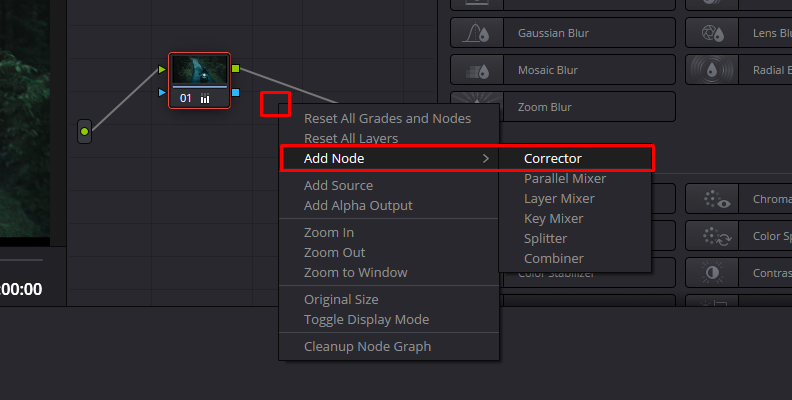
If the node grid is not visible, click the Nodes button in the window's top right corner.
Step 3: Open the RGB Mixer
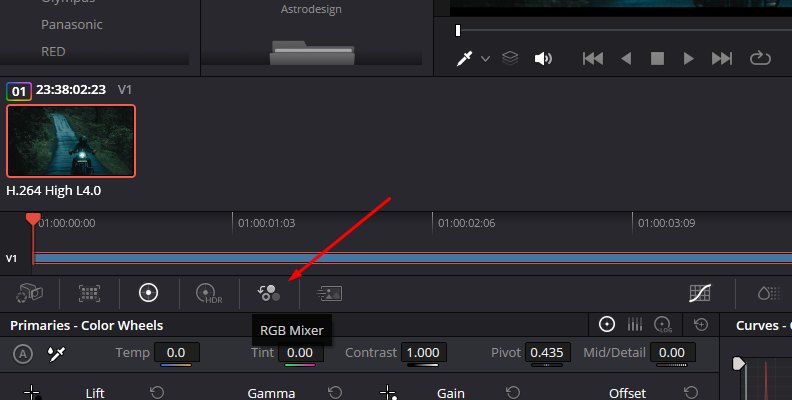
Select the new node and go to the RGB Mixer. The RGB Mixer is in the primary menu on the Color page (a symbol with three dots). Depending on your Resolve version, the Monochrome option can be at the bottom of the RGB Mixer or from the options by clicking the three dots in the top corner.
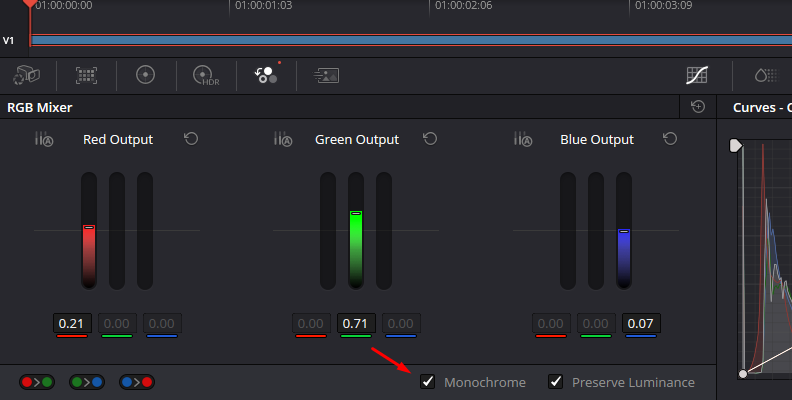
When you enable Monochrome, your image will turn black and white, and you'll have more control over the luminance values, adjusting the color channels independently. Play with the Red, Green, and Blue controls to achieve your desired black-and-white tone.
Make a Clip Black and White in DaVinci Resolve with BCC+ Black and White
BCC+ Black and White is a filter that turns an image’s colors to black and white. It can simulate photography's black-and-white look with six customizable filters and presets.
Step 1: Apply BCC+ Black and White
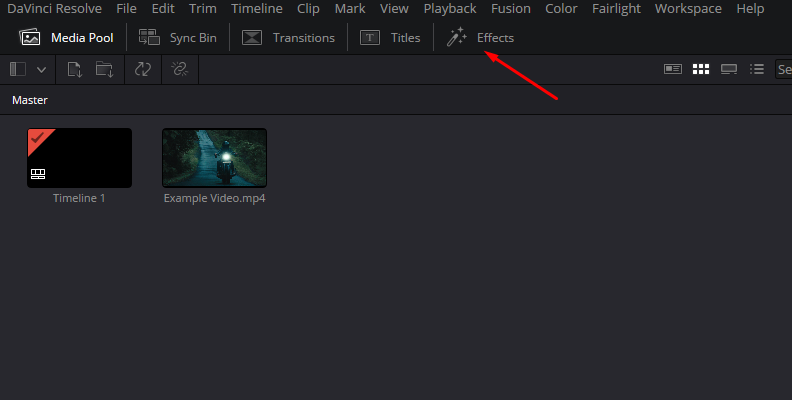
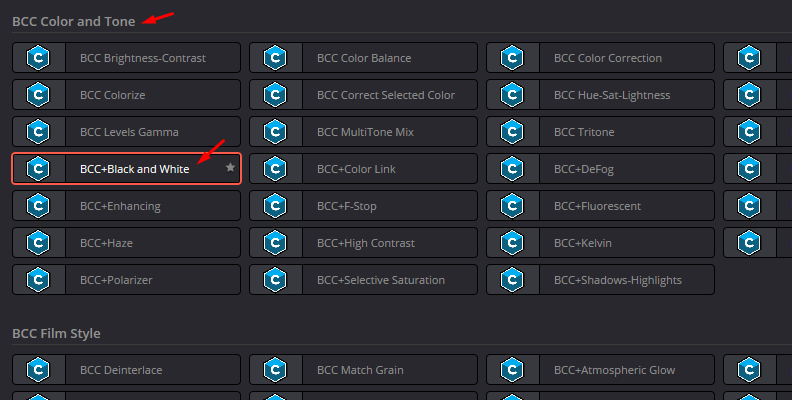
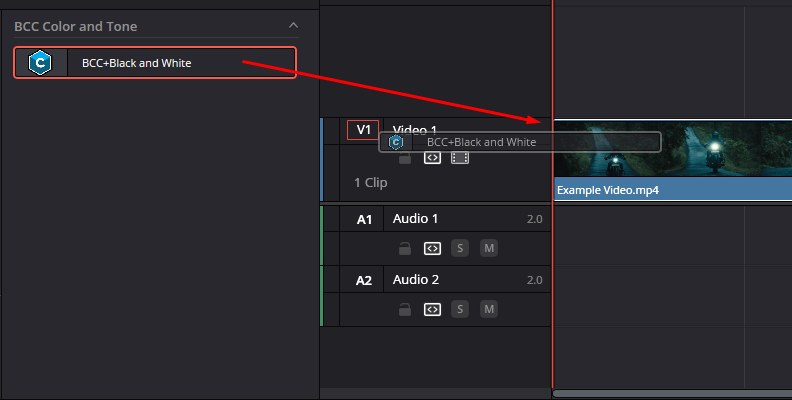
Go to the Edit page and click on Effect to display the effects library. Search BCC+ Black and White or browse it under Open FX > BCC Color and Tone > BCC+ Black and White. Click and drag the filter to the clip in the timeline.
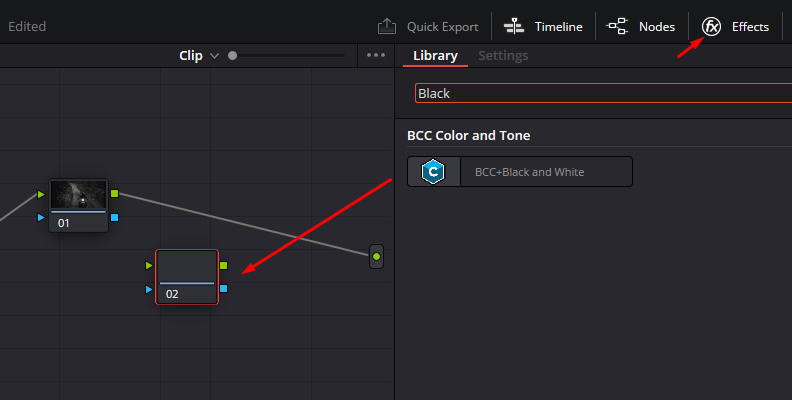
If you are working on the Color Page, right-click on the grid and select Add Node > Corrector. Link the new node to the previous one in the sequence. Click the Effects button at the top right and search for BCC+ Black and White. Then, click and drag the filter to the new node.
Step 2: Quickstart With Presets
Select the clip and open the Inspector to see the filter’s settings. Click the FX Editor button to launch the filter interface with the presets.
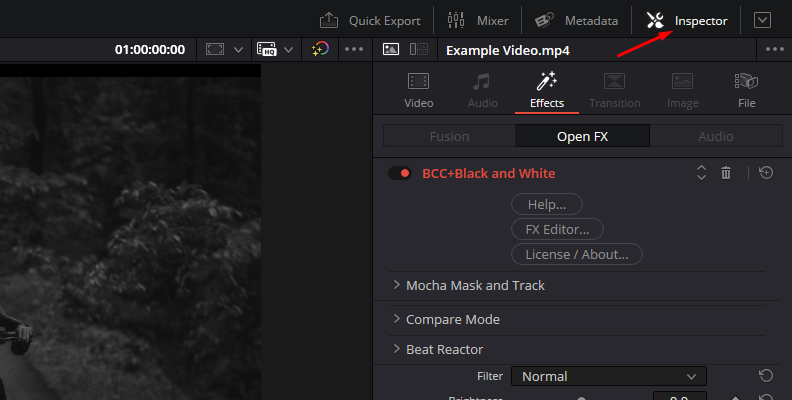
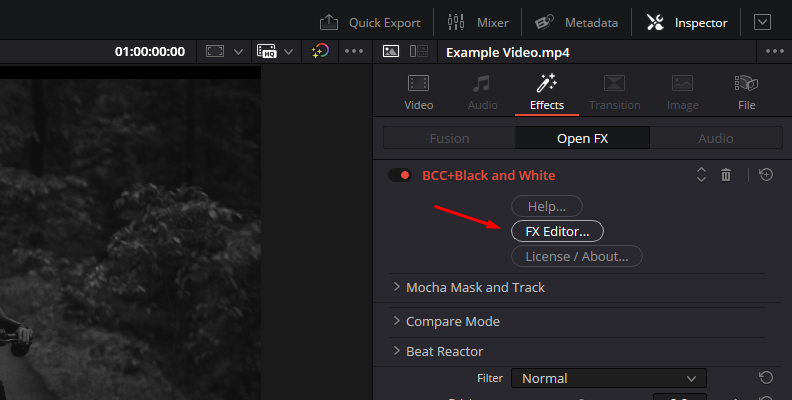
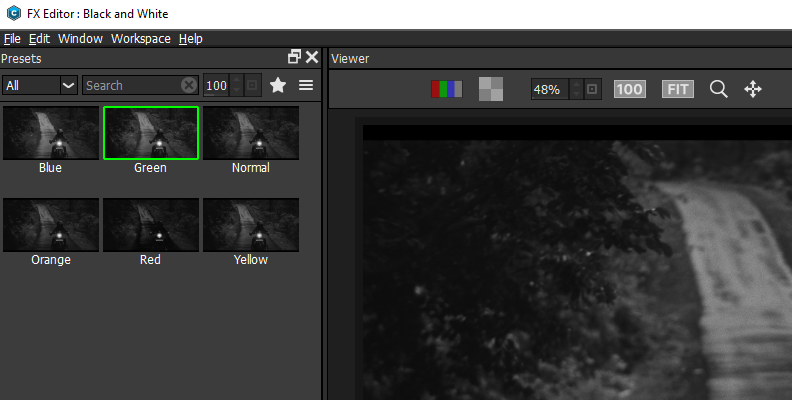
You can preview each preset by selecting it in the left panel and viewing it on the viewer window in the center. To use a preset, click Apply to return to DaVinci Resolve. You can customize the presets in the FX Editor or the DaVinci Resolve Inspector.
Step 3: BCC+ Black and White Filter Settings
If you want to customize the filter, open the Inspector and scroll down. The first option you can adjust is the Filter. It selects the black-and-white filter that will be applied to the clip image.
The filter provides six options: normal, which converts the color image to black and white, and six color filters that simulate red, green, blue, yellow, and orange filters in black and white photography. Try all filters. The result might be different depending on the original colors in the photo.
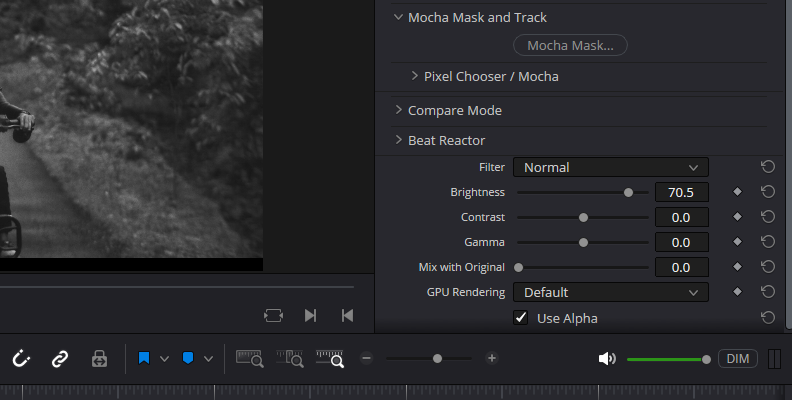
There are a few more settings to fine-tune in the filter. Adjust the brightness of the image. Reducing the values will make the clip’s image darker, and increasing brightness will lighten it. Use Contrast to increase or decrease the image contrast and Gamma to adjust the midtones between the black and white points.
Step 4: Getting Creative with Mocha Mask
If you need your clip to be part black-and-white and part color, you can achieve this effect with masks. BCC+ Black and White has the planar tracker Mocha built-in feature. With Mocha, you can create masks and track objects in the clip to restrict the effect of the masks.
You can launch Mocha from the Inspector by displaying the Mocha Mask and Track parameters and clicking the Mocha Mask button. Draw the mask in the Mocha interface.
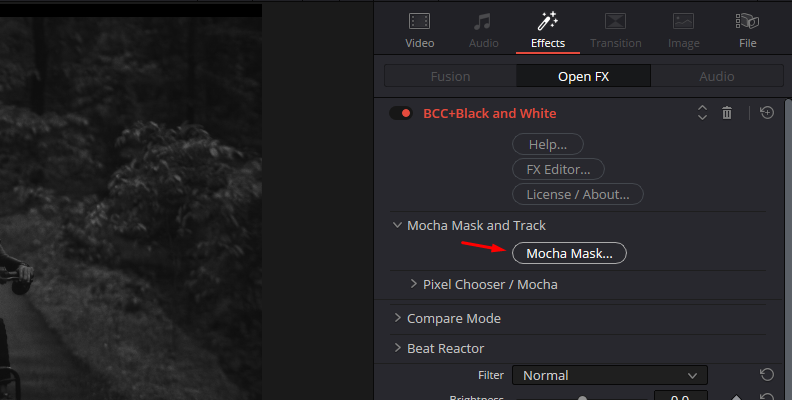
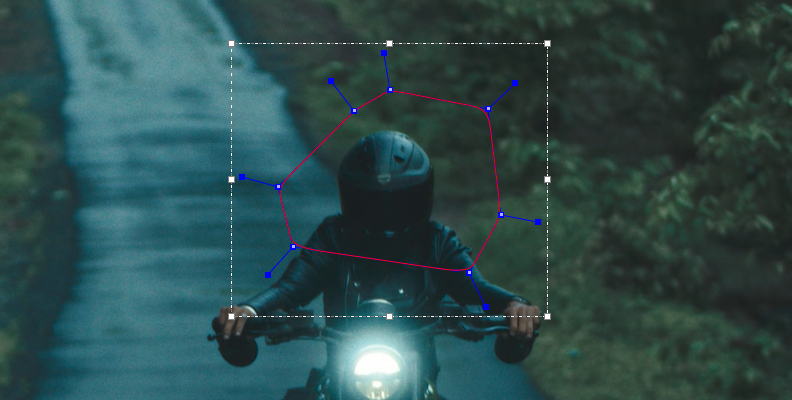
Back in DaVinci Resolve, you can adjust the mask in the Pixel Chooser / Mocha and then display the Masks parameters. There, you can smooth the mask, invert it, change opacity, and more.
Final Words
DaVinci Resolve is a go-to tool for making color adjustments, and you can also use it to create black-and-white images for your video footage with the monochrome mode or by setting saturation to 0 (desaturate). The RGB Mixer tool is very useful and allows you more control over the image's result than simply adjusting saturation from the color wheels.
BCC+ Black and White, on the other hand, offers a quick black-and-white filter for creating beautiful and interesting black-and-white videos and photos. With the complete Continuum suite, you can even enhance your video projects.
Get a Continuum free trial with the BCC+ Black and White filter and other filters and effects to colorize photos, create film looks, restore images, create motion graphics, and more.
Good luck!


