


Adobe Premiere Pro is one of the best video editing tools, but it demands plenty of power from your computer to truly shine. In some cases, it can become laggy, crash, or even show you the infamous "This effect requires GPU Acceleration to work" error message. So, why is Premiere Pro lagging, and what can you do about it?
The GPU acceleration feature can improve your video editing workflow. It allows you to work better with VR effects, color options, playback, rendering, and other demanding processes by enhancing GPU usage.
Today, you'll learn how to enable GPU acceleration in Premiere Pro and why you want to do that.
Reasons You Might Need to Use GPU Acceleration
Before going to the step-by-step guide, let's discuss why you might need to enable GPU Acceleration in Premiere Pro. If you already know why you need it and just need to know how to do it, you can skip to the next section.
The main reason to use GPU acceleration in Premiere Pro is that sometimes you'll get the error "This Effect Requires GPU Acceleration" when applying an effect to a video. This usually occurs when working with VR effects since these effects are GPU-rendered only.
In Adobe Premiere Pro, you can take advantage of your dedicated GPU to process GPU-accelerated effects and enhance render and playback. You can also enable hardware-accelerated decoding and encoding of H.264 and HEVC codecs.

Enabling GPU acceleration allows you to lessen the CPU load, which does most of the processing, and redistribute it to your GPU to achieve a better performance when working on projects with too many effects. GPUs tend to be faster at rendering effects and features, such as resizing images, color space conversions, coloring features, timeline scrubbing, and full-screen playback.
Remember that your CPU will still do most of the processing, and you require a GPU compatible with hardware acceleration capabilities. Also, not all effects in Premiere Pro are GPU-accelerated, so don't worry if you don't have a compatible graphics card; you may still be able to work with basic effects. All GPU-accelerated effects will have a small icon next to their name, indicating that they are GPU-accelerated.
To turn on GPU acceleration in Premiere Pro, you must have compatible graphics cards and the latest drivers. If you’re unsure if your GPU is hardware-acceleration compatible, refer to your manufacturer’s manual and website. Most recent Intel, NVIDIA, AMD GPUs, and Apple Silicon support hardware acceleration.
According to Adobe, the minimum GPU memory required to run Adobe Premiere is 2GB, and 8GB is needed for Apple Silicon. However, they recommend at least 4GB for more demanding features such as GPU acceleration and working with 1080p videos. They also suggest 6GB for 4K videos and eight or higher VRAM for GPU-accelerated effects and higher resolution video.
For NVIDIA CUDA graphics cards, Adobe recommends installing the CUDA driver 11.8 or newer and, for Intel graphics, a version above 27.20.100.8476.
How to Turn on GPU Acceleration Premiere Pro
In Adobe Premiere Pro, select File > Project Settings > General > Video Rendering and Playback. Then, select Mercury Playback Engine GPU Acceleration (OpenCL/CUDA/Metal) as Renderer.
Enabling GPU acceleration might require more guidance for those who aren't familiar with the process. Just follow the next steps, and you’ll be ready to benefit from your GPU capabilities in Adobe Premiere Pro.
Step 1: Open the Project Settings Window
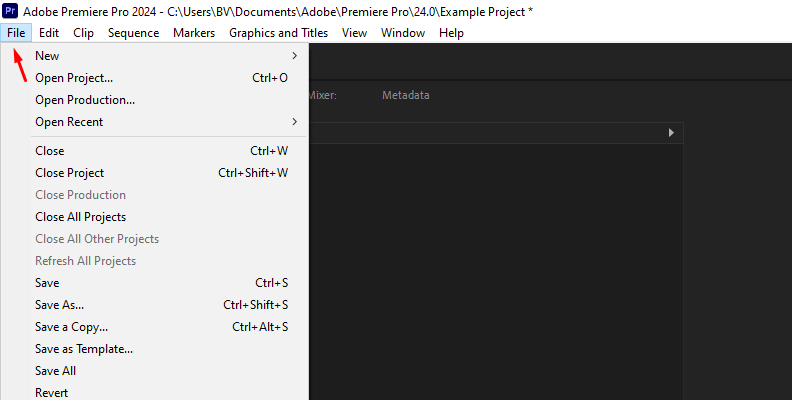
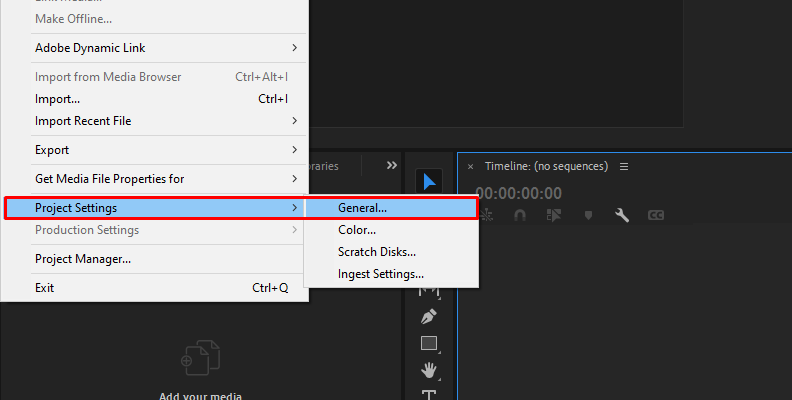
Go over the upper menu and click on File > Project Settings. In the next Project Settings window, click on General.
Step 2: Enable GPU Acceleration
Under the section "Rendering & Playback," click the dropdown menu to display the options for GPU acceleration and select Mercury Playback Engine GPU Acceleration (OpenCL/CUDA/Metal) as the renderer option.
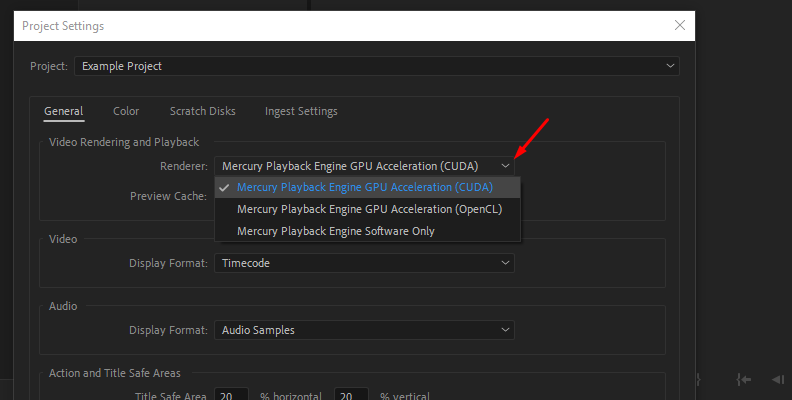
Choose the one according to your graphics card as follows for best performance:
OpenCL for AMD GPU
CUDA for NVIDIA GPU
Metal for Apple
Step 3: Save Your New Settings
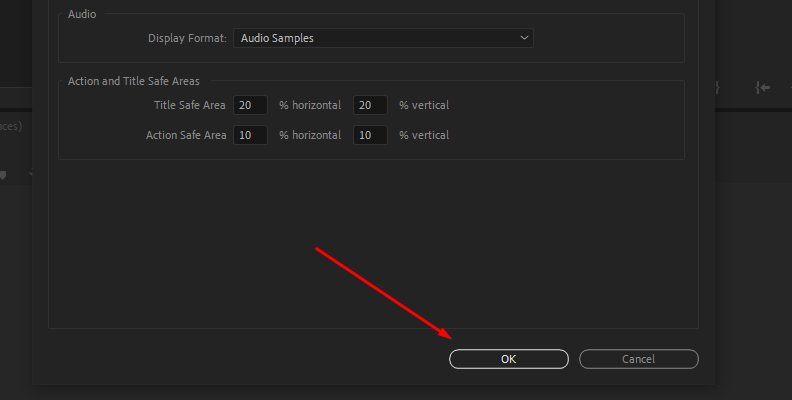
Click OK to save the GPU acceleration settings and close the Project Settings window. That's it! You have now enabled GPU acceleration.
Step 4: Enable GPU Acceleration in the Adobe Media Encoder
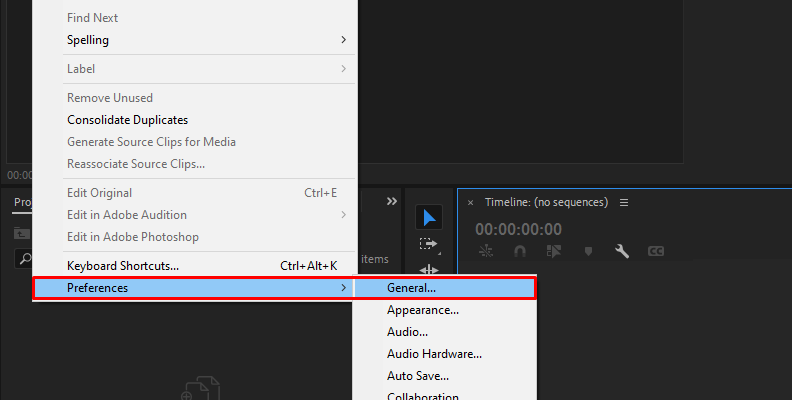
You can also enable GPU Acceleration in the Adobe Media Encoder. Go to Edit > Preferences. Click the General tab and scroll down to the Video Rendering section. Choose the Renderer to Mercury Playback Engine GPU Acceleration (OpenCL/CUDA/Metal).
Troubleshooting
You may not see the GPU acceleration option in the Rendering & Playback dropdown menu. Here are some common reasons why this happens and how to fix it.
Update Graphics Drivers. Ensure your graphics card is compatible with GPU acceleration in Premiere Pro and update its drivers. To do so, go to the manufacturer's website, download the most recent drivers, and reboot your computer. Then restart Adobe Premiere Pro.
GPU Drivers Clean Installation. If the options are still not available after updating, try a clean installation of your GPU. A clean installation removes old driver files that may be interfering with the new installation.
Not sufficient VRAM. Your GPU might not be compatible or have enough VRAM to process GPU-rendered effects such as VR effects. In this case, the only solution is to upgrade to a more recent GPU.
Final Words
Premiere Pro takes advantage of your dedicated GPU and offers the GPU acceleration option to handle GPU-rendered effects like VR, Rendering, playback, and encoding and decoding codecs. This option must be enabled when you open Premiere Pro for the first time to ensure the best video editing experience.
If you work with professional videos, investing in a higher-end computer with the most recent CPU and having GPU acceleration enabled is worth it for maximizing your workflow in Adobe Premiere Pro.
FAQ
How to check if GPU in Premiere Pro is on?
To verify that GPU acceleration is on, go to File > Project Settings > General and verify that Mercury Playback Engine GPU Acceleration is selected as the Renderer.


