


Nowadays, the rewind or reverse effect is extremely popular in films, commercials, and short-form content like YouTube Shorts, TikTok, and Instagram Reels.
These techniques to reverse a clip to play backward are now included natively in many video editing software programs, like Adobe Premiere Pro, Final Cut Pro, and DaVinci Resolve. The latter has become popular among filmmakers and content creators because of its powerful yet sleek user interface.
DaVinci Resolves' free version makes editing videos accessible to anyone. It features most of the basic and advanced features, including the ability to change the clip speed, reverse videos, slow motion, VFX, 3D tools, color grading, and even audio editing in post-production.
DaVinci Resolve also supports third-party plug-ins, which can dramatically expand your video editing possibilities.
In today's article, you'll learn how to reverse a video in DaVinci Resolve step-by-step guide using a reverse effect from the Sapphire plug-ins. So, download DaVinci Resolve and prepare your shooting to reverse videos in post-production easily and quickly.
Let’s dive in!
How to Reverse a Clip in DaVinci Resolve with Resolve's Built-in Tools
You can change the clip speed by right-clicking the footage and selecting Change Clip Speed from the drop-down menu. This will open a pop-up window with various options to adjust the clip speed, and from there, you can activate the reverse video effect by checking the Reverse Speed checkbox.
How to Reverse a Video in Davinci Resolve with Sapphire's ReverseClip
DaVinci Resolve has a built-in feature called Change Clip Speed, which works well when it comes to speed ramping, reverse speed, and change clip speed. There’s also the option to reverse clips using the Retime Controls and Retime Curve options in DaVinci Resolve.
For this tutorial, I will show you how to reverse a clip in DaVinci Resolve using ReverseClip, an effect included in Sapphire, the Award-winning VFX plug-in. Sapphire is a pack of plug-ins that allows you to create unique and amazing VFX and transitions for your videos.
ReverseClip allows you to reverse the frame order of a video clip. You can reverse the field of the frame if you want to use different methods. Additionally, ReverseClip, like the rest of Sapphire's effects, includes a Mocha feature for tracking footage and creating masks.
Sapphire’s ReverseClip works with Windows PC, Linux, and Mac and on video editing software such as DaVinci Resolve, Adobe Premiere, After Effects, Vegas Pro, and more.
Step 1: Download and Install Sapphire
Go to theand download the installer. You can use the free trial if you want to try it first. Install the Boris FX Hub, where you can install all of Boris FX tools. Select Sapphire and choose DaVinci Resolve from the list. Wait for the Sapphire download and installation to finish, and then run DaVinci Resolve to begin your project. sapphireSapphire is the essential visual effects plugin suite favored by top VFX and motion graphics artists. Create stunning organic looks in seconds with Hollywood’s favorite lens flares, glow effects, transitions, and highly stylized effects. Available for Adobe, Avid, and OFX host applications.
sapphire

Step 2: Import Your Video Clips
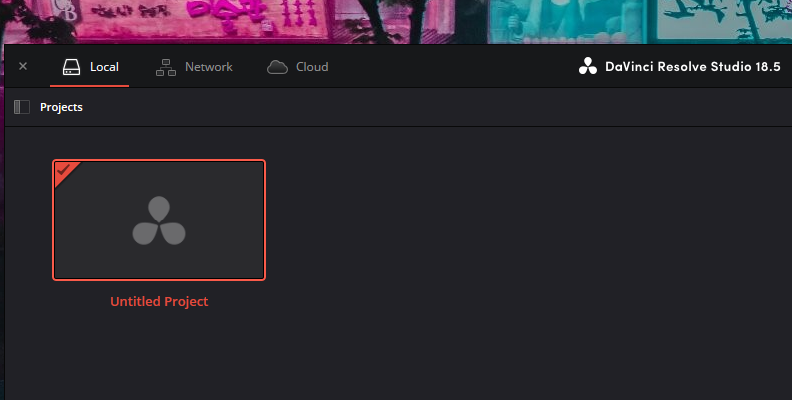
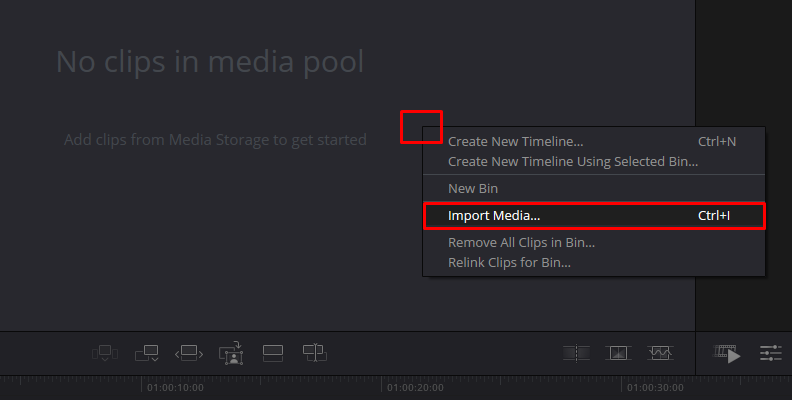
Create a new project in DaVinci Resolve and import the videos you want to reverse into the Media Pool.
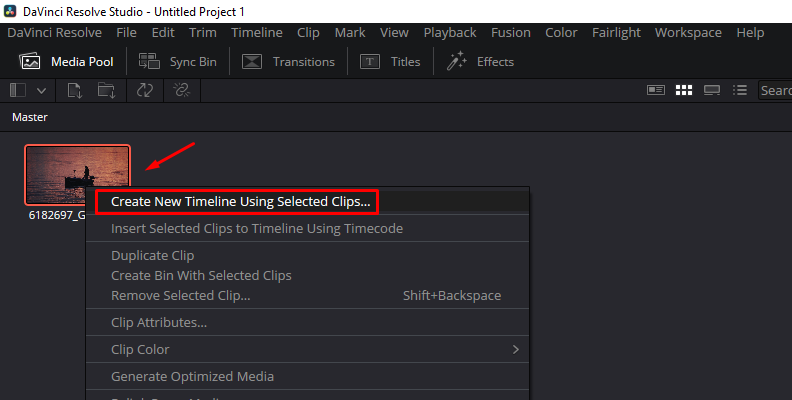
Create a new timeline and add the videos from the Media Pool to the sequence.
Press the Edit tab or go to Workspace > Switch to Page > Edit (keyboard shortcut is Shift + 4) to go to the Edit page.

Play each clip to find the part you want to reverse. Make cuts in the video clip to remove the parts of the videos that you don’t need until only the part of the video clip you want to reverse is left.
Step 3: Setting Up the Clips
Here are some tips to make your life easier when applying the effect to other clips. If you cut the clip into smaller clips and want to apply the effect to those sections, I suggest rendering each clip; otherwise, when you apply ReverseClip, it could use more frames from the footage.
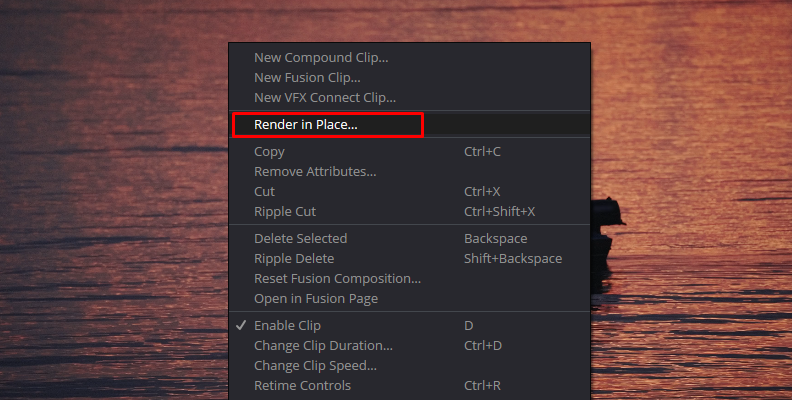
To avoid this issue, select the clip and right-click on it to open the dropdown menu. Select "Render in Place" and click Render in the following pop-up window.
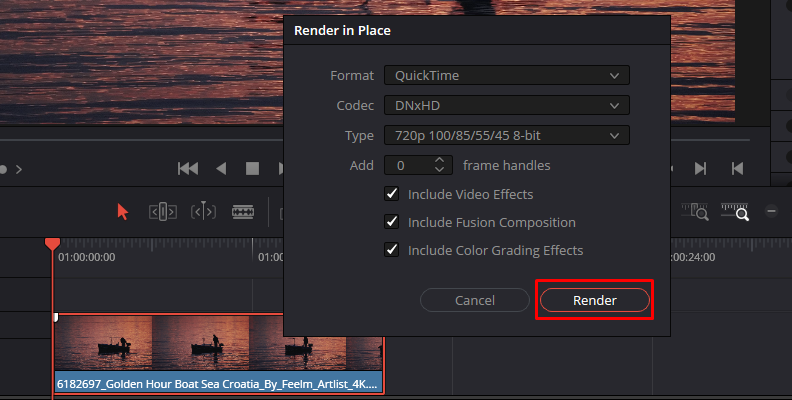
The cut part will become an independent clip, and now you can apply the reverse effect without a problem.
If you need to extend or edit the original video clip, you can undo the render by right-clicking the clip again and selecting “Decompose to Original.”
Step 4: Apply Sapphire Effect
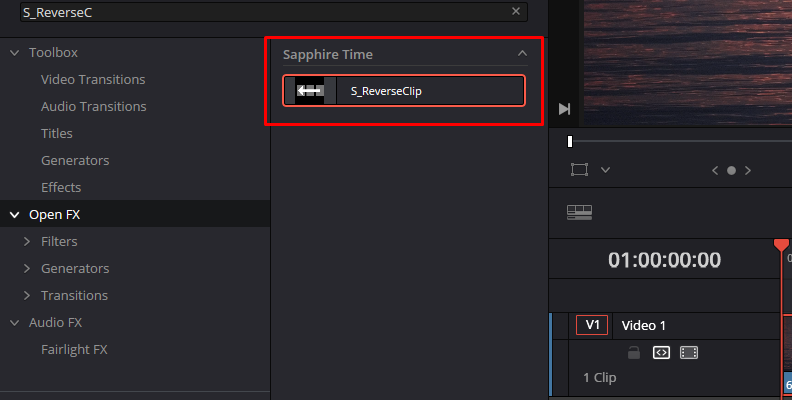
To apply the ReverseClip effect select, ensure you’re on the edit page and display the Effects panel from the button on the top left of the screen. Use the search box and type S_ReverseClip or scroll to the Sapphire Time category to find it.
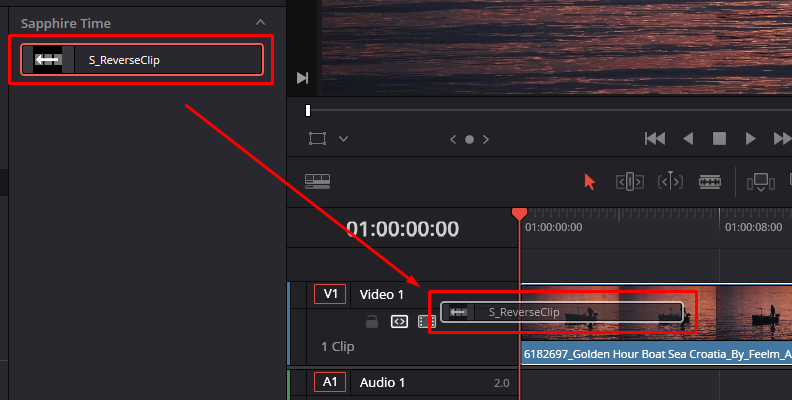
To apply ReverseClip, click and drag it to the video clip you want to reverse. If you immediately preview the clip, you'll notice it's now playing in reverse. But let’s find out what you adjust in the Inspector.
Step 5: Adjust the Reversed Clip
If you want your clip to play normally and then at reverse speed, a quick tip is to duplicate the clip. Copy and paste the clip after the original, removing the effect from the first clip. Now, play the clips to see the result.
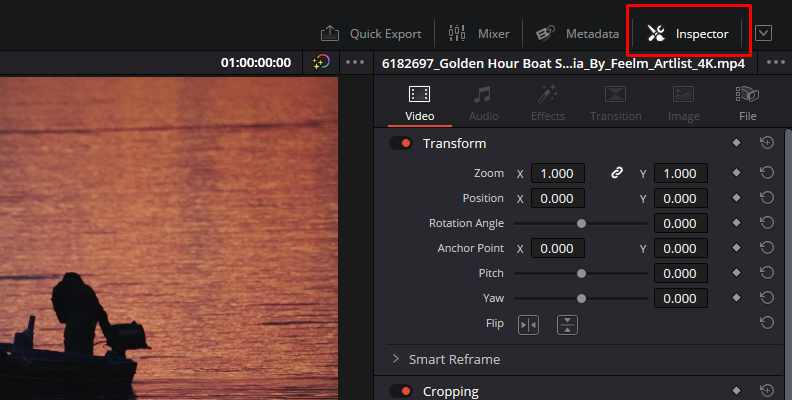
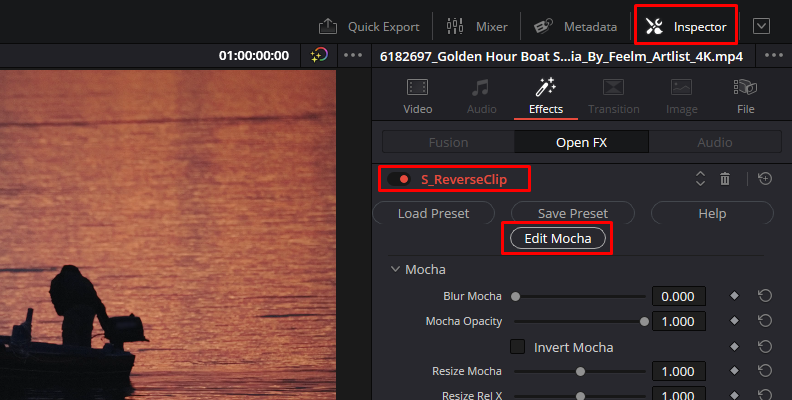
However, you can adjust a few things in the ReverseClip effect. To find its settings, open the Inspector by clicking the button at the top right corner and navigating to the Effects tabs.
Step 6: Edit with Mocha Tracking
Using Mocha, you can create a mask and track data from your footage to restrict the effect to part of the video. You can then customize the mask's size, position, opacity, and blur to blend the Mocha mask with the source video and create unique effects.
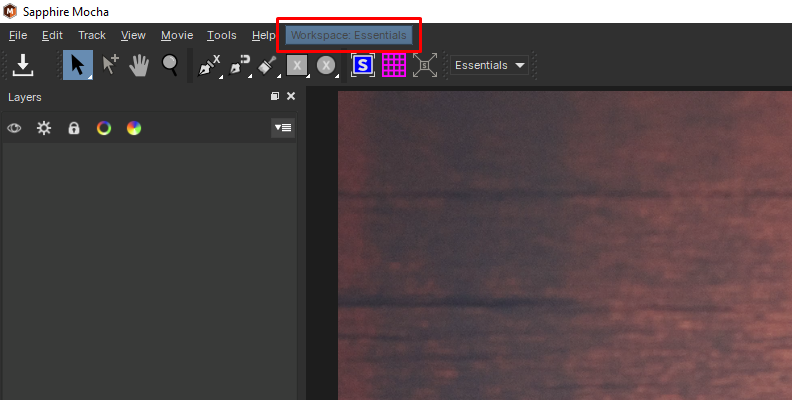
Click on Edit Mocha to launch the Mocha UI. If you're unfamiliar with Mocha, ensure you're in the Essentials Workspace to have the right tools for tracking and masking.
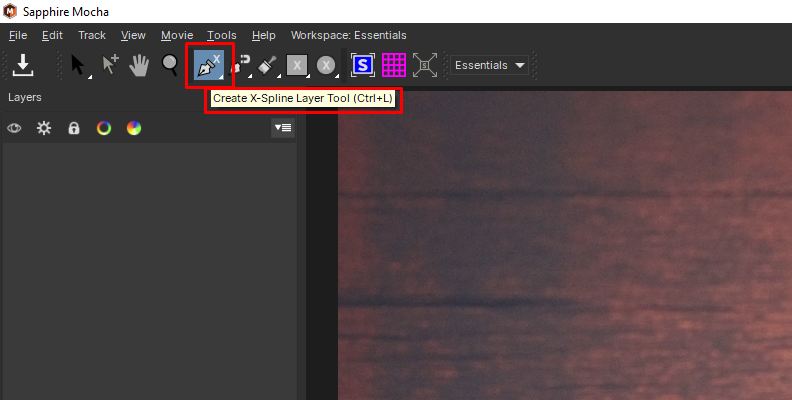
Choose one of the spline tools or shapes and draw a shape around the area or object you want to limit the reverse clip effect. For example, you can use this technique to track a falling object and make it look like it's levitating while the rest of the frame plays forward. Be aware that the specific characteristics of the video clip will determine your options.
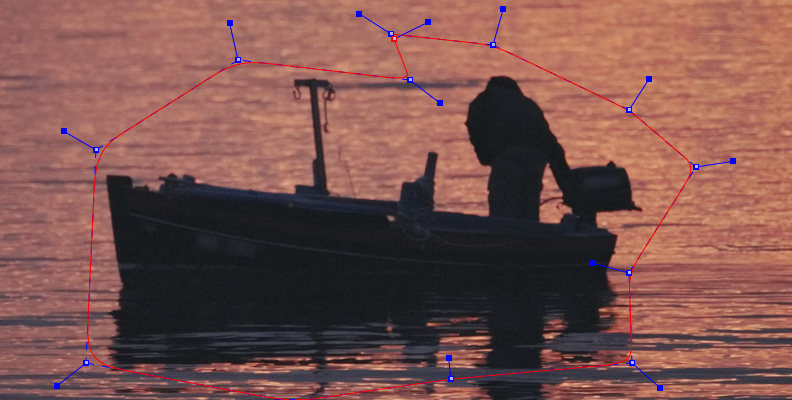
Use the controls under the layer panels to choose what to track and the track buttons to begin tracking. It will take a moment, depending on the length of the clip. Go to File > Save Project and close Mocha.
Back in DaVinci Resolve, display the Mocha settings in the Inspector and play with the parameters to achieve your desired look.
Additionally, you can select if you want to reverse the fields of each frame and the method to do it. The default option works fine, but you can experiment with another method.
Final Words
Reversing a clip in DaVinci Resolve is extremely simple and time-saving with ReverseClip from Sapphire. You can easily reverse a clip with the click-and-drag effect, create masks to control the impact, and give the final video a new look.
I hope this step-by-step guide and tips will make you more confident when using tools to reverse videos. If you're looking for the best video editing tools to use in DaVinci Resolve, download the free Sapphire trial and experiment with hundreds of effects and transitions to improve your video project’s quality.
Good luck!


