Reverb is a popular effect used in many music productions to make recordings sound more dreamy, add depth, or enhance the overall sound. However, if not used carefully, it can create problems in your audio or video file. For instance, when recording voiceovers, podcasts, or audiobooks, you want the voice to be clear, without any echo. So, how do you use reverb in this situation?
Another issue arises when you have different audio files, and one of them has too much reverb. In that case, you need to make the sound consistent with the others. This means you need to use tools to reduce noise, remove reverb, and improve the overall audio quality. In this tutorial, you’ll learn how to quickly remove reverb from audio using a single tool so you can achieve great sound quality.
Let’s dive in!
What is the Nature of Reverb in Audio?
Let’s start by understanding the nature of reverb and using this knowledge to avoid it while recording.
When you record sound in an untreated room, the sound waves travel from the source to a surface and bounce back to walls and floors. These reflections combine and produce a deeper and wider sound.
In music production, reverb is often applied in post-production to add these characteristics to an audio recording, but when it is recorded naturally, there’s less control in post-production. Depending on the texture of the surface in the recording studio, some frequencies will be affected differently and produce unwanted reverb in your voice recordings.
Remove Reverb from Audio with Voice Enhance
Try Voice Enhance Now!
Instantly transform any voice recording into professional-quality sound with the power of AI. No internet access required- your audio stays private and secure. Toggle it on/off to hear the difference.
On-location Interview
Selfie-style Phone Audio
Zoom Call
Ridiculous Echo
Traffic Noise
Far from Mic
Untreated Room
Recording at Home
On-location Interview
Voice Enhance is an AI-powered audio restoration plug-in that's part of the CrumplePop software suite. It instantly improves the voice's clarity from audio recordings, reducing echo, noise, and reverb, achieving studio-quality sound for your podcasts and voiceovers.
Voice Enhance can be used as VST3, AAX, and AU plug-ins on Mac and Windows computers. It works with audio and video editing software such as Premiere Pro, Audition, Audacity, DaVinci Resolve, Final Cut Pro, Pro Tools, Logic, and many more to create professional sound for your audio-visual projects.
Step 1: Install CrumplePop
Download CrumplePop and install it on your computer. There is a free trial if you want to try Voice Enhance before purchasing it. When ready for purchase, click the Buy button in the plug-in UI and remove the beeping sound.
Once you install the Boris FX Hub app, search for CrumplePop from the product’s list and select the download for your host application. I recommend you close your audio editing software before installing it or close it and relaunch it after the installation.
Step 2: Open Your Audio Project
Launch your audio editor or DAW and import the audio file with unwanted reverb to the timeline to apply Voice Enhance.
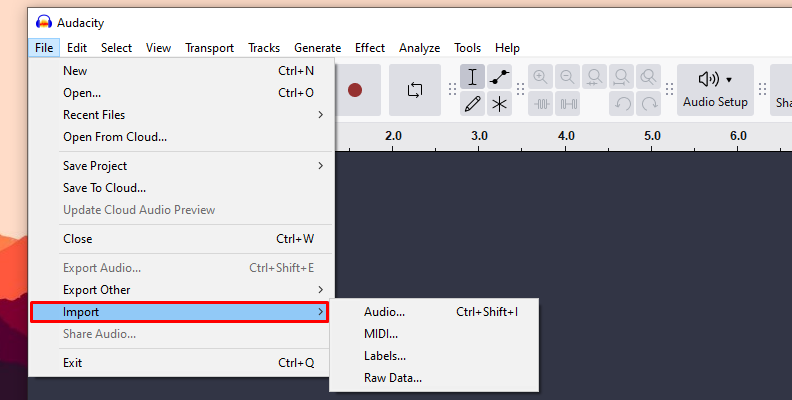
You can also work with a video file from any supported video editing program.
Arrange your timeline to identify the audio clips or tracks to clean with Voice Enhance.
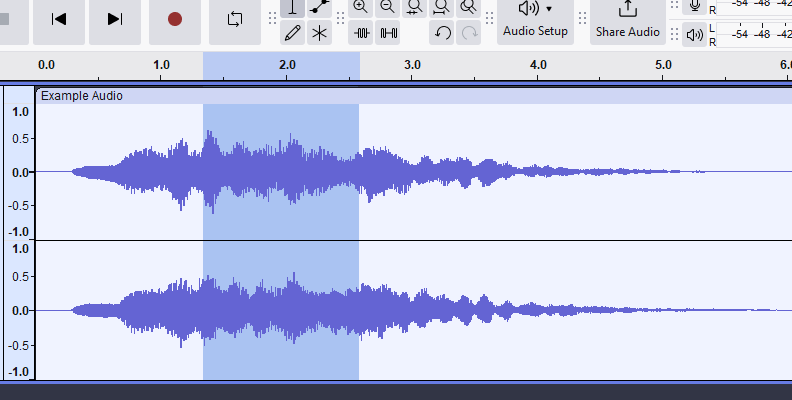
Step 3: Apply Voice Enhance to an Audio Track
Go to the effects library in your software and search for Voice Enhance. If your software does not have a search function, look under your AU/VST library and find CrumplePop Complete > Voice Enhance.
If you cannot find it after installing it, try rescanning your plug-in folders.
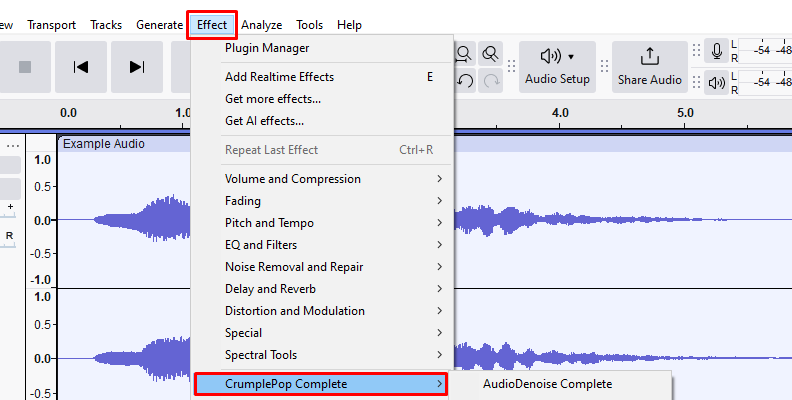
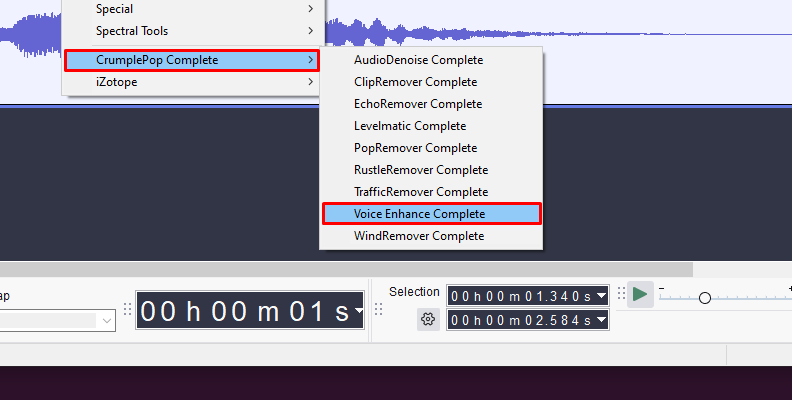
Step 4: Remove Reverb with Voice Enhance
Applying Voice Enhance for the first time will automatically analyze your audio file and use the default settings. You’ll notice an improvement immediately, but you can customize the settings according to your audio file.
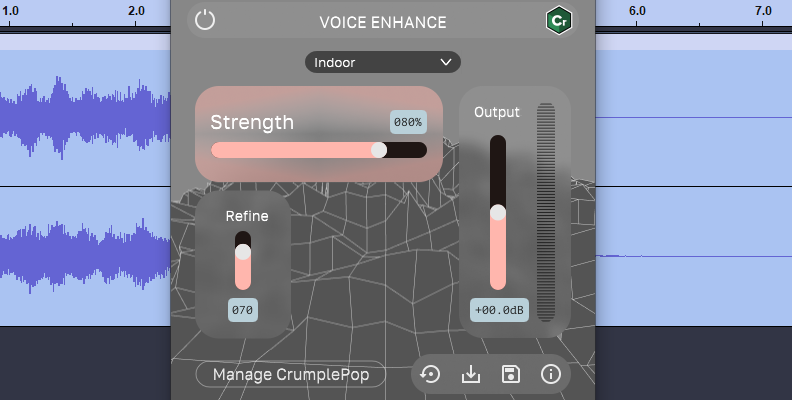
Usually, you only need to adjust the strength or output sliders, which controls how much of the effect it applies and the output volume after the process is done. But I’ll show you a workflow to use Voice Enhance and remove reverb.
Step 5: Reverb Remover Workflow
Start by selecting one of the three AI models: Indoor, Indoor-noisy, and Outdoor.
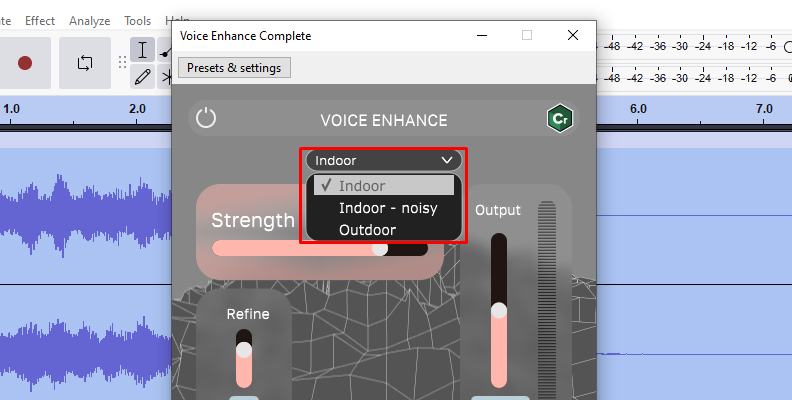
Choose the Indoor model when working with recordings in a home studio or office with no acoustic treatment that increases reverb. For most projects recorded indoors, this will be the best effect
Use the Indoor-noisy model when the recording location has echo and loud background noise captured in your recording.
Select the Outdoor model when you record outside in windy environments, with traffic and other external noise.
Experiment with the three AI models because (sometimes) Indoor can work perfectly, even for outdoor recordings.
Next, adjust the Strength slider to adjust the amount of the AI reverb remover to apply. Click and drag the strength control and set the percentage.
The Refine slider is helpful in your mix when you need to fix artifacts in your voice recordings. You can set it from 0 to 100. Somewhere around 70 generally works best.
The last step is to adjust the output levels with the Output slider. Increase or decrease the dBs in a range of -24 to +24 dB.
Listen to the audio and make adjustments. If you need to reset the default values, click the refresh button, which is the first icon at the bottom of the UI window.
Step 6: Loading and Storing Presets
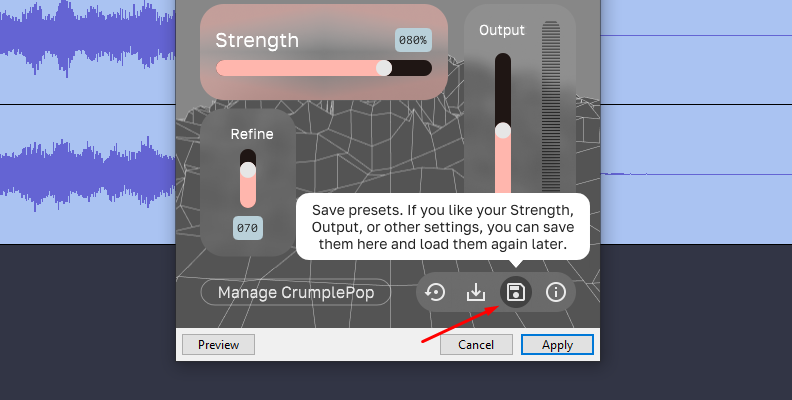
You can save and load your custom settings as presets for future projects. To store a preset, click the disk icon at the bottom of the plug-in interface. Press the download icon and browse the preset file to load a preset.
Final Words
Voice Enhance is a groundbreaking and easy-to-use AI-powered tool that, with simple controls, can do many things. You can use it as a reverb remover, noise reduction tool, audio enhancer, audio restoration, or vocal isolation to improve your sound.
A reverb-free sound will make your music and audio projects more engaging for your audience. Try Voice Enhance to reduce reverb with the CrumplePop free trial.
Good luck recording!


