


Dead pixels are those tiny spots you often find in your footage and images. They are distracting, and chances are you can't stop thinking about them once you notice them!
In this guide, you’ll learn two methods to deal with a dead pixel problem in DaVinci Resolve: one using DaVinci Resolve’s built-in Dead Pixel Fixer tool and the second with BCC Pixel Fixer plug-in. Whether you're dealing with a dead or hot pixel, this tutorial will show you how to remove them effectively.
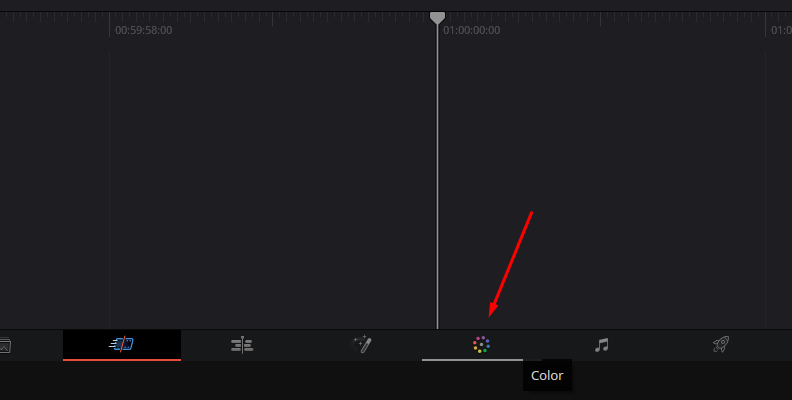
What is the Dead Pixel Removal Process in DaVinci Resolve?
Dead pixels occur when a bad pixel builds up in your digital camera's sensor, preventing it from sending power or information to that pixel. This is a common issue with damaged and old cameras that affects the quality of your videos.
In post-production, video editors and photographers fix dead pixels with dead pixel removal tools. The process fixes dead pixels already in your still photographs and video footage, creating a patch above the dead pixel using colors from the surrounding pixels and content awareness.
How to Remove a Dead Pixel in DaVinci Resolve
DaVinci Resolve has an effect called Dead Pixel Fixer that removes dead pixels from video footage. This effect makes fixing an image or video with dead pixels easy. To use this effect, import the footage with dead pixels, drag it to the timeline, and switch to the Color page.

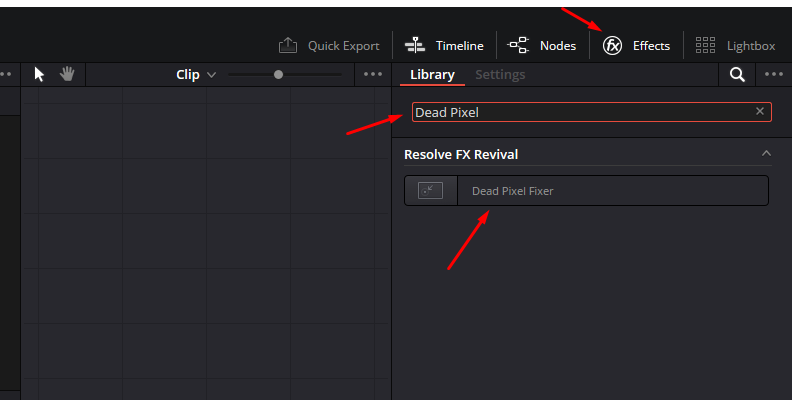
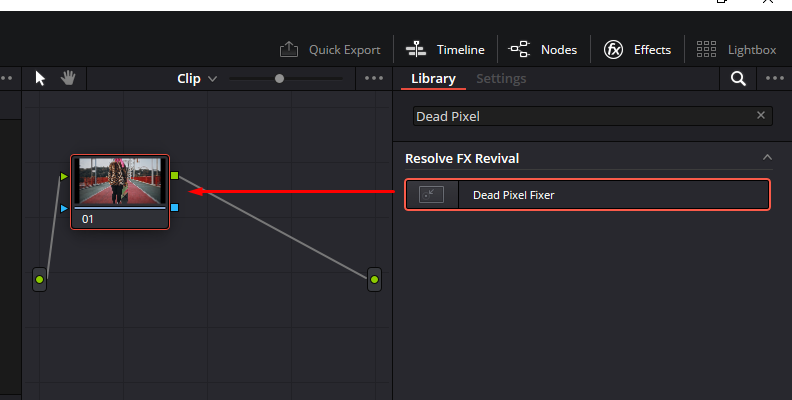
Step 1: Apply Dead Pixel Effect
In the Color workspace, click the Effects button in the top right corner to open the Effects library. Search for Dead Pixel Fixer in the following directory: Open FX > Resolve FX Revival > Dead Pixel Fixer. Drag the Dead Pixel remover to the node with the video or image you want to fix the dead pixel.
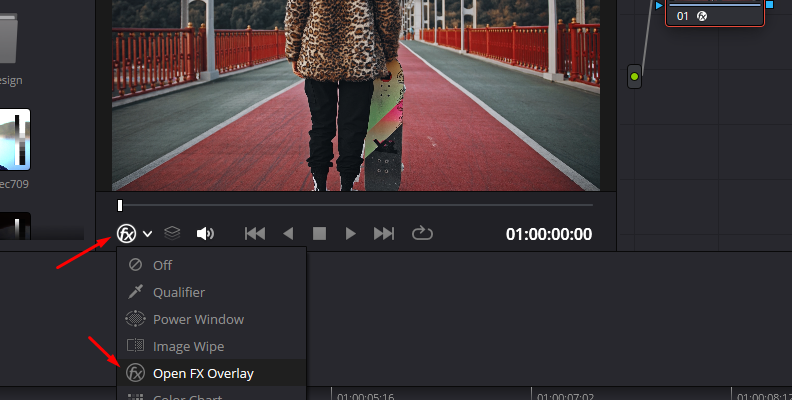
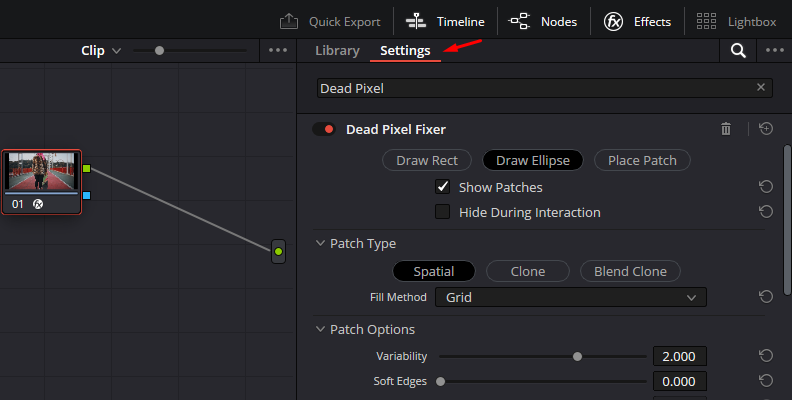
Step 2: Dead Pixel Fixer Settings
First, ensure the Open FX Overlay (an icon with Fx) shows below the preview window. If the Qualifier (the dropper icon) or another option is selected, click on it and change it for the Open FX Overlay. It will allow you to work in the preview area with the effect. If you click on the preview area, you'll see the cursor change to a cross.
On the Effects Settings panel on the right, you can choose the shape of the fix between a rectangle or ellipse shape or place a patch. You can also select the patch type, fill method, and other settings, such as edge softness.
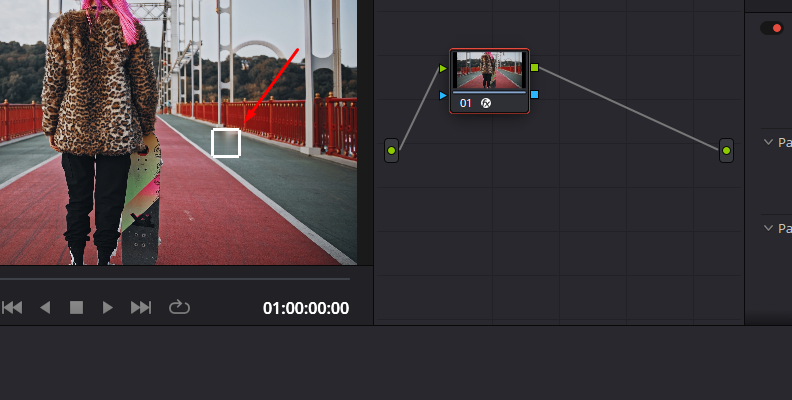
Click and draw to create a shape over the dead pixel to cover it. For a still image, this would be enough. However, if you're working with a video, especially if you apply stabilization, you may have artifacts around the area, or the dead pixel may change position.
Step 3: Fine Tuning Dead Pixels
To fix a dead pixel on a video with stabilization, you must use the Dead Pixel remover effect before applying stabilization. The trick here is to fix the dead pixel, then create a compound clip with the fixed dead pixel and apply stabilization. In this way, the stabilization won’t interfere with the dead pixel fix in the clip.
Another fix is to add more nodes to apply color grade and corrections, grain, blur, and mask layers to cover these artifacts.
Remove Dead Pixels in Adobe DaVinci Resolve with BCC Pixel Fixer
If your footage has dead pixels in areas with people or textures, you might need a more advanced dead pixel remover like the one I’ll cover in the next section. The BCC Pixel Fixer included in the ![]() continuum
continuum![]()
continuum

With BCC Pixel Fixer, you can remove up to 10 dead pixels in just a few clicks, and the process will also work fine when having issues with hot pixels.
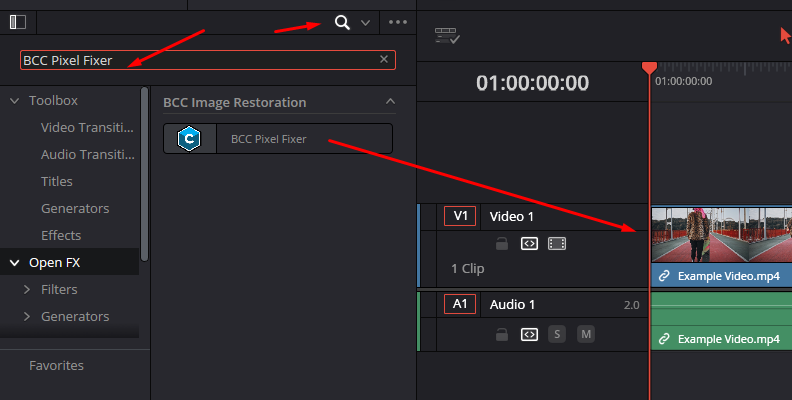
Step 1: Apply BCC Pixel Fixer
You can apply BCC Pixel Fixer from the Edit or the Color page. Browse your effects library for BCC Pixel Fixer under Open FX > BCC Image Restoration > BCC Pixel Fixer. Click and drag the effect to the clip where you have the dead pixel.
Step 2: Adjust the Pixel Fixer Effect
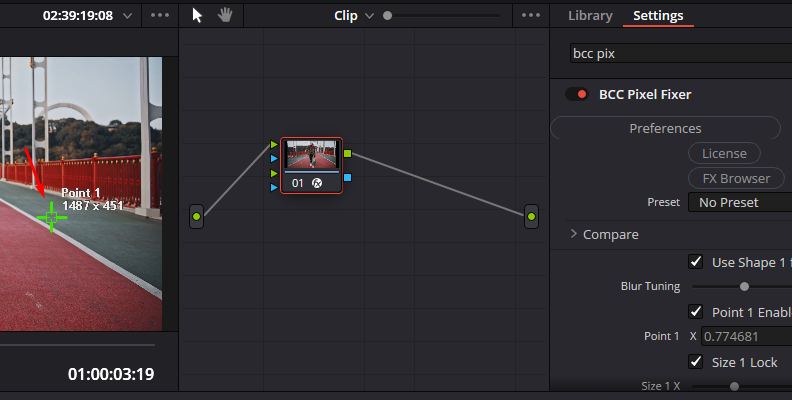
Remember to enable Open FX Overlay below the preview window to interact with the effect. On the Edit page, you have Transform by default (rectangle icon) and Qualifier (dropper icon) in the Color tab. You can manually adjust the position in the settings, but I find it easier to move the point directly in the preview mode.
The Settings for Pixel Fixer are very simple. Place the point over the dead pixel and adjust the size and blur tuning slider to adjust blur around the dead pixel and reduce artifacts.
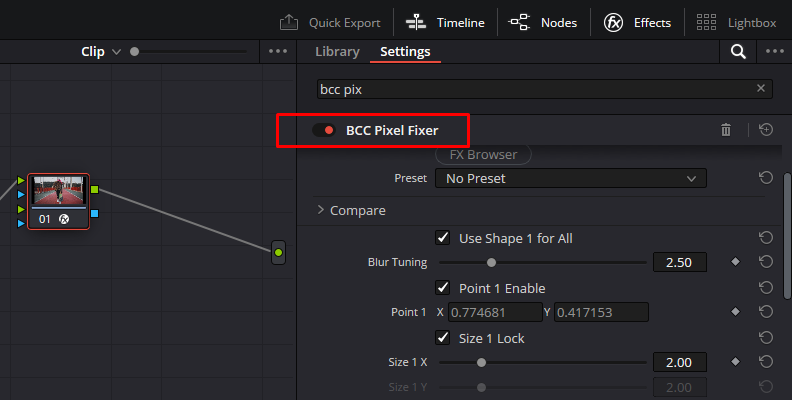
You can enable up to 10 points by displaying More Points and checking the necessary boxes. Then, move the points to each dead pixel and adjust the size. You can check ”Use Shape 1 for All” to use point 1 size for all points.
Final Words
How well DaVinci Resolve's Dead Pixel remover works depends on many factors, such as the original footage, whether it's a video or still image, and the naturality of the dead pixel, such as size, color, and location. Dead pixel fixers might not remove the dead pixel entirely; they might only hide it. However, you can apply extra layers of colors.
BCC Pixel Fixer makes it easier to fix dead pixels in the image. It also features a preview mode that allows you to compare the result in a side-by-side or split-screen view between the original image and the one fixed. Plus, you have the rest of the Continuum effects to cover and enhance the quality of the video footage.
Good luck!


