


Removing wind noise is among the most burdensome tasks when recording audio and video, and finding it while you're editing in post-production with no chance to re-record is even more stressful. which is why figuring out a way to quickly remove wind noise in Adobe Premiere Pro becomes a priority.
In today's article, you'll learn how to reduce wind noise in Adobe Premiere Pro using its built-in tools and a powerful plug-in designed exclusively to remove wind noise.
Let’s dive in!
How to Quickly Reduce Wind Noise in Premiere Pro
In Premiere Pro, one way to get rid of wind noise is to find the High Pass filter in the Effects Workspace or Effects Window, apply it to your clip, and then adjust the Cutoff setting to remove any wind noise present. Begin with a minimum setting of 10 and gradually increase it while paying attention to the sound.
There are several methods that allow you to quickly remove wind noise in Adobe Premiere Pro to improve the audio clip quality. Below you'll find the best four methods that combine results and ease of use.

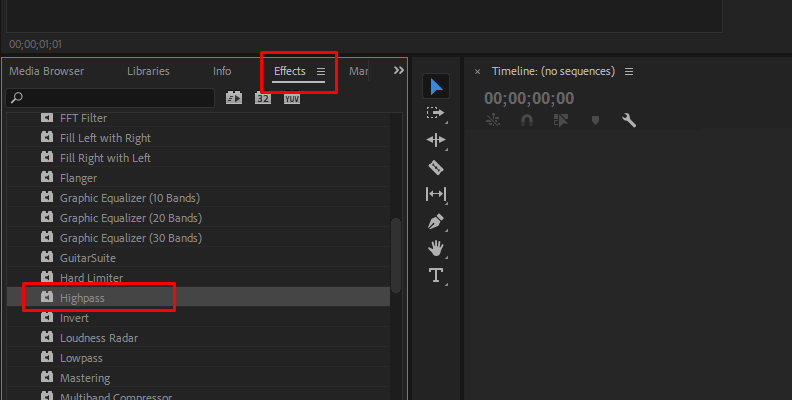
High Pass Filter
The high pass filter in Premiere Pro works as a low-cut frequency and is best with a low-frequency rumble caused by wind noise. However, it may affect your voice if you use it too aggressively.
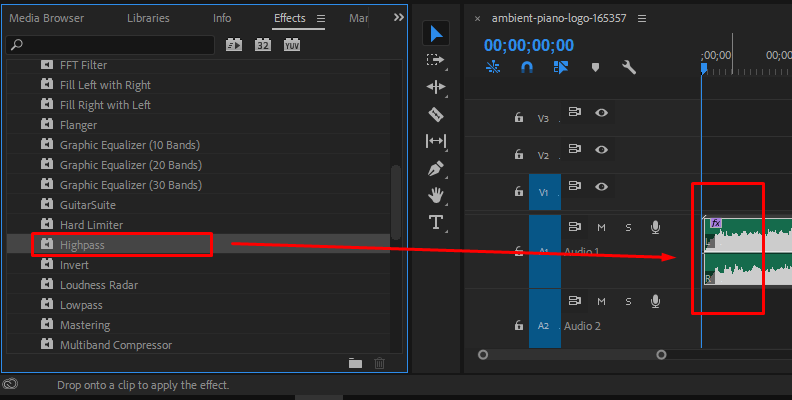
Go to Audio Effects > Filter and EQ > High Pass.
Drag the high pass filter and drop it to the audio clip with wind noise.
Adjust the Cutoff value in the effect control panel by slowly increasing the frequency. Setting it below 200Hz is usually safe and will not affect the rest of your audio.
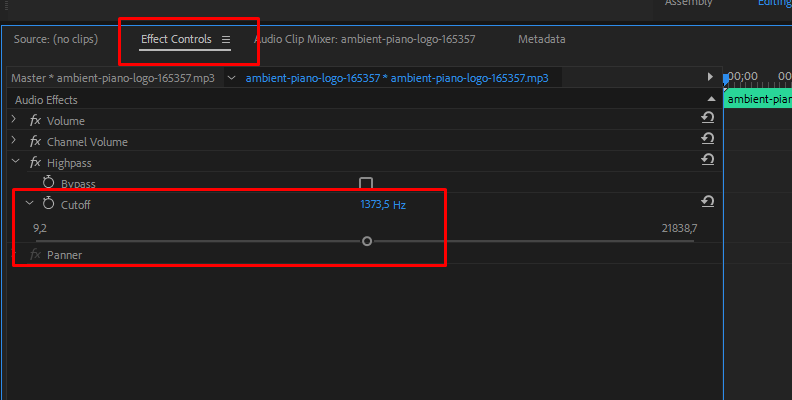
Play back the audio clip. If the wind noise is still present, adjust the cutoff frequency.
As a side now, a low pass filter does the opposite of this and cuts off high frequency sound and can be adjusted in the same way. Premiere Pro has both built in by default.
DeNoise Effect
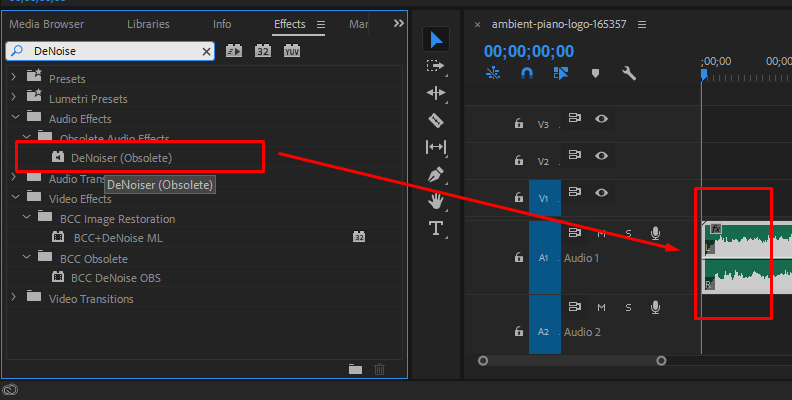
If the High Pass filter that Premiere Pro provides did not remove wind noise from the audio clip, the following method can quickly remove it. This effect has simple controls that anyone can adjust to reduce wind noise.
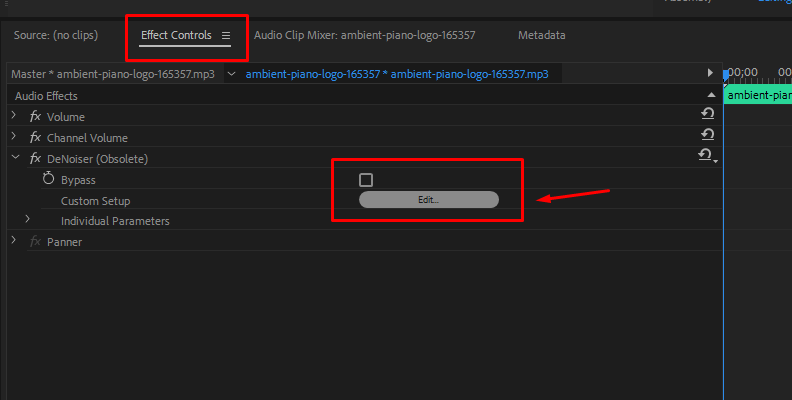
Go to Audio Effects > Noise Reduction/Restoration and drag the DeNoise effect to the audio clip.
Select the DeNoise effect in the effect controls panel and select a custom setup by clicking Edit.
In this new window, use the slider to select the amount of the DeNoise effect to apply to the video. You can also choose a processing focus to target how the DeNoise effect processes the frequencies.
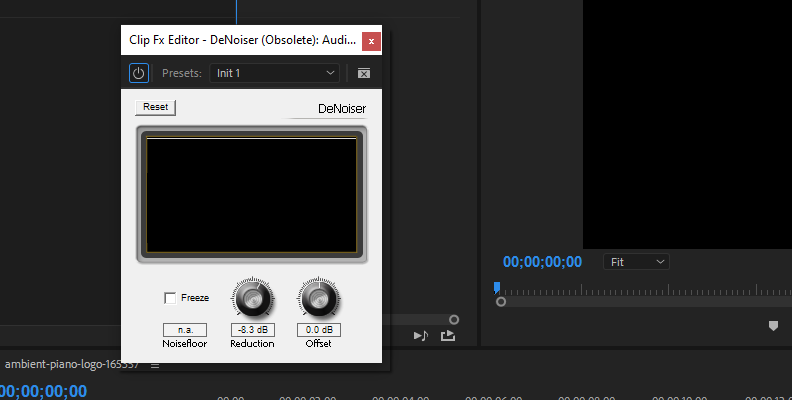
Try some of the presets and listen to your audio clip to ensure the wind noise is removed.
Parametric Equalizer Effect
This third method in Premiere Pro gives you more control over removing wind noise. The Parametric Equalizer can define which audio frequencies you want to increase or cut to reduce wind noise. It lets you control how it impacts adjacent audio frequencies to keep the best sound quality.
Search the effects panel for the Parametric Equalizer effect under Audio Effects > Filter and EQ and drag it to the audio clip.
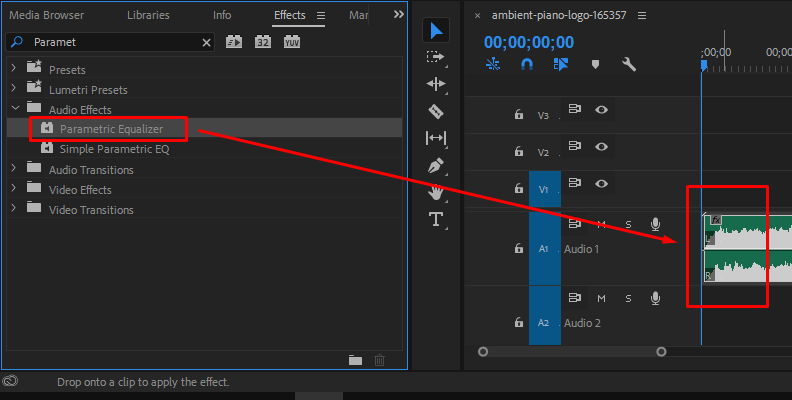
In the effects controls panel, select Edit.

In the Parametric EQ window, you can manually pinpoint the frequencies where the wind noise is and adjust the amount of gain, or you can use the presets, which you can customize to find the sweet spot.
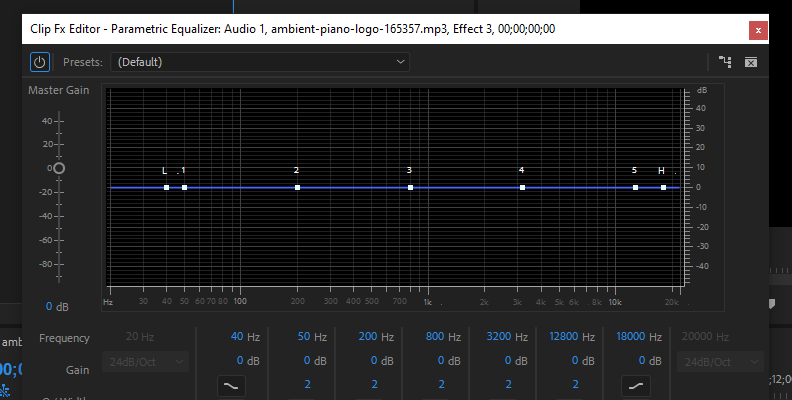
You can also select which bands to display and add a low and high cut frequency with the HP and LP options.
Essential Sound Panel
This method involves using the Essential Sounds Panel. Premiere Pro offers this feature, which allows you to quickly remove wind noise by applying effects from the list.
Enable the Essential Sound Panel from the Window menu if it isn't enabled.
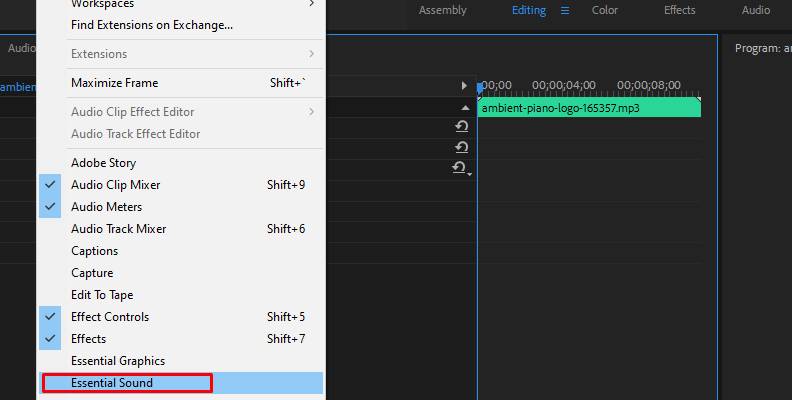
Select the audio clip in the timeline and display the Essential Sound panel to see all its options.
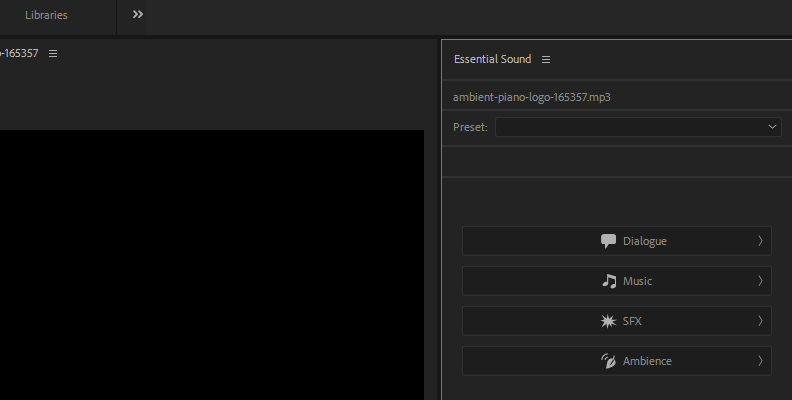
Click on Dialogue and choose among the effects. Reduce Rumble is great for wind noise reduction because it specifically targets low frequencies.
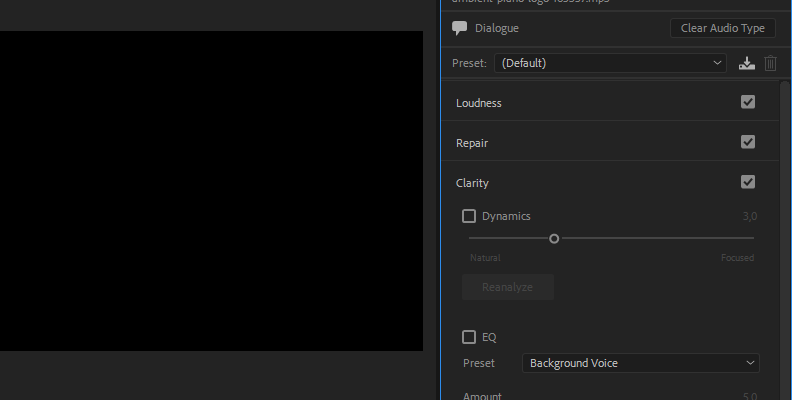
Adjust the slider to set the amount of wind noise reduction to apply.
If reducing wind noise affects the voice in the audio clip, this panel offers options to adjust the dynamics, enhance speech, and add an EQ to improve audio quality.
How to Reduce Wind Noise in Premiere Pro with CrumplePop WindRemover
The built-in noise reduction effect and the other methods for removing wind noise in Adobe Premiere Pro are great when wind sound occurs in silent moments and does not affect much of the rest of the audio clip. However, wind noise can sometimes be more difficult to remove due to its characteristics and overlapping with voices and other sounds in the audio tracks.
In those cases, you will need an audio effect designed to reduce wind noise from your audio recordings and videos, like CrumplePop WindRemover. WindRemover is a better solution because it uses advanced AI algorithms to identify and remove wind noise only. It ensures that voice recordings will sound natural, unlike the other methods that make them sound robotic.
The steps to remove wind noise in Adobe Premiere Pro with WindRemover are easy following these steps.
Step 1: Apply WindRemover to Audio Clip
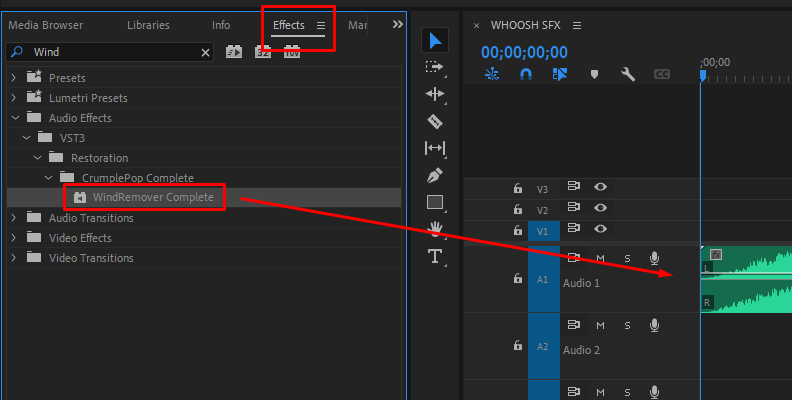
Look for the WindRemover on Effects > Audio Effects > VST3/AU > CrumplePop. Drag it to the video clip with unwanted wind noise. As soon as you apply it, the plug-in will analyze your audio, identify those parts with wind noise, and use the amount needed to reduce wind noise while retaining audio quality.
Step 2: Adjust the WindRemover Effect
WindRemover usually does a great job removing wind noise with its default settings, but you might have audio files that require morex§ sound customization to achieve optimal results. To remove wind noise in challenging recordings, you can adjust the amount of effect applied and control the low, mid, and high frequencies.
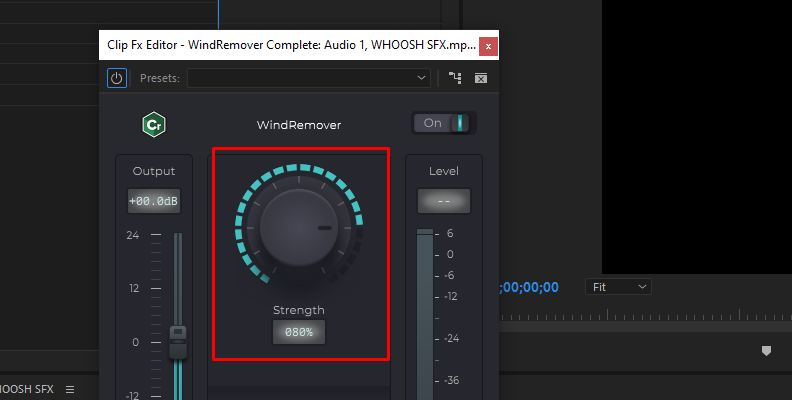
Click the Edit button on the effect controls panel to launch the WindRemover user interface. The big Strength central knob is the main parameter that controls how much wind noise reduction to use.

On the bottom, you have three small knobs to adjust the frequencies range and fine-tune the effect to reduce wind noise. With the low and high knobs, you can add a low or high pass filter effect.
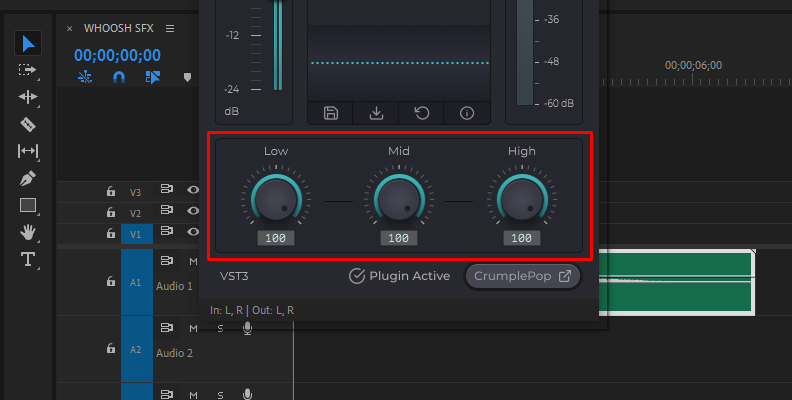
Control the output gain volume with the left slider and monitor your level meters on the right side.
Step 3: Work with Presets
When you find the settings you like or that work for specific situations, you can save them as presets and retrieve them whenever you find the same type of wind noise on a different audio clip.
You can save presets by clicking the disk icon and giving them a name. To use a preset, click the second icon next to the save option and select the preset you want.
Presets helps you streamline your workflow to quickly remove wind noise in Premiere Pro the next time you encounter that problem.
Final Words
Removing wind noise can be hard when you don't have the right audio production tools, such as a WindRemover, designed to analyze and remove it automatically. However, remember that the best way to avoid wind noise is to prepare for windy days.
Here are a few tips to remove wind noise before being recorded:
Choose the correct microphone for the occasion. Directional microphones perform best in windy scenarios.
Place the microphone away from the wind source.
Using a windshield or dead cat reduces wind noise from being captured and makes the post-production process easier.
Use headphones to monitor the recording and hear if there is a rumbling sound.
If you follow these tips, you'll have less wind noise in your videos, which will also be easier to remove. If you still record wind noise, now you know how to fix it in Premiere Pro using WindRemover.
Good luck!


