


Putting a video in reverse is one of the oldest video editing "tricks" you can perform to enhance your project's storytelling, special effects, or overall creativity.
You can use the reversal of a video file in many different ways, for action replay purposes, symbolism, such as going back in time, creating visually engaging moments, such as the reversal of liquid spilling or glass shattering, and much more.
If you want to learn how to reverse video clips within video editing software, we cover this and lots more in the following sections below, so without further ado, let's look at what you need to know.
How to Put a Video in Reverse With ReverseClip
There are numerous tools available to transform a regular video into a reversed video. Thanks to tireless developers, what was once considered the work of professionals is now available for every amateur editor in just a few clicks.
In this section, for the video reverse effect, we'll be using ReverseClip, a tool available in Sapphire by Boris FX.

Before we get into the details, a quick introduction of Sapphire.
Sapphire, just like Continuum by Boris FX, is a plug-in pack that will allow you to take your editing work to the next level. It includes more than 270 effects and thousands of presets for them, as well as an effect and transition builder and a masking and tracking feature through the powerful and renowned Mocha Pro.
Sapphire is available for all popular video editors, such as Premiere Pro, After Effects, DaVinci Resolve, Avid, VEGAS Pro, and more.
In this specific guide we'll be using Adobe Premiere Pro as our software of choice, but keep in mind that you can do the same in any other video editing software you're familiar with, as long as it is compatible with Sapphire. The process will be exactly the same besides the UI differences in the software.
So, here's what you need to do to reverse video files using Sapphire's ReverseClip and Adobe Premiere Pro.
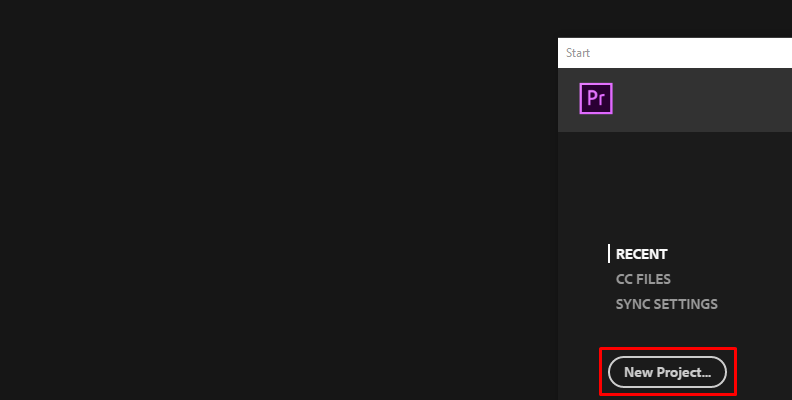
Step 1: Launch Premiere Pro and Create a New Project
The first step is to launch Premiere Pro on your PC and create a new project. You can do this using the "New Project" button on Premiere's home screen menu, as shown in the image below.
We always recommend creating a fresh project when trying out something new so you don't make any unwanted changes to a project that's already in progress.
Step 2: Import Media and Create a New Sequence (Timeline)
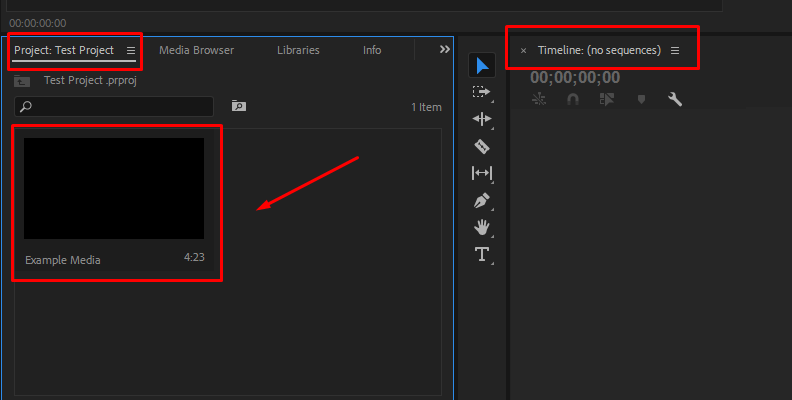
Once the software loads and you're into the new project you created, it's time to import media.
In Premiere Pro, you can do this by navigating to the "Project" tab and right-clicking anywhere on the empty area where it says "Import media to start" and then choosing "Import" from the list of options, as shown below.

Once you do this, your operating system's File Explorer will open, and you will need to find the video clip you want to reverse on your PC and select it.
Upon finalizing the import, it's now time to create a new sequence (timeline).
As you can see, the video is imported, and you can find it in your "Project" tab. On the timeline panel located on the right, you'll see that it says "no sequences".
To create a sequence, simply drag and drop the video from the "Project" tab onto the timeline area.
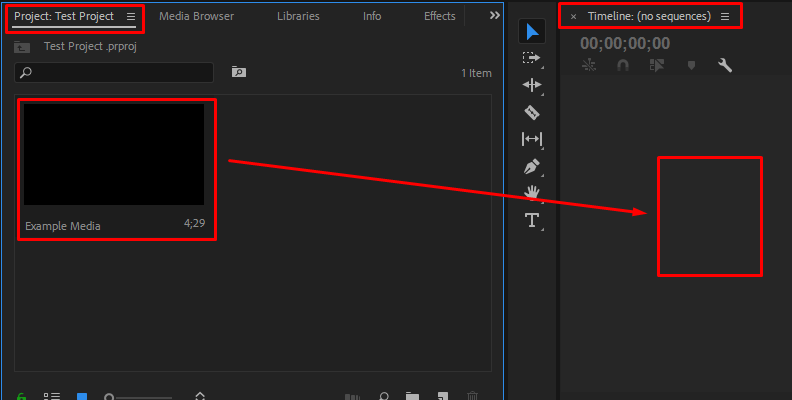
You will now see the video on your timeline.
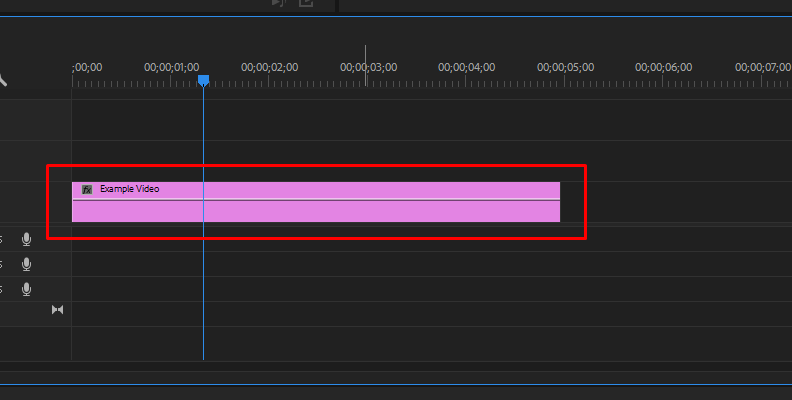
You have successfully created a sequence out of it that you can now edit in various ways, including doing anything that's needed to reverse a video, which in this case would be applying the ReverseClip effect.
Step 3: Search and Apply the ReverseClip Effect to Your Video
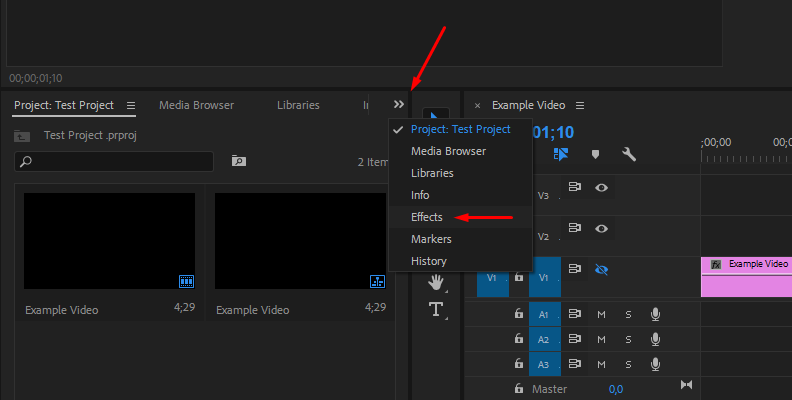
Now it's time to open the "Effects" tab and add the ReverseClip effect to the video on your timeline. You can do this by clicking on the two arrows and selecting "Effects" from the list of options.
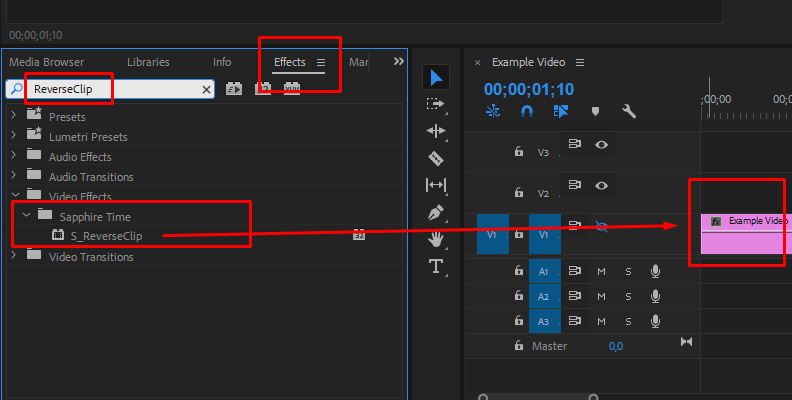
Then, once you're in the "Effects" tab, use the search bar to look up "ReverseClip" as shown below. You will find it under the "Sapphire Time" folder.
Drag and drop the ReverseClip effect onto the video on your timeline.
Step 4: Adjust Settings in the Effect Controls Panel and Save Changes
The last step is to open the "Effect Controls" panel and make any adjustments that you need according to your project's requirements.
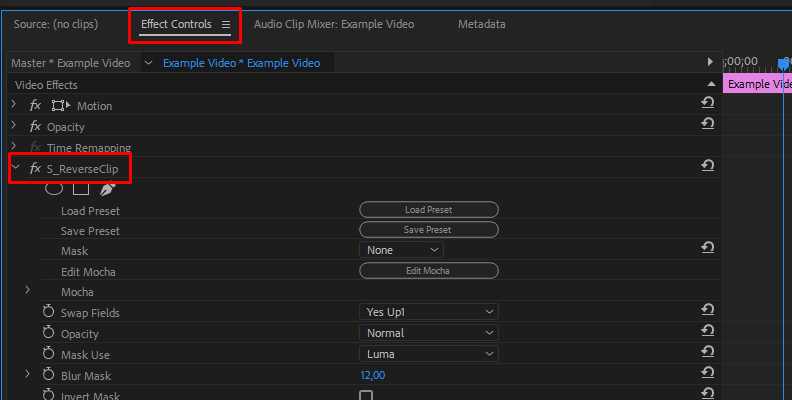
For a full, detailed list of all features and an explanation of their functions, take a look at the official ReverseClip info webpage.
When done, simply save the changes and repeat the process as many times as you need with various clips. Then, export your reversed videos, and they're ready to use!
How to Put a Video in Reverse on iPhone
There are ways to put a video in reverse on Windows, Mac, an Android device, but also on iOS, the operating system of iPhones.
If you have an iPhone and are looking to learn more about reversing videos, here's how to do it easily in only a few steps.
Step 1: Download and Install the CapCut Video Tool
Before we start, we need to download an app that also has a video reverser option. CapCut is one of the most popular video editing apps that you can use to play videos and make edits in real-time, add effects such as slow motion, or reverse videos.
To make the video backwards, you'll first need to download the CapCut video editor from the AppStore.
Once you install the app, launch it and move on to the next step.
Step 2: Allow Phone Access and Import the Video
Before the app can access your videos, you'll need to allow access to your phone's storage.
Once you do that, go to the bottom left and tap on "Edit".
Click on "New Project".
Select the video that you wish to reverse.
Once it's imported and placed on the timeline, scroll the bottom tool menu until you find the "Reverse" function. When you find it, simply click the button and your regular video will become a reversed video.
You can also make cuts from the whole video and then tap them to select and only apply the reverse effect to the cuts and not the whole video.
Step 3: Save and Export Reversed Clips
When done, tap the "Export" icon in the top-right.
Wait for the export to complete and then your video will be saved to your phone's gallery.
That's all there's to it!
Final Words
Now you know more about putting a video in reverse both on your PC and an iPhone device.
Hopefully, this will help you bring your content creation to a whole new level of creativity.
We thank you for reading and wish you the best of luck with your work!


